V8EK4us- 383 SBC,4 link,Torana f/e - 12 months on...
-
blackstack
- Posts: 52
- Joined: Sun Jun 08, 2008 3:23 pm
- State: NOT ENTERED
- Location: Bangalow
- Contact:
Cheers Guys  .
.
A little update.
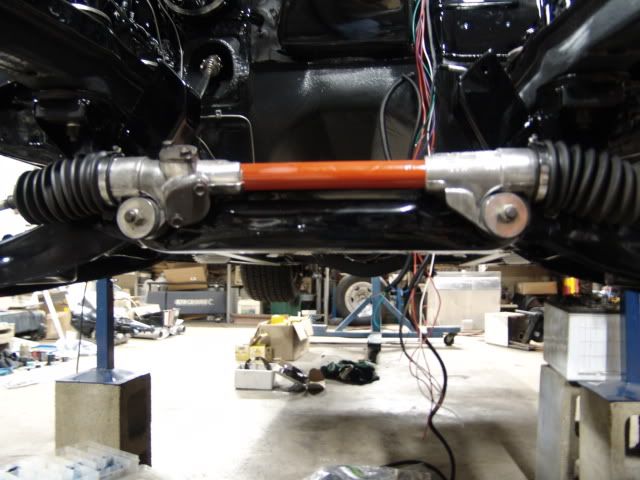
Torana rack fitted, used S/S uni joints and 3/4 DD intermediate shaft. Lower uni has been machined out and also machined to take a "woodruff" key, the key locks the uni to the round Torana rack input shaft 100%. The key has been drilled and threaded to accept the Locking grubsrew and then the whole assembly was assembled with High strength locktight as an added precaution. Painted the centre of the rack "Chevy Orange" to match the engine block . Final update on frontend: LH Torana crossmember and wishbones, Torana rack, HZ Stub axles (give a 1" drop) frontend has been set in ar to compensate for the 1.5 degree variance in castor, HQ Calipers, Modified P76 Discs and Braided S/S brake lines (ADR Approved).

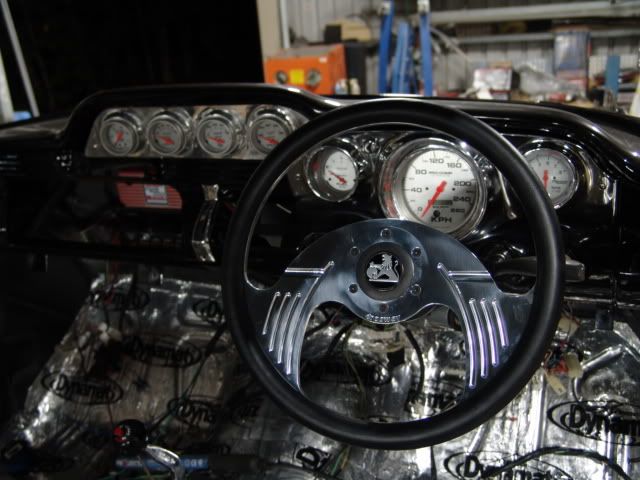
Steering wheel is a Billet SW69 from Dragway Engineering, I chose this one because its pattern is very similar to the "C" pillar chrome trim and also the pattern on the Convo Pro's.
A little update.
Torana rack fitted, used S/S uni joints and 3/4 DD intermediate shaft. Lower uni has been machined out and also machined to take a "woodruff" key, the key locks the uni to the round Torana rack input shaft 100%. The key has been drilled and threaded to accept the Locking grubsrew and then the whole assembly was assembled with High strength locktight as an added precaution. Painted the centre of the rack "Chevy Orange" to match the engine block
Steering wheel is a Billet SW69 from Dragway Engineering, I chose this one because its pattern is very similar to the "C" pillar chrome trim and also the pattern on the Convo Pro's.
 Woofto Car Club Member No4
dude, this is awesome man!...i'm loving this build
a suggestion if i may...lose the holden horn badge personally i think it looks a little wired just a stainless or billet i think would give it a much better look...with a groove in it to match the rest of the wheel(s)
but each to there own...even with that the car is amazing may a credit to you but seriously you need to go quiker you have slowed downa fair bit...
cheers
NoMAD

Cheers guys!!
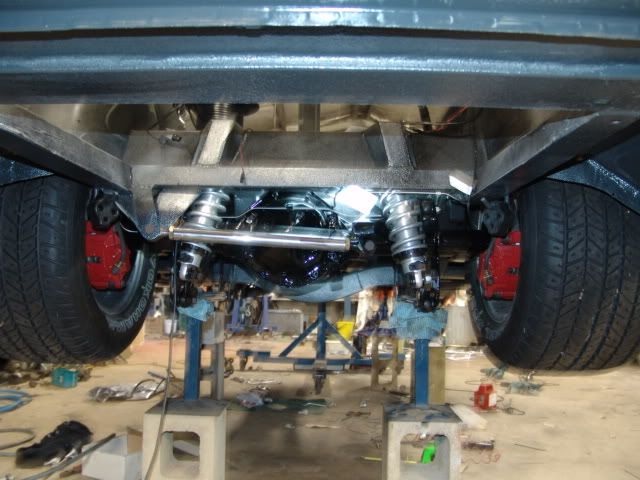
I have just about got to the stage of dropping the motor and trans in, all the doors/boot/bonnet/chrome and interior (seats/carpet/doortrims) will be the very last thing to go in.... makes it a damn sight easier working without them in the way, all the wiring has been run and tested including the electrics for the motor (starter, sensors, alternator, fans etc...).
Rear end (brakes and suspension) finished:
Don't know who's more excited to see this finished - the forum or the owner - I guess Gary by a fair margin 
The only complaint I have is now it's painted it's hard to see body lines etc etc - but I'll quickly get over it
The only complaint I have is now it's painted it's hard to see body lines etc etc - but I'll quickly get over it
The only reason for time is so everything dosen't happen at once.
If Macca's home delivered there'd be one less drunk on the road.
If Macca's home delivered there'd be one less drunk on the road.
-
matches
- Posts: 870
- Joined: Mon May 26, 2008 6:08 pm
- State: NOT ENTERED
- Location: port macquarie, nsw
man that looks tuff 

 DAMN IT!!! i was too slow, i was going to put the same type of fuel filler as you have (thought i'd be original
  ) oh well, at least i'll be copying one of the best cars i've seen.
now i'm trying to figure out how i can get the money together to get to bendigo, just to see this car in the flesh. it'd be worth it.
Luke
now i'm trying to figure out how i can get the money together to get to bendigo, just to see this car in the flesh. it'd be worth it.
Luke


-
EK Dreamer
- Posts: 414
- Joined: Tue Jan 23, 2007 3:18 pm
- State: NOT ENTERED
- Location: Newcastle