Thanks.
Project 2.
Re: Project 2.
No not piss taking Neil, just working through the options. You could do it either way I think, but wanted to hear from someone who had done it.
Thanks.
Thanks.
Sucker for a rusty bomb
Re: Project 2.
Good to see the second one survived the trip mateFireKraka wrote: Wed Nov 03, 2021 11:32 am I followed Blacky's lead after being in his shed one day, he had a couple of these laying around in the yard (amongst other stuff) drop the inside of mine by about 10 deg
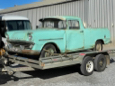
010.JPG
Neil
Tiedowns - they work
I started with nothing and still have most of it left.
Foundation member #61 of FB/EK Holden club of W.A.
Re: Project 2.
A few photos for those that are unsure about how the outer K-Frame arms are attached to the A pillars.
There is a bit of a misconception that the bolt on the A pillar must tighten down onto the outside skin. Some people have talked about the need to use crush tubes so that the bolt doesn't squash the pillar sheet metal as it tightens up the k-frame arm. If the standard bolt is used, this is not the case.
The machined ledge on the bolt tightens against the support mount that is welded to the inner sill. The rest of the bolt is a loose fit in the A Pillar with the head coming to rest on the outer skin of the pillar. Ideally the bolt head will end up tight against the outer skin, but the K-Frame does not get it's support from this surface. I seal around it to make it a bit more water resistant, and I treat the bolt with POR15 or something similar to keep it from corroding. I also use a zinc or copper based thread anti seize to help the next poor bugger.
Sorry for those of you who are fully conversant with all this, but we have an increasing number of first timers on the forum and I thought it might help.


Sent from my SM-G975F using Tapatalk
Sucker for a rusty bomb
Re: Project 2.
Owe you are hilarious Blacky
yes it is amazing that tie downs work
Neil
Neil
Member of WA FB/EK Car Club
Frankenstein EK V6 Ute
The Reverend FB Station Wagon Project
Frankenstein EK V6 Ute
The Reverend FB Station Wagon Project
Re: Project 2.
I will now count myself among the first-timers . . . the outer subframe bolt and inner sill got revised significantly between FC and FB, it appears.
The FCs have a folded piece of sheet metal in the shape of a rectangular tube between the inner and outer sills. FB and EK have the two reinforcements on the inside of the inner sill, one rectangular, one like a big washer. The FC outer subframe bolts are 7/16" diameter, except for the 5/16" UNF threaded part. So what's the subframe bolt's shank diameter?
The FB/EK setup is better engineered.
Rob
Re: Project 2.
Thought there must have been a change there. Although they are all basically the same, it is interesting how many changes were made between each of the four models, as are the differences between FX and FJ.
FB ute fixer upper, EK van on rotisserie
getting my FB ute on the road
EK van on rotisserie
Re: Project 2.
Today's tasks. Get rid of ragged bits.
Nice rainy day in the shed patching and strengthening B pillar and what would be C pillar in a sedan. A bit messy but should be good enough.
And a random photo of a lot of brass
A bit still to finish off on the A pillar,and then a move to the drivers side to start it all again.


Sent from my SM-G975F using Tapatalk
Nice rainy day in the shed patching and strengthening B pillar and what would be C pillar in a sedan. A bit messy but should be good enough.
And a random photo of a lot of brass

A bit still to finish off on the A pillar,and then a move to the drivers side to start it all again.


Sent from my SM-G975F using Tapatalk
Sucker for a rusty bomb
- funkyscooter
- Posts: 699
- Joined: Wed Aug 16, 2017 8:12 am
- State: NSW
- Location: Sydney
Re: Project 2.
Hey Brett, as one of those first timers, I really appreciate the effort. I will no doubt return to Page 29 of this build in the not too distant future.
Thanks!
Thanks!
Scott
(Not so rusty) Ol' Rusty - FB/EK Sedan
Project 2.
I’m with [mention]funkyscooter [/mention]. This info will be very helpful in the next few months as I progress down that road. Thanks [mention]Brett027 [/mention]funkyscooter wrote:Hey Brett, as one of those first timers, I really appreciate the effort. I will no doubt return to Page 29 of this build in the not too distant future.
Thanks!
Sent from my iPhone using Tapatalk
FB Ute Stock
EK Ute in Pieces
EK Ute in Pieces
Re: Project 2.
Yep very helpful.
Great pics and insights
Hey Brett were you chasing half size sealant seam goo? Bunnings has a few options in tube size. Sikaflex 227 is the stuff. You can use a tube each side. Black or white
And the tip about dipping your fingers in prepsol prior to applying. Works well.
This Stuff is like antiseize. Open it up and it’s everywhere you don’t want it to be.
I went the sealant joint instead of welding for the rear 1/4 seam also like Patrick.
Also made sure I covered the top of the seam joint to seal it from the inside as much as I could.
Blackdog
Sent from my iPhone using Tapatalk
Nostalgia isn’t what it used to be.
Re: Project 2.
Thanks for that info Blackdog. I assume the prepsol is to stop it sticking to your hands? Do you still prepsol the bare metal before glueing or does it risk adhesion?
Today I checked my mig gun access without the rear cab floor panel and an opening through the cab wall and it can be done I think if I pre-drill and spot weld. Maybe every 50mm rather than 25
I probably will try to weld it but am also interested in trying the adhesive. The modern car industry can't be wrong
Today I checked my mig gun access without the rear cab floor panel and an opening through the cab wall and it can be done I think if I pre-drill and spot weld. Maybe every 50mm rather than 25
Sucker for a rusty bomb
Re: Project 2.
Further question: do you paint surfaces first or apply to clean bare metal?
Sucker for a rusty bomb
Re: Project 2.
Hi Brett, best to get the product data sheet for whichever adhesive you are using. Patrick
e.g. https://industry.sika.com/content/dam/d ... ex-227.pdf
