Page 27 of 51
Re: Ol' Rusty - FB/EK Sedan
Posted: Sat Jul 23, 2022 12:40 am
by Blacky
Re: Ol' Rusty - FB/EK Sedan
Posted: Sat Jul 23, 2022 8:42 am
by Brett027
Looking good Scott. I like that line too. NOS panels seem to come with NO- rust in my limited experience. I had a lot of trouble with vein-like rust in a NOS bonnet that I used on sedan. It was very difficult to get rid of.
Re: Ol' Rusty - FB/EK Sedan
Posted: Sun Jul 24, 2022 11:00 pm
by FCEKHKZD
Brett027 wrote: Sat Jul 23, 2022 8:42 am
Looking good Scott. I like that line too. NOS panels seem to come with NO- rust in my limited experience. I had a lot of trouble with vein-like rust in a NOS bonnet that I used on sedan. It was very difficult to get rid of.
NOS- these days its referred as Nasty Old Shit by us resto heads, when a customer comes in with a car and has alot of NOS, we usually send him off to sell it for huge dollars, it still needs alot of massaging to fit and sometime just as easy to fix whats stuffed*btw, nothing fits full stop as we like
to think
Re: Ol' Rusty - FB/EK Sedan
Posted: Mon Jul 25, 2022 6:55 pm
by EK283
FCEKHKZD wrote: Sun Jul 24, 2022 11:00 pm
Brett027 wrote: Sat Jul 23, 2022 8:42 am
Looking good Scott. I like that line too. NOS panels seem to come with NO- rust in my limited experience. I had a lot of trouble with vein-like rust in a NOS bonnet that I used on sedan. It was very difficult to get rid of.
NOS- these days its referred as Nasty Old Shit by us resto heads, when a customer comes in with a car and has alot of NOS, we usually send him off to sell it for huge dollars, it still needs alot of massaging to fit and sometime just as easy to fix whats stuffed*btw, nothing fits full stop as we like
to think
I have to totally agree, I'm no panel beater but I've done a lot of panel work. It is so true that not even the original pressings from car to car will fit each other. Think about a die punching out 40000 door frames and skins, it will wear with time and can sometimes end up 5mm different in size.
The cars were hand built and usually panels were swapped around to fit best on each car. Lets not even go to the Friday arvo slap together floor pans !!!! The jigs were also hand set and varied from state to state, within tollerance of course.
Greg
Re: Ol' Rusty - FB/EK Sedan
Posted: Mon Aug 01, 2022 8:09 pm
by funkyscooter
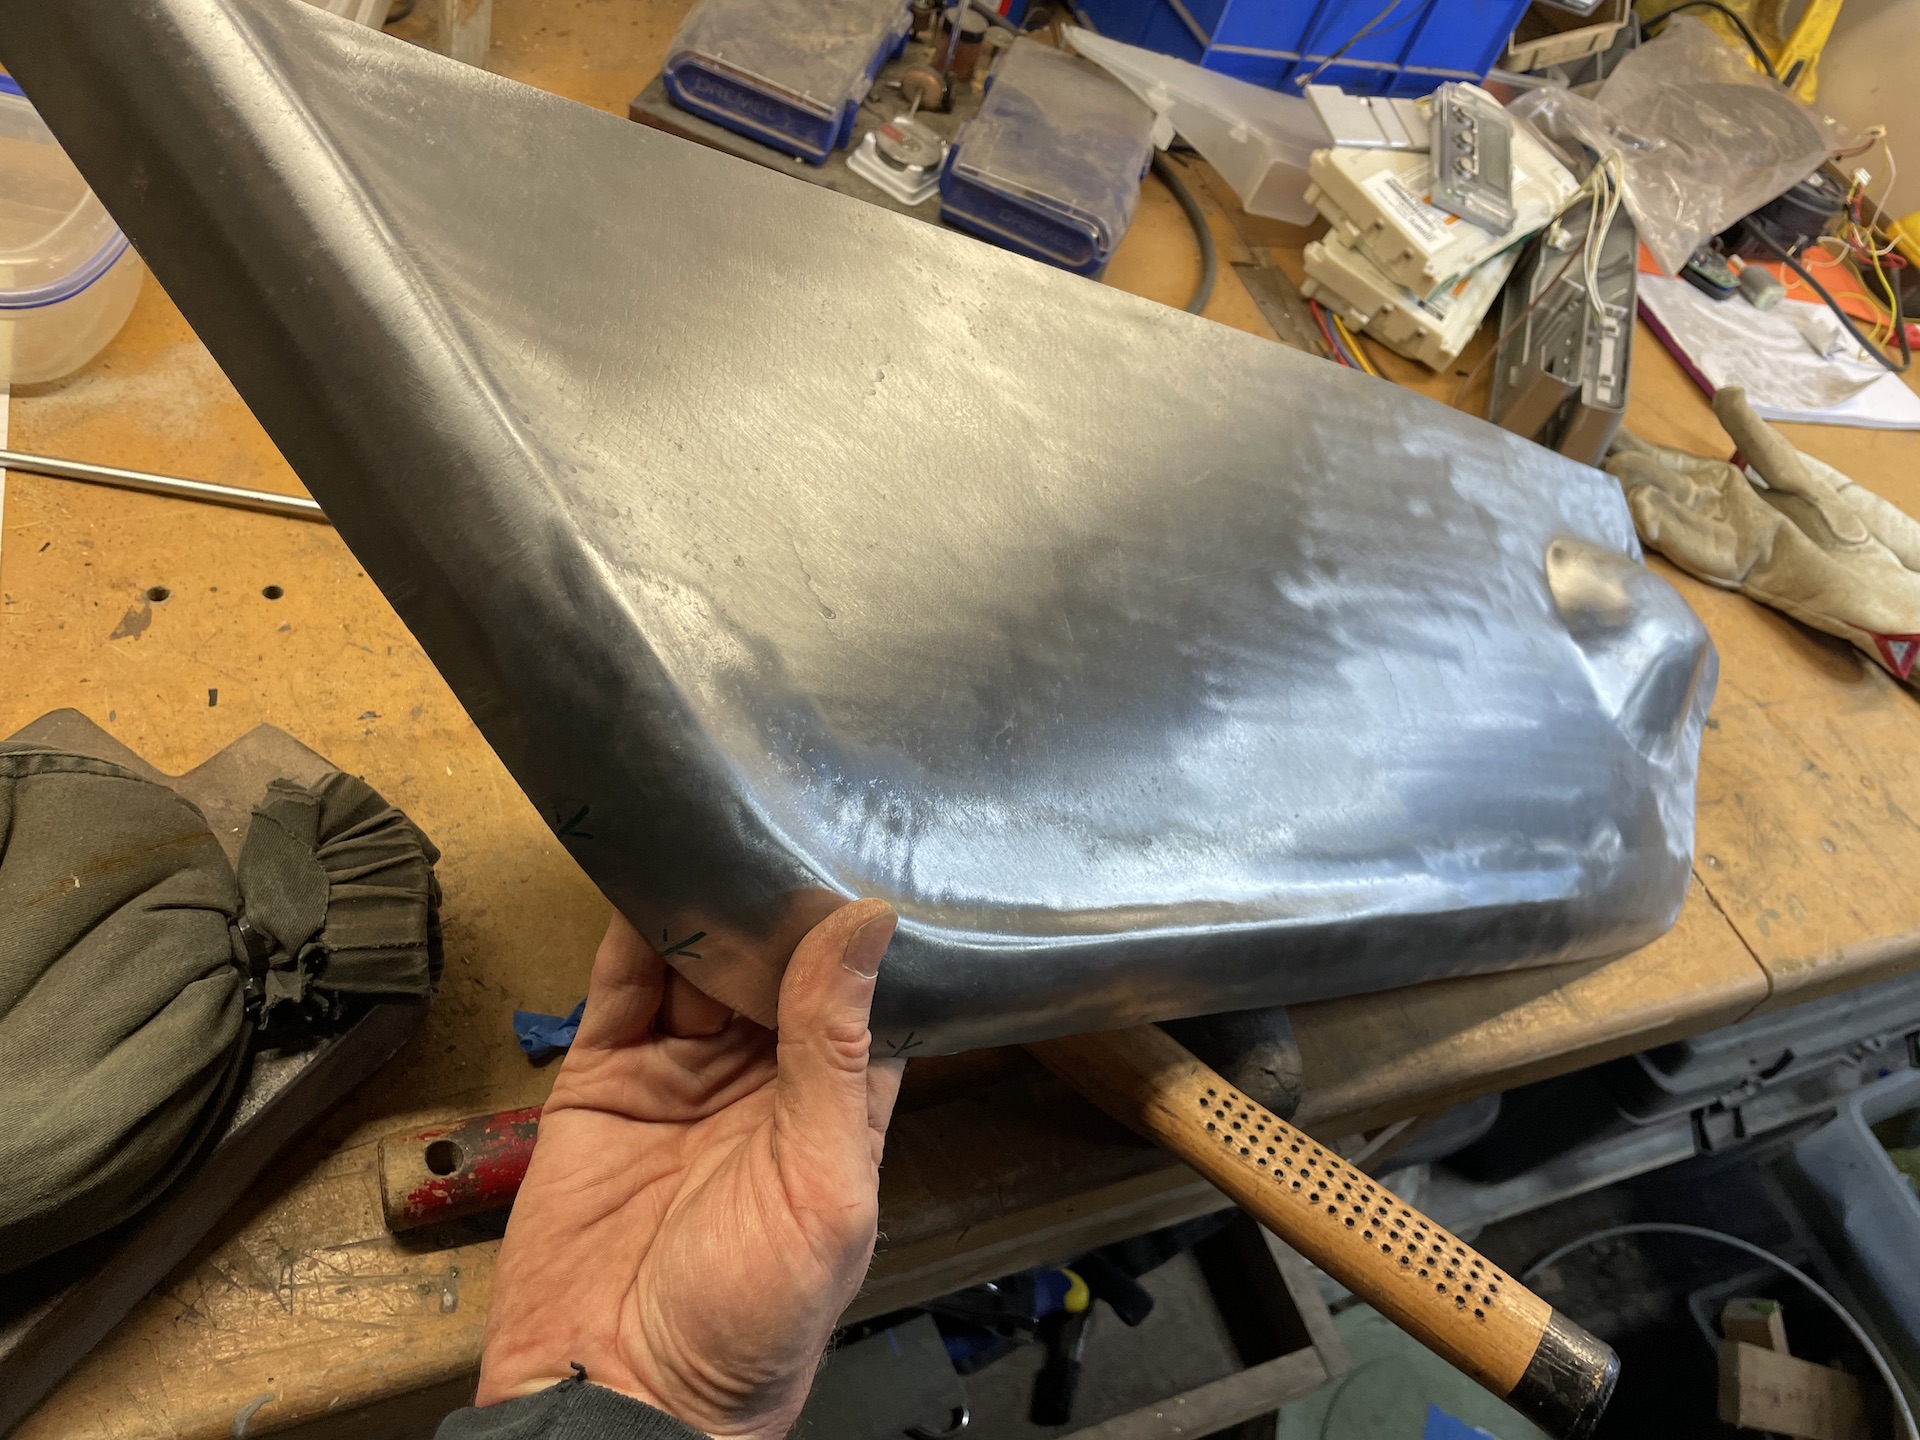
Had a go at shaping the rear quarter panel with my knee to see if I could get a bit of curve in the panel. Well got a bit more than I need....
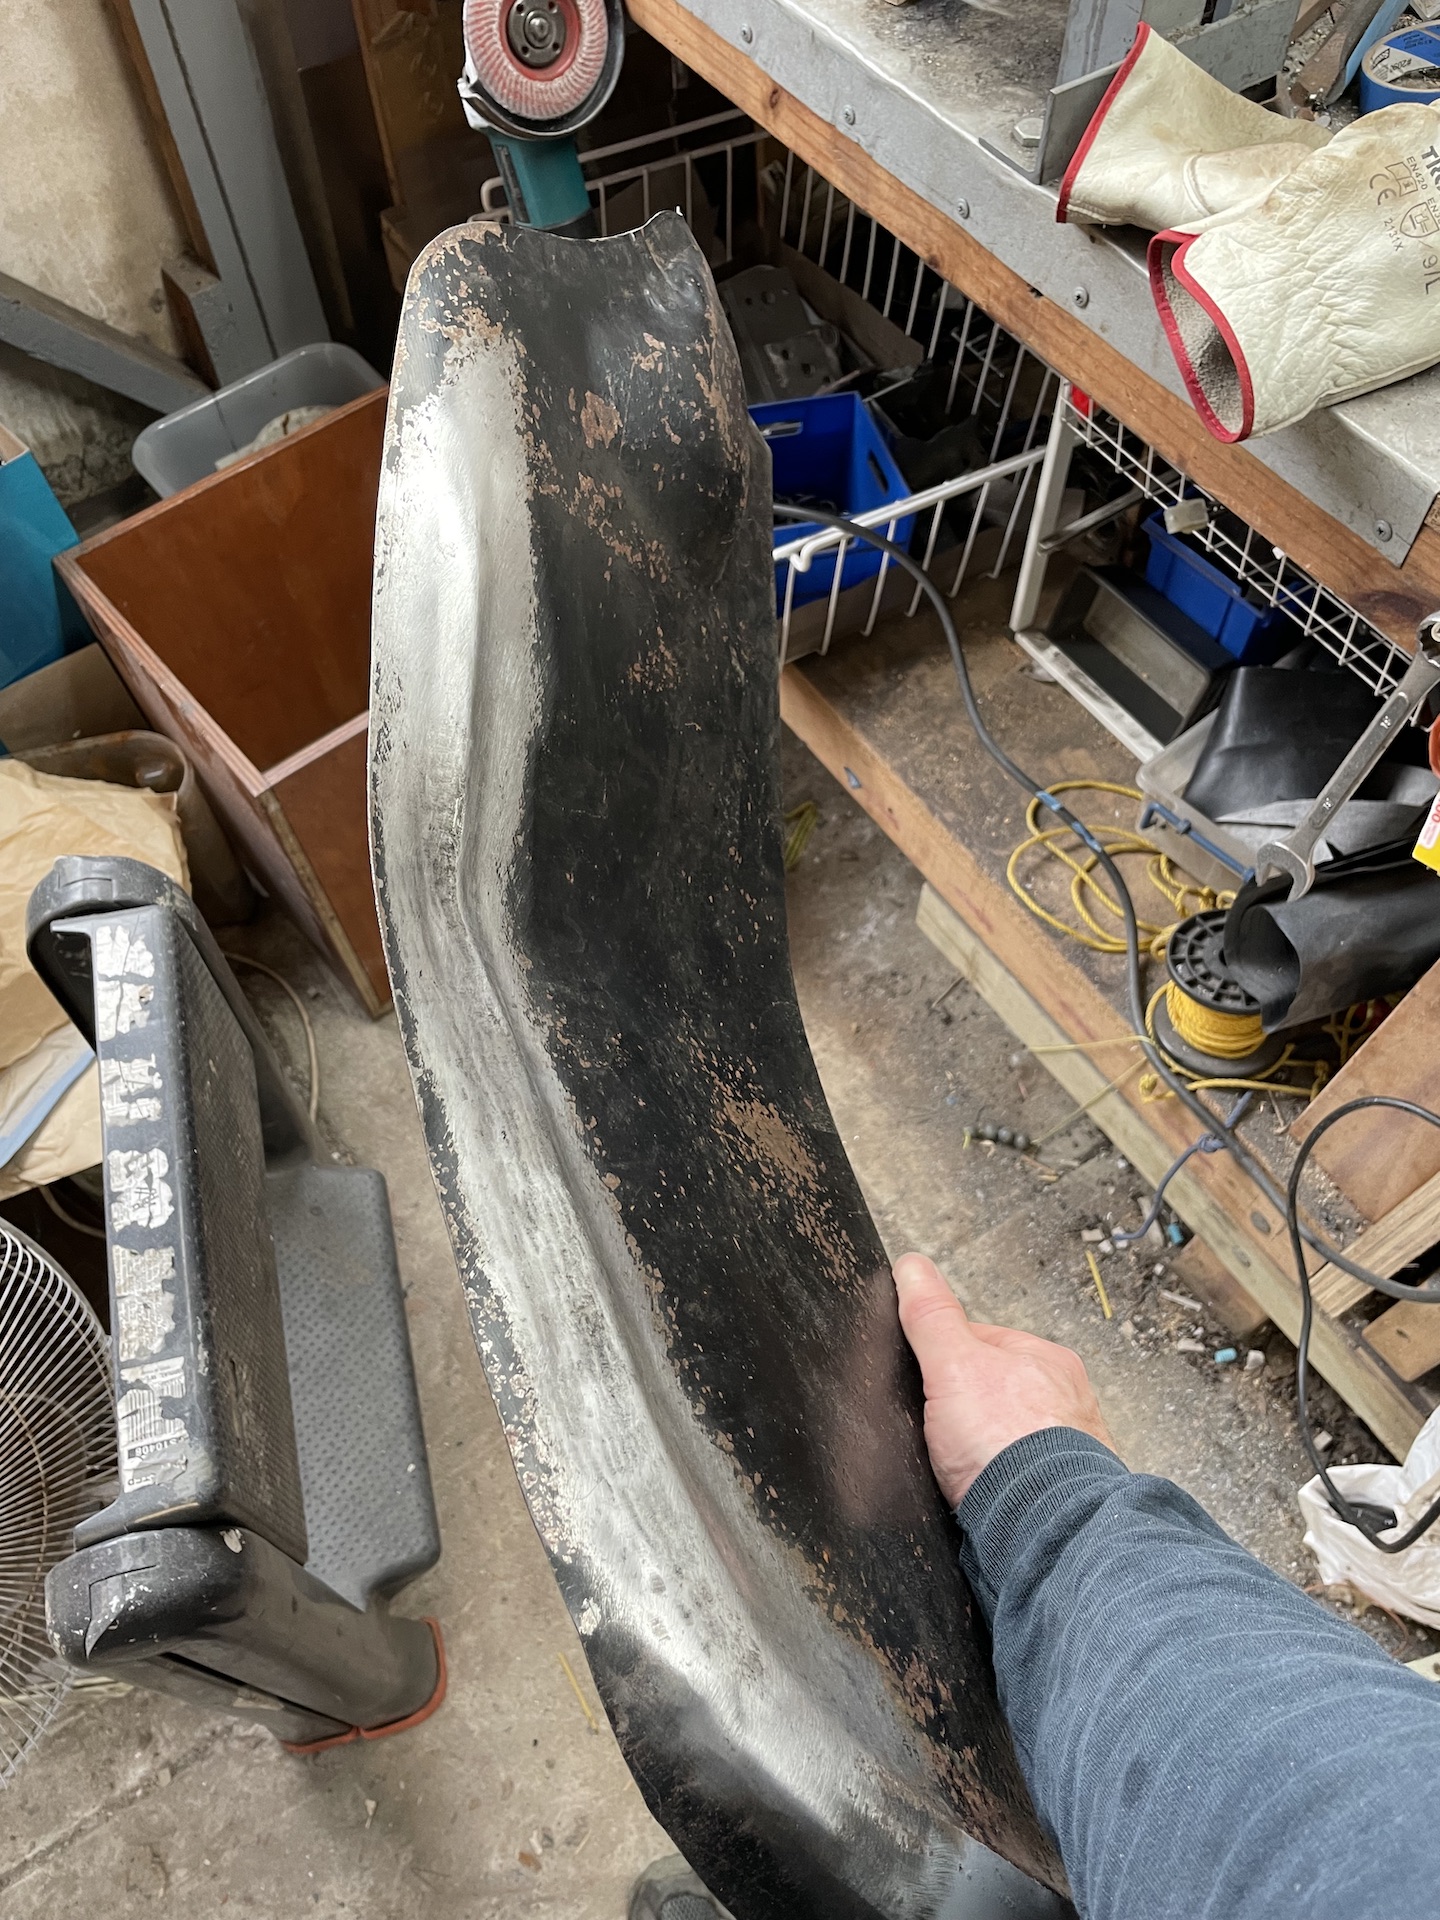
- IMG_0404.jpeg (906.95 KiB) Viewed 2348 times
Decided might be about the right time to straighten it out, and put it in a nice warm acid bath.
Swapped it with the passenger side which had been soaking for a few days. With a quick wire brush this one scrubbed up alright. The rod I used first time round is great to draw out the line to use as a guide on the inside of the panel

- IMG_0410.jpeg (892.49 KiB) Viewed 2348 times
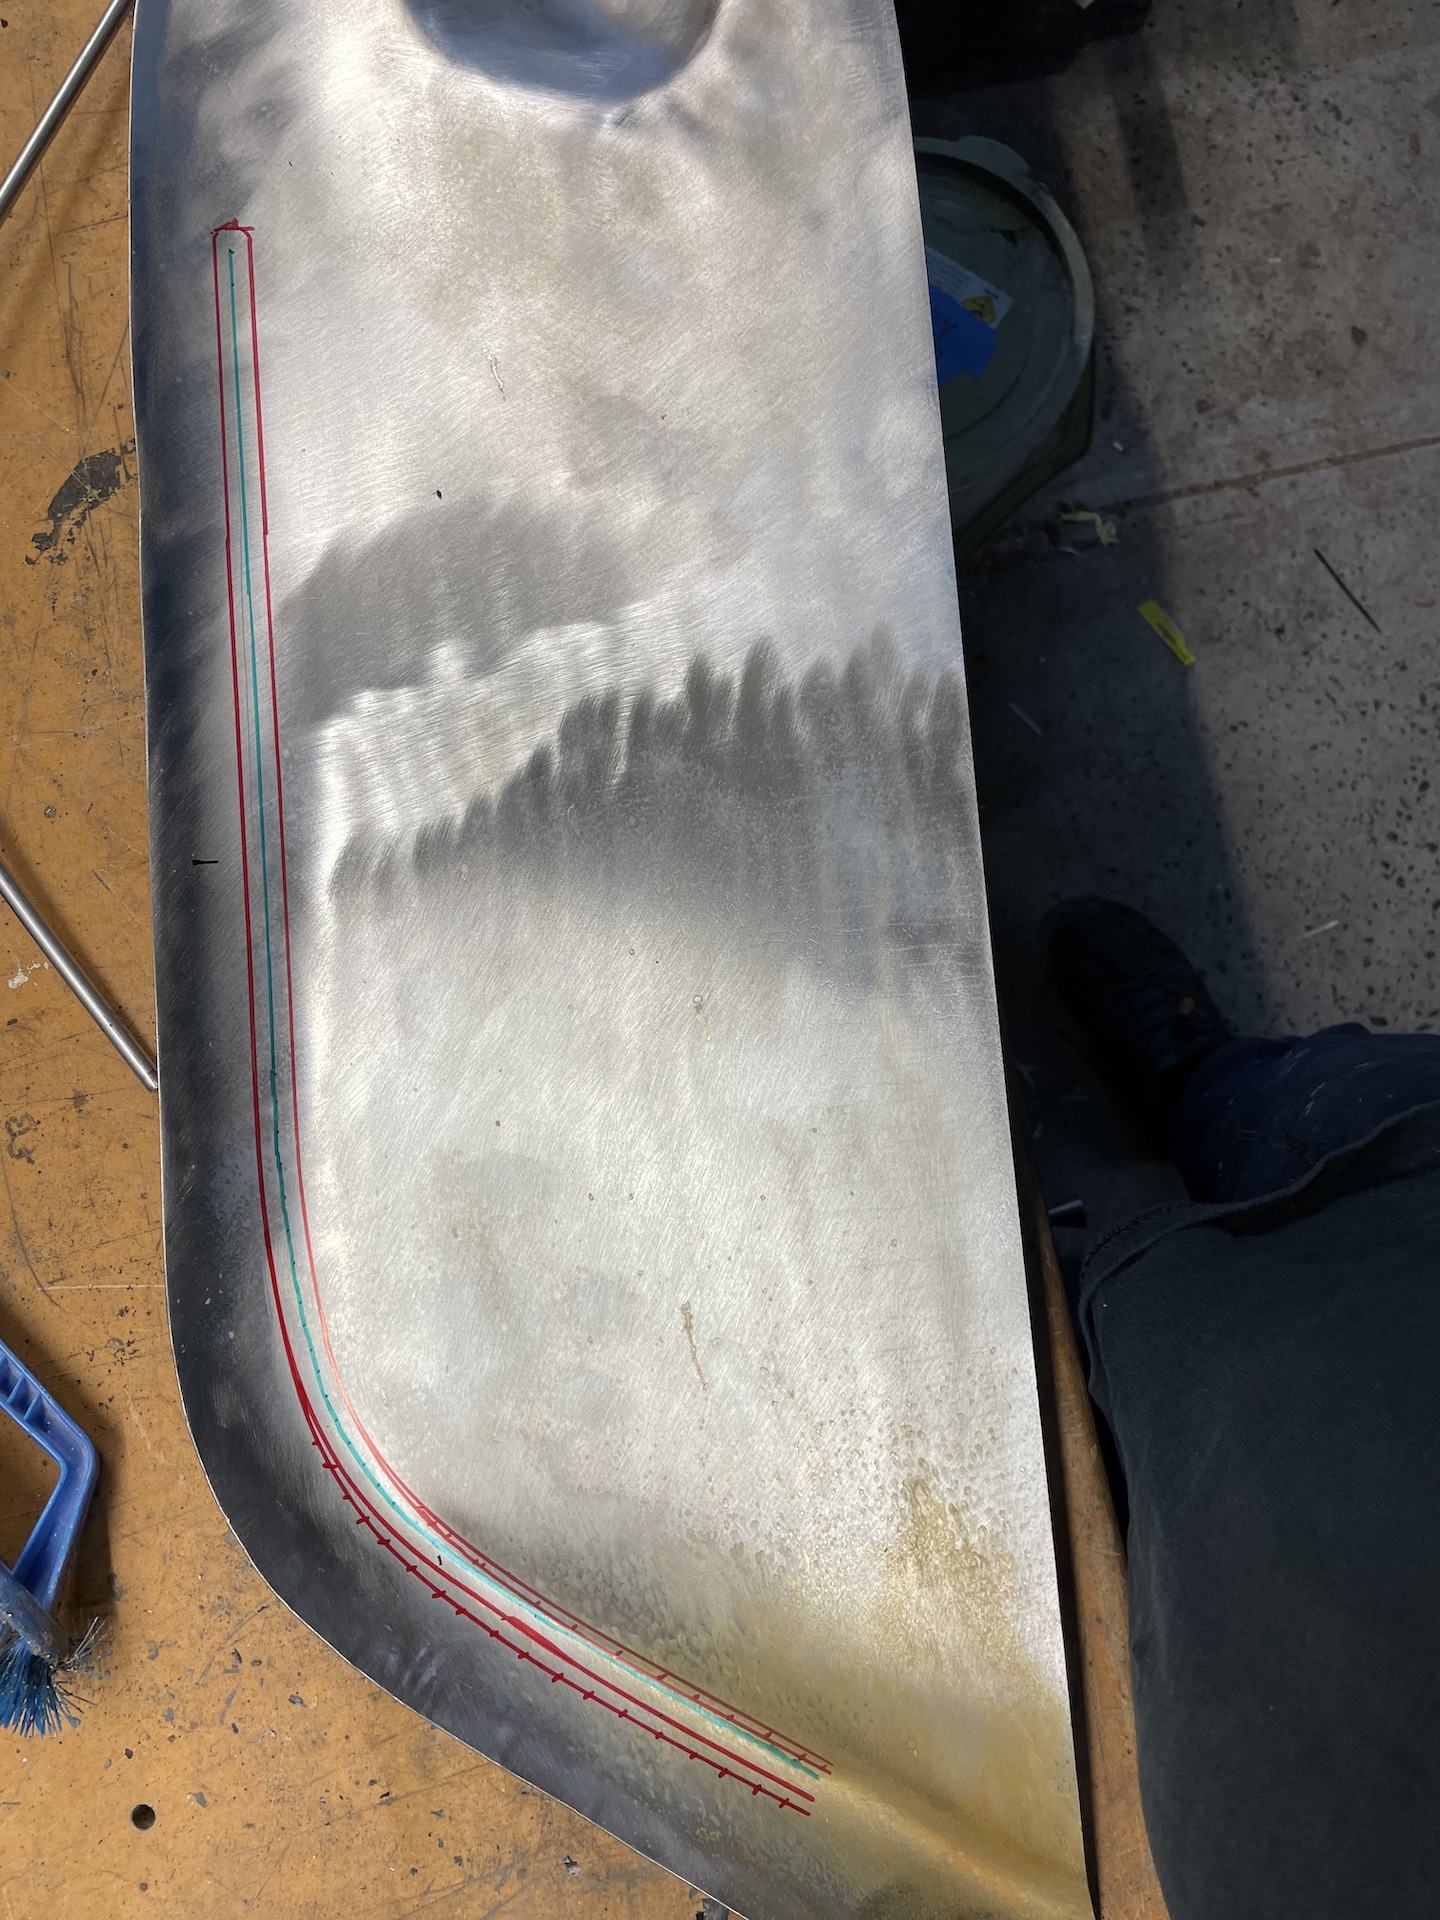
- IMG_0411.jpg (804.46 KiB) Viewed 2348 times
Repeated the process from earlier. To help the panel curve I shrunk it a bit more. Cold chisel, a couple of old drill bits with a washer between them and some ducting tape does the job.
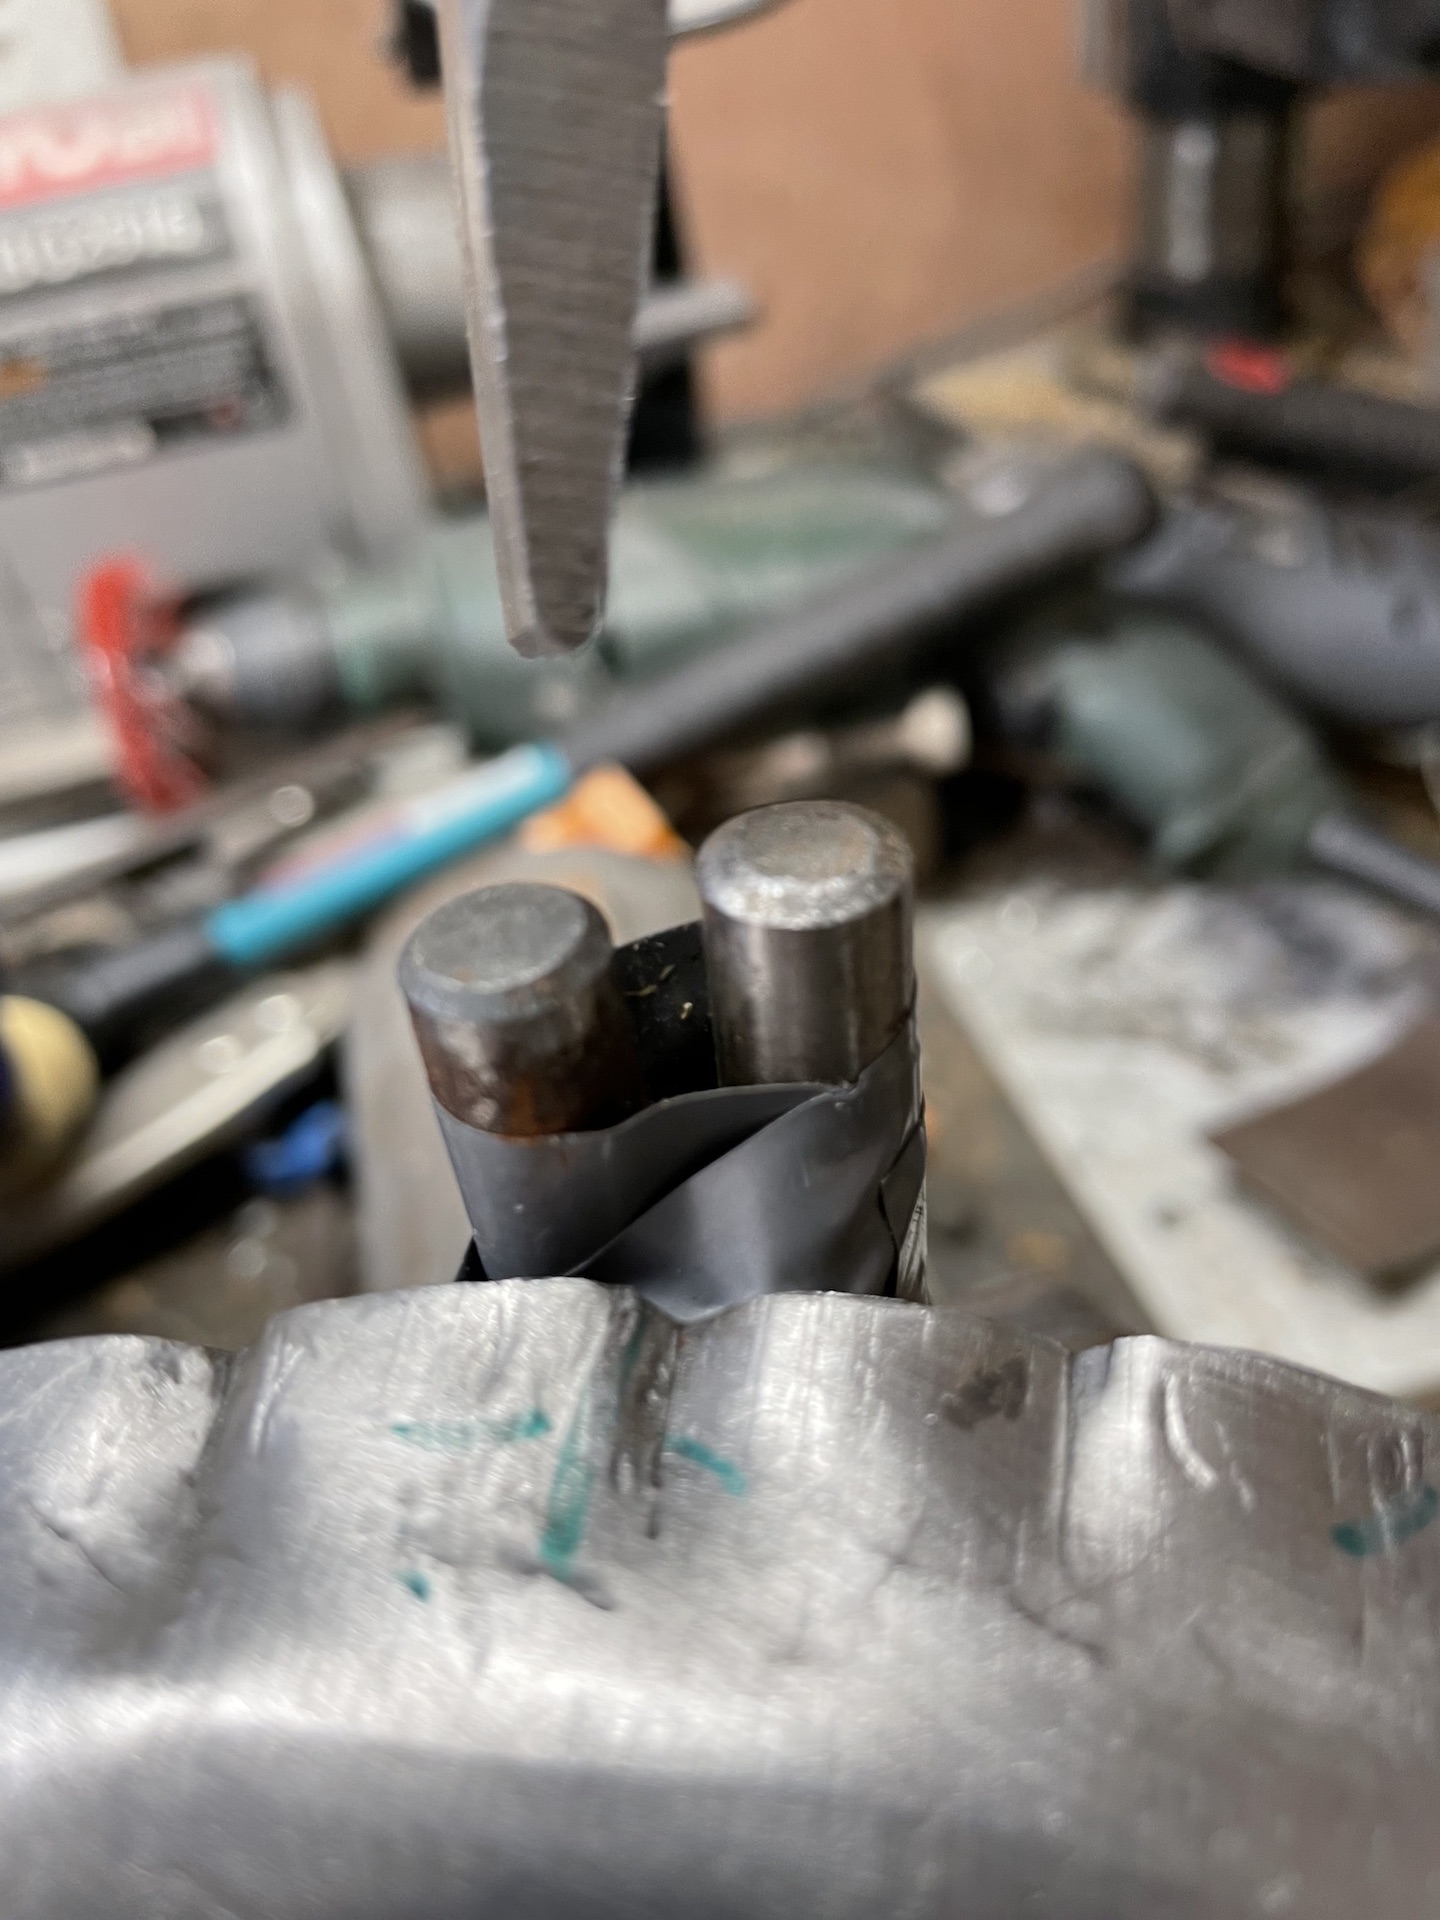
- IMG_0419.jpeg (500.18 KiB) Viewed 2348 times
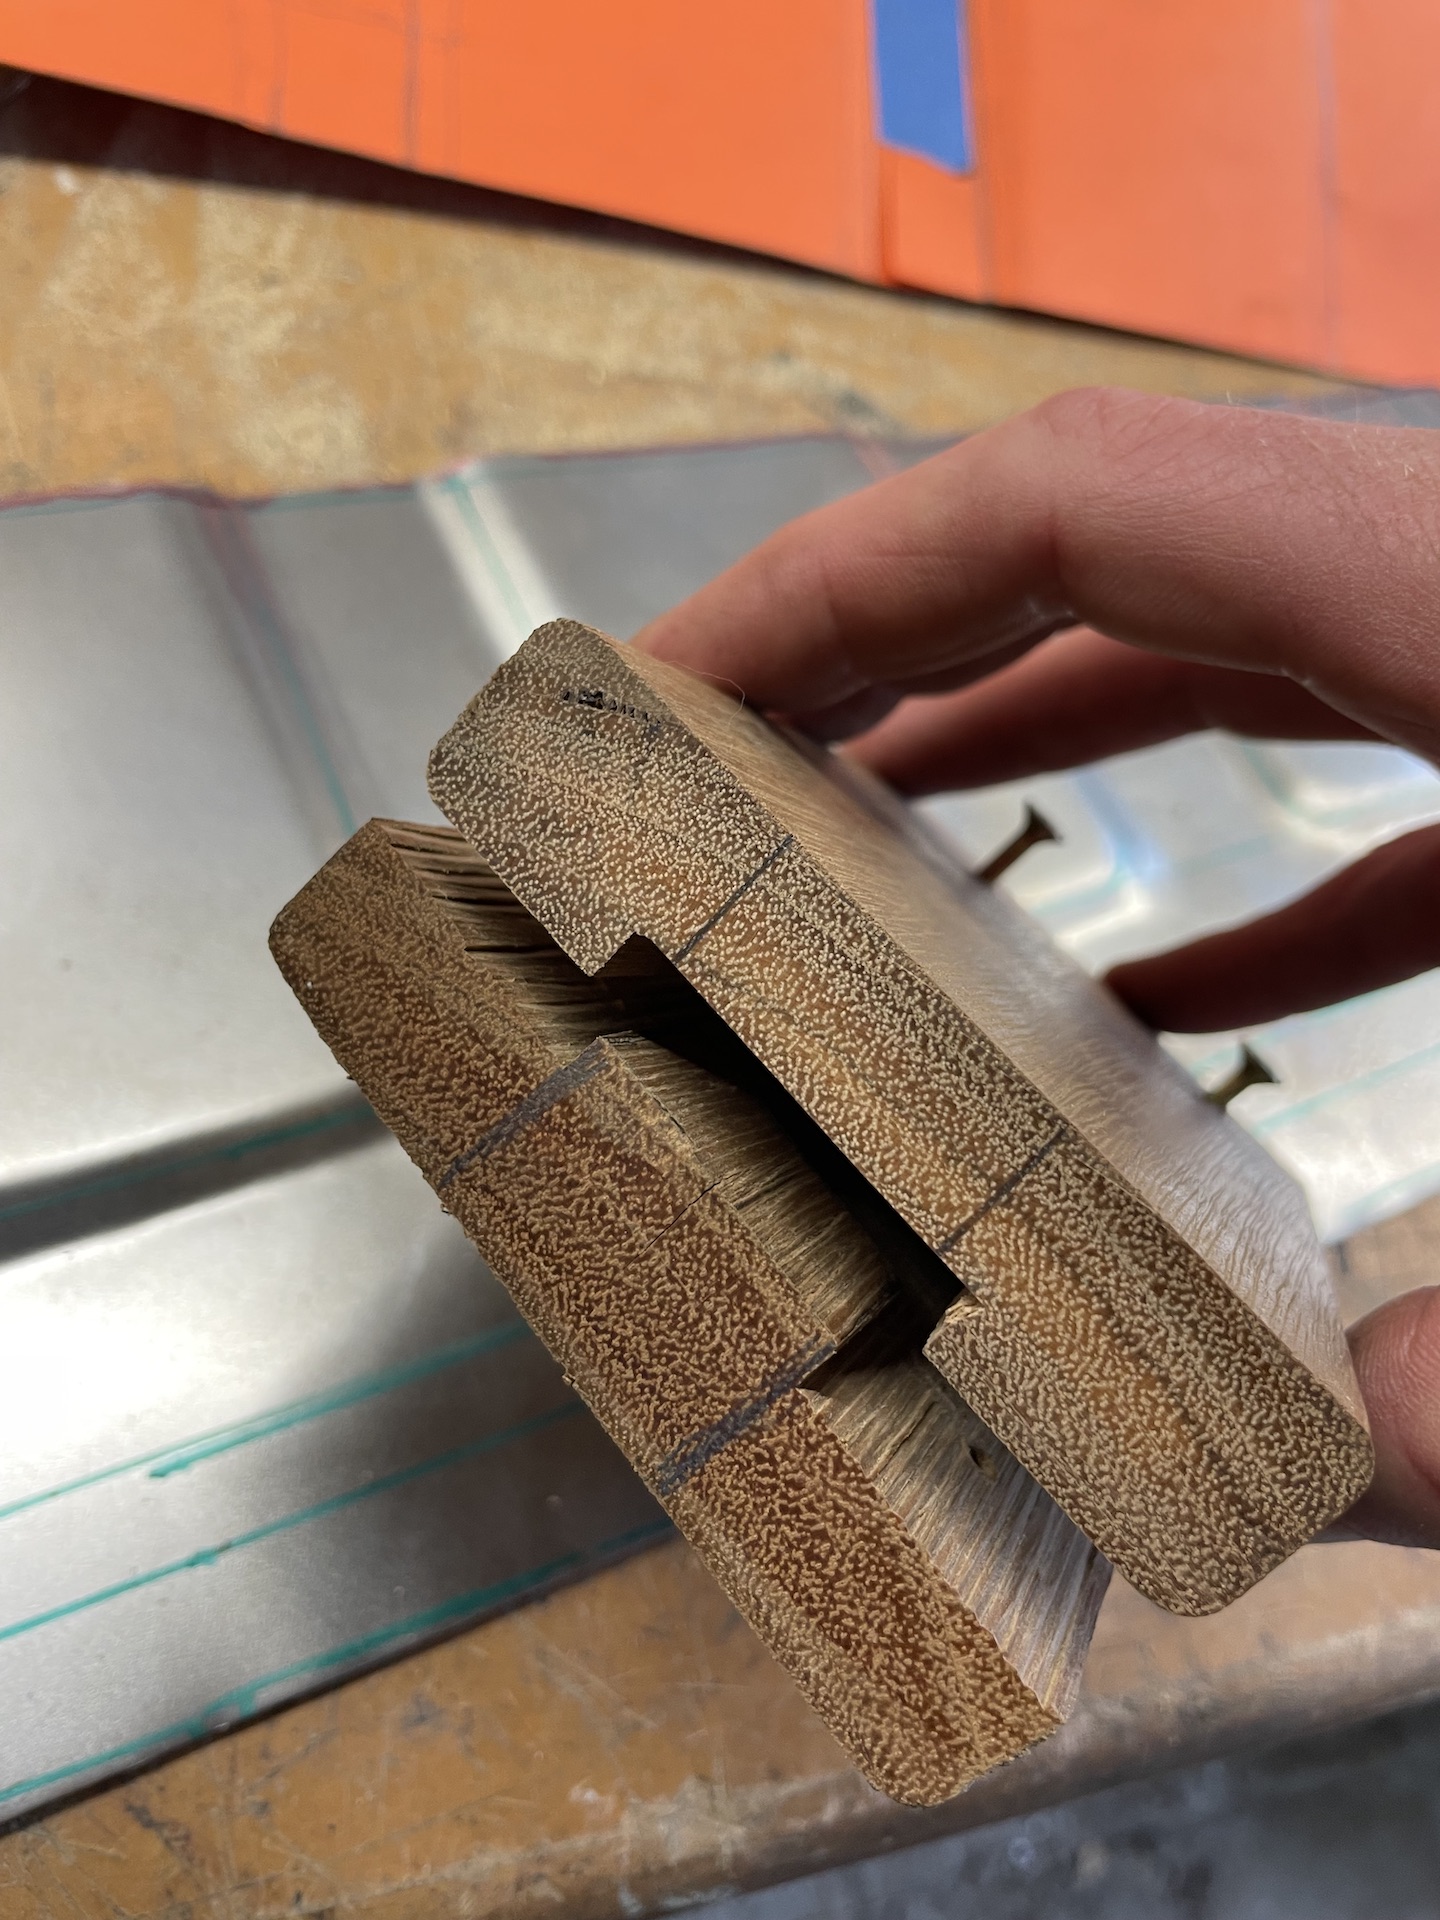
Using a shifter to help with the bends leaves little scratches so I decided to make some soft jaws out of hard wood and masking tape.
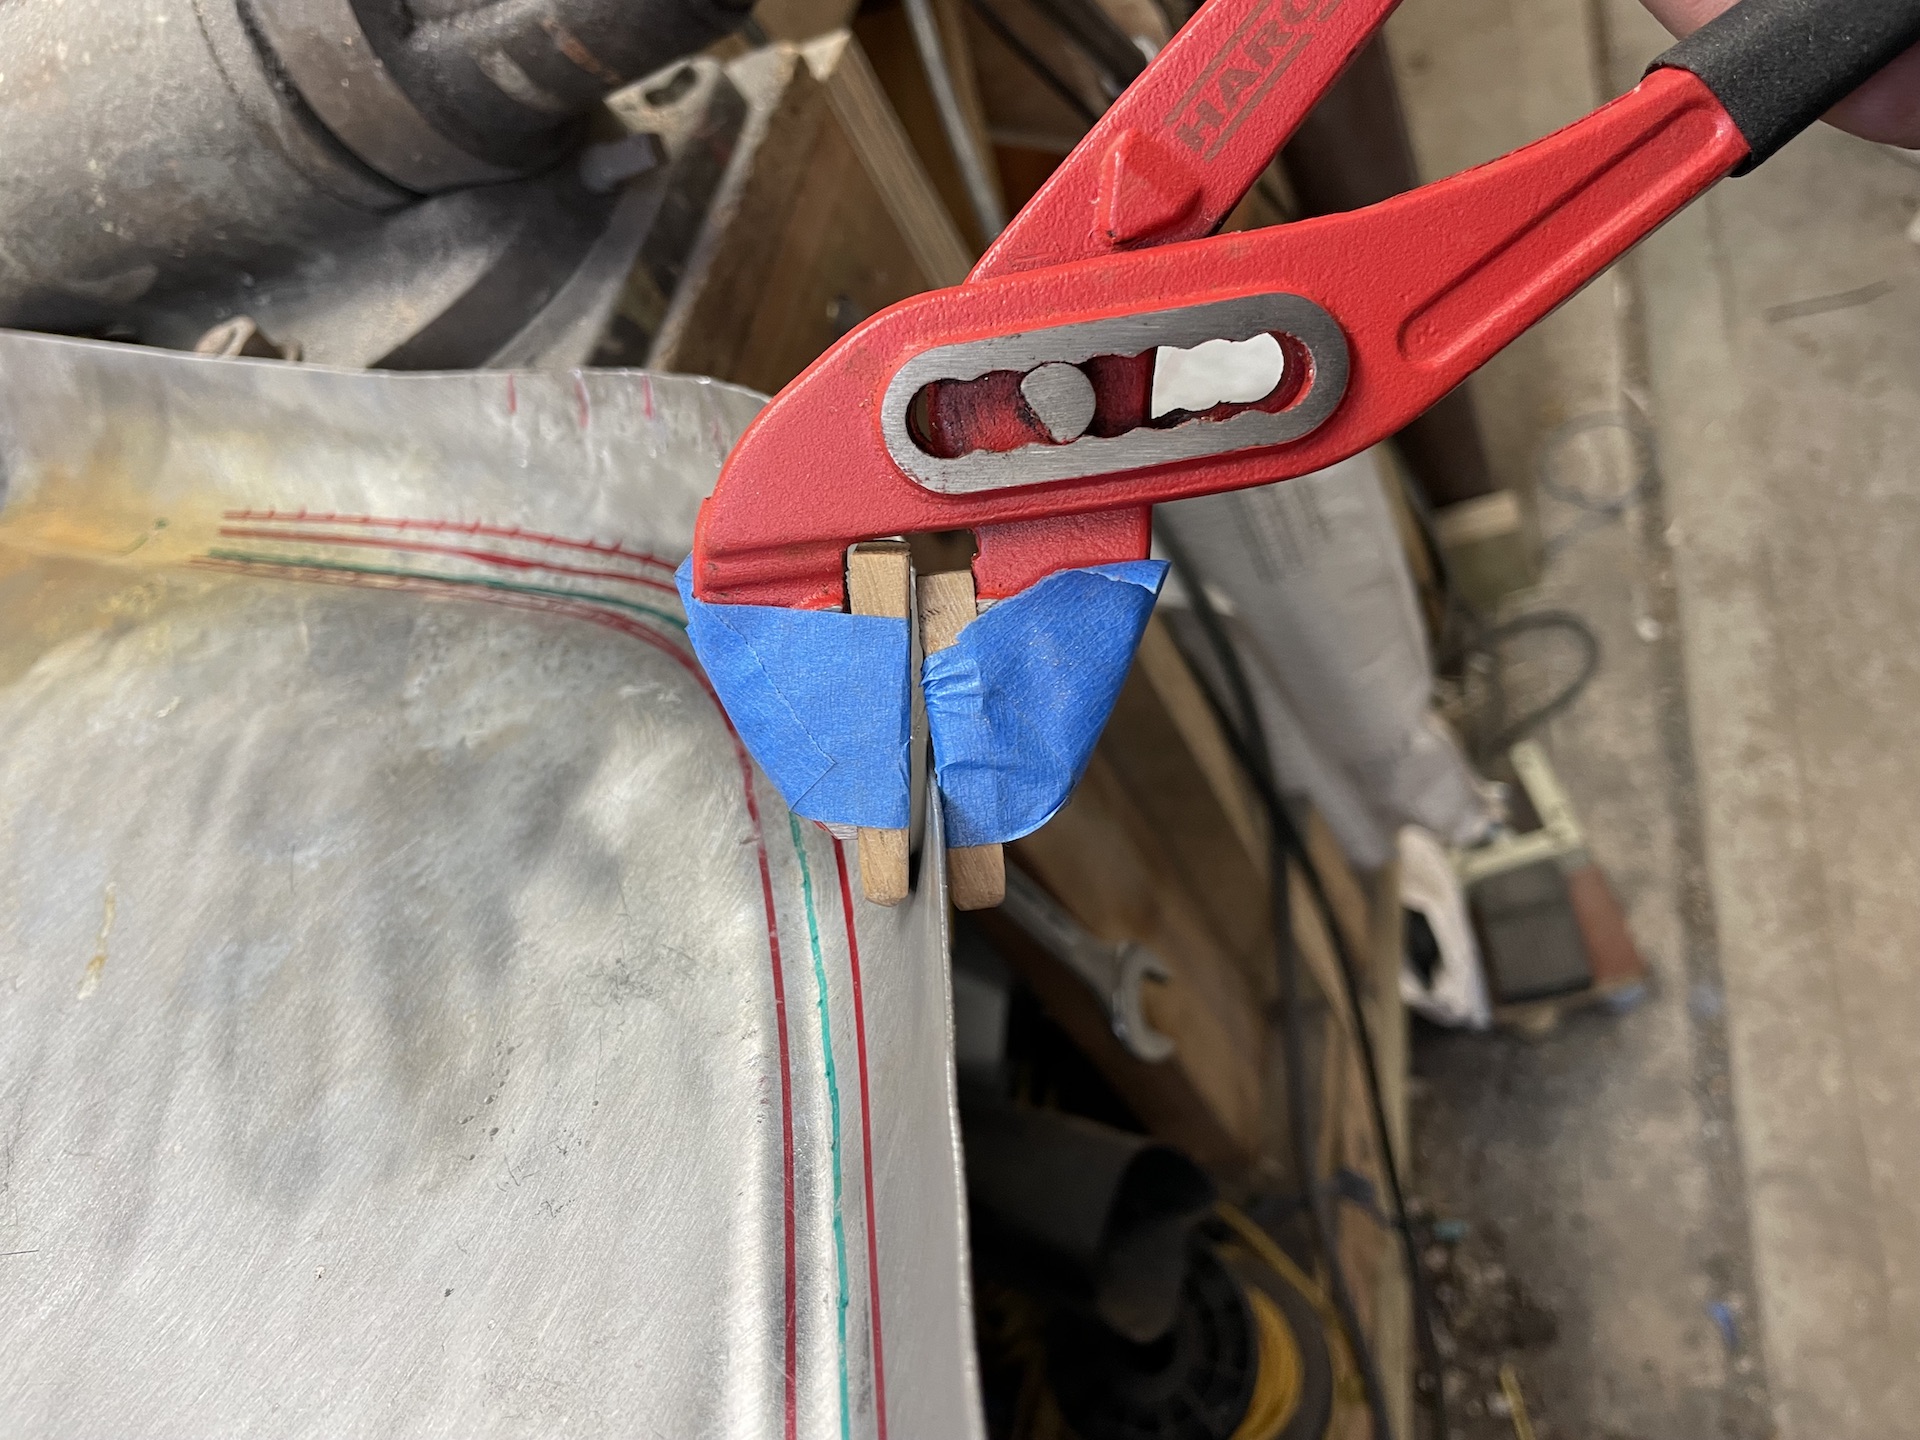
- IMG_0420.jpeg (700.6 KiB) Viewed 2348 times
Here is the result
- IMG_0414.jpeg (705.92 KiB) Viewed 2348 times
Re: Ol' Rusty - FB/EK Sedan
Posted: Mon Aug 01, 2022 8:12 pm
by funkyscooter
Time to crack this open. My though process is to remove as little as possible for now, and keep as much in place to help guide the replacement metal. So first remove outer skin.
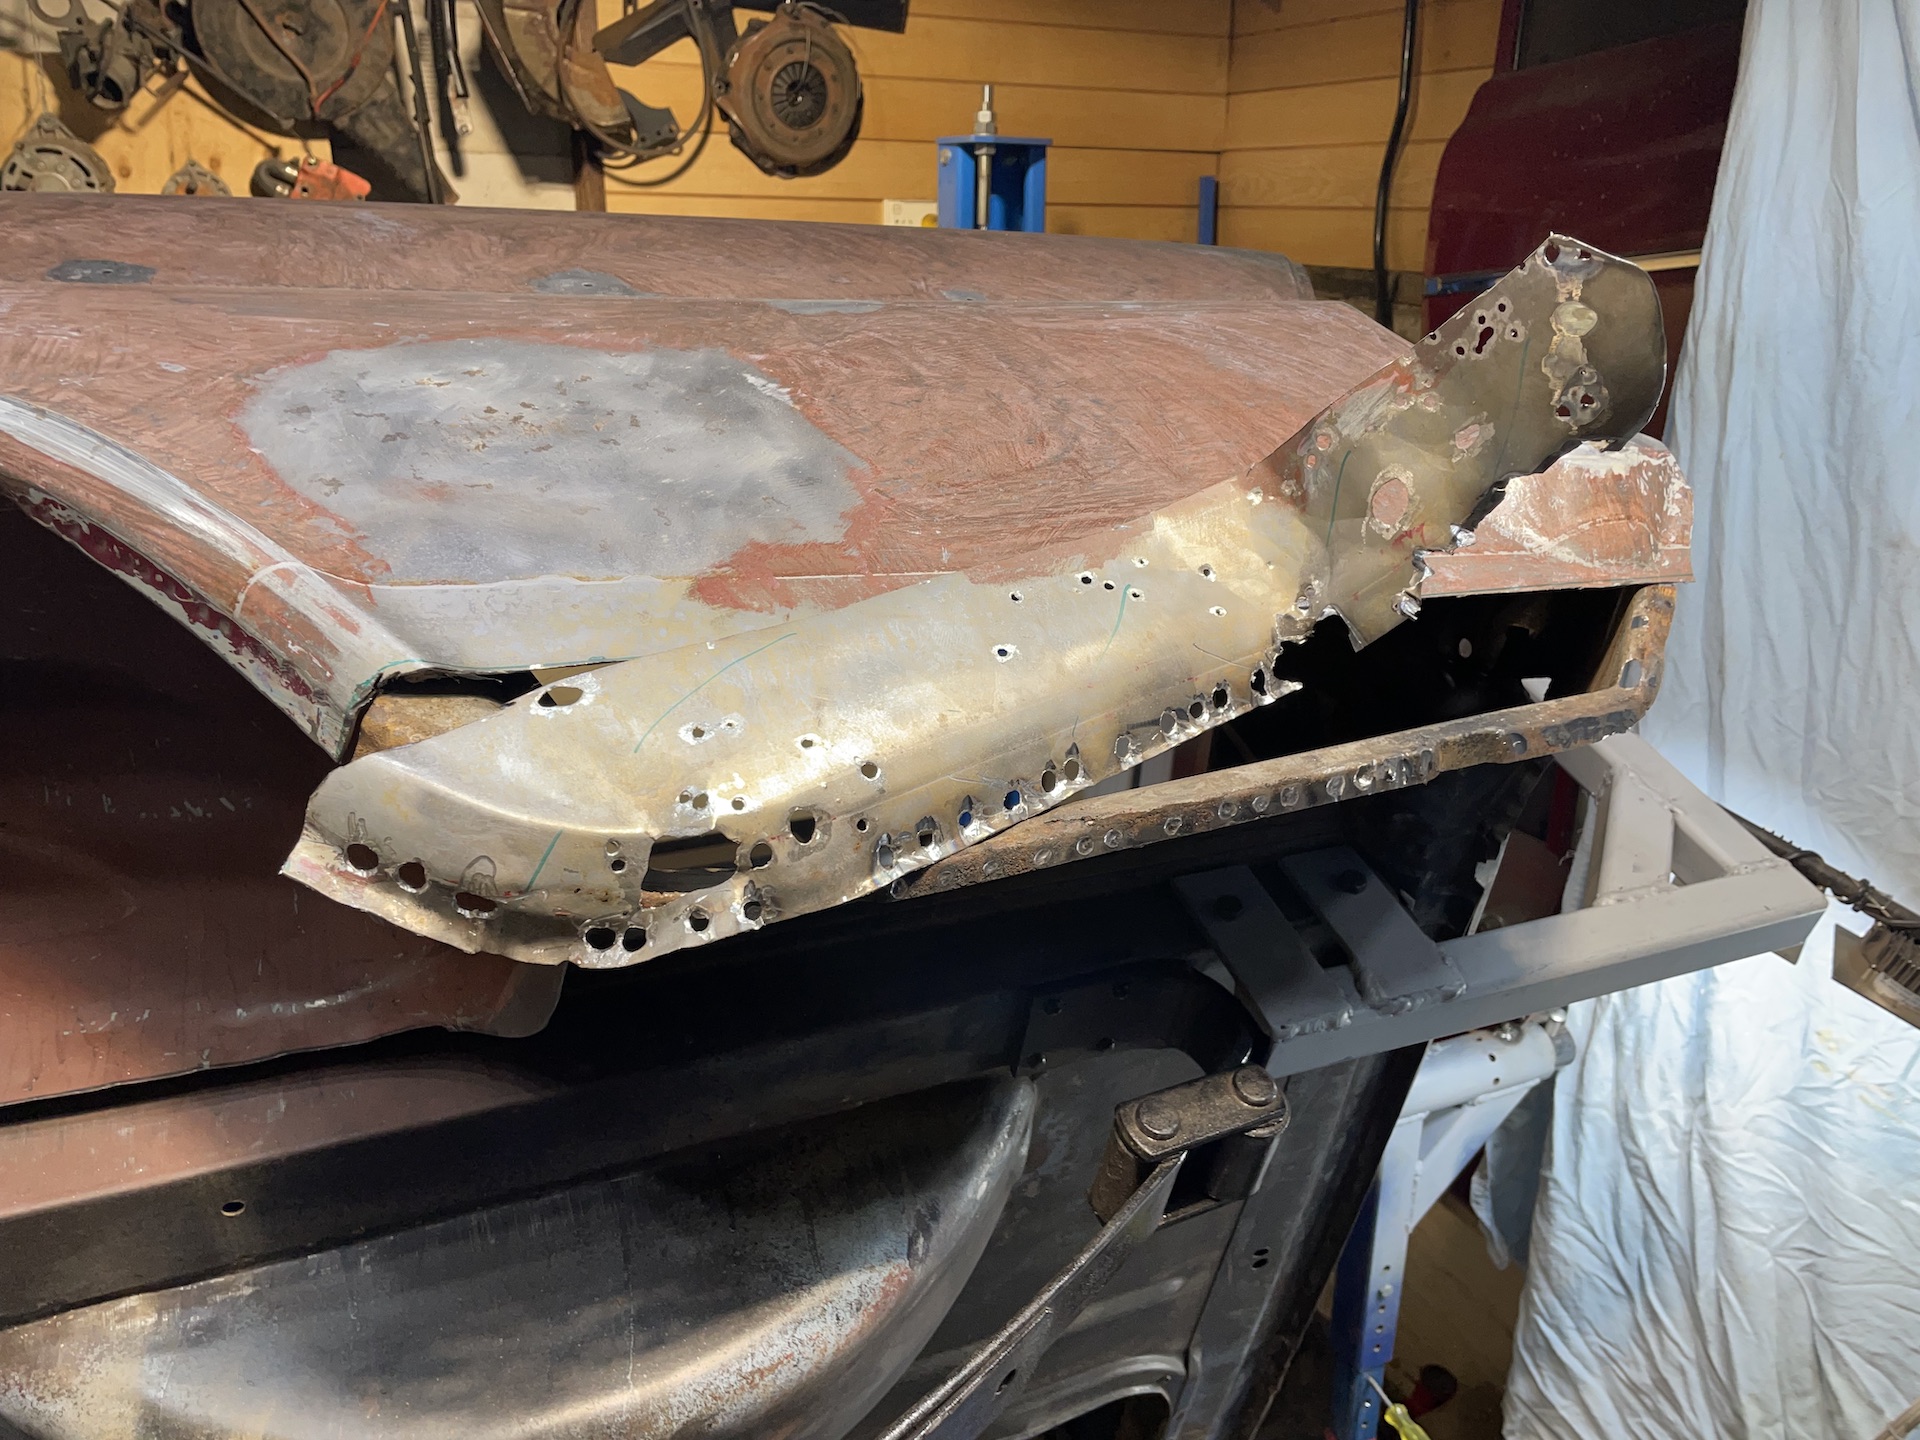
- IMG_0467.jpeg (696.46 KiB) Viewed 2325 times
This is a bit janky above the rusty hole in the wheel arch so starting here
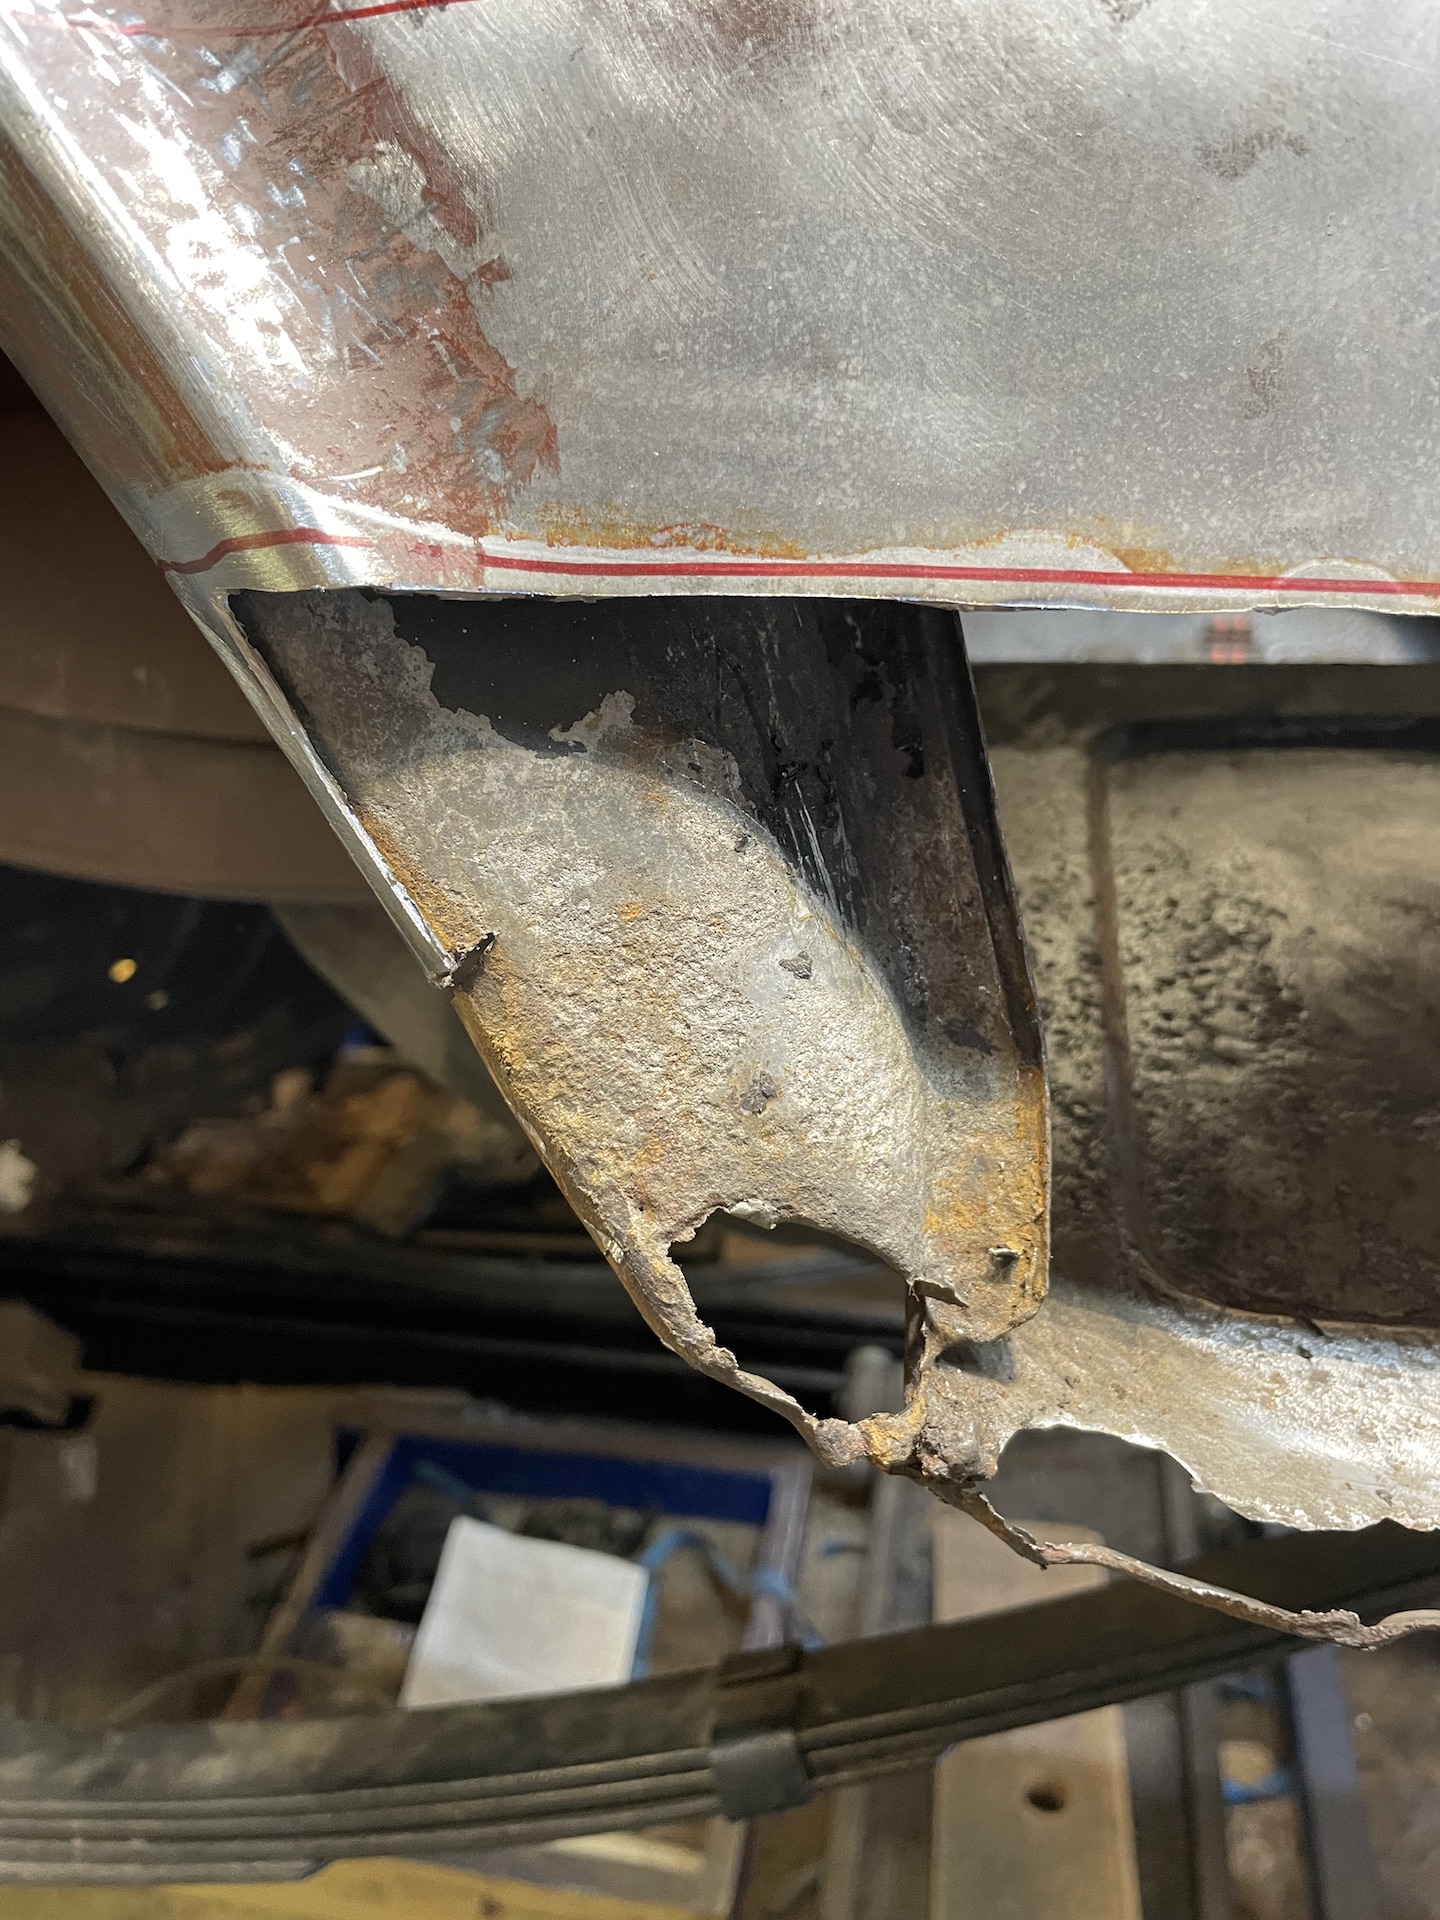
- IMG_0469.jpeg (872.32 KiB) Viewed 2325 times
Cut out the offending piece and get the crafty paper into action again. Trace around the shape.

- IMG_0472.jpeg (620.25 KiB) Viewed 2325 times
Test fit

- IMG_0473.jpeg (785.89 KiB) Viewed 2325 times
Trace onto a piece of leftover floor pan, cut, fold, stretch, shape on my sand bag, fit, refit, bend with fingers, make new soft jaws, fit blah blah......
And an hour later
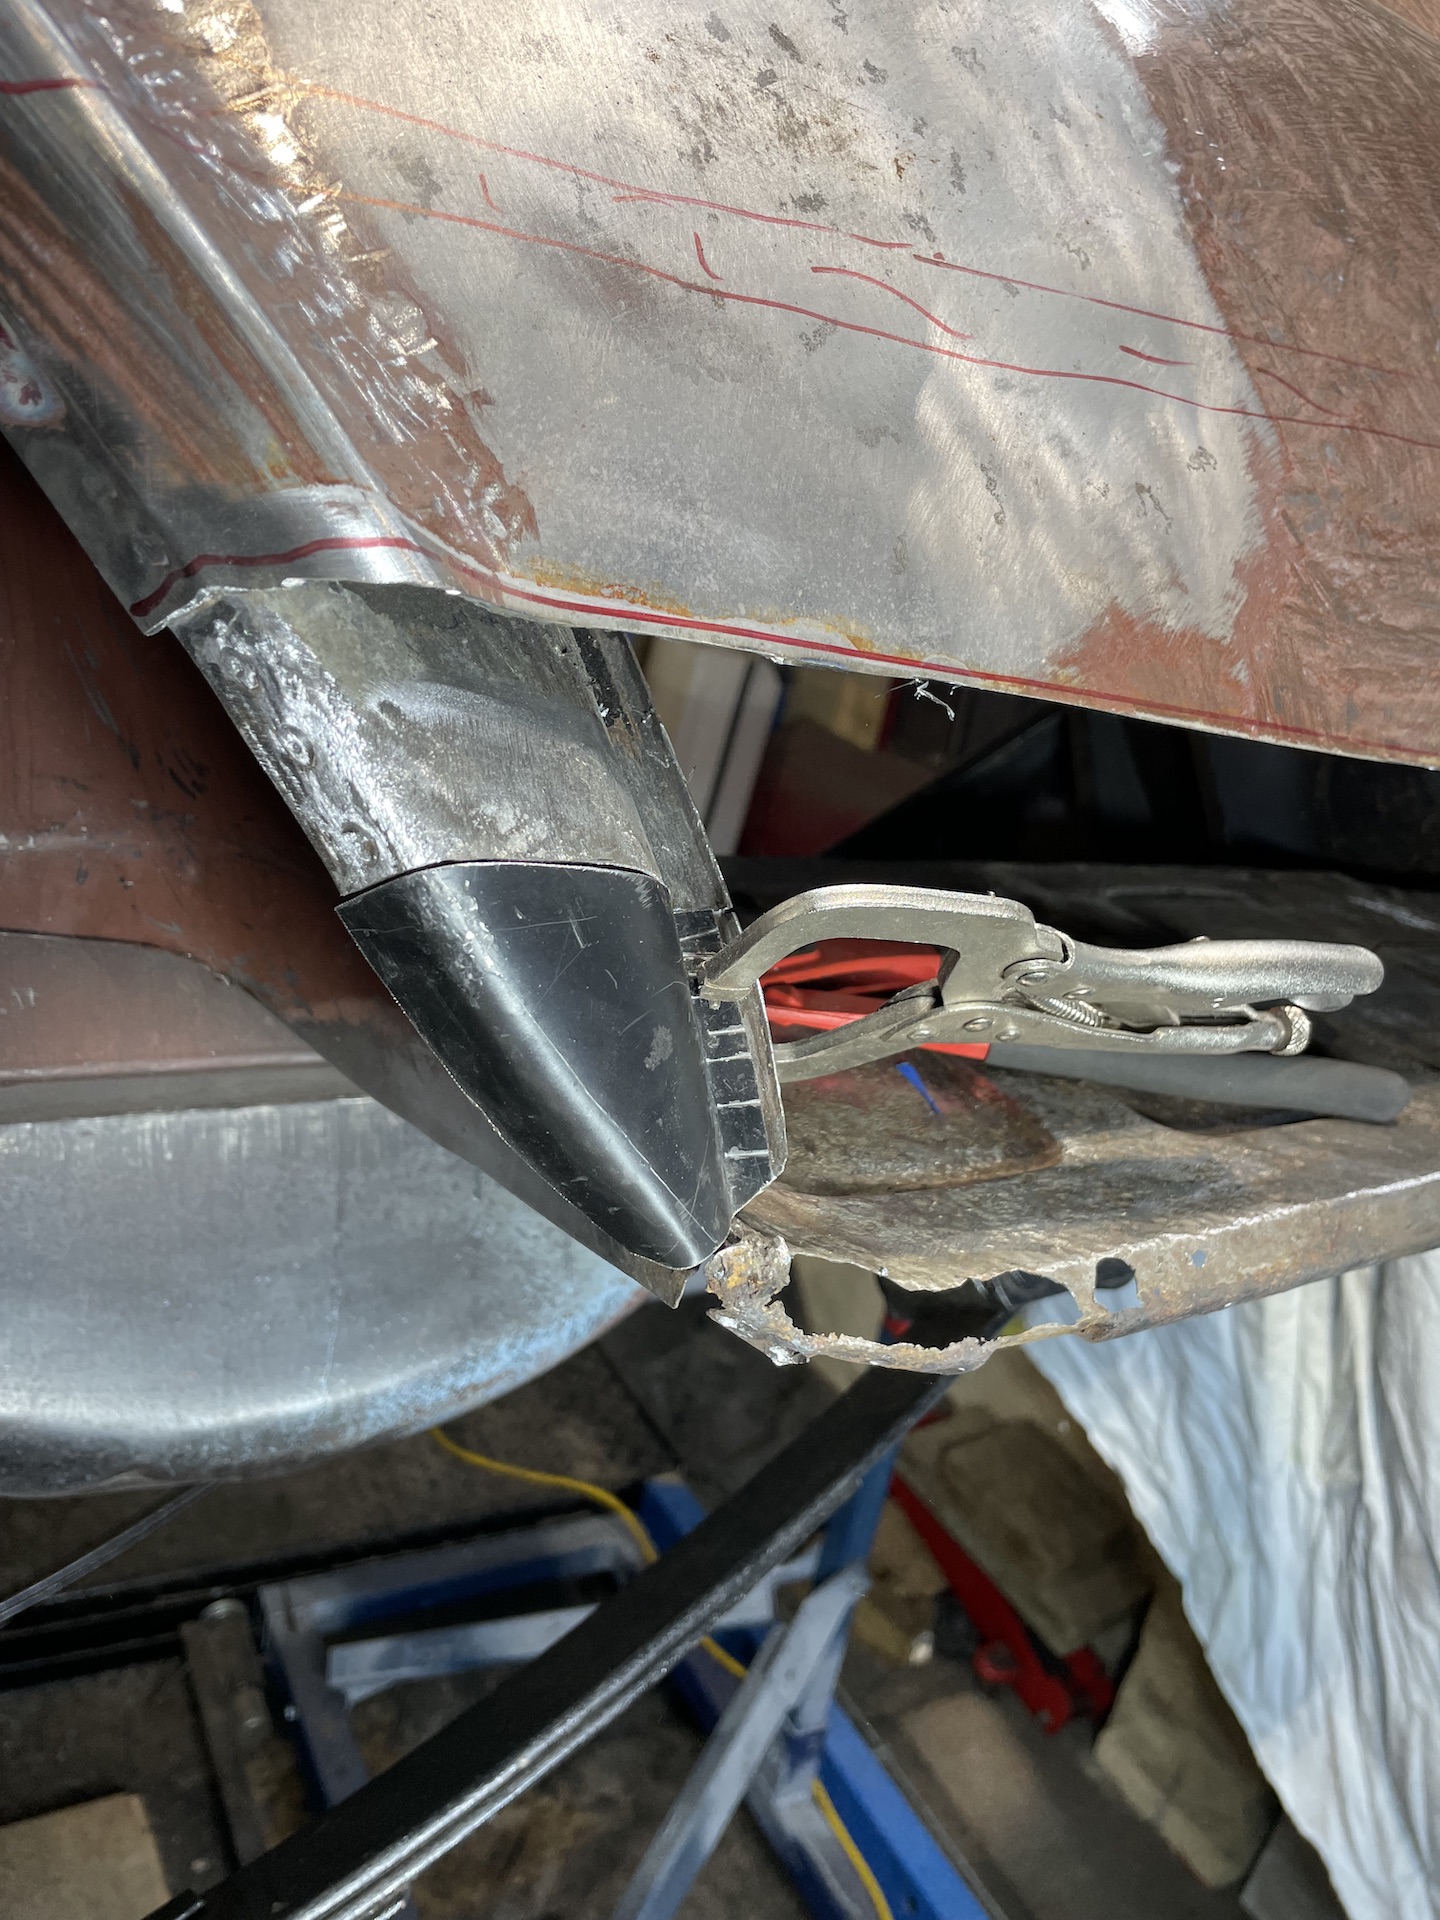
- IMG_0474.jpeg (729.23 KiB) Viewed 2325 times

- IMG_0475.jpeg (799.32 KiB) Viewed 2325 times
Prepped it ready for welding next shed time
Re: Ol' Rusty - FB/EK Sedan
Posted: Mon Aug 01, 2022 8:18 pm
by Errol62
Very satisfying innit?
FB ute fixer upper, EK van on rotisserie
Re: Ol' Rusty - FB/EK Sedan
Posted: Mon Aug 01, 2022 8:31 pm
by Brett027
You do very neat work Scott. It's a credit to you.
Re: Ol' Rusty - FB/EK Sedan
Posted: Mon Aug 01, 2022 8:43 pm
by In the Shed
Great work Scott, nice results with some imagination and common shed tools. Love it

Regards
Stephen
Re: Ol' Rusty - FB/EK Sedan
Posted: Tue Aug 02, 2022 6:32 am
by funkyscooter
Thanks gents. I probably repeat myself a bit here but I do honestly have some 'holy crap that actually worked' moments.I share them to remind me I can do it. And of all my tools that pants leg cable tied and filled with sand is my go to every time.
Re: Ol' Rusty - FB/EK Sedan
Posted: Tue Aug 09, 2022 2:59 pm
by funkyscooter
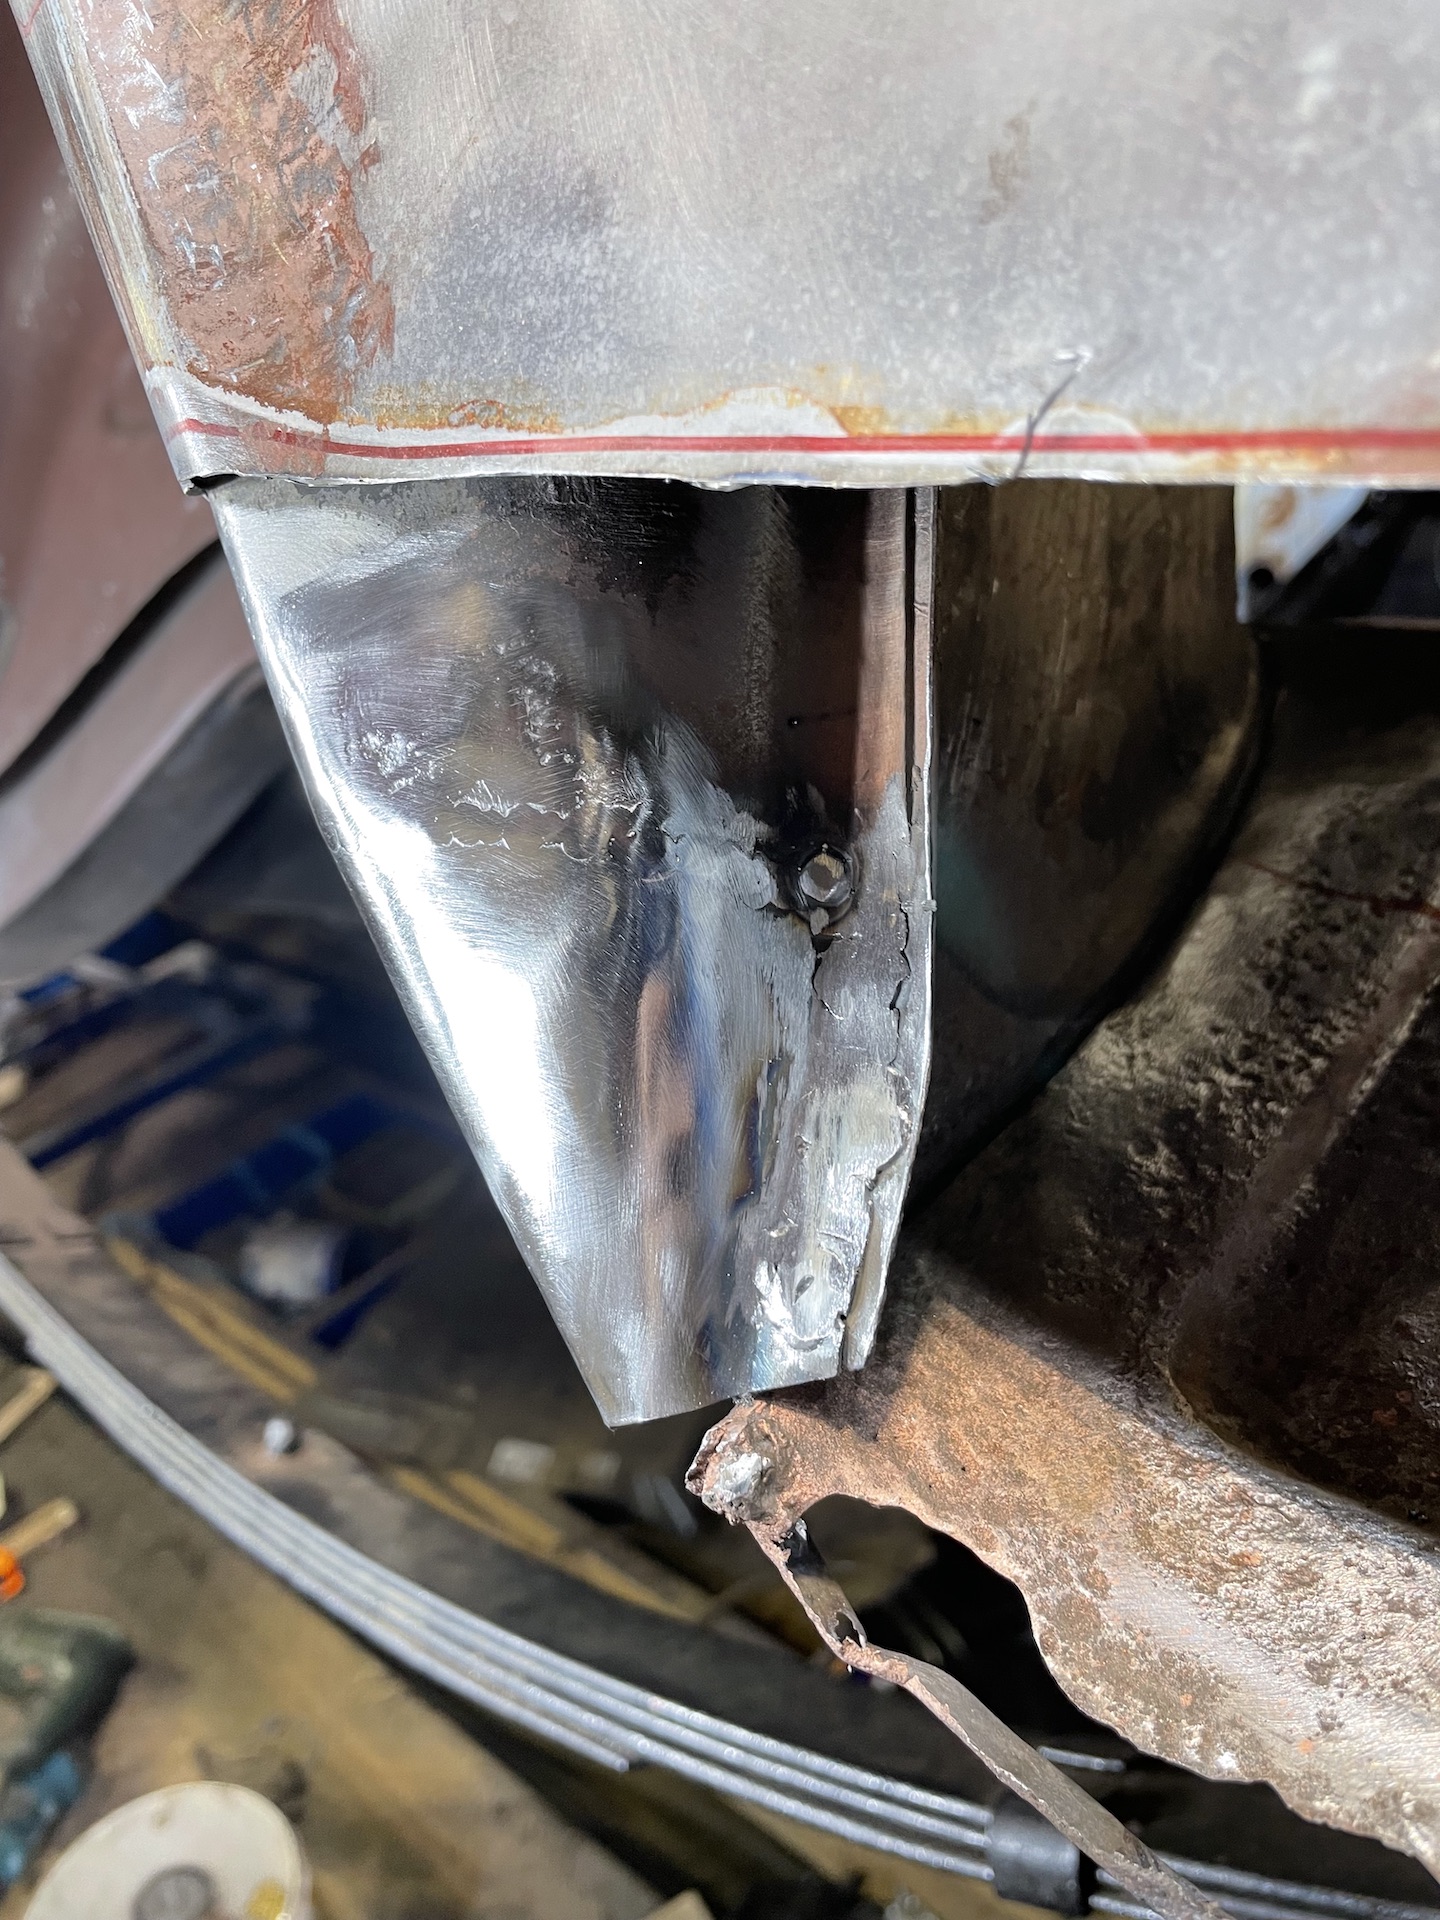
Got the welder into action the other day and finished that little repair off.
Decided to try a new setting on the welder. Turned it up to "2" and set the wire speed to 10. (Was set to 1 with the feed at

. Much better penetration. Only blew one hole in it. Had copper behind it which helped a bit but a short burst and then wait for the glow to start to fade before hitting it again seemed to work. Well this time anyway. All the flap disks had a run on this one for a bit of shiny fun.
- IMG_0486.jpeg (810.57 KiB) Viewed 2254 times
Quick snap of the other quarter. Straight out of acid, power washer, then coated in Easyphos. No shine for this one.
- IMG_0488.jpeg (930.38 KiB) Viewed 2254 times
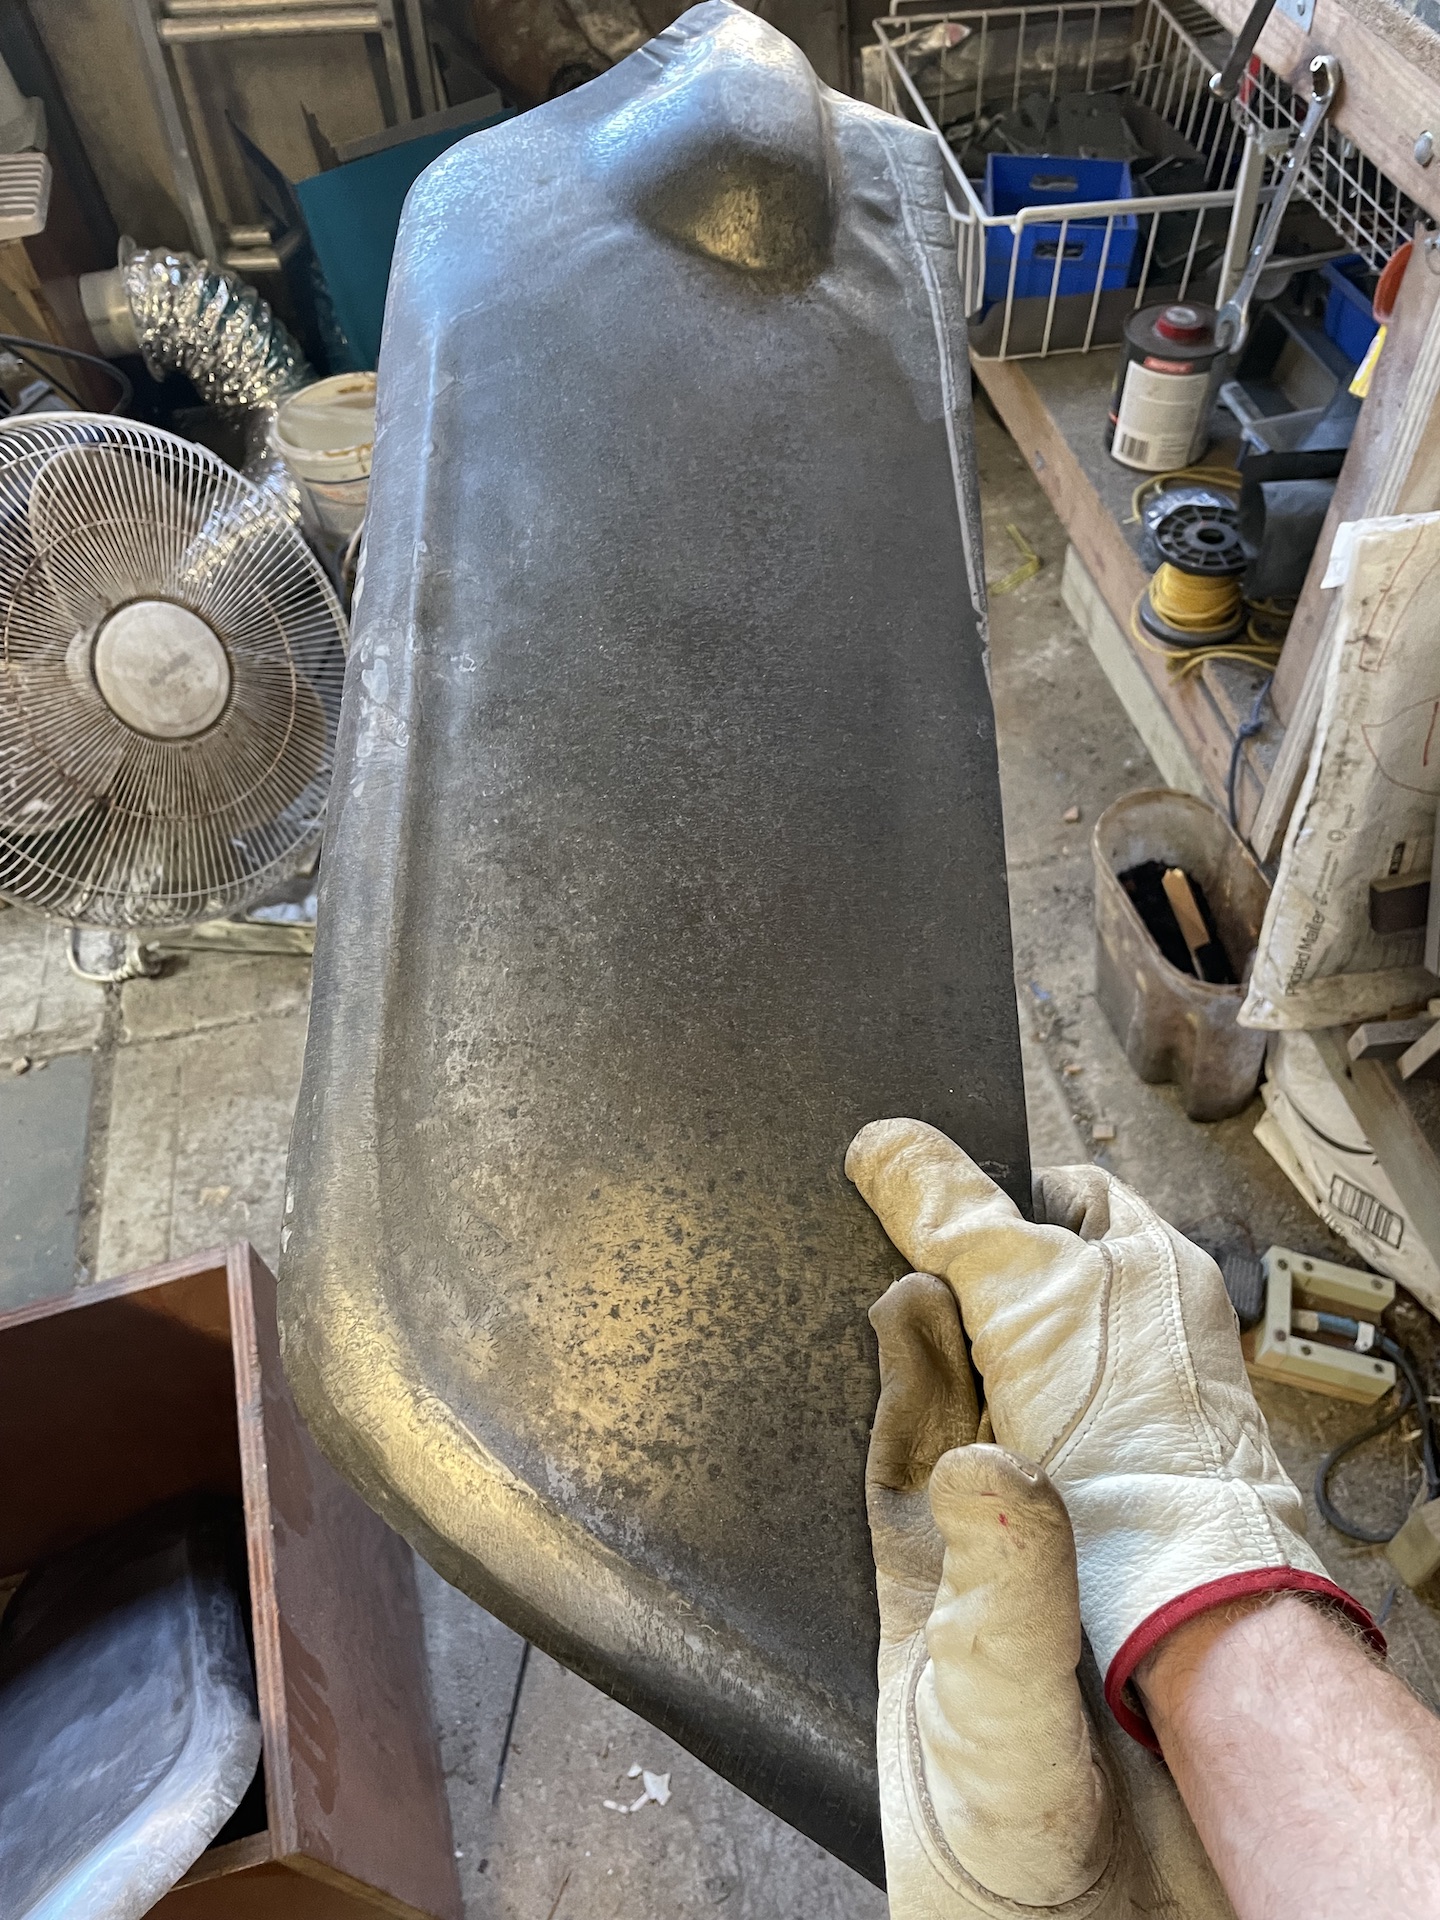
Now on to the passenger inner quarter. There is a guy on FB selling these and against better logic I decided to have a go. Cue orange paper

- IMG_0441.jpeg (858.83 KiB) Viewed 2254 times
Discovered that some left over decking at 88mm is pretty close here.
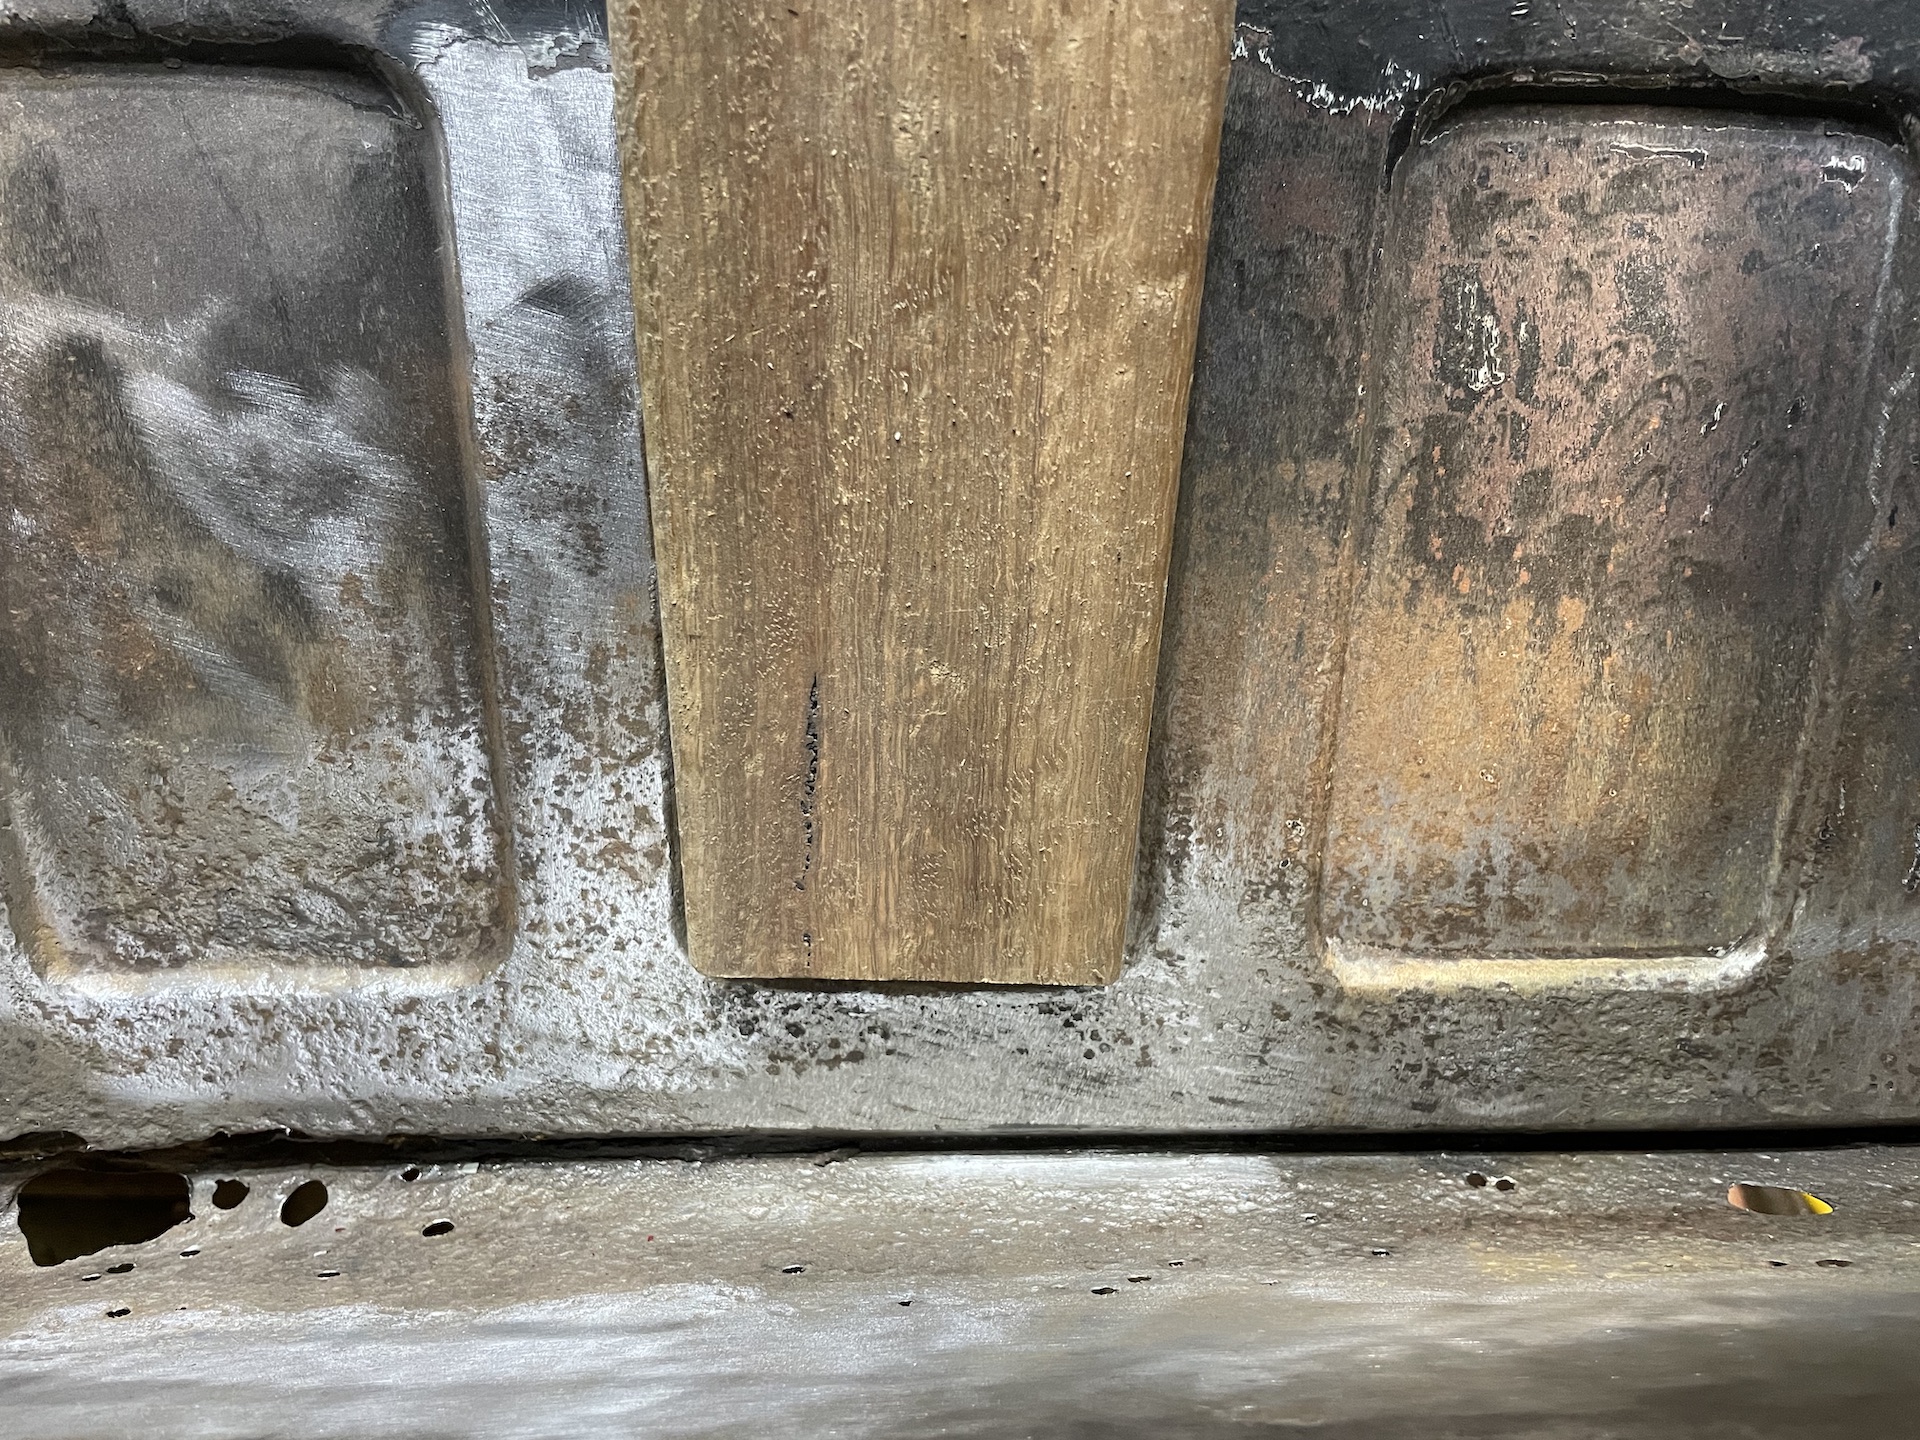
- IMG_0442.jpeg (1.2 MiB) Viewed 2254 times
So made up a jig for the press.
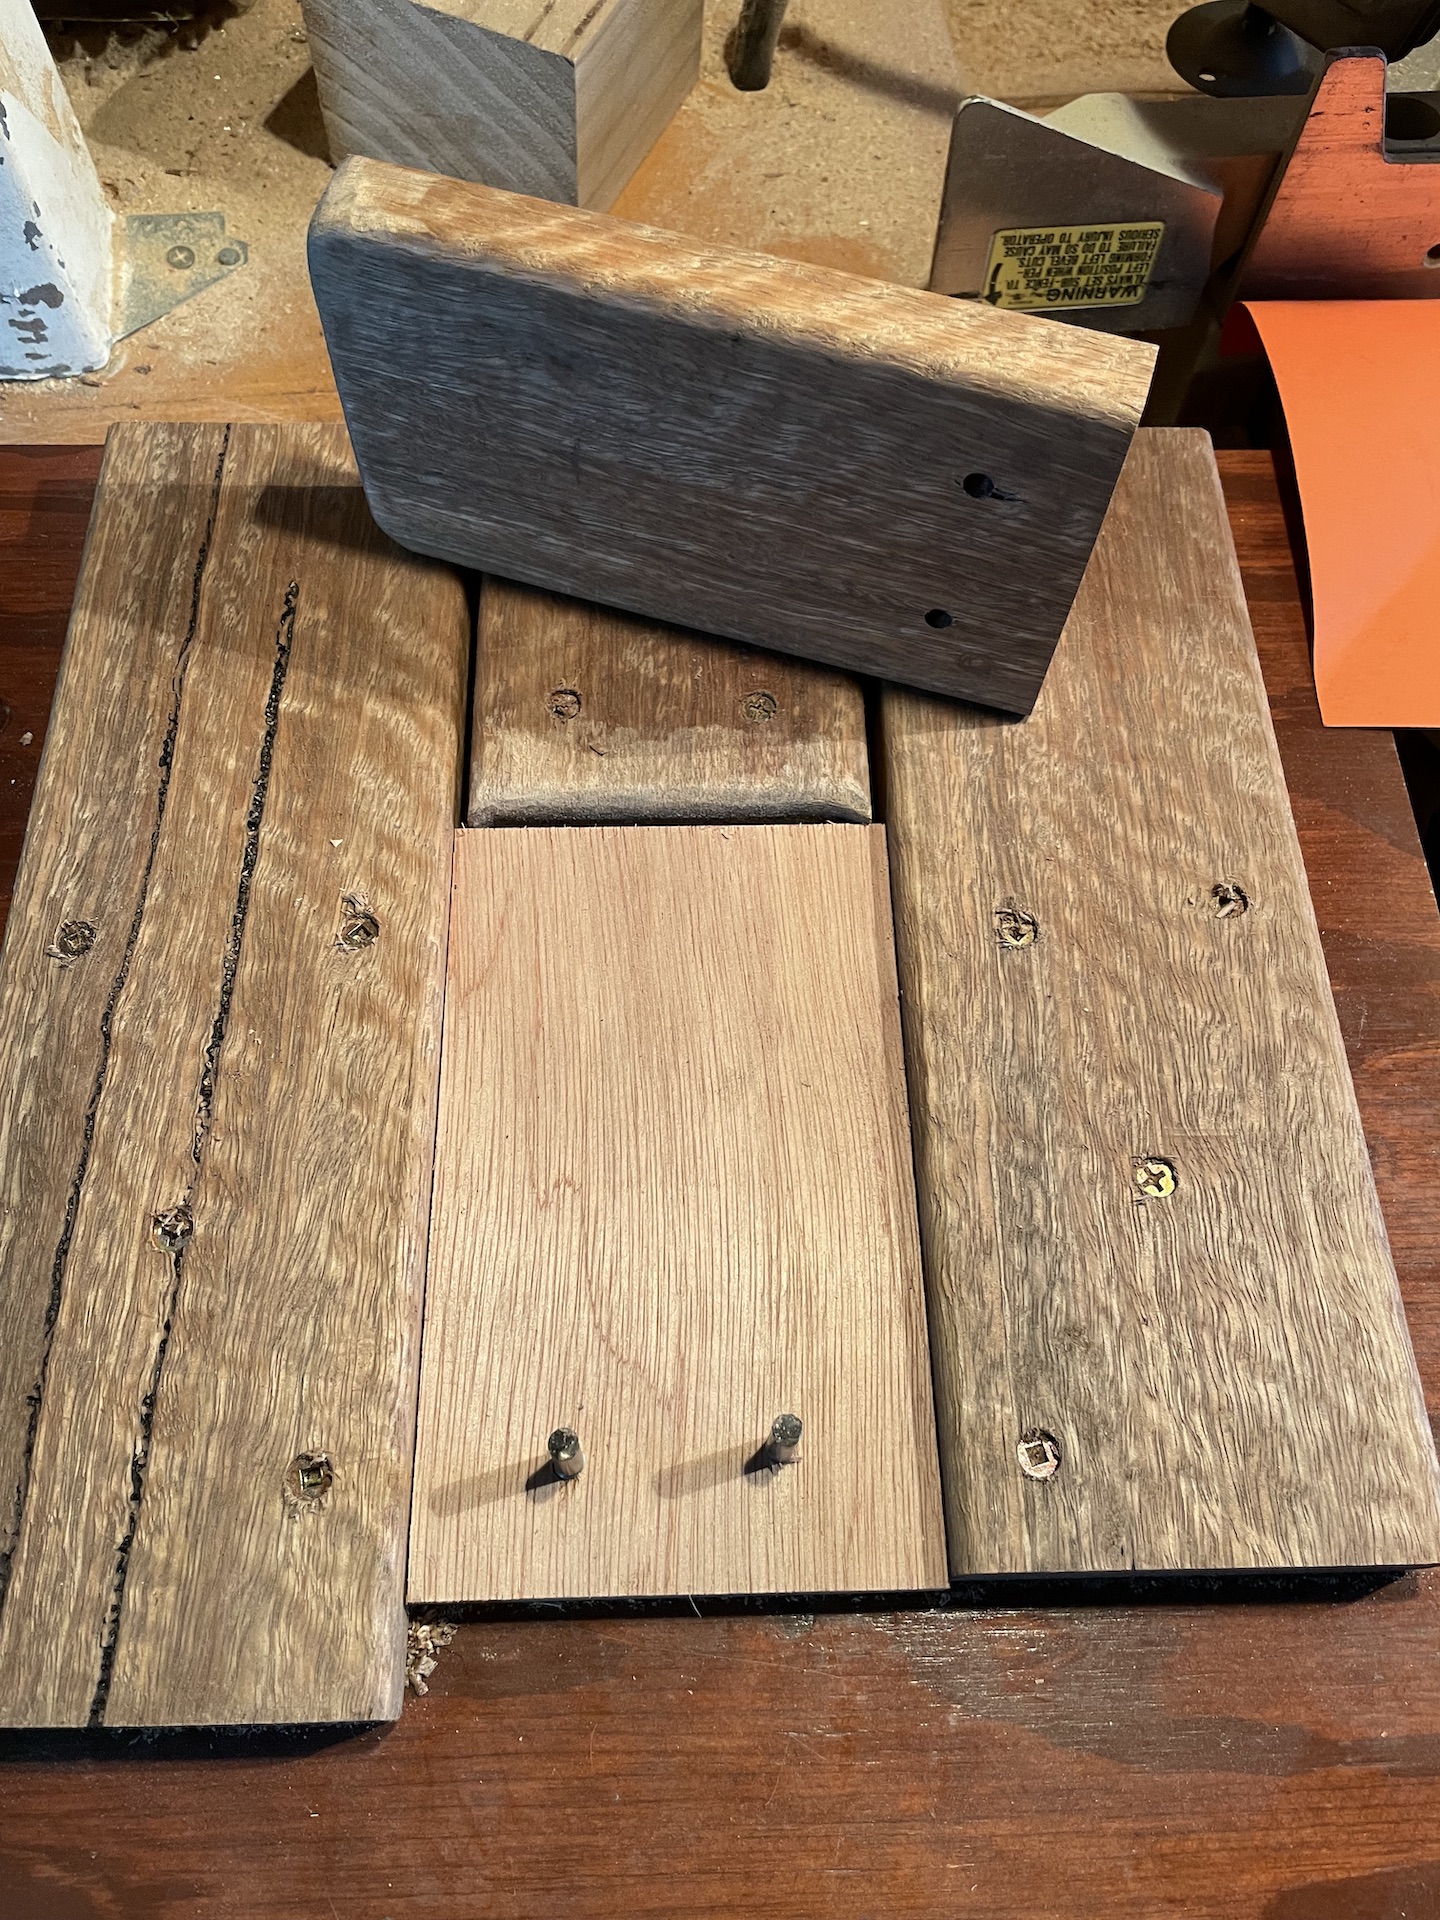
- IMG_0445.jpeg (1.08 MiB) Viewed 2254 times
Had to modify it so the pressed metal would fit but you get the idea.
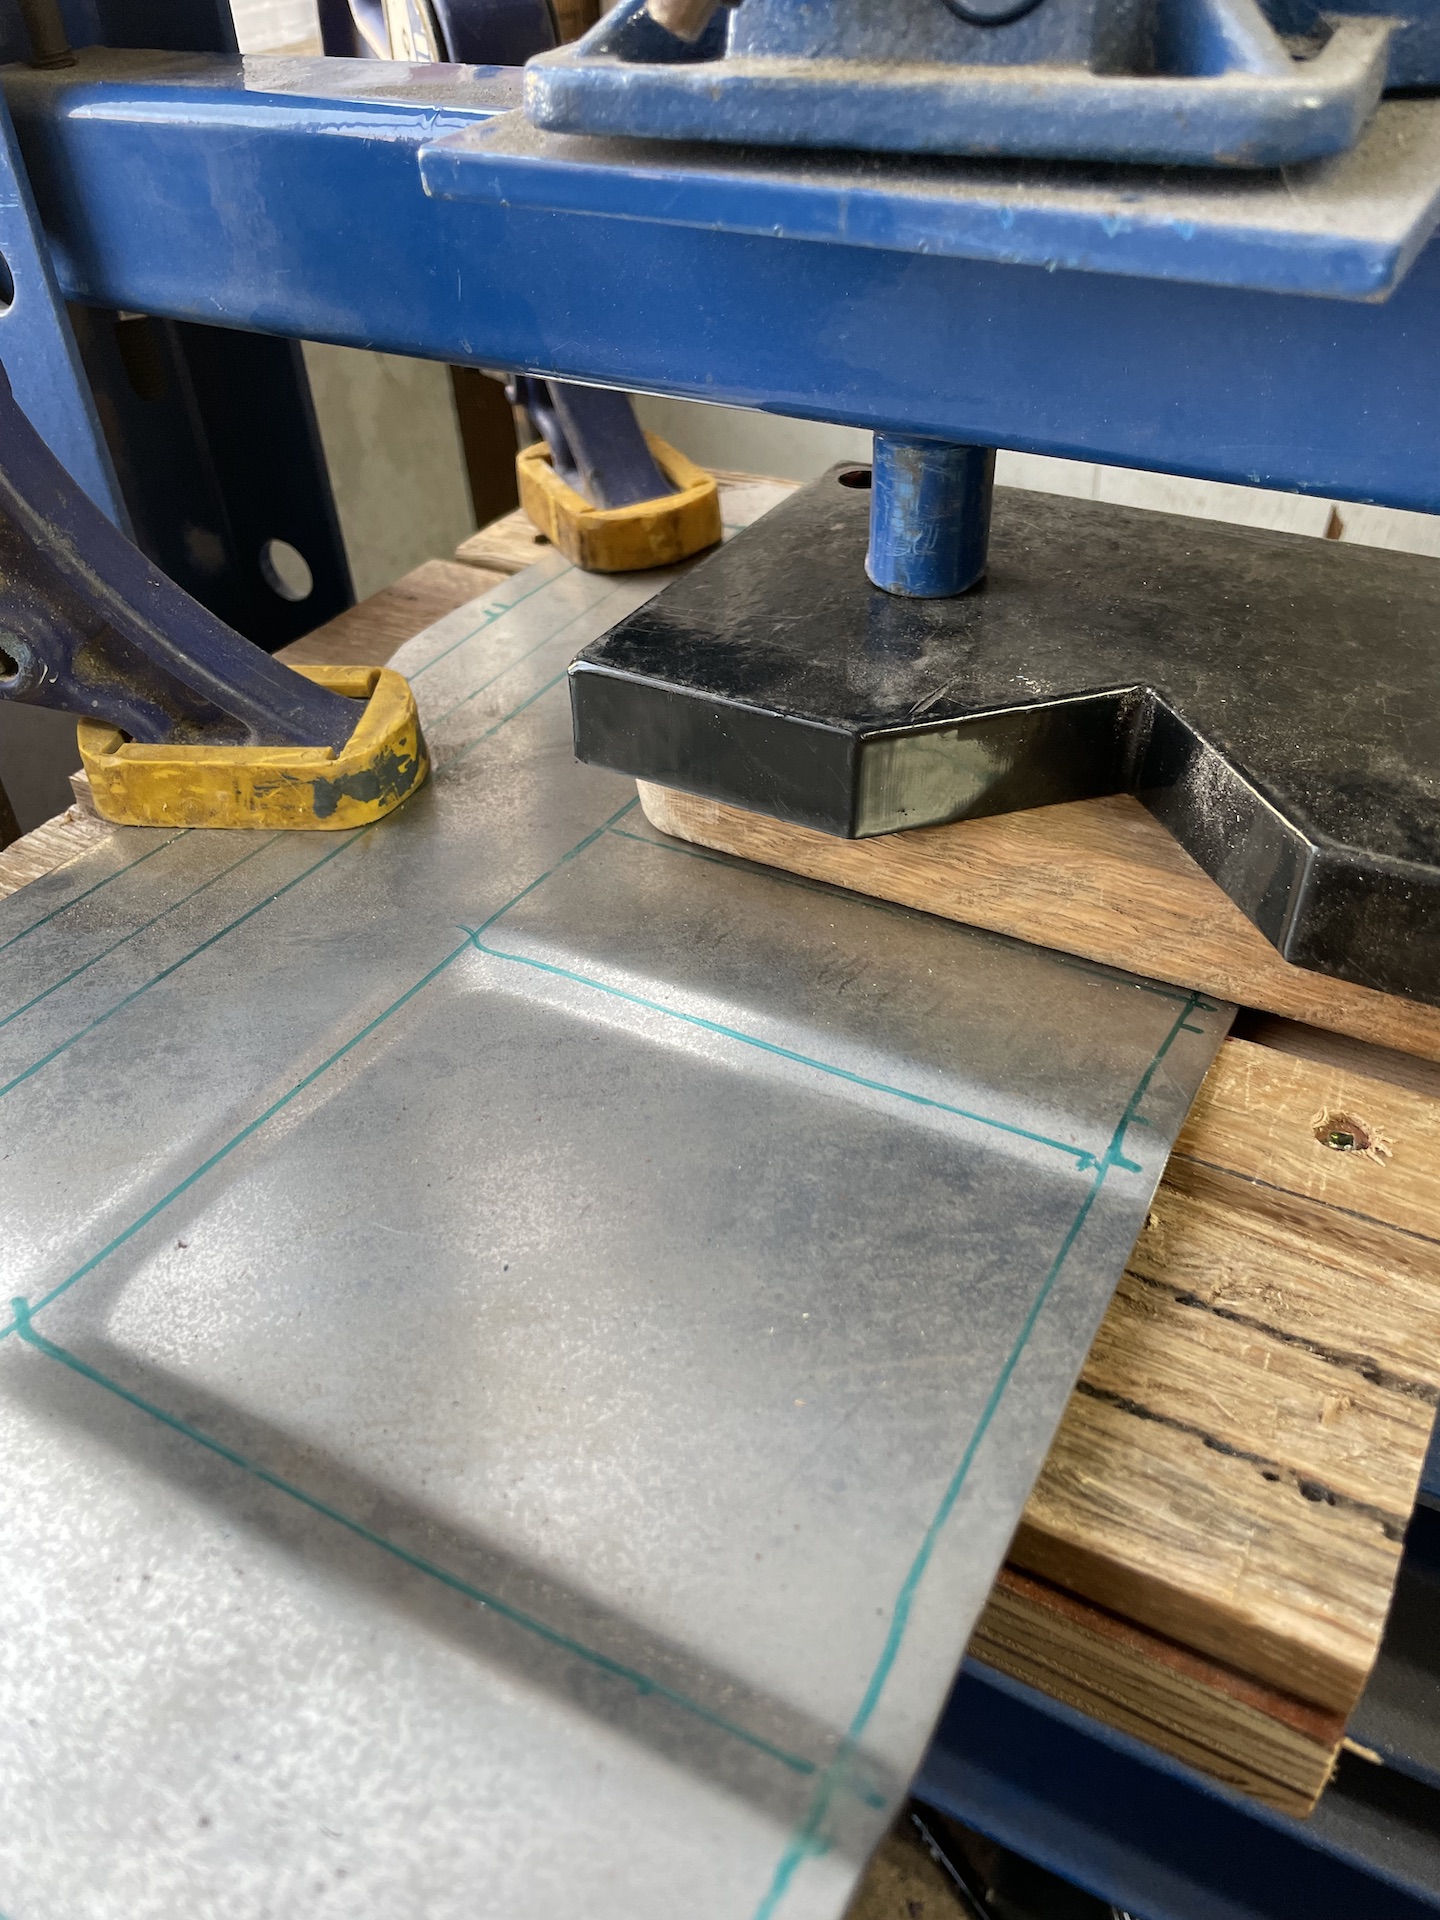
- IMG_0450.jpeg (709.93 KiB) Viewed 2254 times
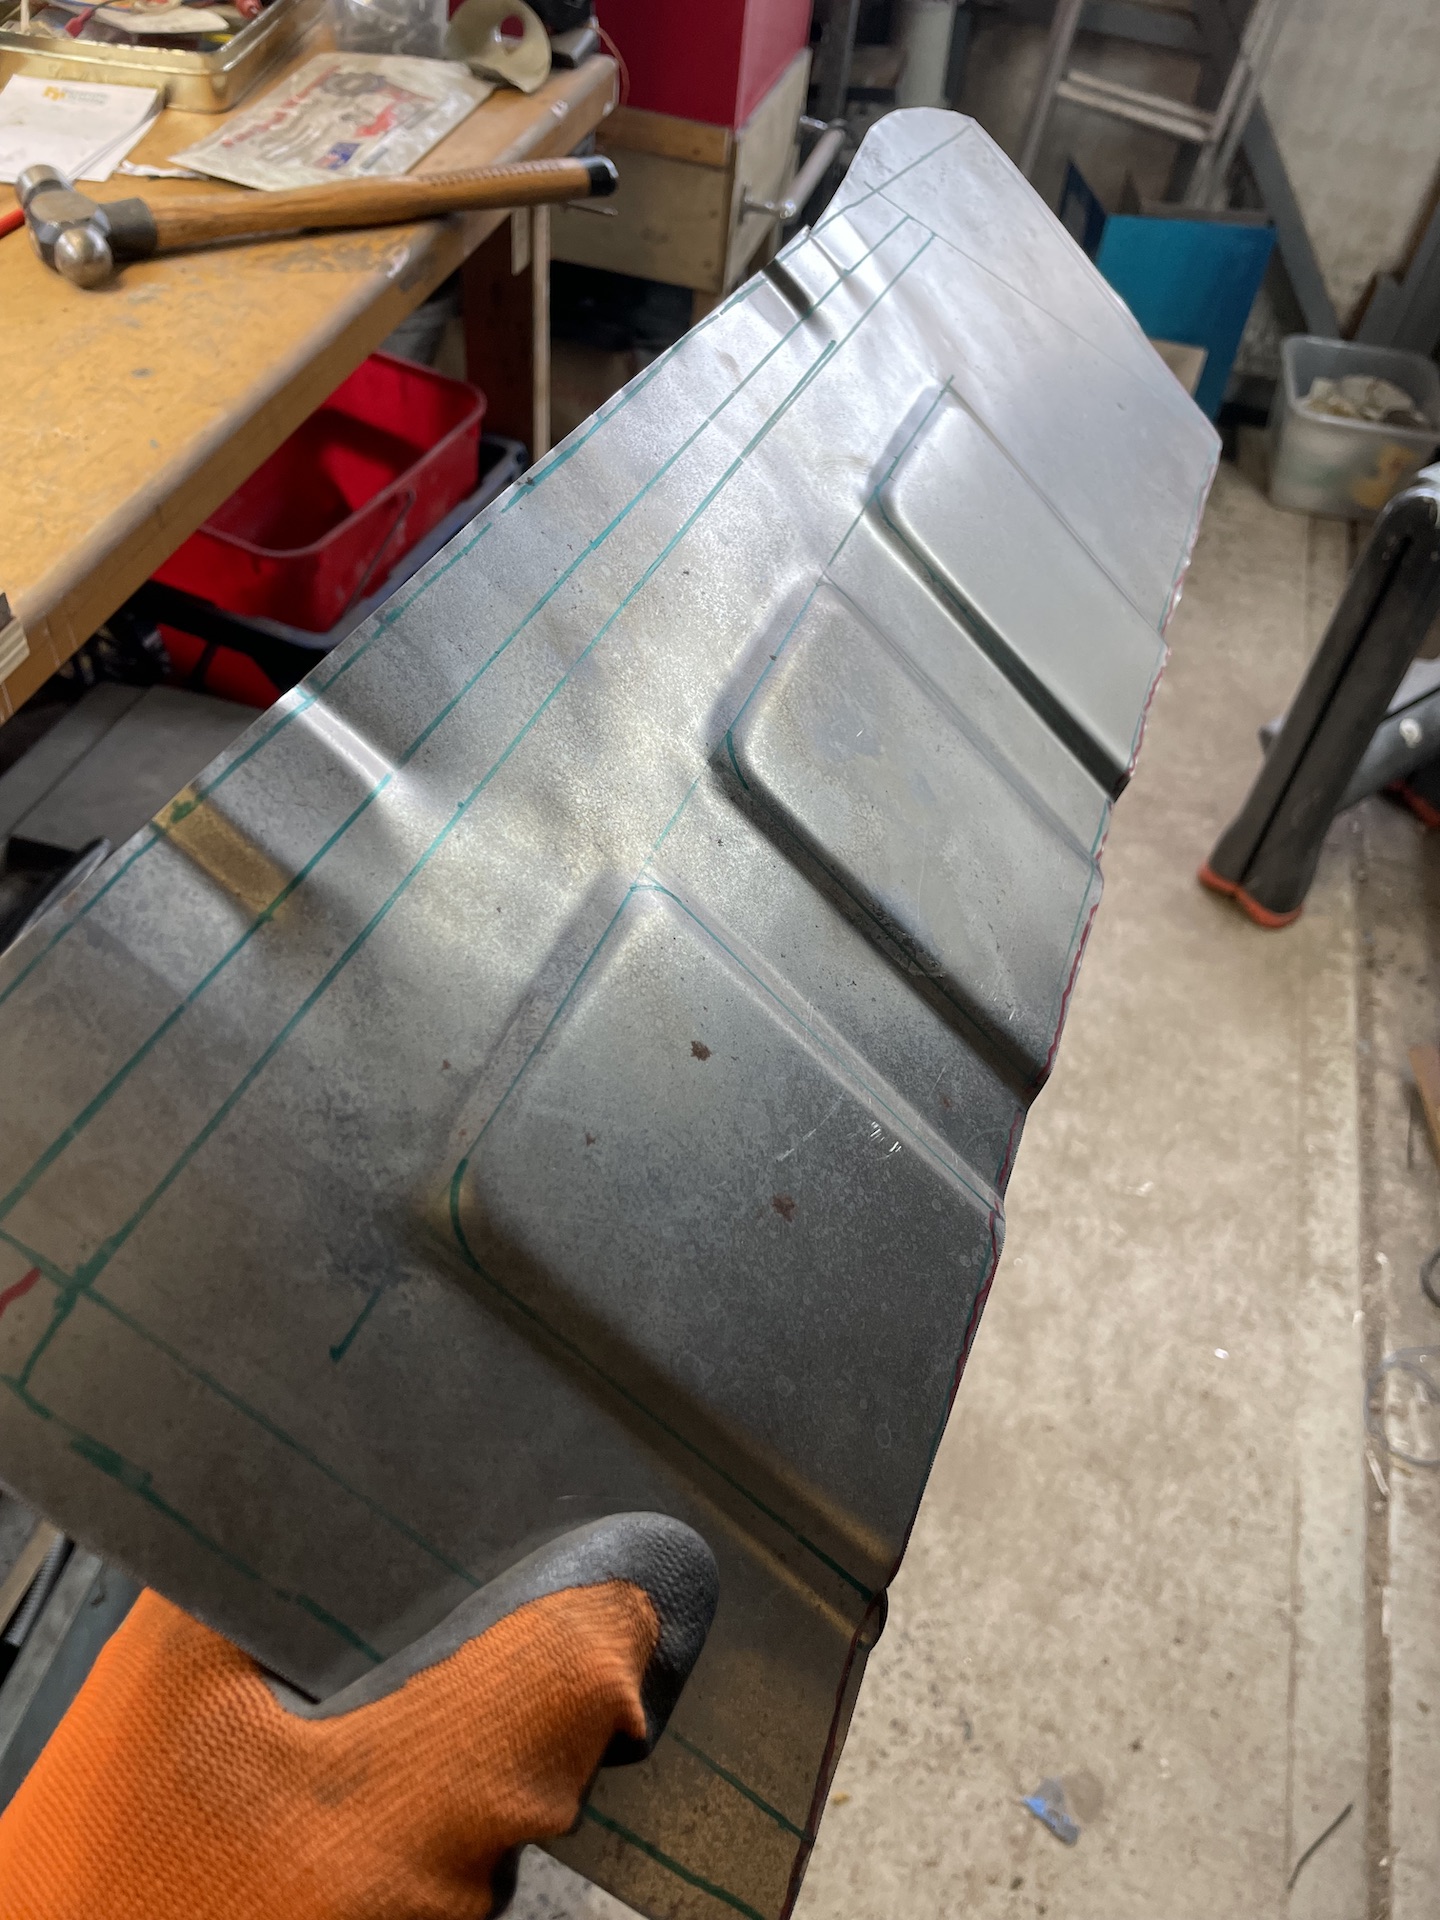
Not sure how close these will get to lining up to the original. Just guessing based on the drawings I mapped out on the sheet. But for where it is, don't think it will matter.

- IMG_0452.jpeg (812.47 KiB) Viewed 2254 times
Re: Ol' Rusty - FB/EK Sedan
Posted: Tue Aug 09, 2022 3:01 pm
by funkyscooter
More offcuts to make a jig for the 2 drains that I will fill with deadener and seam sealer so that they are next to useless

- IMG_0455.jpeg (620.02 KiB) Viewed 2253 times
- IMG_0459.jpeg (641.79 KiB) Viewed 2253 times
And a couple more bits to make up a guide for forming the double fold that the outer is spot welded to. FYI the angles are 15 and 45 degrees.
- IMG_0511.jpeg (775.11 KiB) Viewed 2253 times

- IMG_0515.jpeg (732.62 KiB) Viewed 2253 times
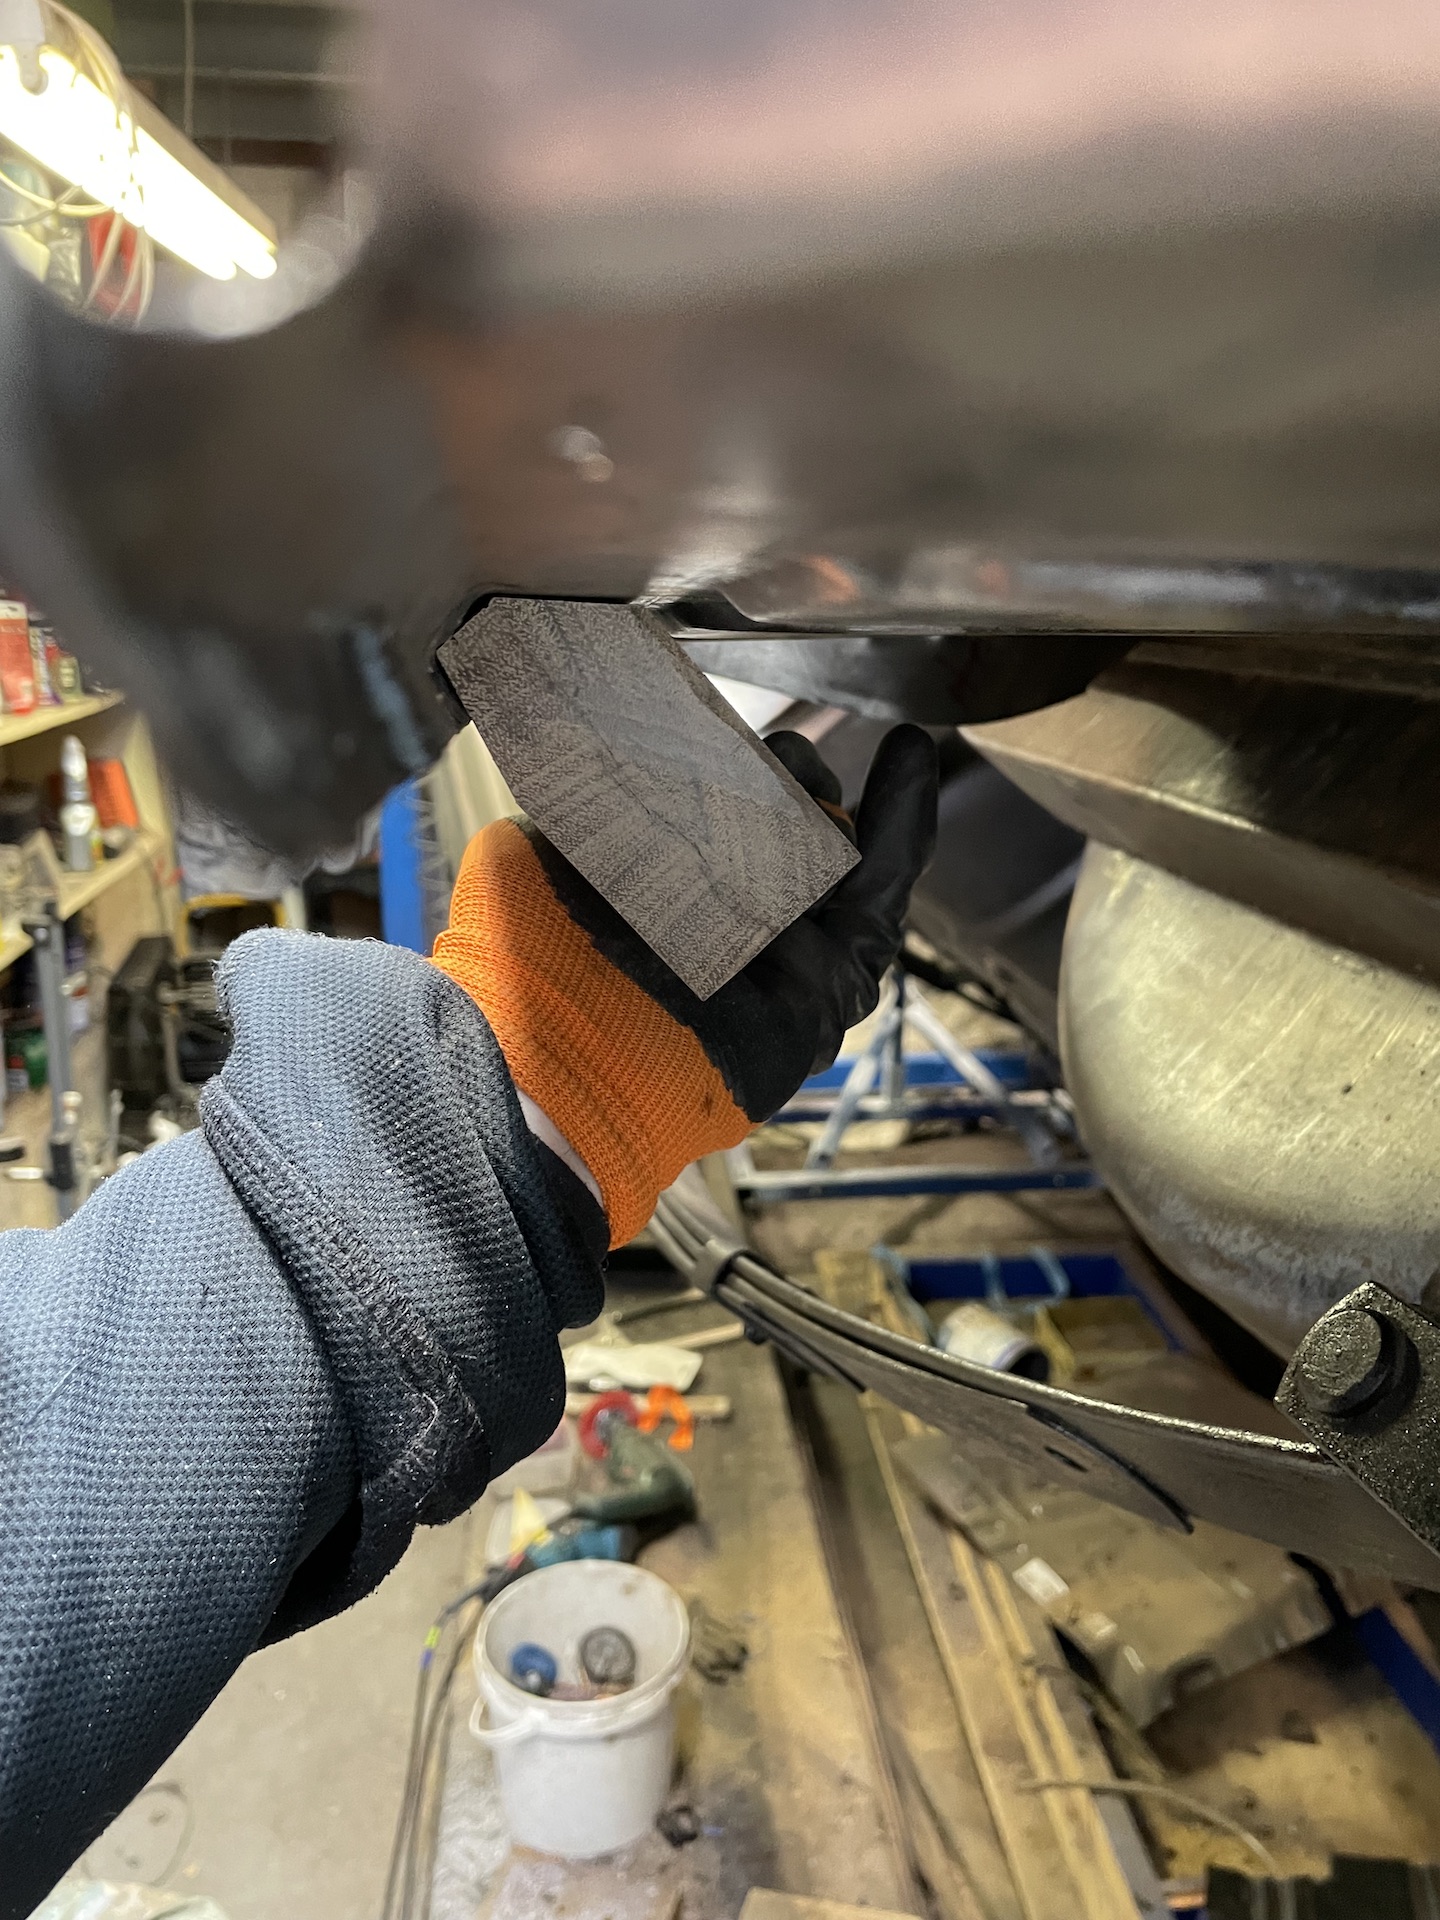
Despite attempting to stretch the metal, I was never going to get it as far as I needed so relived it with the cutoff wheel
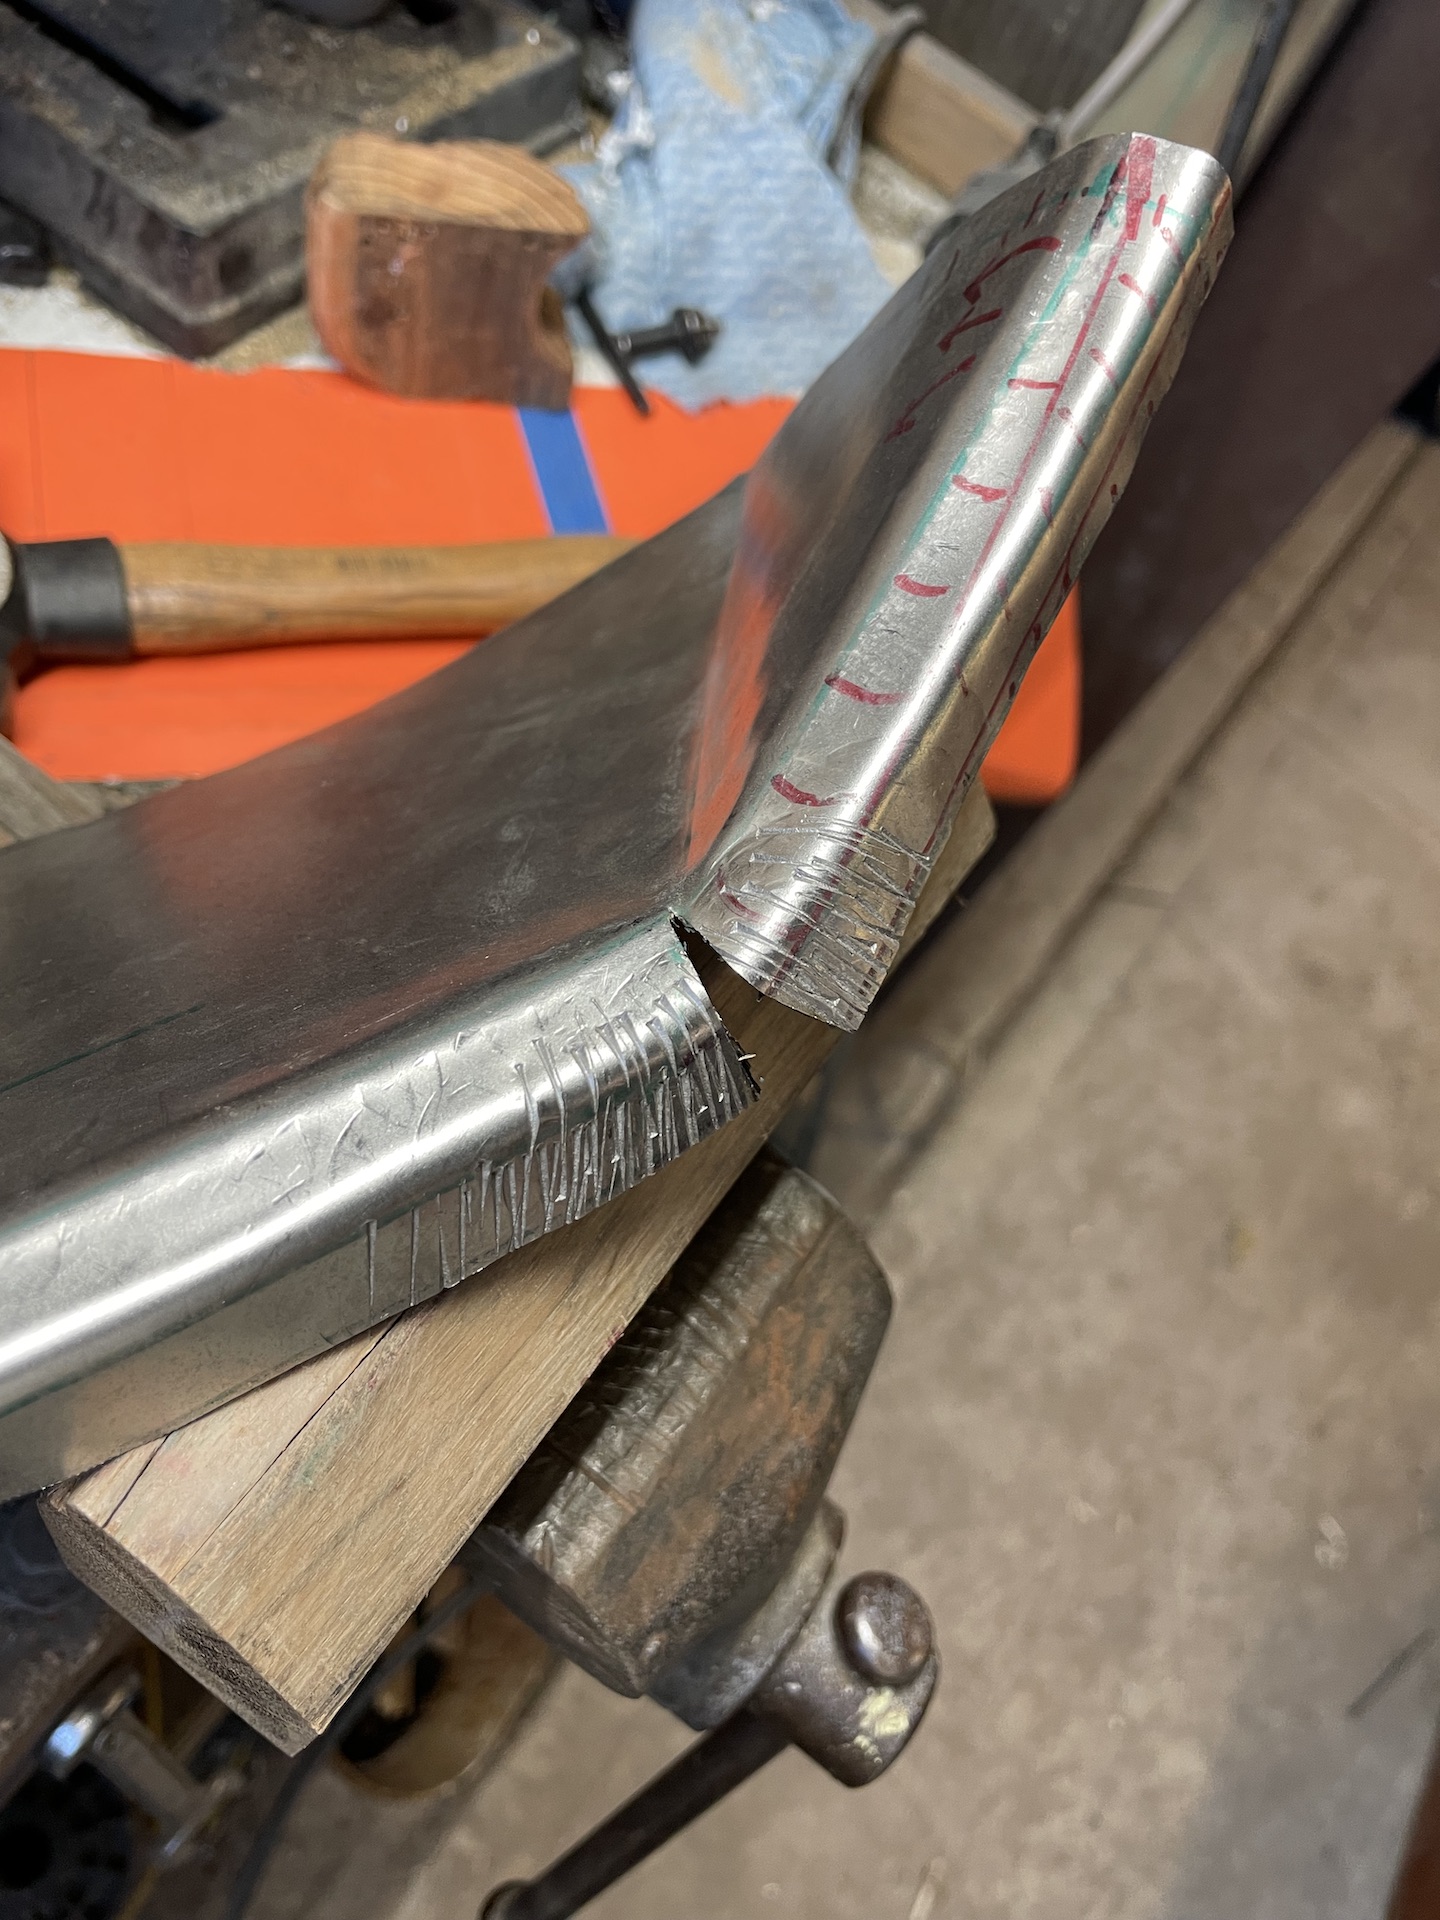
- IMG_0517.jpeg (637.15 KiB) Viewed 2253 times
Lot more bending, twisting and head scratching and I have got it to here.
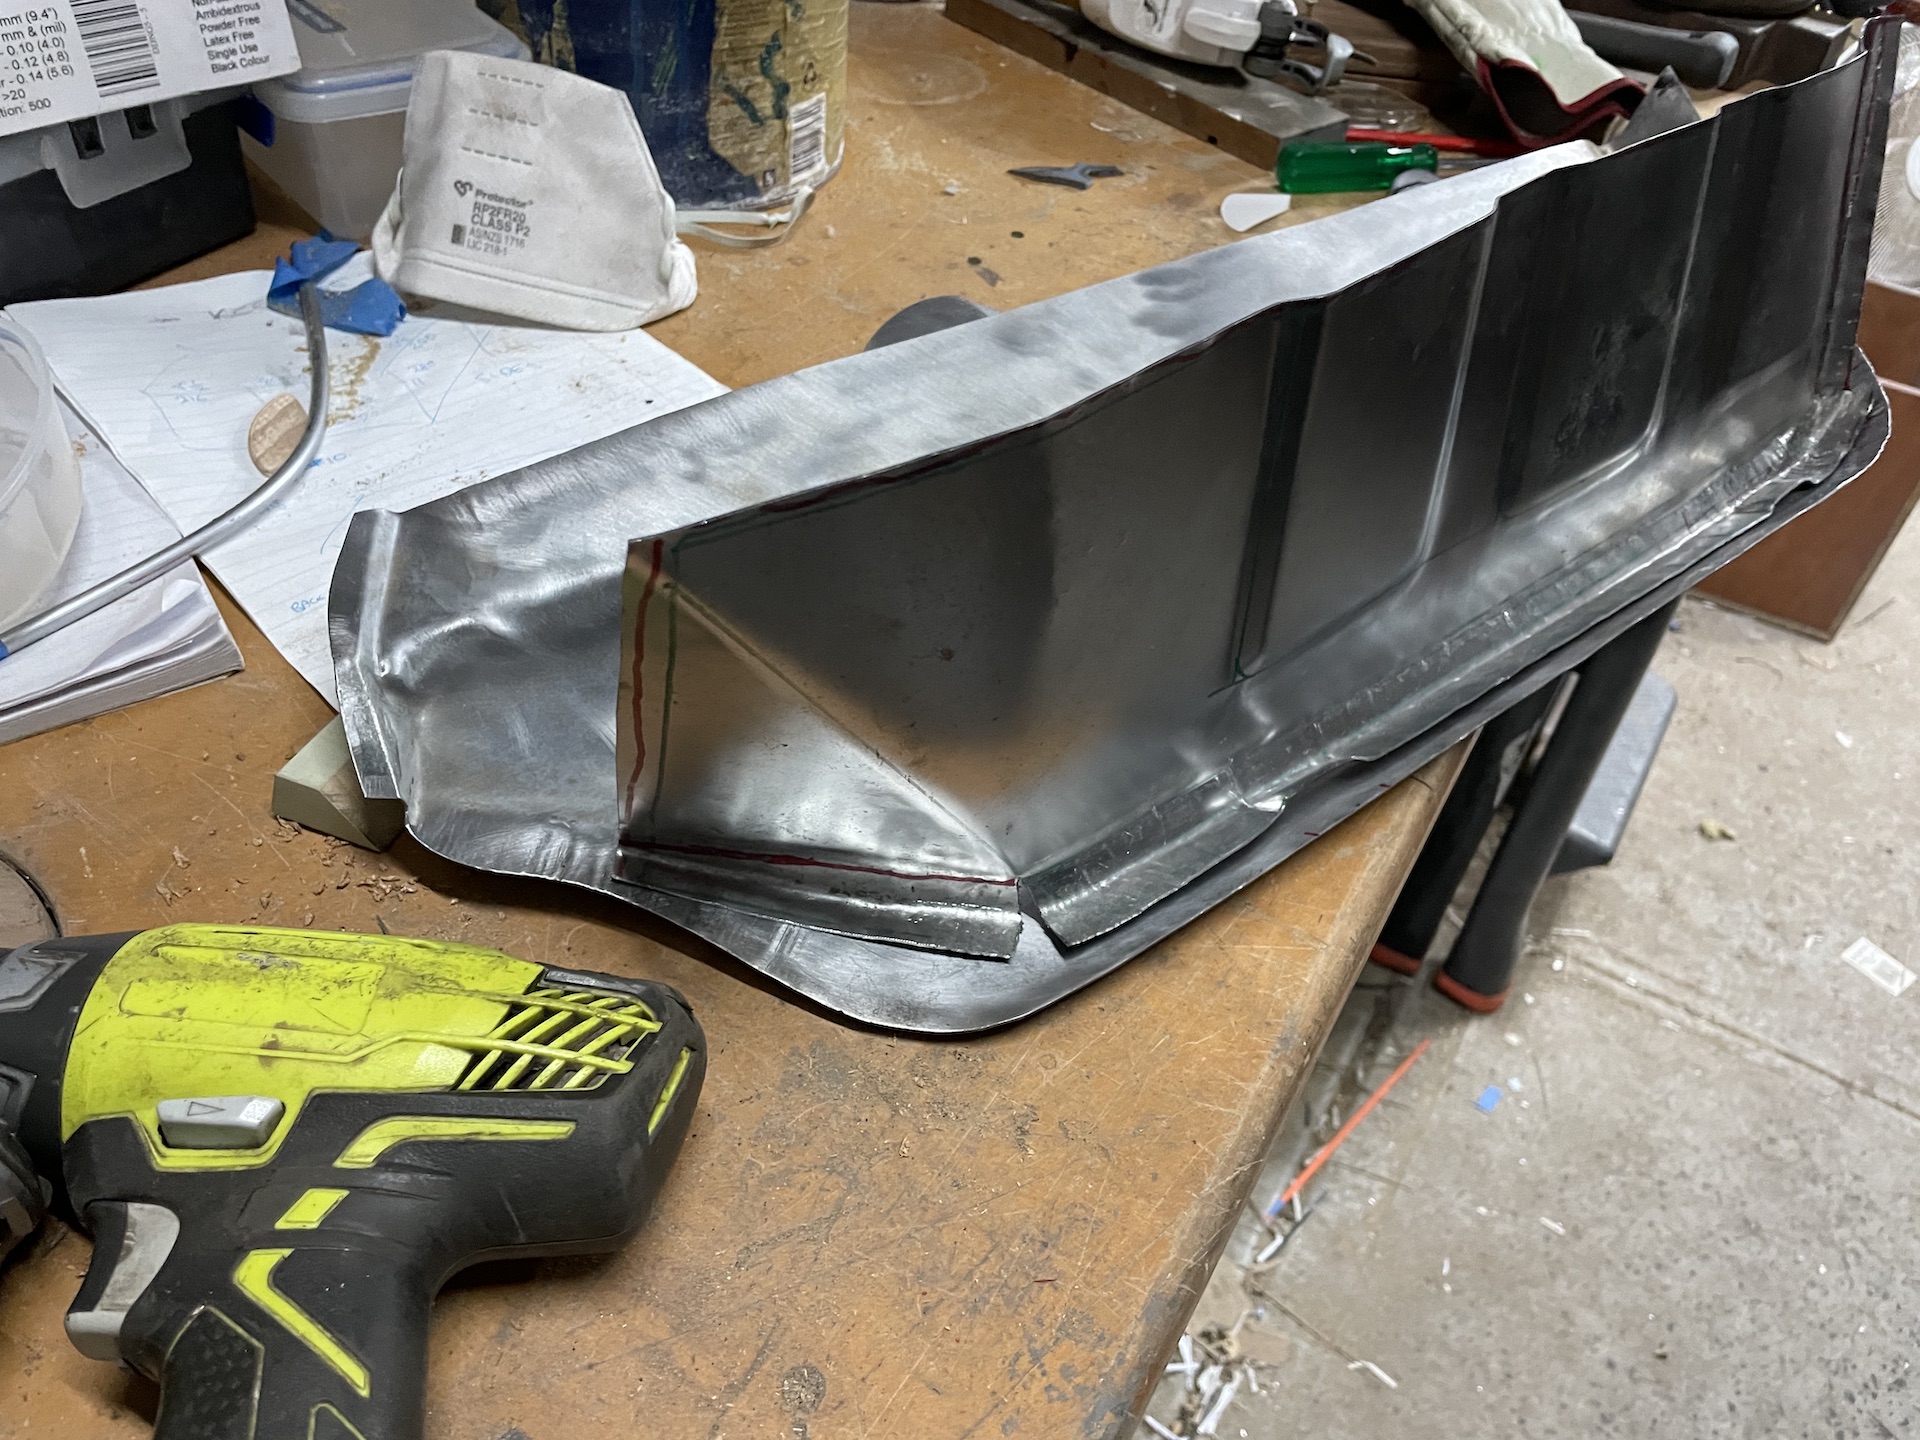
- IMG_0524.jpeg (779.28 KiB) Viewed 2253 times
Spent way too much time trying to get the inner to match what is on the car. Then I had a face palm revelation that there is no point as the outer is new and does not fit the current inner anyway.
Thinking now is to cut out old inner, fit new outer, then fit the inner to suit. Any misalignment and corrections will then be hidden under the car.
Re: Ol' Rusty - FB/EK Sedan
Posted: Tue Aug 09, 2022 3:03 pm
by Brett027
Love your work Scott. Some great ideas there too. Thanks for sharing.
Re: Ol' Rusty - FB/EK Sedan
Posted: Tue Aug 09, 2022 5:56 pm
by Errol62
Busy as ever. Great work.
Sent from my SM-G781B using Tapatalk
Re: Ol' Rusty - FB/EK Sedan
Posted: Tue Aug 09, 2022 6:12 pm
by Blacky
Brilliant , who says you need all the fancy gear to do a good job ? It just makes it faster ........

