van floor
-
HOLD-ON-EKKY
- Posts: 45
- Joined: Sun Sep 23, 2007 9:21 pm
- State: NOT ENTERED
- Location: western victoria
van floor
i pulled up the floor in my ek van to see what was under the ply wood covering ,shit loads of room hidden there , straight away thought of the possabilities that could be hidden battery, washer bottle & evan gas tanks and what eva else has any one else done this with there van if so how & what have they made the top covering out of , also i get new floor panels this week is their any do's and dont's that you might have learned along the way to putting these in , also under the scruff plates?? (the panel under the door jam) there is a lengh of timber that the scruff plates are screwed in to does this need to be there can i do away with that piece to make it all flat , any pic's would be a great help cheers fellas 
STOP YOUR WHINGING, BUILD A BRIDGE AND GET OVER IT.


-
HOLD-ON-EKKY
- Posts: 45
- Joined: Sun Sep 23, 2007 9:21 pm
- State: NOT ENTERED
- Location: western victoria
-
HOLD-ON-EKKY
- Posts: 45
- Joined: Sun Sep 23, 2007 9:21 pm
- State: NOT ENTERED
- Location: western victoria
-
parisian62
- Posts: 3997
- Joined: Wed May 11, 2005 2:19 pm
- State: NSW
- Location: Sydney
- Contact:
can't imagine why there would be timber...maybe a previous dodgy welding job?
here is a link to some recent work on my EK on rear pans. http://www.fbekholden.com/forum/viewtop ... sc&start=0 We removed the 'lip' where the outer sill and innder pan joins because the rust was so bad along the top of the inner rail and we needed access to repair the top of the inner rail. We used a straight edge to line the new 'lip' up with the rest of the car.
We are about to start the front pans in the next week or so.
here is a link to how post up pics...
http://www.fbekholden.com/forum/viewtopic.php?t=194
regards
Stewart
Feelin free in a '61 FB.
Member of FB-EK Holden Car Club Of NSW Inc.
Check out the Rebuild of Old Timer
Member of FB-EK Holden Car Club Of NSW Inc.
Check out the Rebuild of Old Timer
-
HOLD-ON-EKKY
- Posts: 45
- Joined: Sun Sep 23, 2007 9:21 pm
- State: NOT ENTERED
- Location: western victoria

-
parisian62
- Posts: 3997
- Joined: Wed May 11, 2005 2:19 pm
- State: NSW
- Location: Sydney
- Contact:
Had a play with the images...it just needs to be resized down to about 600 pixels... reason why it wasn't showing is because they were in a subfolder in your photobucket called ek holden.
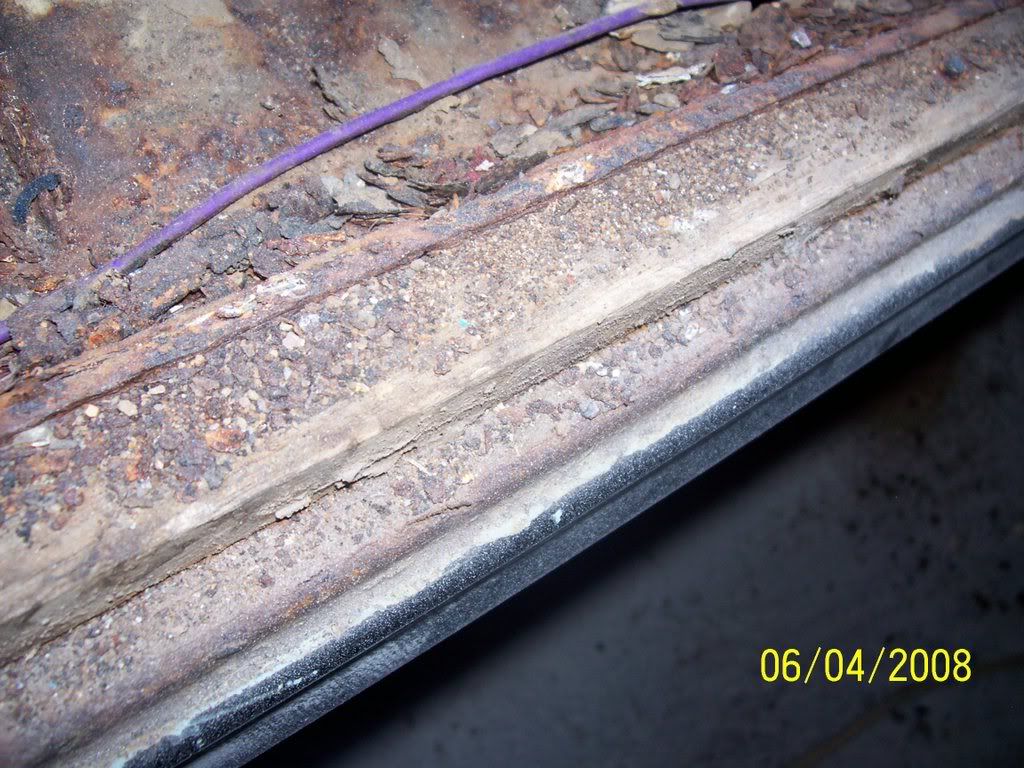
When I lifted the scuff plates on my EK a previous owner had backed them with thick rubber...looks like someone has done similar to yours but using timber.
regards
Stewart
When I lifted the scuff plates on my EK a previous owner had backed them with thick rubber...looks like someone has done similar to yours but using timber.
regards
Stewart
Feelin free in a '61 FB.
Member of FB-EK Holden Car Club Of NSW Inc.
Check out the Rebuild of Old Timer
Member of FB-EK Holden Car Club Of NSW Inc.
Check out the Rebuild of Old Timer
Hi Ekky,
just my thoughts - were the scuff plates damaged - there are "spacers" which hold them up so that when the self taps are screwed down - they don't crush the scuff plates.............. could be that these spacers had "dissolved" and wood was used as a spacer - seems to me the thickness of that wood is just about right...............
or
could be that the screw holes wouldn't hold and wood was used to share the load ......................
just my thoughts.......
and - the trans tunnel looks as if it's a CRS fabrication - they fit great - with a little "adjusting" - nothing fits our cars properly without some adjustment.
The CRS tunnel will give you all the room you need.......... stitch welded underneath - seam welded on top - this is the way my engineer wanted it done........
frats,
Rosco
-
HOLD-ON-EKKY
- Posts: 45
- Joined: Sun Sep 23, 2007 9:21 pm
- State: NOT ENTERED
- Location: western victoria
the scuff plates were totally stuffed home made out of colour bond sheet, so i get the thumbs up for removing the lip that comes up & over the timber, any heads up on a left hand guard took some paint of mine tonite to do some work on it totally stuffed not worth the time on fixing it i reckon, has any body brought replacement panels off early holden spares & repairs they sell on ebay r from capalaba in QLD , cheers fellas.
STOP YOUR WHINGING, BUILD A BRIDGE AND GET OVER IT.
Yeah, ive used that early holden mob, has some rust sections put into an eh wagon i owned early last yeah, fitted a treat (once adjusted like rosco said). Just make sure you cut the gaurd etc with a bit of overhang so you have a good edge to weld onto.Tack weld first to see dimensions.
My thoughts on the timber.... is the sill rusted underneath... if so, looks like someones done a quick repair and forgot to do it properly.
My thoughts on the timber.... is the sill rusted underneath... if so, looks like someones done a quick repair and forgot to do it properly.
master of nothing, leader of nobody.
-
HOLD-ON-EKKY
- Posts: 45
- Joined: Sun Sep 23, 2007 9:21 pm
- State: NOT ENTERED
- Location: western victoria
yep the sills were rusty before they turned to brown dust, for those of you that have removed all that spacer set up under the scuff plates, what have you got the wether seal sitting against - because the seal was glued to the side of the timber, cheers tim
STOP YOUR WHINGING, BUILD A BRIDGE AND GET OVER IT.
-
HOLD-ON-EKKY
- Posts: 45
- Joined: Sun Sep 23, 2007 9:21 pm
- State: NOT ENTERED
- Location: western victoria