I have been busy up the station fencing over most of October so not as much done as I would have liked on Ammo's ute.
Tail gate in, rear bumper on, doors on, front guard attached loosely pending gapping.
Running gear all in bar the tailshaft and brakes completed.
I had an issue with the chroming of front indicator surrounds at A Class Plating here in SA, so I grabbed a set of Retro Richard and sent these to Wizard Class Chroming in Queensland.
5 month later

they arrived back home and I'm less than happy with the results. There are small indentations on the front surfaces that should have been corrected during the plating process but I can live with those.
- RH.JPG (223.02 KiB) Viewed 1113 times
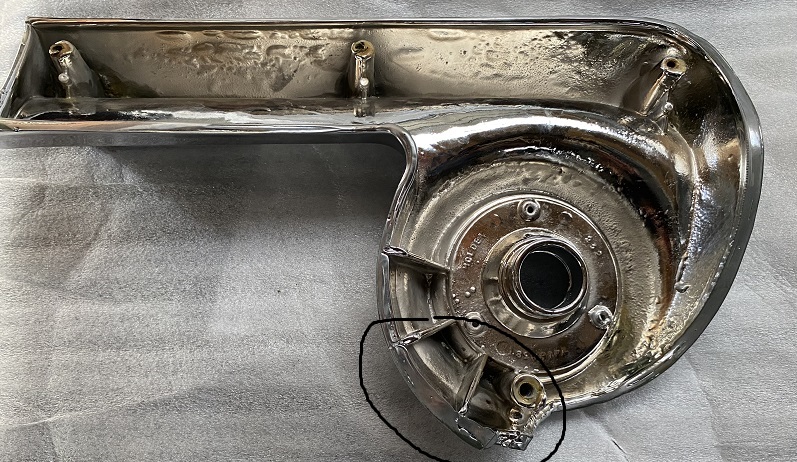
RH side has some material added which suggests the edge was "eaten " away in the acid tank.
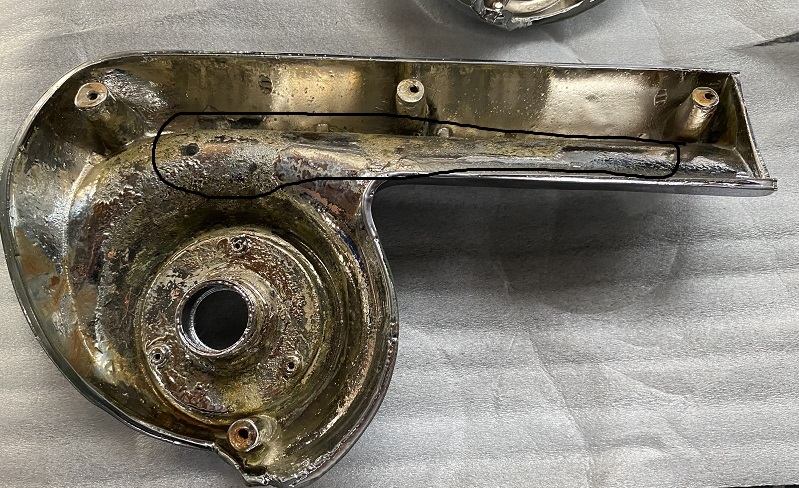
The LH side has not been washed correctly of the cleaning solution and has dripped out of the screw holes, which is causing flaking of material and will need to be fixed. Will probably grind off and silver zinc paint.
- LH.JPG (236.14 KiB) Viewed 1113 times
Their website reads "Home of the diecast Wizard " but my results suggest differently.
.
A class Plating has correct their processing issue and rechromed the first set at no cost so I have a good set for the ute and a spare set as wall art.
Cheers,
Roger
There is a right way and a wrong way and then there is my way which is usually the long way.