EK Wagon project - Total rebuild

Post photos of your pride and joy, or updates on your rebuild!

Moderators: reidy, Blacky

Finny
Posts: 1895
Joined: Tue Mar 18, 2008 10:30 pm
State: QLD
Location: Brisbane North
Contact:

Re: EK Wagon project - Total rebuild

Post by Finny »

Based on what Rosco said, I decided to remove the gear shaft/column again.
I enjoyed it so much last time. :D :) :( :shock:

Image

I didn't grease it the first time and it was very tight to move, although it had got a lot better.
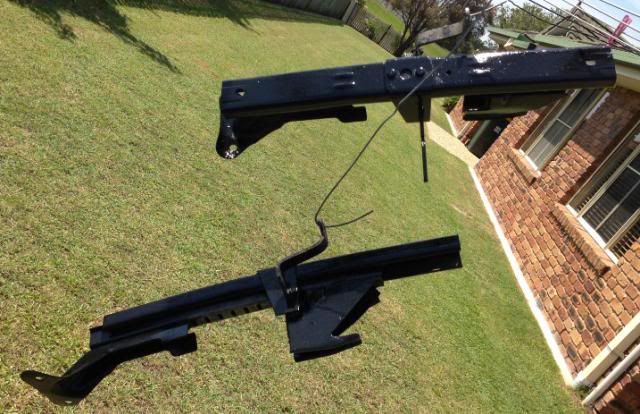
All greased and re-installed and it's back to being tight again.
I expect it to loosen up again with a bit of use.

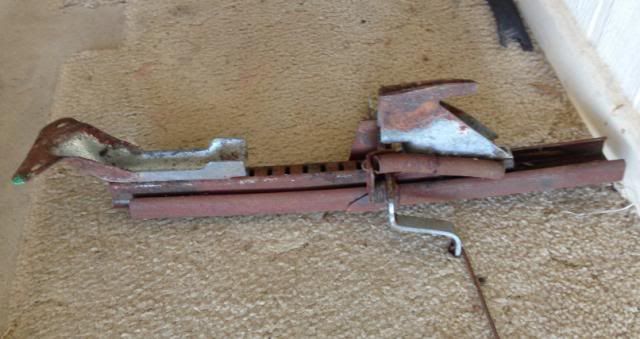
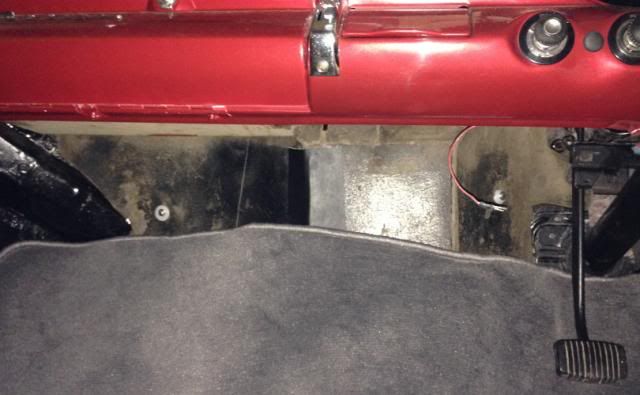
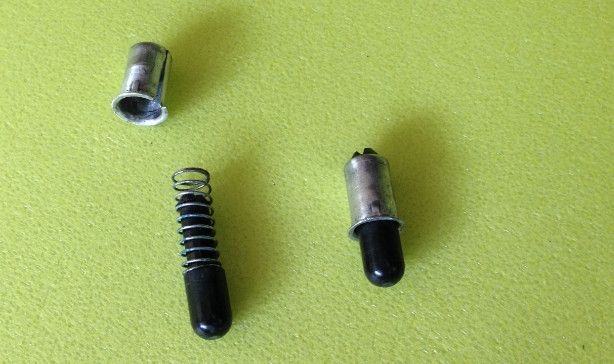
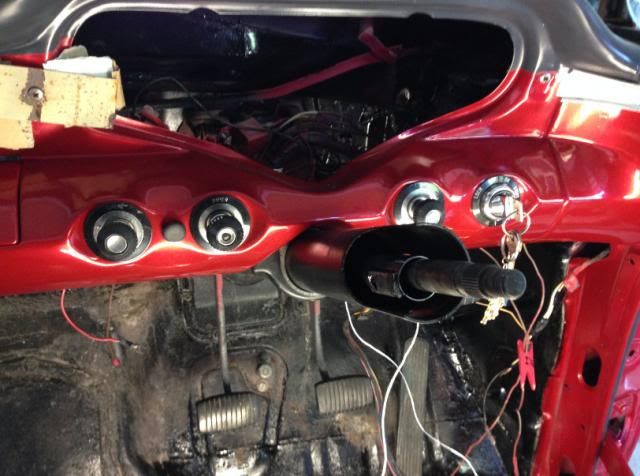
SunnyTim wasn't 100% sure if you could get the gear shaft out without removing the entire steering column.
The answer is you can. :D
Easy to remove :D not quite so easy to re-install, especially the selector at the bottom.
Would have been much easier with a second person inside the car to assist with the pressure on the spring.

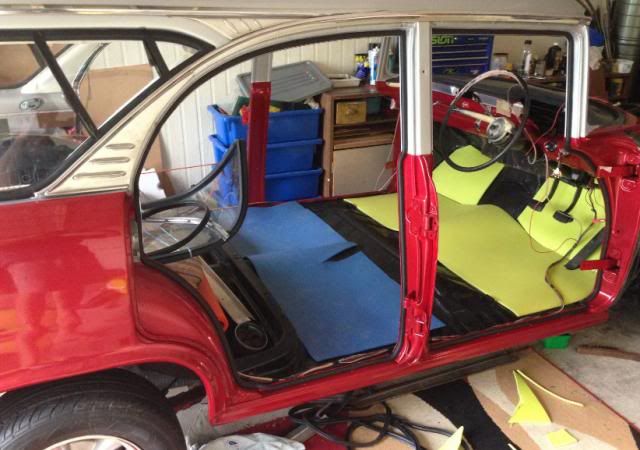
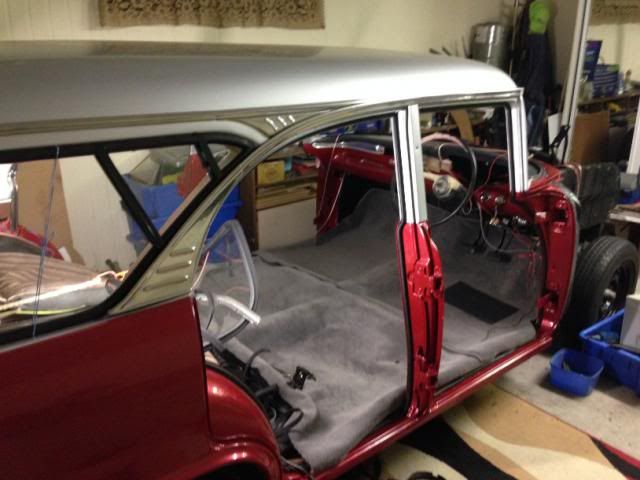
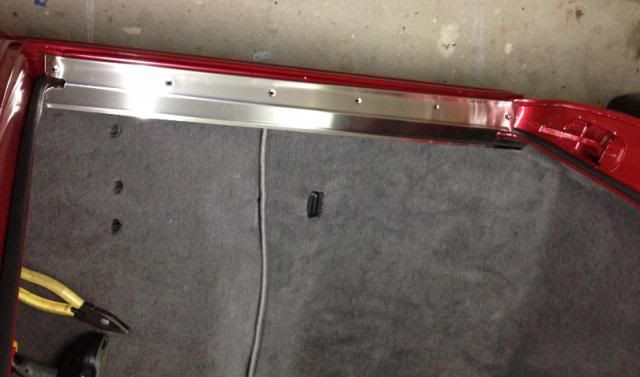
So the next job is to get the outer door rubbers on the car.
But you need the Scuff plates in.
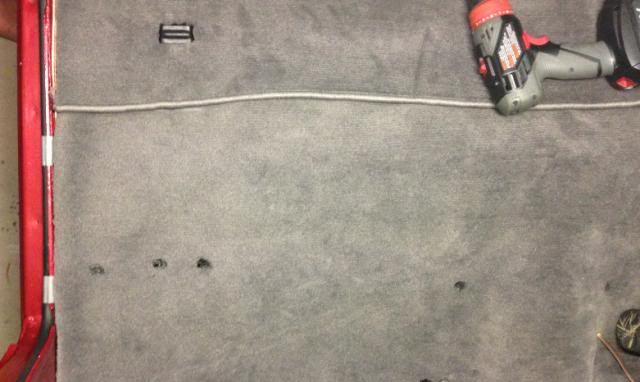
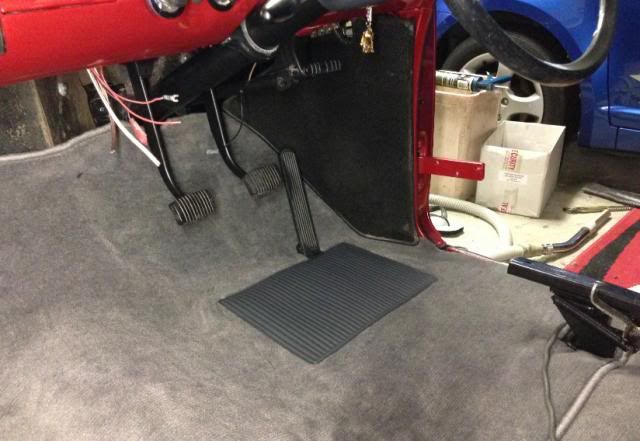
To put the scuff plates in, you need the carpet in.

Image

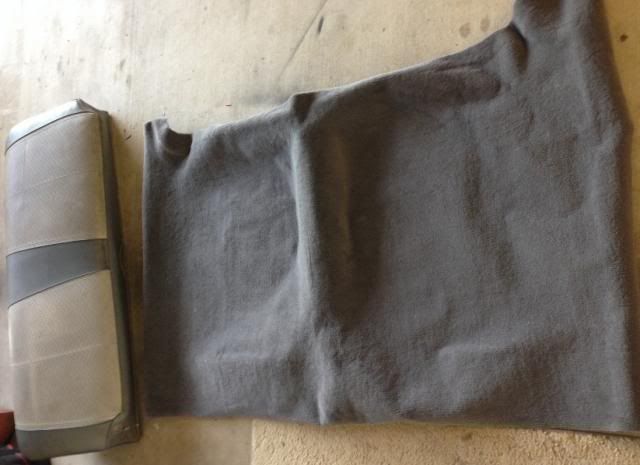
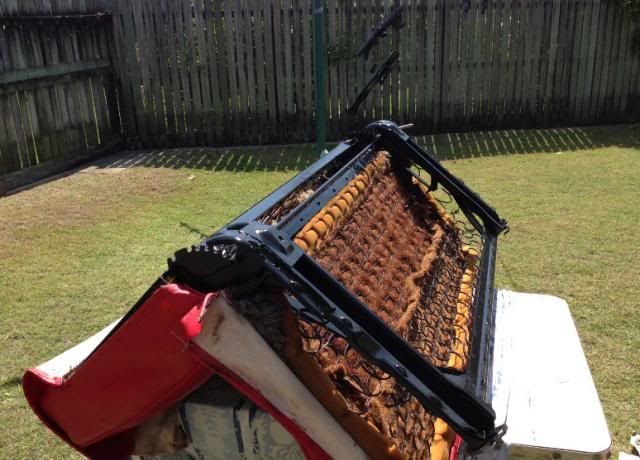
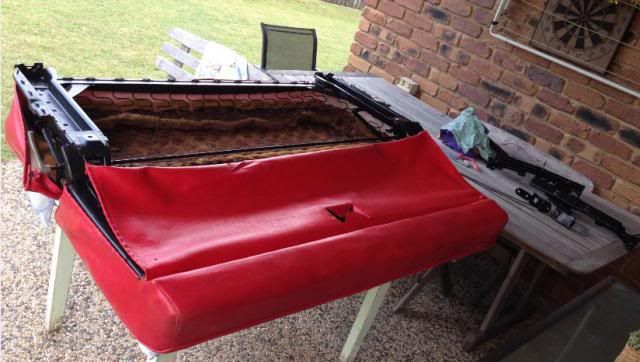
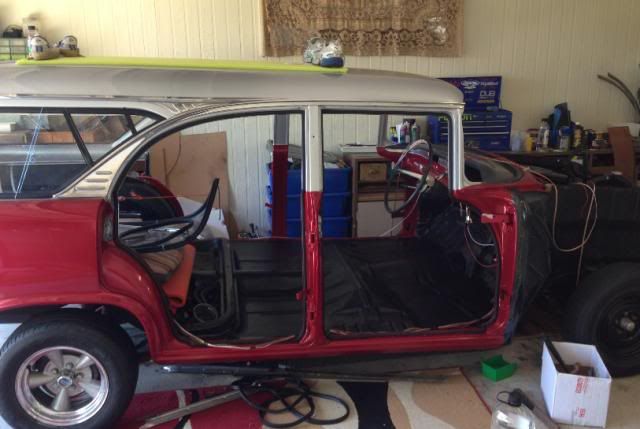
In order to get the carpet in, you need to remove the seats.

Image

Once I had the seats out, might as well pull out the mechanisms, redo all the padding, treat the surface rust, paint the frame and get it all lubricated and cleaned up. :D :D

Image
Image
IT's LIKE WATCHING DRUNK MONKEYS TRYING TO HUMP A FOOTBALL.
rosco
Posts: 2569
Joined: Wed Feb 04, 2004 8:34 pm
State: VIC
Location: Melbourne

Re: EK Wagon project - Total rebuild

Post by rosco »

Ahhh, Finny - now you've become a "restorer"...... most of what you are now doing can be laborious - but when it's done right - you won't ever have to re-visit it unless it gets broken.... and, I bet - not by you....

I fitted my scuff plates and door rubbers without the carpet in... I just propped up the inner scruffs with a folder over scrap piece of carpet.... and gently pulled them up to slip the floor carpet under.... be careful screwing down those plates - they will buckle.
And - if you go the full insane trip I took - be absolutely careful if you want to buff them up to polished stainless.... the buff will pick up the ends of those plates and either break them off - or fling them back at you.....
And - don't work the plates too hard or they'll get too hot and buckle.... my first one did with the sisal buff.. and I had to buff the underside to get it back into shape...... bet I've got the only double buffed plate in existence......

Steering column.... mine hasn't been taken out yet... but I do fully understand the linkages - and that nylon trunnion... indeed, two people would make that job so much easier... but like yourself - I'm the only one who works on Rosco's bus.... I can get my wife to pump the brakes - but anything else..... might as well ask the cat..... don't get me wrong, she would help if she could.... but I'm a bi of a tyrant when it comes to doing things my way - no-one would possess the patience I need for them to help..... been this way since I was a kid.... and learned to improvise when just two hands aren't enough....

Great to learn that you are picking stuff off and seemingly enjoying it... ?

The trouble areas sort themselves out - that square peg will go in .... it just has to get you to understand what it wants.....

keep going, the easy stuff has to get done sooner or later... may as well be now whilst you're coming to terms with the tricky bits....

Oh - and by the way - what's the black rubber button between your choke and wipers.. is that your washer button?

frats,
Rosco
rosco
Posts: 2569
Joined: Wed Feb 04, 2004 8:34 pm
State: VIC
Location: Melbourne

Re: EK Wagon project - Total rebuild

Post by rosco »

Finny, just a re-visit to your moulding issue.... I'm almost certain the mouldings were fitted before the glass went into the rubber... it's a long time back - but I believe that's the way it should go - will take a peek at the manual tomorrow and follow this up...

As you are aware - there is a dog-leg at the base of each moulding... trying to get that into the slot in the rubber with the glass in would be near impossible.. if you've done that - me dips me lid to ya.....

From memory, I believe the mouldings went in first - then the glass into the rubber, then the assembly into the body aperture, then the little holding plate on top centre then the cover piece over that and finally the dog-leg corners slid up on each side until they could be slid across onto the bottom piece.. and finally the self tapper to hold them in place.....

frats,
Rosco
User avatar
Devilrod
Posts: 7394
Joined: Fri Apr 30, 2004 12:55 pm
State: VIC
Location: Beaconsfield, Vic

Re: EK Wagon project - Total rebuild

Post by Devilrod »

rosco wrote:From memory, I believe the mouldings went in first - then the glass into the rubber, then the assembly into the body aperture, then the little holding plate on top centre then the cover piece over that and finally the dog-leg corners slid up on each side until they could be slid across onto the bottom piece.. and finally the self tapper to hold them in place.....

frats,
Rosco
Thats how we did mine Rosco. Finny you're flying along now! Looking good.
Speed and Style........... One day I'll get the speed bit.
Finny
Posts: 1895
Joined: Tue Mar 18, 2008 10:30 pm
State: QLD
Location: Brisbane North
Contact:

Re: EK Wagon project - Total rebuild

Post by Finny »

Thanks for the suggestions. :D
Will get back to the Windscreen shortly.
Devilrod, I'm still totally amazed that someone took your car. I would have thought something unique like that would be too obvious to take. :shock:
Security system/s just got elevated in the priority list. :evil: :evil:

So the seats are back out again, and time to do the whole rust treatment and Rust proof painting.

Image

The adjusters are looking much better.

Image

Just need to put all the clips back on, and repack some of the foam.
Damn thing collapsed in half on the table. :shock: :shock: :wink: :wink: :D :D :D

Image

So now the car is clear and ready to start the flooring.

Image

Work out why the floor has so many holes. :? :? and why two of the ones I need have been sealed. :? :?
Looks like it had Bucket seats at some stage. Time ti add some extra bolts and seal them over.
Again each step takes time. Find the right bolts, find other bolts, clean, treat, find matching bolts, etc, etc.

Image

This is a later photo, but it shows the Firewall insulation reinstalled. Couldn't use the old plugs, so made up some rubber grommets and bolted it back on.
Might have to give it a coat of paint also, it looks out of place. 8)

Image

Also put down some non-water-retaining insulation under the carpet. Nice and bright.

Image

Image

Just need to trim the carpet and re-install the seats.
Then I can get back to installing the Scuff plates and the outer door rubbers. :D :D :D
Image
IT's LIKE WATCHING DRUNK MONKEYS TRYING TO HUMP A FOOTBALL.
Woody01
Posts: 321
Joined: Thu May 12, 2011 7:00 pm
State: WA
Location: Dampier - WA

Re: EK Wagon project - Total rebuild

Post by Woody01 »

Looking good finny.

One tip you may already know, but you can use a hot soldering iron to burn through a hole for where the bolts have to go. I did this when I put new carpet in my hq. It worked well and seemed to melt the edge of the hole to stop it from fraying.

I found the hole first with a small screwdriver, the. Just pushed the soldering iron through.

Keep the pics coming and the good work up!
Woody - UMX-282
FB EK Club WA
Foundation Member # 138
rosco
Posts: 2569
Joined: Wed Feb 04, 2004 8:34 pm
State: VIC
Location: Melbourne

Re: EK Wagon project - Total rebuild

Post by rosco »

Hi Finny, leaps and bounds - you're putting me to shame at present....
Those holes are definitely the remains of some bucket seat "additions"... the central one in the frame cross member is factory.... I don't know why it's there... someone will....
One question.... what have you painted your floor in.... water will get in there - even if you have a perfectly sealed body.... it comes in with peoples shoes/boots etc.... and will seep down. I'd just like to know that you have sealed the metal with enough confidence that you could literally pour a bucket of water in there and not concern yourself about the metal.....

The seat.... wow! - if I still had mine (sadly gone - and those "holes" have appeared in my floor for the buckets) - I'd be looking at fabricating some hinge mechanism.... not that you'll probably ever want to sleep in there..... but if the front seat could be folded down - as does the back one in a wagon.... even "Lurch" would be able to stretch out on an airbed in your EK, Finny.........

Your work is impressive... I too fitted a lot of "insulation" and padding beneath my carpet. I used a product called "Moonwalk" - quite expensive - from Clark Rubber... but by golly, does it feel nice under foot.... and it does not "flatten" down - it has excellent recovery composure.

Brett! - what's this about your car... surely not?.... I'm now on the "lookout" - there are precious few FB/EK's around anyway..... let alone great specimens like yours....and - no fool would dare mess that roof up - guess it's going to be our best opportunity to find it....

Security system - Finny, there are a lot of people in the Vic club reading this who have just had a coronary..... I won't go into any detail (phew, they say) - but if you want any help with security.... just ask... my wife won't go near ours when it's locked unless I'm there..... and the day of leaving the Nowra nationals (03:50) - attendees at the Caravan Park... will substantiate that my system can wake anyone from the deepest of sleeps....

You have access to all that area under your dash at present..... that blasted seat/s should have been removed when I did mine.... my back took ages to recover... but it's all up under there and protected from view by screwed in cover plates - the wiring runs through conduits..... again, just ask....
At the end of the day - if someone wants it so badly - they'll tow it off..... I can assure you, they won't drive mine away..... and might just get a very nasty "shock" if they try to start it with the key.... I had to remove the one-way brake retention valve in the brake lines.... my engineer wouldn't accept it... or did I....?

Love your work, Finny - might just see if I can find my old bus again in the garage.... I know roughly where it is - there's enough "stuff" on it to hide it..... but the basic shape is a bit of a giveaway... unless someone has piled up some cartons and just left the wheels in place to feign signs of a theft... sorry, Brett.... no offence mooted... :(

frats,
Rosco
User avatar
FeeBee
Posts: 155
Joined: Sun Mar 03, 2013 12:49 pm
State: NOT ENTERED
Location: Brisbane

Re: EK Wagon project - Total rebuild

Post by FeeBee »

Looking awesome Finny!
He who dies with the most toys wins!!
User avatar
Devilrod
Posts: 7394
Joined: Fri Apr 30, 2004 12:55 pm
State: VIC
Location: Beaconsfield, Vic

Re: EK Wagon project - Total rebuild

Post by Devilrod »

Sadly the best security is to not drive them every day....
Speed and Style........... One day I'll get the speed bit.
Finny
Posts: 1895
Joined: Tue Mar 18, 2008 10:30 pm
State: QLD
Location: Brisbane North
Contact:

Re: EK Wagon project - Total rebuild

Post by Finny »

Woody01 wrote:Looking good finny.

One tip you may already know, but you can use a hot soldering iron to burn through a hole for where the bolts have to go. I did this when I put new carpet in my hq. It worked well and seemed to melt the edge of the hole to stop it from fraying.

I found the hole first with a small screwdriver, the. Just pushed the soldering iron through.

Keep the pics coming and the good work up!
I only just finished watching a Youtube clip about the soldering iron.
Mine in broken and can't find the 2nd one, but will give it a try. :D :D
Image
IT's LIKE WATCHING DRUNK MONKEYS TRYING TO HUMP A FOOTBALL.
Finny
Posts: 1895
Joined: Tue Mar 18, 2008 10:30 pm
State: QLD
Location: Brisbane North
Contact:

Re: EK Wagon project - Total rebuild

Post by Finny »

Devilrod wrote:Sadly the best security is to not drive them every day....
Your comment and Rosco's are very relevant.
In a previous life I was a General Manager for a company that had a sideline retailing vehicle security/tracking equipment. Cars, Bikes, Boats, Trailers, Boxes, almost anything bigger than a cigarette packet. :shock: :shock:
It was an area I was very passionate about, especially as I would also see the theft stats on a regular basis.
Needless to say I will NOT post up what I can do. But GPS, GSM, RF, Wireless are just the start.
Unfortunately you can't use the Pepper Spray or some of the other options in Australia, but some you can.
Most of the time it's your amateur opportunist, but even the professionals with scanners, lead blankets, and all their other tricks are just unable to detect or avoid getting caught.
Having said that it all comes at a cost. :shock: :shock:

PS: Rosco, I used the KBS rust proofing kit, so shouldn't be an issue with water. :D :D
Image
IT's LIKE WATCHING DRUNK MONKEYS TRYING TO HUMP A FOOTBALL.
rosco
Posts: 2569
Joined: Wed Feb 04, 2004 8:34 pm
State: VIC
Location: Melbourne

Re: EK Wagon project - Total rebuild

Post by rosco »

Thanks Finny,
if you're confident - I suppose then... so am I...

I went the long winded multi coat and dry fishoilene, metal primer and goodness only knows how many gallons of White Knight Hammered metal epoxy enamel on mine.... could probably pull the floor metal out now and not notice and difference.... this was done on both sides - and to top off the sub-floor - went through the entire overcoating process of bonding coat (tie coat, it's called) and multiple applications of POR15..... one extra leaf in the rear springs - and a few packing rings on top of the coils in the towers..... joking! - but there must be quite a bit of weight added on both sides of my entire floor, frame and sub-frame...

Security - very comforted to learn that you have a plan - and will make use of it..... mine kicks in automatically after 20 seconds - after locking the ignition switch - once the key advances beyond "lock".... it needs the full sequence to disengage or it begins a systemic countdown to armegedon.... and there is a unique sequence of components which must be followed to release the lock-out.....and shut the blasted noise up - removing power does absolutely zip.... either at the vehicle OR alarm supply....
Ordinarily, it will self-arm if i forget - or a lock-out can be initiated using a remote sequence.
This is only one of a number of theft devices I have built into my loom - and ignition system - it was done when I did a total re-loom of most of the sub-dash.. and added a lot of integral "bits".... along with relays for horn, lights and a combination relay of both high beam and horn... it wasn't hard to do - but took a very long time....

I dismantled the instrument cluster "idiot" light assembly and drilled out the unused TEMP lens to the extent that I could fit the alarm LED into that and retain the octagonal TEMP lens.... my TEMP light flashes to indicate the state of arm......and denote a sequence of flashes to localise the area a trigger was initiated.
A further LED is fitted into the binnacle over the gauges - it reminds me the status of a secondary system - the third one I'm not telling... but on failing to disarm that and I have received a nasty "bolt" on attempting to start the engine.... might have to reconsider that one when I get a bit more senile and my coronary system becomes weaker... be warned, folk - mine "bites".... and I will suffer any successful penalty incurred by a claimant if it ultimately prevents an attempt at theft.....

I firmly also believe that a much lesser "physical" deterrent is more likely to put the joy rider off..... in doing so, it might just save some breakage attempting entry..... of course, such marginal "theft protection" devices will not deter those who actually want your vehicle.... there are ways around most of them...

Probably the best advice I can give to anyone is to secretly mark vital components and body panels.... there is a nationally accepted code which will link you and whatever you mark for identification purposes... don't forget to photograph your work - and make sure you fill and paint the mark...... if mine ever goes missing - I will post a pic of everything I have marked .... and hope that members and visitors of this forum will quickly locate any of it when it surfaces.... trust me, a theft of any of my old bus will be heavily punished - and I will publicly announce the perpetrator/s....

PM me if you want the marking code.... but I'm sorry to have to state that I will also add you to my list of "known" users.... and you will most likely be contacted by Police if I have a theft.... nasty business, this......

Sorry for swamping your thread, Finny - I'll return to more relevant contributions once I come to terms with the DR issue .....

Still haven't told me what that "button" between your wiper and choke is, Finny...?

frats,
Rosco
Finny
Posts: 1895
Joined: Tue Mar 18, 2008 10:30 pm
State: QLD
Location: Brisbane North
Contact:

Re: EK Wagon project - Total rebuild

Post by Finny »

Have put my old soldering iron in the rubbish, and found my backup. :D

Re-ran the wiring up into the dash so it was in the correct channels and hidden away.
Again the fiddiliy things like putting the door light switches in. :D

Image

Image

Still need to get the wire on the back, tried a few times but they are tricky suckers.
Made some nice holes where necessary using the soldering iron.

Image

And getting the accelerator pedal through the carpet and bolted back down was a real pain, but rubber sealed and done.

Image

And kick panels fit and look good.

Image

Finally got to see the scuff plate in position, and they really topped it all off.

Image

Image

Finally got the nice feeling that its all coming together. :D :D :D
Image
IT's LIKE WATCHING DRUNK MONKEYS TRYING TO HUMP A FOOTBALL.
rosco
Posts: 2569
Joined: Wed Feb 04, 2004 8:34 pm
State: VIC
Location: Melbourne

Re: EK Wagon project - Total rebuild

Post by rosco »

The grey upholstery looks idyllic for the silver/red paintwork, Finny...
The leads to the courtesy door light switches are easiest fitted by simply arranging the wiring so that there is an uphill run to the switch and the brass eyelet pushed on over the plastic sprung legs. It's the eyelet which holds the assembly together.
I suggest a dip in the lead so that any water which finds its way in drips off the bend - and doesn't run along the lead to the switch...

Looking just so good - you must be going to sleep with a smile on your face.. and drifting off planning the next move...

frats,
Rosco
User avatar
NoMAD
Posts: 1993
Joined: Thu Sep 29, 2005 5:07 pm
State: WA
Location: Perth, WA

Re: EK Wagon project - Total rebuild

Post by NoMAD »

looking really good finny...

the scuff plates and some nice bling, keep going mate!

cheers
Nathan
FB/EK Holden Car Club of W.A. Inc
Foundation Member
Post Reply