EK Wagon project - Total rebuild

Post photos of your pride and joy, or updates on your rebuild!

Moderators: reidy, Blacky

Finny
Posts: 1895
Joined: Tue Mar 18, 2008 10:30 pm
State: QLD
Location: Brisbane North
Contact:

Re: EK Wagon project - Total rebuild

Post by Finny »

Thanks for the suggestions, notes below.
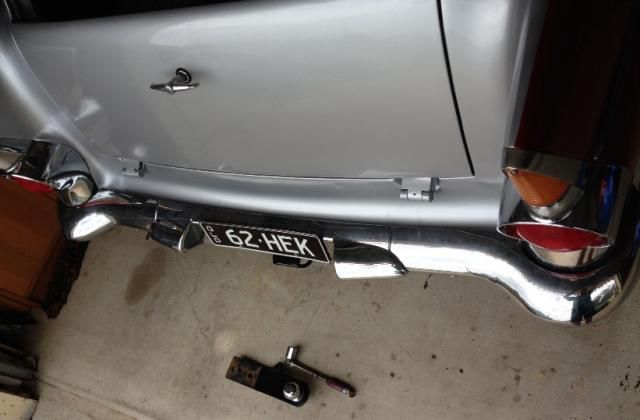
The door tool looks impressive, but too difficult.
Harv wrote:G'day Finny,

Those plugs look like burnt oil to me... hard to tell in the photo, though could be "running rich" soot.
a) is it loosing any oil (dipstick dropping)? (HAVEN'T NOTICED ANY DROP.)
b) do you have a PCV connected? If so, try running it vented to atmosphere and see if the problem goes away. (NO, ONLY BRAKE BOOSTER CONNECTED)
c) are all the plugs that crappy, or only some? (ALL THE SAME)
d) how does the compression check look for dry (rings) and wet (valves and seals)? (NEED TO TEST THAT)
e) Does it give a blurt of smoke when you put your boot into it, or on long hills? (NO, HAVEN'T NOTICED ANY SMOKE)
f) what carb and jet are you running now? (ORIGINAL)

Cheers,
Harv
Thought about hotter plugs, but I couldn't identify where to find hotter plugs, or what the codes were.
Last edited by Finny on Sat Sep 06, 2014 8:31 am, edited 2 times in total.
Image
IT's LIKE WATCHING DRUNK MONKEYS TRYING TO HUMP A FOOTBALL.
Finny
Posts: 1895
Joined: Tue Mar 18, 2008 10:30 pm
State: QLD
Location: Brisbane North
Contact:

Re: EK Wagon project - Total rebuild

Post by Finny »

Now have a nice LED light strip for the rear area. Nice and BRIGHT :D :D
Little switch on the rear compartment trim, blends in fairly well.
You don't even see the light, unless you really go looking for it.
another item off the list.... :thumbsup:

Image

Image

Image

Image

Image
Image
IT's LIKE WATCHING DRUNK MONKEYS TRYING TO HUMP A FOOTBALL.
User avatar
Harv
Posts: 5069
Joined: Mon Oct 08, 2007 2:00 pm
State: NSW
Location: Sydney, Australia

Re: EK Wagon project - Total rebuild

Post by Harv »

Finny,

Looking at fuel only (assuming it's not oil), it's unlikely to be the main metering system at fault if the standard 0.051" main metering je is in place (if anything, it will be a poofteenth lean with modern E10 fuel).

Could be the idle system running way, way rich (especially if it is doing it around town) - wind the needle back (screw it in) 1/8 of a turn and see if it helps. Should only be open about 1 turn from (gently) seated in any case.
Could be the vaccum piston on the power system engaging too early - can be a drama with a lumpy cam, or if the piston is shagged. How much vacuum do you have at idle?

If you want to run hotter plugs, standard FB/EK NGK is the BP56. The BP4 is the hotter plug (also the standard humpy plug).

Cheers,
Harv
327 Chev EK wagon, original EK ute for Number 1 Daughter, an FB sedan meth monster project and a BB/MD grey motored FED.
Finny
Posts: 1895
Joined: Tue Mar 18, 2008 10:30 pm
State: QLD
Location: Brisbane North
Contact:

Re: EK Wagon project - Total rebuild

Post by Finny »

Thanks Harv,

I cleaned the plugs and its running well again.
I also wound in the idle, but haven't checked the vacuum yet.
Due to mostly short runs so far, I have been using the choke a bit.
I see how it goes now and with some longer runs.

Removed and turn the rear lights up the correct way. I knew something was on the wrong way.
Also blasted the lens covers so they are smokey instead of clear, looks a lot more original.

Image

Also did a full measure up on the extra side mouldings.
But I'll need to wait until the front doors are correctly aligned before I do anything more permanent.

Image
Image
IT's LIKE WATCHING DRUNK MONKEYS TRYING TO HUMP A FOOTBALL.
Blacky
Posts: 12267
Joined: Tue Jul 20, 2004 8:58 am
State: WA
Location: up in the Perth hills

Re: EK Wagon project - Total rebuild

Post by Blacky »

Looking good Finny :thumbsup:
When you're faced with an unpleasant task that you really don't want to do, sometimes you just have to dig deep down inside and somehow find the patience to wait for someone else to do it for you.


Foundation member #61 of FB/EK Holden club of W.A.
Finny
Posts: 1895
Joined: Tue Mar 18, 2008 10:30 pm
State: QLD
Location: Brisbane North
Contact:

Re: EK Wagon project - Total rebuild

Post by Finny »

A few more items off the list. :D

Didn't like the look of the rear drums showing through the mags.
Seeing I had painted the front disc's red, I did the rears to match.
The red even reflects off the chrome on the mags to give a red glow, a nice extra touch. :D

Image

Image

Image
Image
IT's LIKE WATCHING DRUNK MONKEYS TRYING TO HUMP A FOOTBALL.
Finny
Posts: 1895
Joined: Tue Mar 18, 2008 10:30 pm
State: QLD
Location: Brisbane North
Contact:

Re: EK Wagon project - Total rebuild

Post by Finny »

I also now have the front doors aligned.
One of my sons actually came over an helped me get it started. :D :D
I actually needed to move the body hinge, so jack up the car, remove the front wheels so I could get at the bolts under the guards.
Well they are good enough to close with a nice solid sound, without needing to slam them. :( :(
I wondered how many tries it would take. The answer, I lost count. :shock: :shock:
But it feels great to have finished this one. :thumbsup:

Image

Image

Image

Image

And that meant that I could finally get the front door trims back on and have handles working....Luxury...... 8) 8) 8)
Image
IT's LIKE WATCHING DRUNK MONKEYS TRYING TO HUMP A FOOTBALL.
Finny
Posts: 1895
Joined: Tue Mar 18, 2008 10:30 pm
State: QLD
Location: Brisbane North
Contact:

Re: EK Wagon project - Total rebuild

Post by Finny »

Got all the clips in place, and re-did the weather seals.
Front door cards now back on and the inside is looking normal again. :D :D :D
Probably could have tightened up the arm cover a bit more, but I'm happy its all back on.

Image

Image

Image

Image

Image

Image

And it has reduced the noise levels inside the car so the stereo doesn't have to work quite so hard. 8) 8)
Image
IT's LIKE WATCHING DRUNK MONKEYS TRYING TO HUMP A FOOTBALL.
Finny
Posts: 1895
Joined: Tue Mar 18, 2008 10:30 pm
State: QLD
Location: Brisbane North
Contact:

Re: EK Wagon project - Total rebuild

Post by Finny »

Now onto upgrading the headlights. :shock:
Spot lights fill the holes in the bumper nicely. :D :D

Image

Image

I am looking at swapping the normal bulbs for halogen H4's. Just the 55/60 units. The Spots will add extra light if needed on dark roads.
I noticed a few other posts regarding replacing the whole light with new halogen kits, but I'm wondering why I can't just upgrade the bulbs.
I was putting in double relays and realise I'll need to get new connections and also consider how to mount the bulbs.
Is the amount of heat really going to cause a problem ? :? :?
Love to hear if anyone has done it and had a problem as a result.
Image
IT's LIKE WATCHING DRUNK MONKEYS TRYING TO HUMP A FOOTBALL.
User avatar
WayneXG95
Posts: 2565
Joined: Wed Sep 07, 2011 9:42 am
State: NSW
Location: Sydney

Re: EK Wagon project - Total rebuild

Post by WayneXG95 »

Lovin this and can't wait to see it at the nats.. :thumbsup:
Milkshakes getting sealed beams next week, over candle power.. :think:
Wayne Chambers
President
FB EK Holden Car Club of N.S.W
User avatar
Harv
Posts: 5069
Joined: Mon Oct 08, 2007 2:00 pm
State: NSW
Location: Sydney, Australia

Re: EK Wagon project - Total rebuild

Post by Harv »

I've put halogen bulbs in many vehicles, with few issues. Provided the lenses are toughened glass, heat is not an issue. Must use a relay though. Only drama I've ever had was with a Toyota Tarago (don't ask :oops: ) where the vehicle would run both high and low beams when switched to high beam (just the way Toyota designed them). Big halogen bulbs with both filaments running made for lots of amps.... wiring was OK as it was relay protected, but used to burn out the earth tab/connector on the bulb :shock: . Not much fun driving home on the parker lights from out the back of Elk Snout, Tamworth at some ungodly hour.

Forget the H4 bulbs though with the standard buckets - easier to use a drop-in halogen bulb from this mob: http://www.classicandvintagebulbs.com/page2.html

Cheers,
Harv
327 Chev EK wagon, original EK ute for Number 1 Daughter, an FB sedan meth monster project and a BB/MD grey motored FED.
User avatar
WayneXG95
Posts: 2565
Joined: Wed Sep 07, 2011 9:42 am
State: NSW
Location: Sydney

Re: EK Wagon project - Total rebuild

Post by WayneXG95 »

These are the sealed beams I used on Blueberry and installing on Milkshake.
They throw plenty of light, your choice for the H4's thro
Looks easy to do but I'm getting a auto electrican to do it because I'm a lazy prick somethimes.. :lol:
The lot $52 from rares but you might get cheaper elsewhere?

Image

:ewink:
Wayne Chambers
President
FB EK Holden Car Club of N.S.W
In the Shed
Posts: 1886
Joined: Wed May 16, 2012 10:18 pm
State: SA
Location: South Australia

Re: EK Wagon project - Total rebuild

Post by In the Shed »

Hey Finny,
Neat wagon, looks great. Now onto the headlights. I"'Ve done both (retro globes in original lights and new lights with H4 globes). The better result was with the latter, plus you have more choice with H4 globes. I started with 90/130 watt globes but dropped back to 55/60 which is a big improvement. You definitely need relays though.
Regards
Stephen
A day in the shed beats a day at work!
Finny
Posts: 1895
Joined: Tue Mar 18, 2008 10:30 pm
State: QLD
Location: Brisbane North
Contact:

Re: EK Wagon project - Total rebuild

Post by Finny »

Thanks for the feedback on bulbs, will be upgrading them later in the year.

Have been thinking about putting the Towbar back on the wagon.
I though it may have been an eyesore, but I had a look on the old photos and it really wasn't that noticeable.

Image
Image
IT's LIKE WATCHING DRUNK MONKEYS TRYING TO HUMP A FOOTBALL.
Finny
Posts: 1895
Joined: Tue Mar 18, 2008 10:30 pm
State: QLD
Location: Brisbane North
Contact:

Re: EK Wagon project - Total rebuild

Post by Finny »

Off on another tangent over the weekend.
I needed to use a trailer so I gave Hek an extra ball.
The nuts that the bolts go into aren't that big so he won't be pulling anything to big, but certainly OK for light work.
Start with some nice freshly painted bits.

Image

Remove rear bumper.
Image

Install towbar.
Image

All back together, re-wired and tested.
Image

Image

Image

Image

And remove the tongue when not in use so I don't remove the skin off my shins.
Image

I did notice again the issue with the battery not being able to turn over the engine enough to start it once it got hot. :( :(
Let to cool for half an hour and it starts fine. :shock:
But when hot its like the battery is flat. Any and all ideas appreciated.
Image
IT's LIKE WATCHING DRUNK MONKEYS TRYING TO HUMP A FOOTBALL.
Post Reply