Page 6 of 59
Posted: Mon Jun 30, 2008 7:08 am
by mrs ratbox
the mounts have been moved but like ben said i don't think far enough for an FB/EK they are usually right on the back of the crossmember, prolly out of an EH
Posted: Mon Jun 30, 2008 6:37 pm
by FB MAD
Had a closer look at my engine mounts today.I welded mine right on the rear leading edge at rear of crossmember so as rat and ben have said

,those mounts on your crossmember appear to need moving further back about 1/2 inch or so??.
Outrigger appears to be an EH one ( no holes in it for grey motor front mount) so rat's right there as well in saying it's probably out of an EH.
Posted: Mon Jun 30, 2008 8:04 pm
by mrs ratbox
Posted: Sun Jul 06, 2008 11:08 pm
by Finny
Wet weekend, did some more minor work on removing the inside. Only had an hour to spend.
Got the dash out, and chrome dash strips off. I think I found the original colour.
Similar to what will be going back on it in the end.
Gave the Instrument panel a quick wipe, and it came up pretty good. Haven't polished it yet, but It will be OK. Only a couple of pits, mostly fish oil cover. Dame that stuff is an absolute pain to remove

, but does a great job of protecting things

.

Also got the roof lining off (almost). The interior dome light is still holding it on. Couldn't see how to get it off ?

Any ideas

Posted: Mon Jul 07, 2008 5:05 am
by Trev
Take the cover off and inside there are 2 tabs that twist to hold it in place, Trev

.
Posted: Mon Jul 07, 2008 7:49 am
by stinky
The cover just "pinches" off, go easy on both the cover and the twist tabs though. Those tabs can break off quite easily.
Posted: Mon Jul 07, 2008 8:54 am
by Finny
Thanks guys, I could see something like that, but it was getting dark, and I didn't want to risk breaking anything.

I'll twist the tabs, and take it slow.
Here's the next step, can you refit the roof lining without taking out the front windscreen, and rear side glasses and rubber ? Or do you need to remove them ?
Posted: Mon Jul 07, 2008 12:04 pm
by ben
You will need to remove your windows to refit a new headlining Finny. Im guessing you would of had to rip or cut the old one out. When you fit the new lining, it will need to pulled tight and clipped to the window pinch weld/frame area. Once its all nice and tight/crinkle free its glued to the pinch weld/frame area .When you get around to it buy yourself a heap of those big paper/alligator clips. the more points you can pull and clip and then glue the lining the better the outcome. That was my experience anyway, the smart way would be to get a pro to do it
Posted: Mon Jul 07, 2008 12:35 pm
by stinky
Finny wrote:Here's the next step, can you refit the roof lining without taking out the front windscreen, and rear side glasses and rubber ? Or do you need to remove them ?
You don't "have" to remove the screen, I have done an EK Pano with the front screen still in. I made up a piece of 3mm MDF that matches the profile of the panel that the rear view and sunvisors attach to, then drilled about four or five holes at strategic locations to get some "christmas tree" push-through clips through.

I then trial fitted the roof lining and marked where to attach the roof lining to the MDF strip, glue the two together and refit.
Another way is to duplicate what happens at the rear in a station sedan, with the serrated strip that gets tapped down once the hoodlining is pressed into place.
Posted: Mon Jul 07, 2008 1:11 pm
by Devilrod
Whatever you do don't mess up the order of the support rods in the headlining. The only fit one way from what I've been told.
Posted: Mon Jul 07, 2008 5:13 pm
by ben
Thats right DR, but from memory they were colour coded on the bars, and there is a reference in the manual to there order, if you do mess them up
Posted: Tue Jul 08, 2008 2:46 pm
by Finny
Thanks for feedback, I'll mark them before I take them off the headlining.
It for a wagon, so I have the front windscreen and both rear glass sections. Not sure if MDF would work on those two areas.
Any tips on safely removing the rear side glasses. ????
Posted: Thu Jul 10, 2008 10:35 pm
by Finny
OK, I have finally got the head back.
The delay was in getting the exhaust valves, which I finally got off EvilBay.
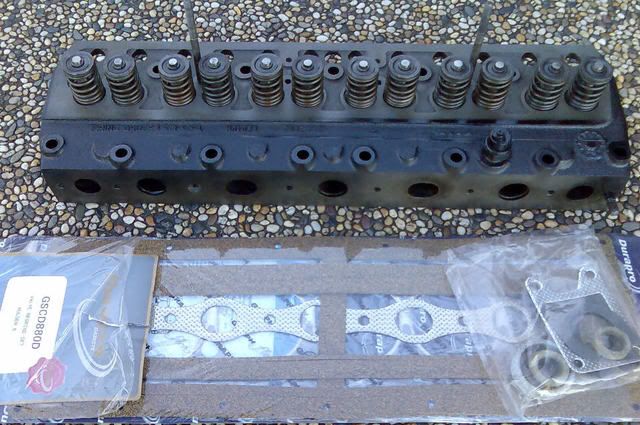
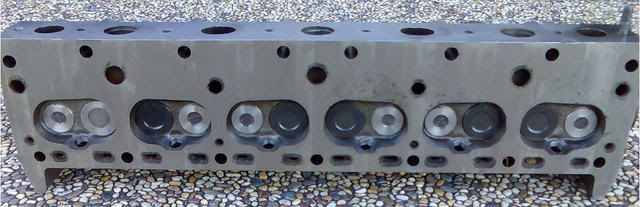
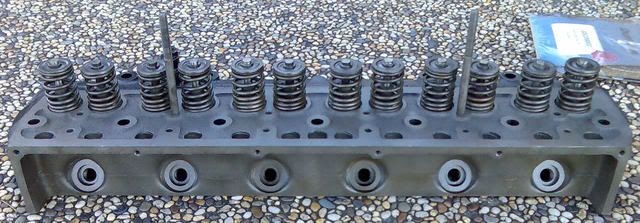
Total cost was $533. Included full valve grind, Pressure test, new inlet valves, unleaded upgrade and new gasket set. Looks good, but won't really know for a couple of weeks until I get the time to put it back together. Very happy with Barry the guy that did it, very helpful and knowledgeable. And he fixed up the push rods and plungers?
The Gasket set was only $48.20 +GST. I thought that would be a lot more expensive. Full set, Head, Side cover, Fuel, Water, side plate, Exhaust, the lot.
Just have to wait and see if the block had any issues.
Posted: Thu Jul 10, 2008 10:41 pm
by stinky
Finny wrote:Any tips on safely removing the rear side glasses. ????
Make sure you have a mate there to help out and be very careful!
Posted: Thu Jul 10, 2008 11:22 pm
by Finny
Do Rare Spares or Clark Rubber have the rubbers for the rear side glasses?
Left and right would both be different I assume.