rosco wrote: Sun Mar 22, 2020 10:24 amI'll slip out into the garage later FJW - anything in particular you want close-ups of?... I'll take some from both sides of the bottom of the baffle - you'll see where I "bent" the lower stone plate forward to provide clearance for the bottom radiator tank. I'll also take some close-ups of the little inserts I welded into the baffle sides... let me know if you want anything else - digital film is "cheap"...FJWALLY wrote: Sun Mar 22, 2020 10:20 am Pics are always helpful Rosco - especially the bottom sections
frats,
Rosco
WRAY T96 SUPERCHARGER refurb and install
Re: WRAY T96 SUPERCHARGER refurb and install
That sounds good Rosco - the bottom is where the tricky stuff will occur.
You will find me lost somewhere!
Re: WRAY T96 SUPERCHARGER refurb and install
Ok, don't want to swamp your thread with pix of my old bus FJW.. but have 12 here for you to take a peek at for reference with what I did with mine...
probably split this into a few posts...
It took me an eternity to find out that a 6 cyl radiator from a HK/T/G would fit. In the pix which follow - I took my measurements from between the subframe members and could not understand how this radiator would fit... it does - and it was not until I saw one fitted that realised the radiator actually sits up above the offending obstacles... just.
To start off with - you seem to be focused on the lower stone shield part of the baffle... in this pic, you can see how I "bent" this forward to create a gap between the radiator and shield...
I had to mount the radiator forward to get clearance from the fan to the radiator.... as you would appreciate, engine thrust would force the motor forward, so I needed as much clearance as I could build into the fitting of the radiator....
I ended up with enough to "just" get my little finger between the back of the radiator core and the water pump/fan bolt heads...
As promised, with reference to you wanting to effect a "factory" look that would not attract undue attention - I cut out small triangular infills for the ugly openings where I had to cut the baffle on both sides to fit the wider radiator - these were welded in and ground off...
Getting back to the lower section of baffle/radiator - this shot shows the clearance I effected between them, it took a bit of beating to push the shield out.. but I got there. From memory, I did push it too far and split the metal... but welded it back together again. It's pretty tough metal down there and will take a fair bit of hammering...
This is the last pic in the first of two posts... six more to come in the next.
In this pic, we can see that my measurements were correct - and why I believed the radiator would not fit.... it extends beyond that of the subframe members.... but, the radiator is mounted slightly above these and the "round" bottom corner of it just affords clearance as the curvature of the subframe members also begins to open the clearance... it fits - and fits very nicely....
This pic is from the rear of the right hand corner... the overflow tank and hose block the view a bit...
back with the second "edition" shortly..
frats,
Rosco
probably split this into a few posts...
It took me an eternity to find out that a 6 cyl radiator from a HK/T/G would fit. In the pix which follow - I took my measurements from between the subframe members and could not understand how this radiator would fit... it does - and it was not until I saw one fitted that realised the radiator actually sits up above the offending obstacles... just.
To start off with - you seem to be focused on the lower stone shield part of the baffle... in this pic, you can see how I "bent" this forward to create a gap between the radiator and shield...
- 001 lower baffle mail.jpg (120.82 KiB) Viewed 1066 times
I had to mount the radiator forward to get clearance from the fan to the radiator.... as you would appreciate, engine thrust would force the motor forward, so I needed as much clearance as I could build into the fitting of the radiator....
I ended up with enough to "just" get my little finger between the back of the radiator core and the water pump/fan bolt heads...
- 002 fan to radiator mail.jpg (122.65 KiB) Viewed 1066 times
As promised, with reference to you wanting to effect a "factory" look that would not attract undue attention - I cut out small triangular infills for the ugly openings where I had to cut the baffle on both sides to fit the wider radiator - these were welded in and ground off...
- 003 baffle infills mail.jpg (166.21 KiB) Viewed 1066 times
- 004 baffle infills mail.jpg (158.75 KiB) Viewed 1066 times
Getting back to the lower section of baffle/radiator - this shot shows the clearance I effected between them, it took a bit of beating to push the shield out.. but I got there. From memory, I did push it too far and split the metal... but welded it back together again. It's pretty tough metal down there and will take a fair bit of hammering...
- 005 radiator lower clearance mail.jpg (138.08 KiB) Viewed 1066 times
This is the last pic in the first of two posts... six more to come in the next.
In this pic, we can see that my measurements were correct - and why I believed the radiator would not fit.... it extends beyond that of the subframe members.... but, the radiator is mounted slightly above these and the "round" bottom corner of it just affords clearance as the curvature of the subframe members also begins to open the clearance... it fits - and fits very nicely....
This pic is from the rear of the right hand corner... the overflow tank and hose block the view a bit...
- 006 radiator rhs sub frame clearance mail.jpg (122.3 KiB) Viewed 1066 times
back with the second "edition" shortly..
frats,
Rosco
Re: WRAY T96 SUPERCHARGER refurb and install
Ok, second post with final six pix.
This is the clearance on the left rear side from sub-frame to radiator..
Another one of the right side, might be a little clearer..
Here we go to the upper crossmember. I had cut away the rear, top and bottom of what would foul the radiator - and welded in plates then ground off the welds. This pic shows the second attempt at doing this - I learned to stitch weld the second time and kept a close watch on measurements.
In these pix, you can see the clearances I effected so that the radiator would sit inside the outer line of the original upper cross-member....
In this pic, we can see across the vehicle - with the clearance between the radiator and upper x-member.
In this pic, we are looking down at the gap - the part number for the radiator I fitted is also shown in this pic.
In this final pic, you can see the total width of the lower shield clearance. It was always my intention to attempt to create an illusion that this modification was perceived as it being factory....
Let me know if you want more pix..
frats,
Rosco
This is the clearance on the left rear side from sub-frame to radiator..
- 007 radiator lh sub frame clearance mail.jpg (160.77 KiB) Viewed 1064 times
Another one of the right side, might be a little clearer..
- 008 radiator rh sub frame clearance mail.jpg (126.44 KiB) Viewed 1064 times
Here we go to the upper crossmember. I had cut away the rear, top and bottom of what would foul the radiator - and welded in plates then ground off the welds. This pic shows the second attempt at doing this - I learned to stitch weld the second time and kept a close watch on measurements.
In these pix, you can see the clearances I effected so that the radiator would sit inside the outer line of the original upper cross-member....
- 009 upper crossmember lh rear radiator clearance mail.jpg (166.66 KiB) Viewed 1064 times
In this pic, we can see across the vehicle - with the clearance between the radiator and upper x-member.
- 010 upper crossmember radiator clearance mail.jpg (130.65 KiB) Viewed 1064 times
In this pic, we are looking down at the gap - the part number for the radiator I fitted is also shown in this pic.
- 011 upper crossmember radiator clearance mail.jpg (117.05 KiB) Viewed 1064 times
In this final pic, you can see the total width of the lower shield clearance. It was always my intention to attempt to create an illusion that this modification was perceived as it being factory....
- 012 radiator lower baffle clearance mail.jpg (136.59 KiB) Viewed 1064 times
Let me know if you want more pix..
frats,
Rosco
Re: WRAY T96 SUPERCHARGER refurb and install
Cheers Rosco - I think for mine the baffle youve bent forward will have to come out - I could re fab a new one in front of it but dont think its really necessary as the rest of the rad is exposed anyway and may actually help cooling of bottom tank not being there
You’ll find me lost somewhere!
You’ll find me lost somewhere!
You will find me lost somewhere!
Re: WRAY T96 SUPERCHARGER refurb and install
Clay the explanation Fred gave me is the manifolds - all types work on Boyles law - ie the pressure evens out across the system - maybe very slightly favoring the front but not enough to have any effect - “She’ll be right!”
You’ll find me lost somewhere!
You’ll find me lost somewhere!
You will find me lost somewhere!

Re: WRAY T96 SUPERCHARGER refurb and install
Boyle’s Law? Fred must have self-isolated, ran out of beer and started drinking that West End Draught paint stripper 
Only kidding. Boyle’s law says that when you heat a gas, it gets bigger. More heat, more bigger. Probably not why the cylinders feed evenly.
There will be a pressure difference between the front and rear cylinder inlets - less pressure at the back. This is because the gas flows, and flowing gas loses pressure. Only static gases are evenly pressured. The funky box shape of the manifold means there will be lots of swirly eddy effects at the corners too.
The reason that it makes little difference is because of the overall pressure. In a N/A manifold, you have maybe 20”Hg of vacuum in the head (9.8psi absolute), and atmospheric pressure pushing (14psi absolute). That’s only 4.2 psi of difference to shove the gas in. As the gas flows and loses pressure, every little bit counts. Maybe the closest cylinders get 4psi, the ones at the furthest lose 1psi due to flow and see 3psi... that’s 25% less pressure, and hence 25% less fuel. For the Wray, it has the same 9.8psi absolute in the head, but 10psi (gauge) doing the pushing. That’s 24psi absolute, so the difference in pressure is 14.2psi. The closest cylinders might get 14psi, the ones at the end 13psi. That’s only 7% difference, so the Wray is more evenly fed (less affected by manifold design). The higher the boost pressure, the less effect of manifold flow.
Cheers,
Harv
Only kidding. Boyle’s law says that when you heat a gas, it gets bigger. More heat, more bigger. Probably not why the cylinders feed evenly.
There will be a pressure difference between the front and rear cylinder inlets - less pressure at the back. This is because the gas flows, and flowing gas loses pressure. Only static gases are evenly pressured. The funky box shape of the manifold means there will be lots of swirly eddy effects at the corners too.
The reason that it makes little difference is because of the overall pressure. In a N/A manifold, you have maybe 20”Hg of vacuum in the head (9.8psi absolute), and atmospheric pressure pushing (14psi absolute). That’s only 4.2 psi of difference to shove the gas in. As the gas flows and loses pressure, every little bit counts. Maybe the closest cylinders get 4psi, the ones at the furthest lose 1psi due to flow and see 3psi... that’s 25% less pressure, and hence 25% less fuel. For the Wray, it has the same 9.8psi absolute in the head, but 10psi (gauge) doing the pushing. That’s 24psi absolute, so the difference in pressure is 14.2psi. The closest cylinders might get 14psi, the ones at the end 13psi. That’s only 7% difference, so the Wray is more evenly fed (less affected by manifold design). The higher the boost pressure, the less effect of manifold flow.
Cheers,
Harv
327 Chev EK wagon, original EK ute for Number 1 Daughter, an FB sedan meth monster project and a BB/MD grey motored FED.
Re: WRAY T96 SUPERCHARGER refurb and install
Cheers Harv - he did say there was Voodoo involved as well 
You’ll find me lost somewhere!
You’ll find me lost somewhere!
You will find me lost somewhere!
Re: WRAY T96 SUPERCHARGER refurb and install
Ok - if you remove that shield plate, it will expose more of the radiator - but probably only the lower tank.
When I did the first refurb of my baffle area - I had it sprayed and mirror polished.... a trip to the Tenterfield nationals and back via the Newell resulted in much of that paint work being destroyed - stone chips... unavoidable, more so when following/overtaking B doubles.. and even more so in rain on when the road was wet..... ground water seems to carry this fine material.... it was a learning curve.
To prevent this after spending much time rubbing back, priming and top-coating the second refurb - I decided to intervene.
I went to a security door company for "amplimesh" off-cuts.... black powder coated stainless steel...
I cut out and made up three removable sections and fitted them behind the grille.... I have not had one chip or found any stones in the area between them and the radiator/baffle since.
I fitted neoprene "U" section edging around the mesh - to prevent it scratching the surrounding paintwork.
Fitting the mesh was easy - simply using stainless wire which passed through the mesh holes and around the verticals of the grille.. these pass "under" the horizontals and are almost invisible when viewing from the front.
The wire is bent off at around 60 deg to hold the mesh in place - it is thick enough to withstand straightening under air flow pressure.
The three sections are easily removed - simply by straightening the wires and pushing them back out the front... the three panels then come out in sequence.. the larger centre section first - then the two end pieces....
It does not appear to have affected cooling - in fact, it probably assists - by keeping the vanes of the radiator core open and free of insects...
You can see this mesh and some of the wire retainers in one of the above pix... looking across the stone tray and shield.
I like stainless - it doesn't rust... and, because the grille is also stainless - there is no risk of one metal staining the other.. simples...
More pix if you need them, FJW
frats,
Rosco
When I did the first refurb of my baffle area - I had it sprayed and mirror polished.... a trip to the Tenterfield nationals and back via the Newell resulted in much of that paint work being destroyed - stone chips... unavoidable, more so when following/overtaking B doubles.. and even more so in rain on when the road was wet..... ground water seems to carry this fine material.... it was a learning curve.
To prevent this after spending much time rubbing back, priming and top-coating the second refurb - I decided to intervene.
I went to a security door company for "amplimesh" off-cuts.... black powder coated stainless steel...
I cut out and made up three removable sections and fitted them behind the grille.... I have not had one chip or found any stones in the area between them and the radiator/baffle since.
I fitted neoprene "U" section edging around the mesh - to prevent it scratching the surrounding paintwork.
Fitting the mesh was easy - simply using stainless wire which passed through the mesh holes and around the verticals of the grille.. these pass "under" the horizontals and are almost invisible when viewing from the front.
The wire is bent off at around 60 deg to hold the mesh in place - it is thick enough to withstand straightening under air flow pressure.
The three sections are easily removed - simply by straightening the wires and pushing them back out the front... the three panels then come out in sequence.. the larger centre section first - then the two end pieces....
It does not appear to have affected cooling - in fact, it probably assists - by keeping the vanes of the radiator core open and free of insects...
You can see this mesh and some of the wire retainers in one of the above pix... looking across the stone tray and shield.
I like stainless - it doesn't rust... and, because the grille is also stainless - there is no risk of one metal staining the other.. simples...
More pix if you need them, FJW
frats,
Rosco
Re: WRAY T96 SUPERCHARGER refurb and install
Thanks for the explantation Harv. Makes sense.
Sent from my SM-G973F using Tapatalk
Sent from my SM-G973F using Tapatalk
getting my FB ute on the road
EK van on rotisserie
EK van on rotisserie
Re: WRAY T96 SUPERCHARGER refurb and install
Bit of clean up work with the mini belt - will finish off with some blocking what a difference


You’ll find me lost somewhere!


You’ll find me lost somewhere!
You will find me lost somewhere!
Re: WRAY T96 SUPERCHARGER refurb and install
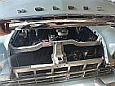
Rad support mods in a bit clearer pic - fully boxed in to maintain strength - will have to shorten the bonnet catch bolts a touch but otherwise wont affect anything else 


You’ll find me lost somewhere!


You’ll find me lost somewhere!
You will find me lost somewhere!
Re: WRAY T96 SUPERCHARGER refurb and install
Nice work, FJW... I'm guessing it "fits"?
The bonnet lock plate assembly will add strength to the upper member - if you have concerns, you could weld in an additional backing plate to the lower member - the bonnet "sits" on that.. and is supported by the grille verticals/stone-tray and hence sub-frame front section.
I don't see issue with the upper member - basically holds the radiator in place and positions the hood lock plate.
I welded in a 20 mm wide section of 2 mm flat bar to my radiator baffle each side for the radiator to mount onto... gave it a bit more support and prevented stress on the body of the radiator if there was any pressure build up at speed - I really don't have much clearance from the fan to the rear of the radiator and did this to build in a bit of comfort...
I don't believe any change in radiator face angle will affect its performance... as long as the air flow "hits" the fins and doesn't pass directly through them - they will work efficiently.
Looking good - we'll see a pic of this in place with the radiator fitted soon ... but, I'm guessing - not soon enough for your liking FJW?
frats,
Rosco
The bonnet lock plate assembly will add strength to the upper member - if you have concerns, you could weld in an additional backing plate to the lower member - the bonnet "sits" on that.. and is supported by the grille verticals/stone-tray and hence sub-frame front section.
I don't see issue with the upper member - basically holds the radiator in place and positions the hood lock plate.
I welded in a 20 mm wide section of 2 mm flat bar to my radiator baffle each side for the radiator to mount onto... gave it a bit more support and prevented stress on the body of the radiator if there was any pressure build up at speed - I really don't have much clearance from the fan to the rear of the radiator and did this to build in a bit of comfort...
I don't believe any change in radiator face angle will affect its performance... as long as the air flow "hits" the fins and doesn't pass directly through them - they will work efficiently.
Looking good - we'll see a pic of this in place with the radiator fitted soon ... but, I'm guessing - not soon enough for your liking FJW?
frats,
Rosco
Re: WRAY T96 SUPERCHARGER refurb and install
Will be a while yet as waiting on manifolds to complete the kit - id love to get a couple days to do rad mods in one go but just cant leave the fam at moment with the missus laid up 
You’ll find me lost somewhere!
You’ll find me lost somewhere!
You will find me lost somewhere!
Re: WRAY T96 SUPERCHARGER refurb and install
Understand, FJW.... for as much as it pains me to say this - what we do with our beloved tin is of very little importance in the greater realm of life... the essentials are health and well being... although, when teeth are firmly dug into a project - it takes a bit of de-latching to reset priorities...
Best wishes for a speedy return to duties for your GLW....
frats,
Rosco
Best wishes for a speedy return to duties for your GLW....
frats,
Rosco
Re: WRAY T96 SUPERCHARGER refurb and install
Tidy looking job Rob. Should buy you some clearance.
FB ute fixer upper, EK van on rotisserie
FB ute fixer upper, EK van on rotisserie
getting my FB ute on the road
EK van on rotisserie
EK van on rotisserie