Page 39 of 47
Re: LS1EK
Posted: Sat Feb 04, 2023 8:17 pm
by Blacky
There are no new ideas anymore - just adaptations of other ideas , or something .....
Re: LS1EK
Posted: Wed Mar 22, 2023 7:22 pm
by TAZ
And yet more wires go in.
Re: LS1EK
Posted: Thu Mar 23, 2023 1:18 am
by Blacky
Wiring never seems to end does it - I did some more on mine last night, had a night off tonight and played boilermaker instead


Re: LS1EK
Posted: Thu Mar 23, 2023 3:42 pm
by melly
Looking very professional Taz, nice job- you're obviously using new aftermarket terminations with fancy new switches etc is that the plan right way thru the re-wire??... can I ask what you guys have been doing with original harness terminations like lamp holders and switches i.e. if you want to run a new harness do/ can do you re-use them??
Blacky it looks like you've been splicing them original bits in to terminate new sections of your loom on the Rattler?
cheers, melly
Re: LS1EK
Posted: Thu Mar 23, 2023 4:58 pm
by Harv
Check the harness carefully for previous owner bodges. Replace those.
Reuse what you can. The factory wiring quality is pretty good other than normal wear and tear.
Splice in new stuff. Buy a quality crimper - I bought a name-brand ratchet crimper, and learned the hard way that they look good but are not (... had to recrimp all my harness with a pair of multigrips after it was in place). I learned some from here:
https://www.jalopyjournal.com/forum/thr ... l.1127519/ and switched over to a Thomas and Betts crimper, and use uninsulated terminals. Crimp, then heat shrink. No mashing flat the 'orrible red and blue plastic ones. The quality of the connection is significantly better.
Cheers,
Harv
Re: LS1EK
Posted: Thu Mar 23, 2023 11:52 pm
by Blacky
Melly, yeah I used the dash wiring and not a lot else , all th erest of it barring the wiring to the taillights has been replaced.
Harv, I have a set of $800 crimpers for insulated terminals, have had them since I was an apprentice about 95821 years ago - they do a beautiful job .
Re: LS1EK
Posted: Sat Mar 25, 2023 11:24 am
by FireKraka
Hi Melly as Harv said check your harness out fully, if your harness is really trash contact Vintage Wiring in Melbourne not cheap and if you need it right now you would need patience but very good quality I believe.
Re: LS1EK
Posted: Sun Mar 26, 2023 6:25 pm
by TAZ

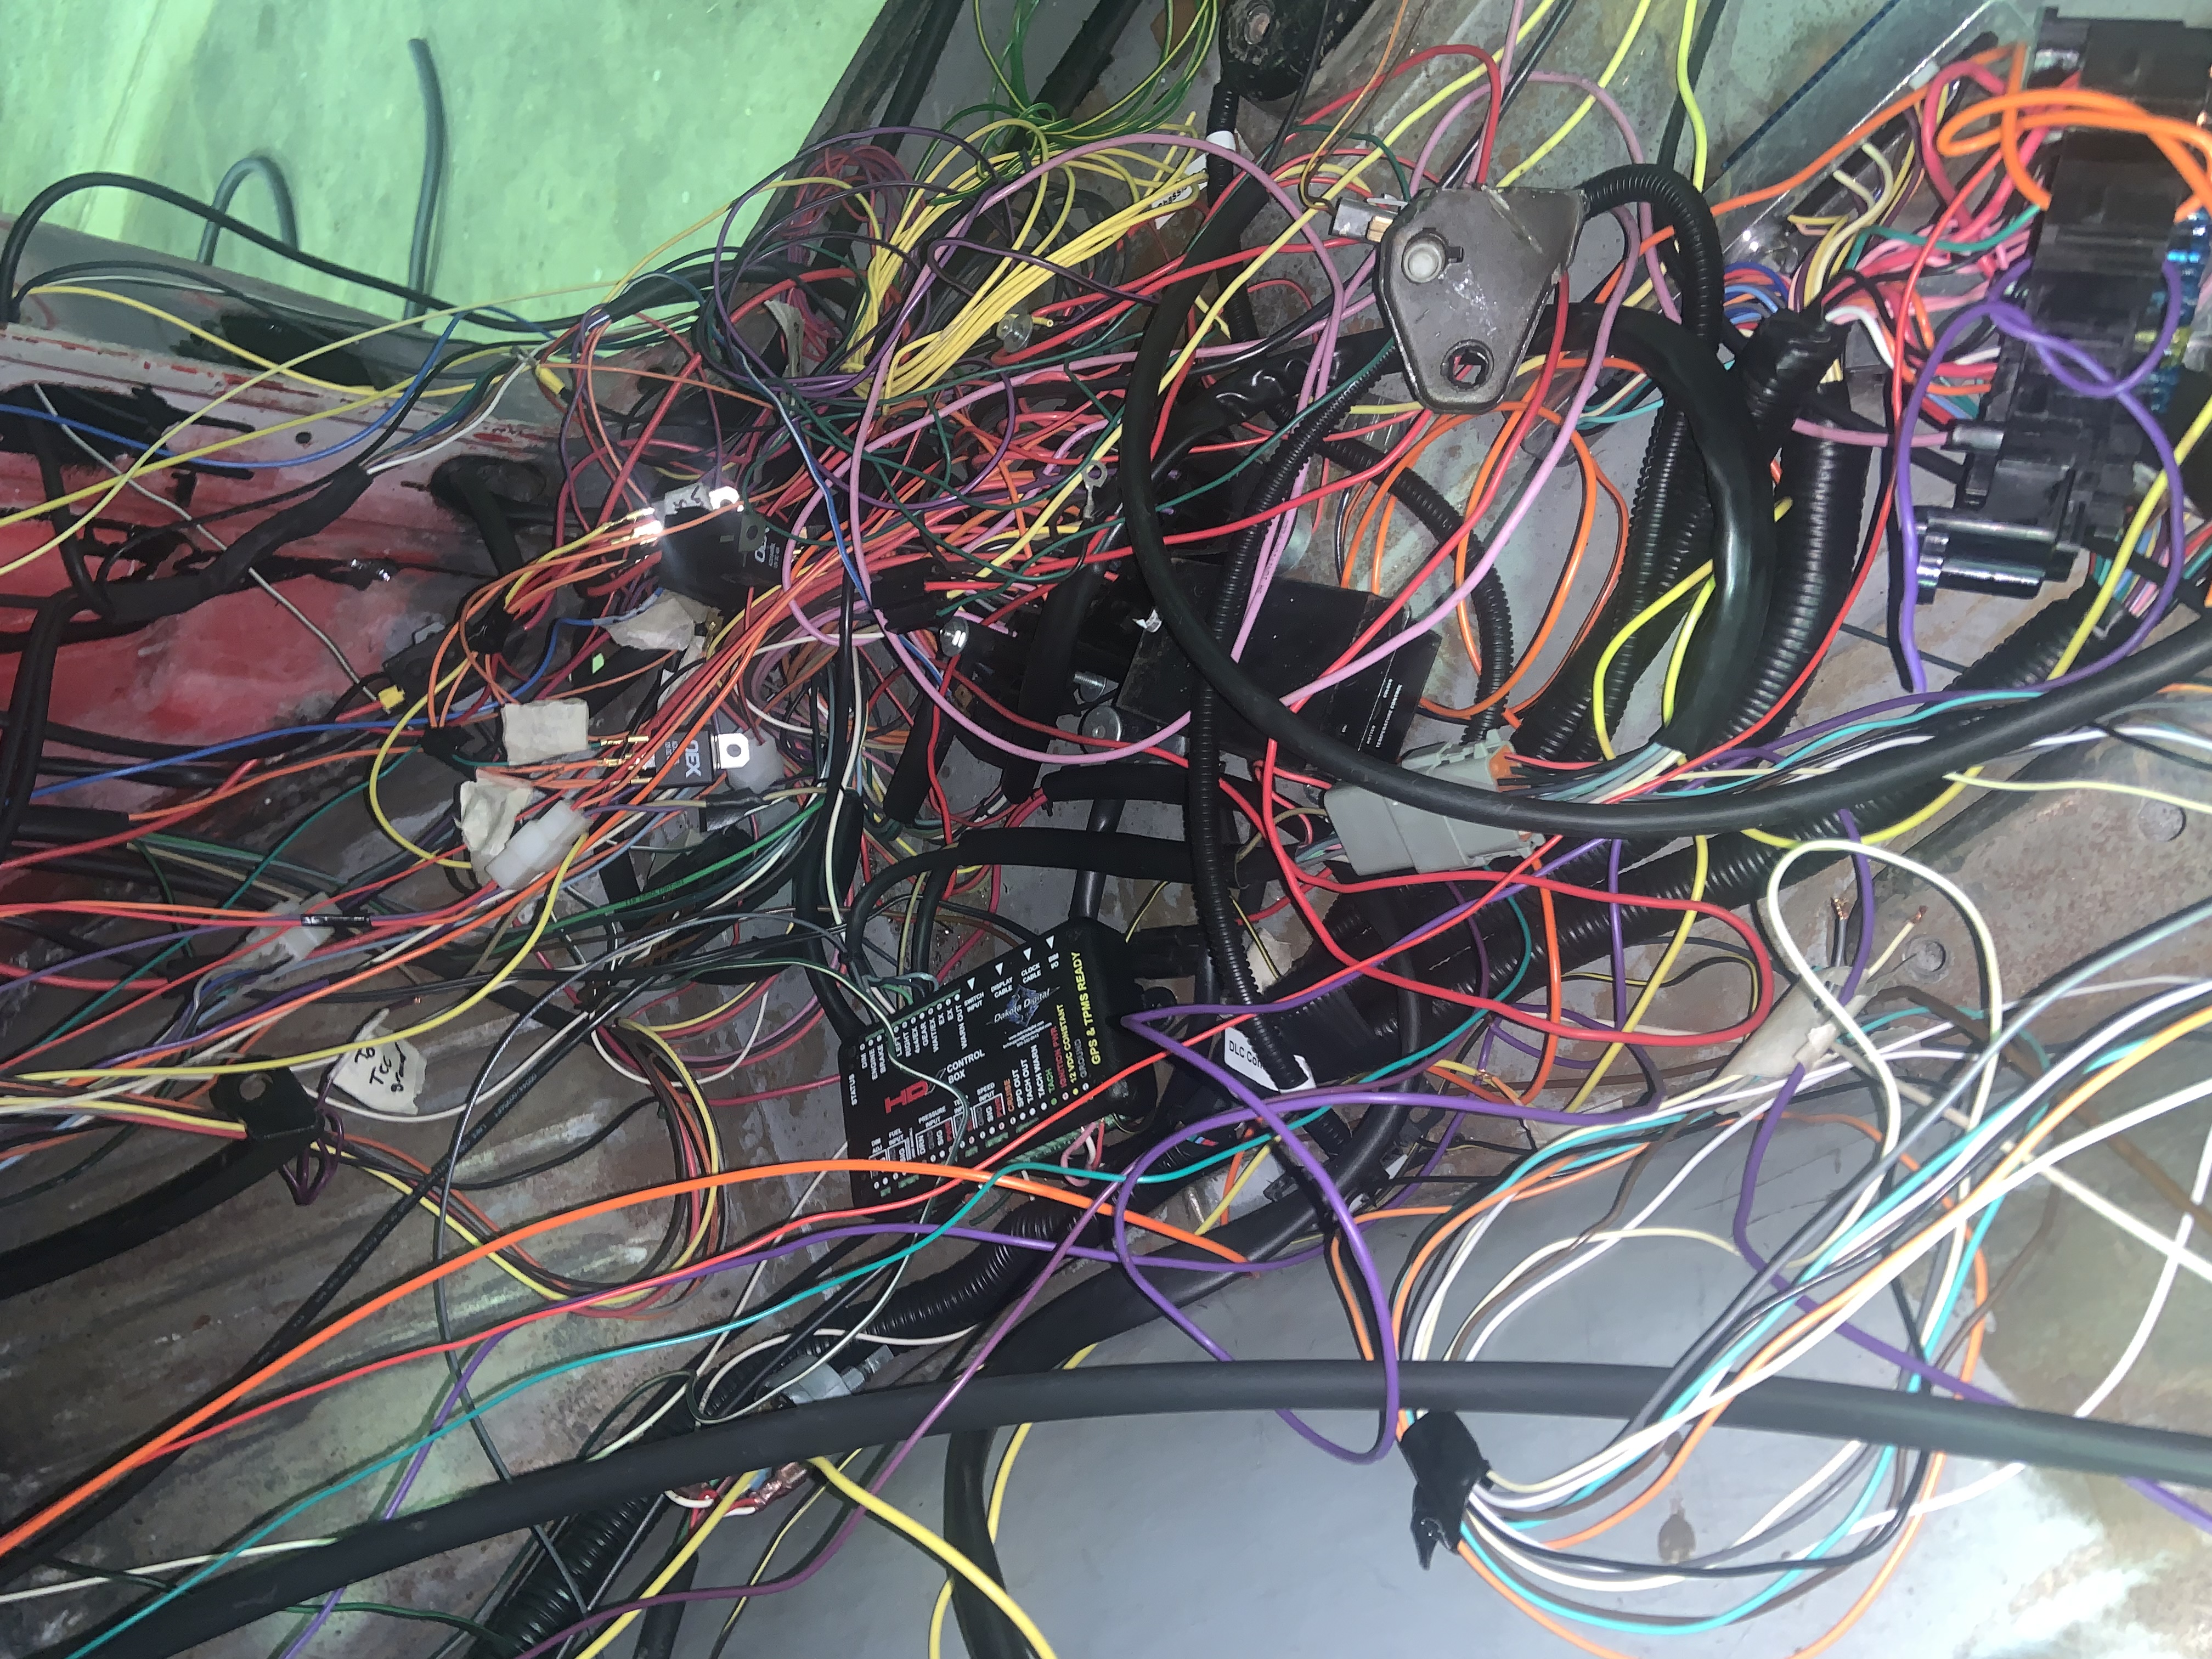
- 49EF5914-F7A0-4CA9-B98E-95399B8FE40F.jpeg (3.78 MiB) Viewed 2201 times
Bloody hell, my mate said why I am away can you start tidying up the wires.

this has taken me 8 hours to untangle his spaghetti


.
Re: LS1EK
Posted: Sun Mar 26, 2023 7:26 pm
by Blacky
Oh criminy, what a bloody mess .....

Re: LS1EK
Posted: Sun Mar 26, 2023 10:41 pm
by TAZ
Blacky wrote: Sun Mar 26, 2023 7:26 pm
Oh criminy, what a bloody mess .....

Bloody sparky’s hey! Always leaving their mess for others to clean up


Re: LS1EK
Posted: Sun Mar 26, 2023 11:32 pm
by Blacky
I kept mine loomed up the whole time , once it is a birds nest like that its waaaayy more work to tidy up
Re: LS1EK
Posted: Mon Mar 27, 2023 10:54 am
by FireKraka
Damn Taz I thought mine was a mess when I was building Frank
Re: LS1EK
Posted: Tue Mar 28, 2023 10:41 am
by Errol62
FireKraka wrote:Hi Melly as Harv said check your harness out fully, if your harness is really trash contact Vintage Wiring in Melbourne not cheap and if you need it right now you would need patience but very good quality I believe.
Wouldn't buy one again.
Sent from my SM-G781B using Tapatalk
Re: LS1EK
Posted: Wed Mar 29, 2023 2:18 am
by melly
Bloody hell Taz the work and manhours gone into that wiring job is gunna make the final product even more impressive... thanks for the feedback fellas- there was some handy tips in that article Harv and I'm not going to need anything in a hurry Neil so reckon I'll have the time to leverage off Blacky's expertise (after I check with him that its OK of course

). I'd like to modify to hide as much as i can. Taz is inspiring me.
cheers, melly
Re: LS1EK
Posted: Fri Apr 14, 2023 8:58 pm
by TAZ
Not much time to tidy up the wiring lately but I did get a small win. The temp sender that was supplied for the gauges used a reducer which placed it only a few mm off the steering joint.
Did some googling and found a supplier who could supply one with the correct thread. Arrived today and fitted tonight, no more clearance issues.
A small win but I will take it.