V8EK4us- 383 SBC,4 link,Torana f/e - 12 months on...

Post photos of your pride and joy, or updates on your rebuild!

Moderators: reidy, Blacky

Finny
Posts: 1895
Joined: Tue Mar 18, 2008 10:30 pm
State: QLD
Location: Brisbane North
Contact:

Post by Finny »

Tough looking is an understatement.. 8) 8) 8) 8)

Love to see it in the flesh when finished. :shock:

Best of luck in getting it ready for the 2009 Nationals. :D
Image
IT's LIKE WATCHING DRUNK MONKEYS TRYING TO HUMP A FOOTBALL.
mrs ratbox

Post by mrs ratbox »

he said he can early in the topic AND can have a supercharger on the 350 if he chooses to

i'm surprised every body with modified cars doesn't live in N.T. :shock: but we can swim in our rivers :wink: :lol:
FB MAD
Posts: 2725
Joined: Thu Jun 30, 2005 7:59 pm
State: NOT ENTERED
Location: Upper Hunter N.S.W

Post by FB MAD »

:roll: The way he's been cruising through this build,he'll have it ready this weekend!! :lol:
I can't think what to write here so this will do.
mrs ratbox

Post by mrs ratbox »

V8EK4us wrote: Ratbox, :shock: :shock: :shock: :shock: you are a certified worry! :lol: :lol: :lol: :lol: :lol: :lol: :lol: :lol: :lol: the world would be a boring place without it's "Ratboxes
:lol: :lol: not real sure if i brake the rules but i certainly will give them a good bend from time to time :wink: :shock: :D

the way i look at it some numbskull with no idea makes these rules up so i'll bend 'em :twisted: :twisted:

classic egzample, other night on the news a guy i know is now after many years getting in the sh!t for ridding his motor bike with his dog on the petrol tank, the guy putting the RTA's point across was some weasley looking nerd who's prolly never been near a motor bike :roll:

AS HAS BEEN MENTIONED BEFORE GOV DEPT'S KEEP AN EYE ON PLACES LIKE THIS IF THERE WAS AN EMOTICON FOR FLIPPING THE BIRD INSERT HERE, YOU PEN PUSHING IDIOTS HAVE NO IDEA
User avatar
V8EK4us
Posts: 1541
Joined: Sat Feb 09, 2008 12:12 am
State: NOT ENTERED
Location: Mildura - Vic

Post by V8EK4us »

Thanks guys,
Look what arrived today 8) 8) 8) . Couldn't help myself, I had to start putting it together :D :D

Image

Image
my70wg
Posts: 982
Joined: Thu Jan 22, 2009 7:06 pm
State: NOT ENTERED
Location: dapto

Post by my70wg »

thats the weirdest looking grey motor iv ever seen :shock: :shock: :shock: :wink:
User avatar
V8EK4us
Posts: 1541
Joined: Sat Feb 09, 2008 12:12 am
State: NOT ENTERED
Location: Mildura - Vic

Post by V8EK4us »

my70wg wrote:thats the weirdest looking grey motor iv ever seen :shock: :shock: :shock: :wink:
:lol: :lol: :lol: :lol: :lol: :lol: :lol: :lol: :lol: It's just the colour that makes it look different :shock: :roll: :wink: :wink:
mrs ratbox

Post by mrs ratbox »

did you get my PM
User avatar
V8EK4us
Posts: 1541
Joined: Sat Feb 09, 2008 12:12 am
State: NOT ENTERED
Location: Mildura - Vic

Post by V8EK4us »

Yeh Ratbox, thanks for the badge, your are a legend mate! 8)
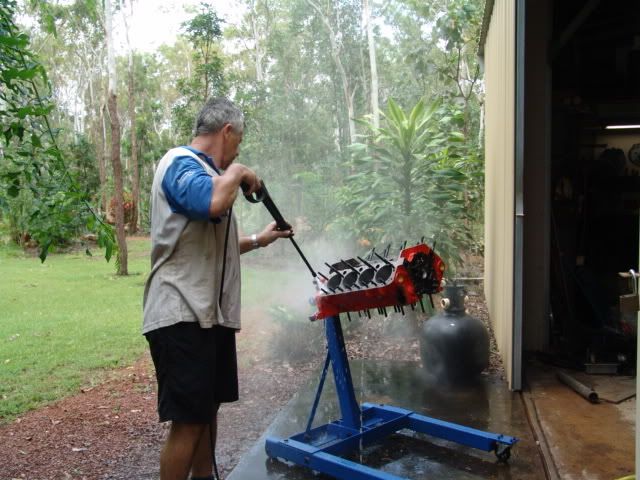
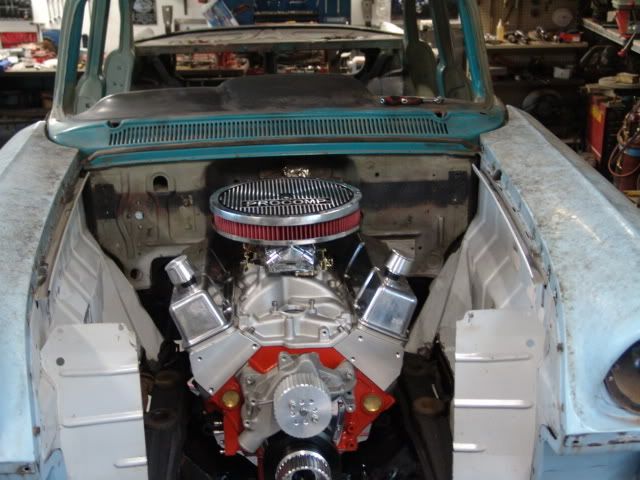
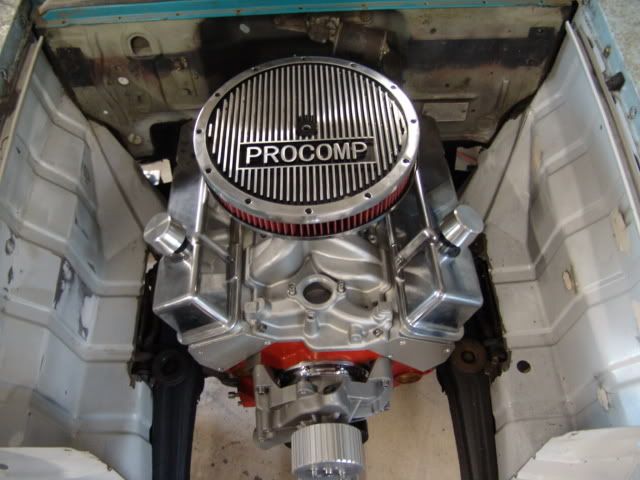
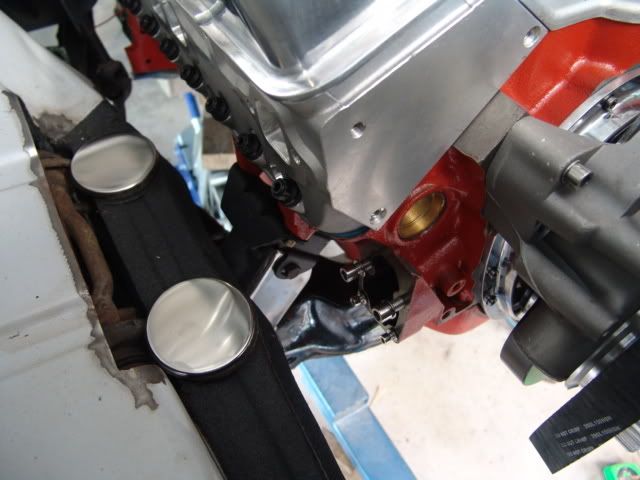
Update on the motor :D .
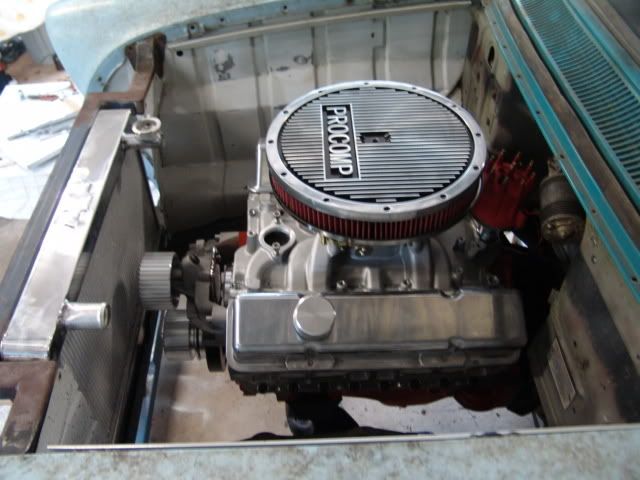
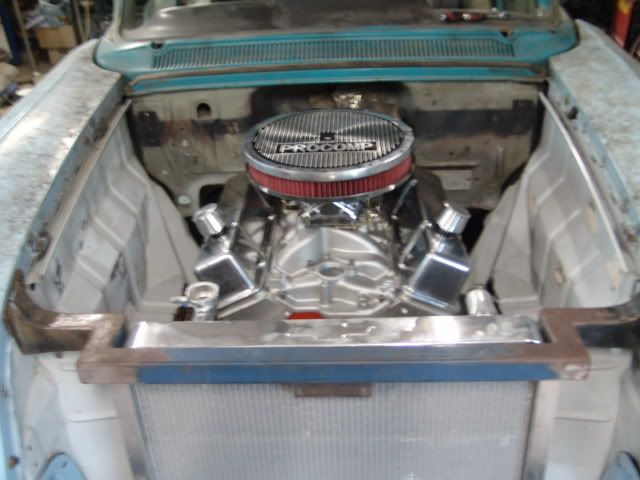
I had to do some Die grinding work on the block today :roll: , then clean the block and crank out before reassembly. The motor will initially be set up like this (as per photo) for bedding in and initial dyno check, then (hopefully) the secret weapons will be added if everything checks out OK :wink: . The Main bearing bolts have been replaced with studs and 12 points to help hold her together when the next stage gets bolted on. Heads are CNC ported Alloy with S/S valves, ignition is 6AL.
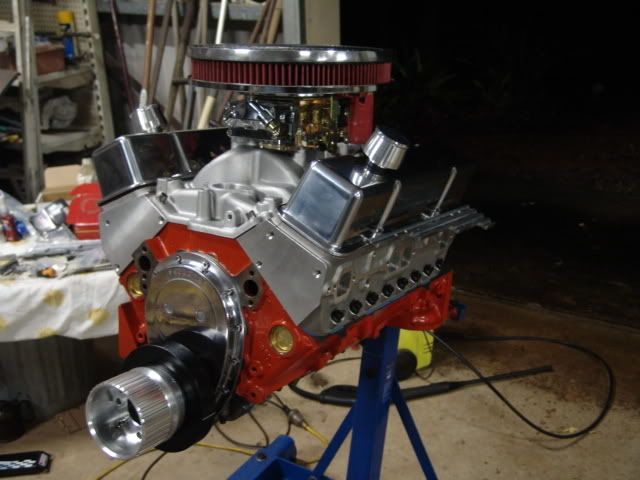
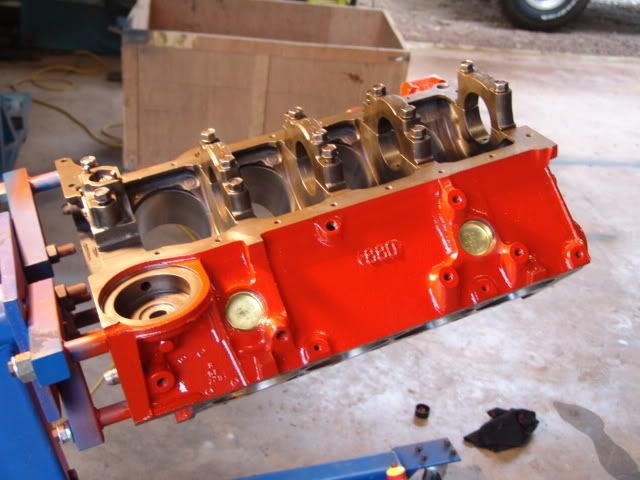
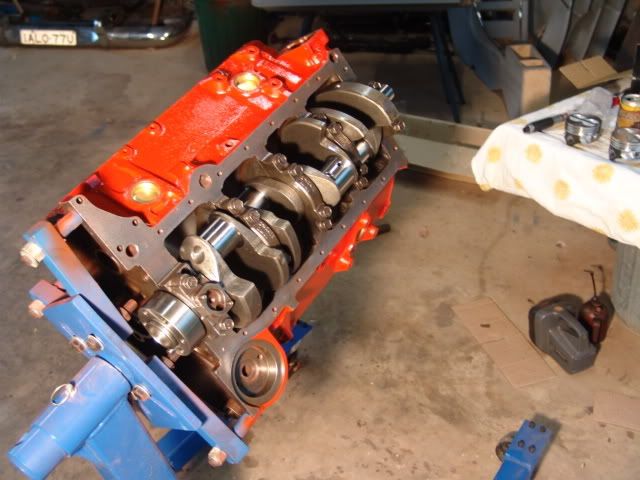
Crank, pistons, rings, heads etc all final fitted and bolts tensioned down.
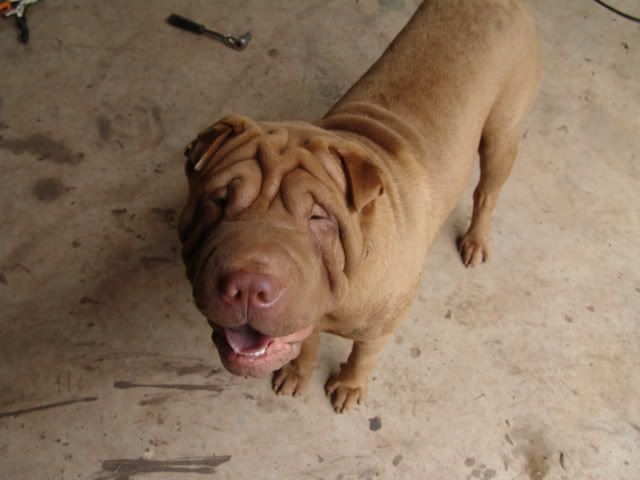
Image

Image


The dog helped out :roll: :roll: his name is ... believe it or not "Chevy", he is a 8 month old Shar-Pei and has a head like a "half eaten pastie" ....... nearly got as many wrinkles as me :lol: :lol: :lol: :lol:

Image
Last edited by V8EK4us on Sat Feb 28, 2009 8:01 pm, edited 1 time in total.
Trev
Posts: 7897
Joined: Thu Apr 15, 2004 6:43 pm
State: NOT ENTERED
Location: Wonthaggi

Post by Trev »

I think if I had a dog like that it would be called "Scrotum"! Don't know why :lol: .
I hope you got more tension on the engine bolts the there is on "Chevie's" face skin :roll: , Trev 8) .
[img]http://i47.photobucket.com/albums/f177/trevwood/WOOFTOsmall.jpg[/img]
Woofto Car Club Member No3
User avatar
V8EK4us
Posts: 1541
Joined: Sat Feb 09, 2008 12:12 am
State: NOT ENTERED
Location: Mildura - Vic

Post by V8EK4us »

Trev wrote:I think if I had a dog like that it would be called "Scrotum"! Don't know why :lol: .
I hope you got more tension on the engine bolts the there is on "Chevie's" face skin :roll: , Trev 8) .
:shock: :shock: :shock: :shock: I don't think a scrotums got that many wrinkles ....... :lol: :lol: :lol: :lol: :lol: :lol: :lol: :lol: :lol: :lol:
User avatar
V8EK4us
Posts: 1541
Joined: Sat Feb 09, 2008 12:12 am
State: NOT ENTERED
Location: Mildura - Vic

Post by V8EK4us »

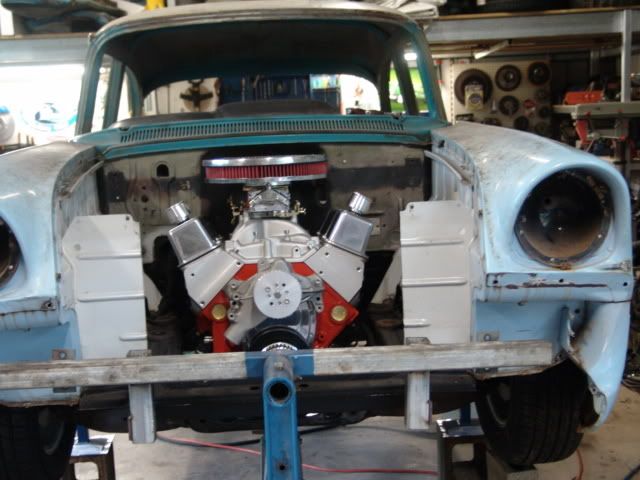
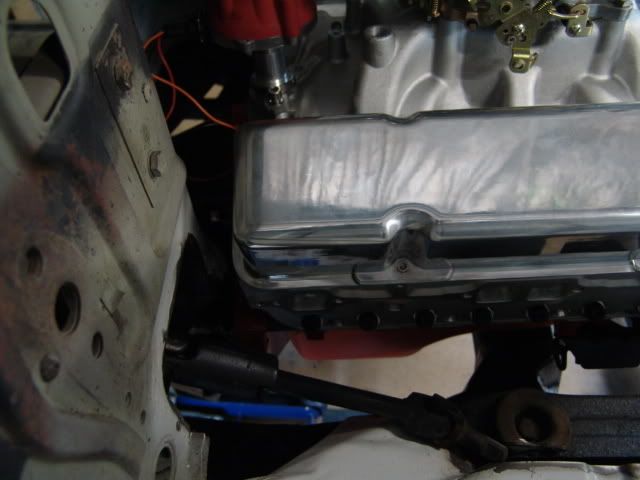
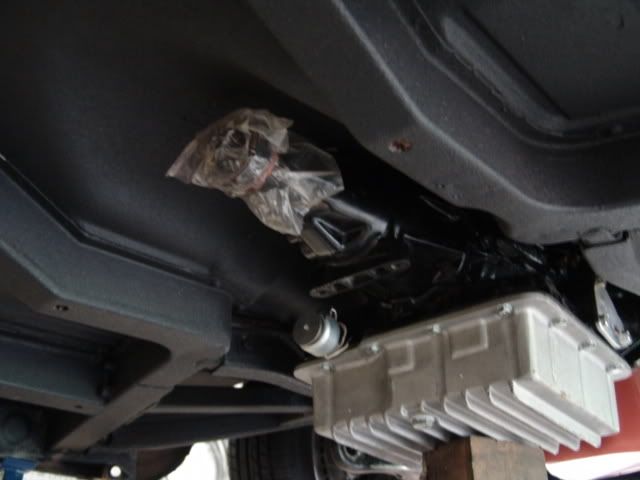
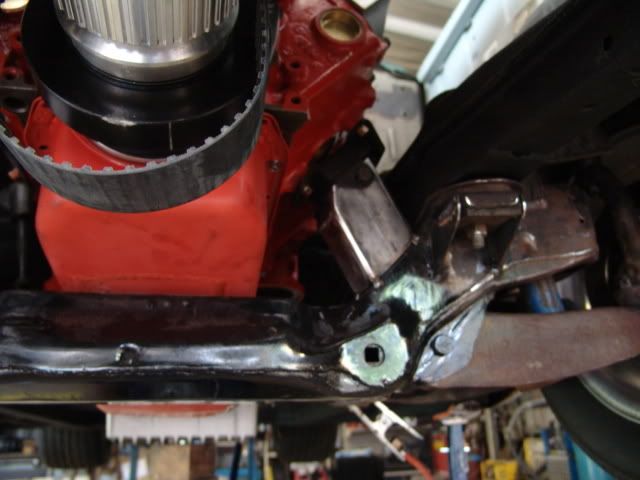
Motor and Powerglide in for prefit and mount fabrication. Shifting the radiator forward was well worth it, I have heaps of clearance on the firewall and radiator even running the Gilmer drive pulley system and long water pump.
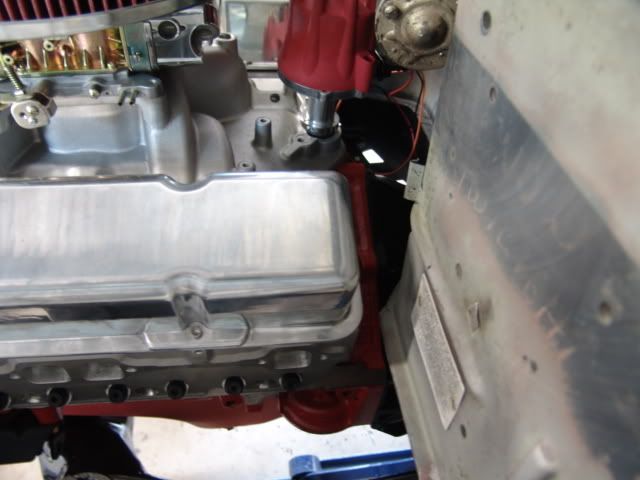
Good clearance for distributor and I can get my hand between Powerglide and tunnel :D :D :D . Only "concern" at the moment is the deep finned pan on the powerglide, it looks good and all, but at the current ride it only has 110mm clearance from the road :cry: .


Image

Image

Image


The new steering uni joints and intermediate shaft (polished Borgeson setup) will go straight fron Commodore column to Torana rack under the headers and inside the engine mounts.

Image

Image

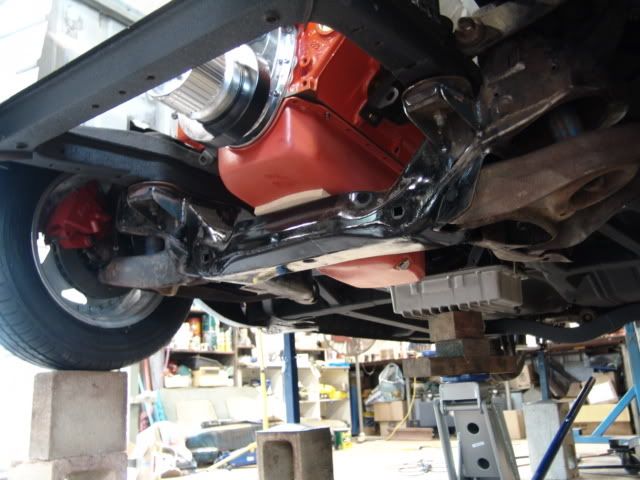
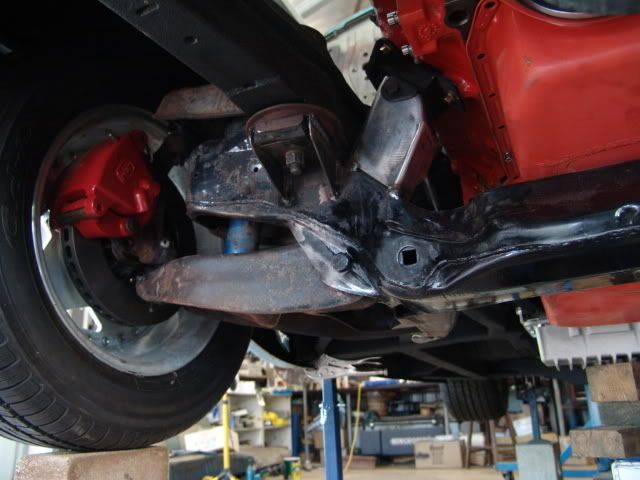
Below is a pic which also shows the LH torana frontend, P76 discs (modified) and HQ calipers (Heinz Variety!!).
Image


May have to change pickup and pan to a smaller one (don't want to plough this into the ground :shock: :shock: :shock: ).

Image

Sump height:
Image

Image

Image
User avatar
V8EK4us
Posts: 1541
Joined: Sat Feb 09, 2008 12:12 am
State: NOT ENTERED
Location: Mildura - Vic

Post by V8EK4us »

Made up the engine mounts - Chev SB to LH/LX Torana frontend.

Had to notch out a section at the rear of the right hand mount so the Torrie Rack pinion shaft clears and has a straight run to the Commodore column. Sump is a spare so I didn't have to worry about knocking it around during prefit.
Mounts are only tacked, will be removed and fully welded prior to 2 pack painting.

Image

This is the notched area for the r & P shaft clearance. (pic below)

Image

Image

Image

Image
Brodie
Posts: 447
Joined: Tue Feb 24, 2009 12:43 am
State: NOT ENTERED
Location: Perth, W.A.

Post by Brodie »

im lovin this build.
gotta be honest every time i get on here this is the first thing i look at :)

keep it up man 8)

cheers,
Brodie
[img]http://i716.photobucket.com/albums/ww162/brodie_mitchell/av-49951.gif[/img]
User avatar
Cal
Posts: 2796
Joined: Sat Nov 08, 2008 8:07 pm
State: NOT ENTERED
Location: Sydney

Post by Cal »

Your god given talent never ceases to amaze me :shock: :shock:


I shit myself at changing a simple gasket of a fuel pump....watching you undertake this build makes me want to hide in a corner in shame :oops:
Post Reply