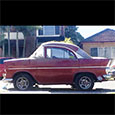
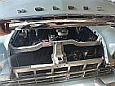
Yeah went a bit crazy with my patchwork.
Ol' Rusty - FB/EK Sedan
- funkyscooter
- Posts: 708
- Joined: Wed Aug 16, 2017 8:12 am
- State: NSW
- Location: Sydney
Re: Ol' Rusty - FB/EK Sedan
Flat bar - now that sounds like a good plan!
Yeah went a bit crazy with my patchwork.

Yeah went a bit crazy with my patchwork.
Scott
(Not so rusty) Ol' Rusty - FB/EK Sedan
Re: Ol' Rusty - FB/EK Sedan
Hey Scott
I cut those pieces out widened the area for my radiator and then welded them back in to retain a bit of an original look there, not that my Ute is very original
Neil
I cut those pieces out widened the area for my radiator and then welded them back in to retain a bit of an original look there, not that my Ute is very original
Neil
Member of WA FB/EK Car Club
Frankenstein EK V6 Ute
The Reverend FB Station Wagon Project
Frankenstein EK V6 Ute
The Reverend FB Station Wagon Project
Re: Ol' Rusty - FB/EK Sedan
Mine had been butchered with oxy. More melted than cut. I just trimmed and tidied up. Once the radiator is bolted in lateral support isn't an issue really. The top bar does most of the work.
There was however a dealer option heavy duty cooling option which included bolting diagonal braces across the front of the radiator. The braces were then welded together where they crossed. Would have provided transverse bracing rather than lateral.
FB ute driver, EK van project
There was however a dealer option heavy duty cooling option which included bolting diagonal braces across the front of the radiator. The braces were then welded together where they crossed. Would have provided transverse bracing rather than lateral.
FB ute driver, EK van project
getting my FB ute on the road
EK van on rotisserie
- funkyscooter
- Posts: 708
- Joined: Wed Aug 16, 2017 8:12 am
- State: NSW
- Location: Sydney
Re: Ol' Rusty - FB/EK Sedan
Thanks for the help and advice!My concern is vibration and drumming if I open it up and if that in turn word stress the radiator. Might try a hybrid Blacky/Neil approach- try not to butcher it too much and add a bit of support.
Scott
Scott
Scott
(Not so rusty) Ol' Rusty - FB/EK Sedan
Re: Ol' Rusty - FB/EK Sedan
This is what mine looked like after I modified it Scott
Neil
Member of WA FB/EK Car Club
Frankenstein EK V6 Ute
The Reverend FB Station Wagon Project
Frankenstein EK V6 Ute
The Reverend FB Station Wagon Project
Re: Ol' Rusty - FB/EK Sedan
I cut back the side flaps on the wagon to suit the VL radiator. No bracing/reinforcing. By the time the radiator support is bolted on top, the flaps are pretty rigid.funkyscooter wrote: Tue Sep 14, 2021 11:59 am My concern is vibration and drumming if I open it up and if that in turn word stress the radiator.
Cheers,
Harv
327 Chev EK wagon, original EK ute for Number 1 Daughter, an FB sedan meth monster project and a BB/MD grey motored FED.
Re: Ol' Rusty - FB/EK Sedan
The horizontal swages also contribute to anti drumming and stiffness, more so than reinforcing the edge. Eventually I may tidy mine up with an 8mm 90 deg return in 18#.
FB ute driver, EK van project
getting my FB ute on the road
EK van on rotisserie
- funkyscooter
- Posts: 708
- Joined: Wed Aug 16, 2017 8:12 am
- State: NSW
- Location: Sydney
Re: Ol' Rusty - FB/EK Sedan
Thanks for posting Neil, that saved me a bunch of time searching for your build.
Looks the goods.
Scott
(Not so rusty) Ol' Rusty - FB/EK Sedan
- funkyscooter
- Posts: 708
- Joined: Wed Aug 16, 2017 8:12 am
- State: NSW
- Location: Sydney
Re: Ol' Rusty - FB/EK Sedan
Good to know Harv. My initial thought was to keep the swage lines (thanks for the term Clay) and delete the metal to open most of it up to the radiator. Might look cool (or lazy). Neil's set up looks good too. Got some new cutting wheels for the grinder and blades for the reciprocating saw, so something is going to be coming off soon either way.Harv wrote: Wed Sep 15, 2021 10:15 am
I cut back the side flaps on the wagon to suit the VL radiator. No bracing/reinforcing. By the time the radiator support is bolted on top, the flaps are pretty rigid.
Cheers,
Harv
Scott
(Not so rusty) Ol' Rusty - FB/EK Sedan
- funkyscooter
- Posts: 708
- Joined: Wed Aug 16, 2017 8:12 am
- State: NSW
- Location: Sydney
Re: Ol' Rusty - FB/EK Sedan
Finished welding the other day. Couple of lessons learnt. When you blow through, stop, just stop. My first reaction is to try and fill the hole while its still hot and I’m frustrated, and all I do is end up filling it with 3 times the metal needed. Second lesson is to make sure that there is always 1mm gaps around repair pieces. I had a few which where fitted before others had been welded in (and expanded), and although the latter piece just fit, inevitably it expanded too when welding and lead to some warping.
Flipped it over to fill and dress the back first. More lessons. Don’t fill and then dress, roughly dress and then work out what needs to be filled. I got trigger happy and pretty much ended up running over most of the weld. This is the pre fill. Don’t have a pic of the post fill, but it wasn’t pretty and I think in hind sight more than 50% wasn’t needed.
Lots of grinding later. 40 grit flap, 80 grit, 120 and then finished with the wire wheel. Some of the work is in places that the grinder can’t reach so that is laboriously done with 60 grit in the powerfile after hitting the high spots with the die grinder. And after all that extra filling, still had about 10 pin holes to fill.
Same back on the inside. This time just dress - no need to fill as there is enough metal there already and all this pin holes have been cover on the other side. More areas on this side that the grinder could not reach so the powerfile got a work out.
It ain’t pretty, but its good metal now and looks factoryesque.
Scott
(Not so rusty) Ol' Rusty - FB/EK Sedan
-
In the Shed
- Posts: 2266
- Joined: Wed May 16, 2012 10:18 pm
- State: SA
- Location: South Australia
Re: Ol' Rusty - FB/EK Sedan
Nice work Scott
Some practical learning there first hand. That will no doubt serve you well as you progress. Others who follow in the future will appreciate your efforts and progress posts.
Stephen
Some practical learning there first hand. That will no doubt serve you well as you progress. Others who follow in the future will appreciate your efforts and progress posts.
Stephen
A day in the shed beats a day at work!
Re: Ol' Rusty - FB/EK Sedan
Looks like a very good job to me Scott. So clean.
FB ute driver, EK van project
getting my FB ute on the road
EK van on rotisserie
Re: Ol' Rusty - FB/EK Sedan
I hate to think how many hours went into that

I started with nothing and still have most of it left.
Foundation member #61 of FB/EK Holden club of W.A.
- funkyscooter
- Posts: 708
- Joined: Wed Aug 16, 2017 8:12 am
- State: NSW
- Location: Sydney
Re: Ol' Rusty - FB/EK Sedan
Thanks Stephen, Clay and Blacky - very fiddly work. There is no quick way to get it done with all those curves. Reckon I spent 8 hours across 4 days cleaning up the mess I made with the welder. With better skills/patience/tools that should have been about 4 hours work. Its done now, time to start cutting the front for the radiator........
Scott
(Not so rusty) Ol' Rusty - FB/EK Sedan
- funkyscooter
- Posts: 708
- Joined: Wed Aug 16, 2017 8:12 am
- State: NSW
- Location: Sydney
Re: Ol' Rusty - FB/EK Sedan
.... and almost done. Half hour of procratination - should I :
a./ cut the ends off and slide them across and inch and re - weld
b./ just cut straight though, then cut the swage line ends out of the waste and weld them back in (geez I like to make things hard)
c./ cut around the swage lines as I previously mentioned.
Decision made based on what would require the least amount of welding and grinding. c./
Cut straight down through to each of the swage lines, and at a 45º angle up from the bottom. Then drilled holes at the end of the lines to get the reciprocating saw in. An hour later after a quick wire brush on the left, shaping the ends of the lines with the powerfile and die grinder in those hard to reach corners. Quick test fit - still got to clean up the back side but looks almost like its meant to be there.
a./ cut the ends off and slide them across and inch and re - weld
b./ just cut straight though, then cut the swage line ends out of the waste and weld them back in (geez I like to make things hard)
c./ cut around the swage lines as I previously mentioned.
Decision made based on what would require the least amount of welding and grinding. c./
Cut straight down through to each of the swage lines, and at a 45º angle up from the bottom. Then drilled holes at the end of the lines to get the reciprocating saw in. An hour later after a quick wire brush on the left, shaping the ends of the lines with the powerfile and die grinder in those hard to reach corners. Quick test fit - still got to clean up the back side but looks almost like its meant to be there.
Scott
(Not so rusty) Ol' Rusty - FB/EK Sedan