Page 3 of 59
Posted: Fri Apr 11, 2008 8:19 pm
by karsten
i wouldnt worry d,s mines not done yet either,,,,,,,,,,,,,,,,,,,,,,,,but its getin closer

cant wait

Posted: Fri Apr 11, 2008 8:28 pm
by Craig
Lets see I can swing past Laidly then to Logan OH and I better pick up Finny too seeings as we have hijaked his thread

Posted: Fri Apr 11, 2008 8:48 pm
by karsten
thanks craig can you drop me home to?????? then i can crawl up the stairs when i sober up from drinking to much rum
what sort of change do the tripples make excitment wise???
i like
Posted: Fri Apr 11, 2008 9:08 pm
by Craig
They need a good overhaul at the moment but with the cam and head work makes the Grey OK
(sorry too much beer or is there such a thing) but in saying that it starts easily, runs great and looks very cool
Posted: Fri Apr 11, 2008 10:39 pm
by Sunnymick
Hi guys gonna start a thread in 'Whats happening in Qld' to get our Beer arvo happening. There is enough of us to get it going. Check it out. Thanks Finny for letting us get social.
Posted: Mon Apr 28, 2008 9:21 pm
by Finny
Well I've made a start. Thought I'd get it going and stopping first. Fairly important I thought.
Stopped the first and only time I ran it (after trying to get it started for some time) and couldn't get it going again. Seemed to be some fuel and oil under the fuel pump, and the carby has been uncovered for quite some time so I assume full of gunk. Also the water leakage. Didn't like brown all over the place.
Well after 3 attempts got the new water pump in and working. PS, replacement pumps don't always perfectly line up. Had to cut my own gasket for the thermostat. Could only get one bolt in. Had to file away a few mm off the bottom to get it to fit, then after putting everything back in, it leaked when filled. Remove it all again and took off the backing plate (which was already assembled), put sealer in there also, reinstalled everything and finally, all ok. Thought I'd also disconnect the after market heater for the time being. All up the whole job only took 5 hours !!!!
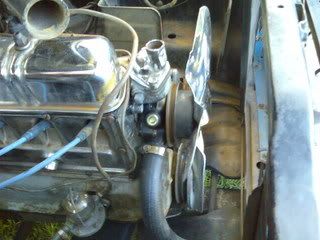
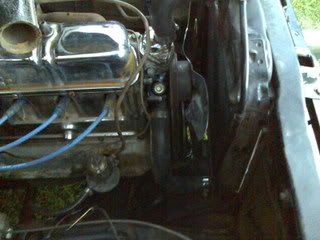
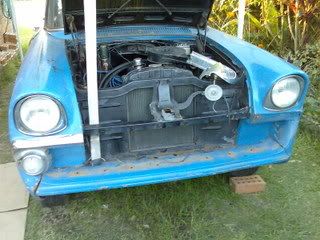
Well the next day moved onto the Fuel pump and carby. No fuel showing in the bowl, but it was in the tank. The line from the fuel pump to the carby is not original, think its off a 186, doesn't quite fit as you can see in the photos (was also in the way of the thermostat), and was pretty badly butchered. Cleaned it all up, replaced the fuel bowl cork gasket, and it finally filled the bowl. Didn't want to mess with the Carby too much, so blasted it with carby cleaner. Chrome fan and housing look OK.
Finally it's running !!!!!!! Not real well (coughs and splutters and backfires through the carby, but its going, and I'll work on it from there).
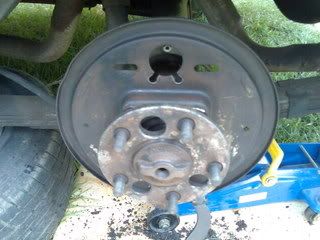
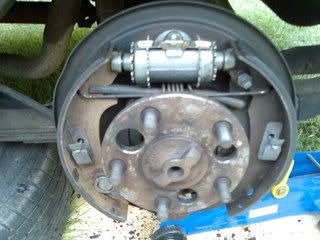
Had a bit of time left, so started on the rear brakes. Fluid leaking down the inside of both rear wheels, so I knew the cylinders were shot.
I remembered it was hard to get the springs off, but getting them on again was a major effort. This is the before photo.
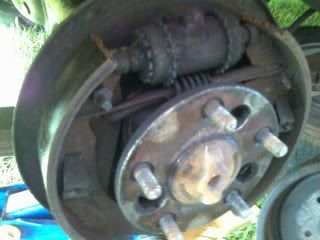
Well one wheel done, and one to go. Tomorrow is another day.
Slow but steady, and lots still to be done.
Posted: Tue Apr 29, 2008 12:18 pm
by karsten
good stuff finny ,,you just need to pull it apart and check everythings clean and working freely,,, mine was backfireing through carb but has got better sticky valve ,,,there was some rear cylinders on ebay
Posted: Fri May 09, 2008 10:36 pm
by Finny
Well the flu has slowed things down a bit (always get ill when on holidays) and Murphy's Law has been in full swing. Each stage seems to find some new challenge. Got both rear wheel cylinders out and new ones in and decided to bleed the brakes.
Back was fine, but couldn't get the bleeder valve to turn on the front. After lots of RP7 and elbow grease still no go. Pulled it all down and found the front cylinder was frozen anyhow. Tried to take it out, but also couldn't get the brake line to undo. On the third day, finally got the line connection to give, (using a metre long monkey wrench on the cylinder and an extension pipe on the spanner) only to find I also need to remove the flexible hose at the other end. Yep, it's locked solid as well, and now slightly burred, but still locked on. Next stage is to hit it with heat on one end and file both sides of the connection to get something to grip. Otherwise I'll need to cut the metal tube and get a new pipe made up.
In between waiting for each spraying of RP7 to penetrate, desided to start pulling the front down.
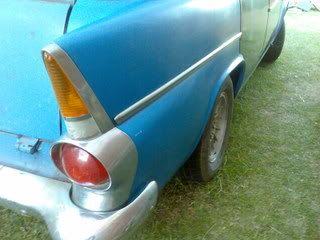
Then started to get rid of the fish oil off the panels, only did the back quarter panel. Doesn't look to bad.
Will get both the front guards off next, as I can see some rust up underneath the front end, which will need to get fixed.
Posted: Sat May 10, 2008 7:07 am
by strogger
Finny,
I struck similar issues when i did the brakes in my car.
I got the ****s and decided to replace all the problem lines with new pipes.
Metal lines were reasonbly cheap to get made, and the rubber line's were made while i waited.
Saved me a lot of busted knuckles and curse words.
Posted: Sat May 10, 2008 8:03 am
by Craig
Bloody domino effect comming along nicly though
Posted: Sun May 11, 2008 9:35 pm
by Finny
Well both the front wheel cylinders are out. The driver side was just a stubborn as the passengers side. At this stage I didn't need to cut the lines, so it should go back in OK. The cylinders looked good but the rubber seals were shot and the sleeves were not smooth. Got the bleed valve out and am a little concerned about rust under the bleed valves and if it will have any affect down the track.
Got started on removing the front guards. They certainly have a lot of bolts, the ones inside the doors were particularly well hidden, especially the one at the top. And only accessible with an extension added to the extension on the socket set. The question I did ask myself - What happens if I drop the bolt inside ? as I can't see any easy way to pick it up from the bottom if it was to fall..........
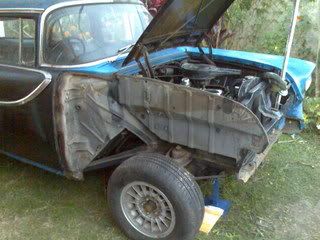
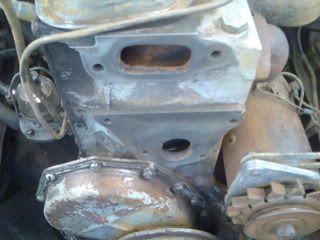
One guard off, and noticed a line towads the top of the firewall panel. Decided to dig a little.
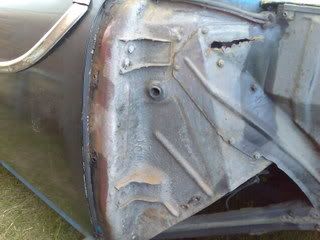
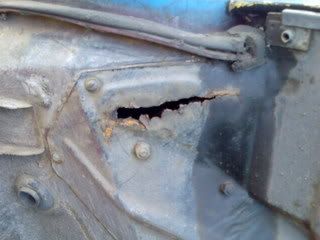
Looks like a bit of cutting and welding needed. Didn't see why this area was rusting, I assume it's the air intake chamber, but will see better when it's cut out.
I get the wheel cylinders off to be re-sleeved tomorrow and get a new Fuel line bent up at the same time. When the other guards off, I'll get the front end cleaned up so I can see exactly what needs to be replaced.
Posted: Mon May 12, 2008 11:16 am
by parisian62
Hi Finny,
yes if you drop the bolts inside they are very hard (impossible?) to retrieve. If you have rusty sills like mine they just fall out


When I removed my guards it was exactly the same as yours...rust...when i removed the front end those areas didn't have any paint...

regards
Stewart
Posted: Mon May 12, 2008 12:21 pm
by karsten
stick a rag in the bottom hole of the pillar and it stops the bolts going down the abyiss ,,,same when refitting as it is harder to get them in than out
Posted: Mon May 12, 2008 12:56 pm
by Finny
Thanks, good ideas. I was going to use some bluetack to hold the bolt, but I'll stick the rag in also. The other thought I had, if I lost one, was to use a magnet strip to pick it up again, and it would work much better off the rag.
Posted: Mon May 12, 2008 2:18 pm
by mrs ratbox
don't be concerned with the rust if anybody tells you there car has no rust in that spot it's been repaired before or they're a liar (not quite) but it would be very very very very very very very very rare
also check the rubber brake hoses as these swell from the inside and don't allow fluid through