Page 16 of 45
Re: Ol' Rusty - FB/EK Sedan
Posted: Tue Jul 06, 2021 6:16 am
by EK283
Great Job mate.
I think this is why my car has taken so long !! I just could not let any rust stay so it become an obsession !!
Even little pit marks got the chop or reweld and grind, 15 years of pure pleasure !!!
Regards Greg
Re: Ol' Rusty - FB/EK Sedan
Posted: Thu Jul 08, 2021 7:58 am
by funkyscooter
EK283 wrote: Tue Jul 06, 2021 6:16 am
Great Job mate.
I think this is why my car has taken so long !! I just could not let any rust stay so it become an obsession !!
Even little pit marks got the chop or reweld and grind, 15 years of pure pleasure !!!
Regards Greg
Great to hear you say that Greg - I was beginning to think I was a bit weird. There is definitely a satisfaction in knowing that you have got it out of the car.
So, gulp, here we go.
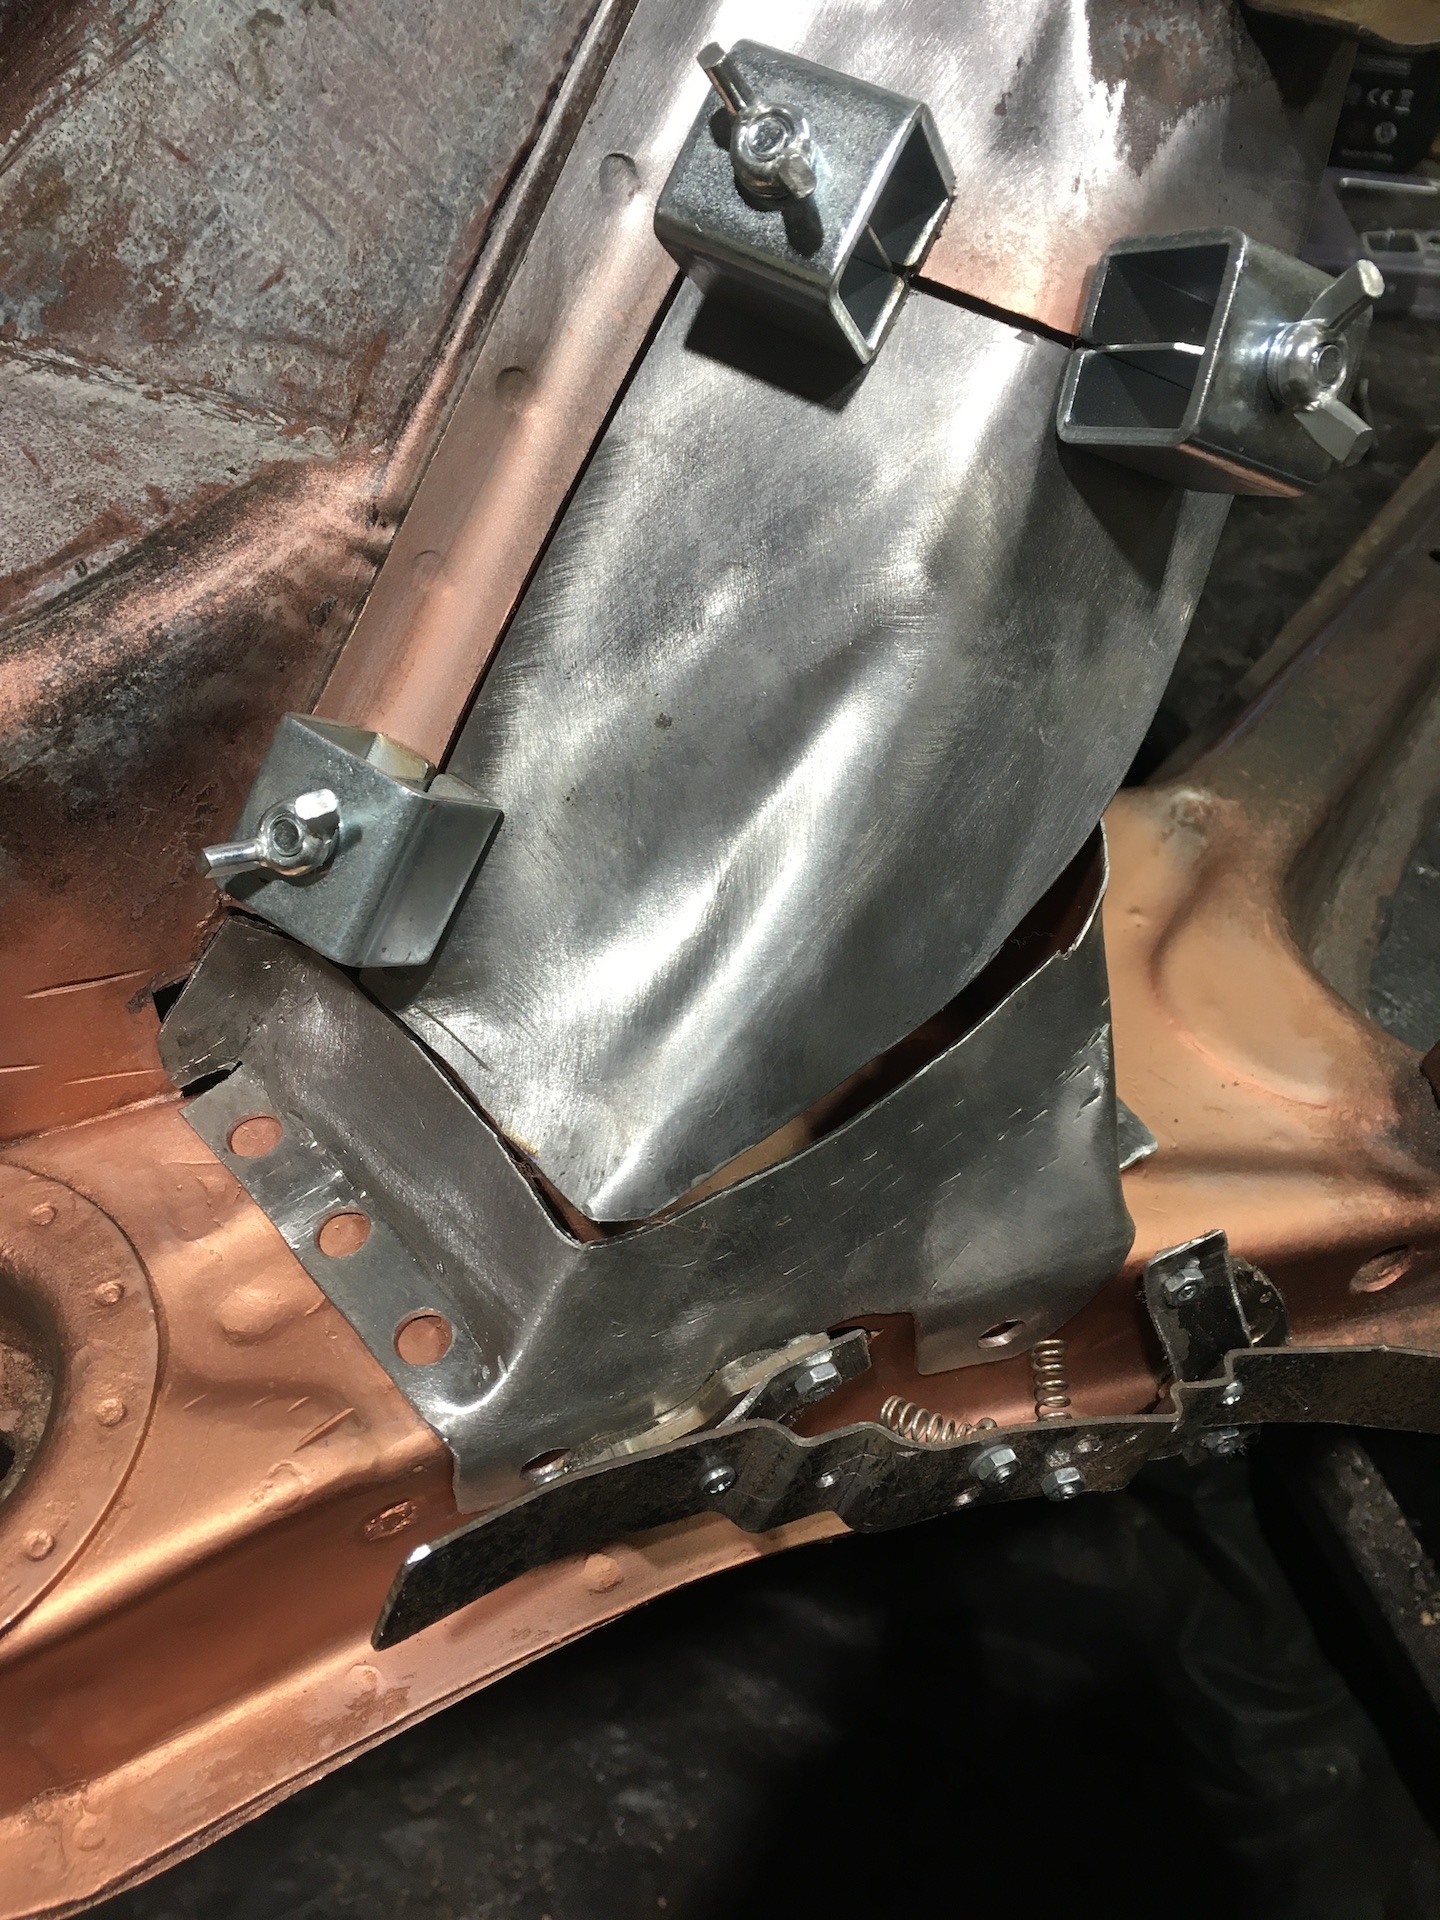
First - build a brace to keep the centre bolt hole of the upright in place. Its bolted into the frame so I can remove it temporarily if needed.
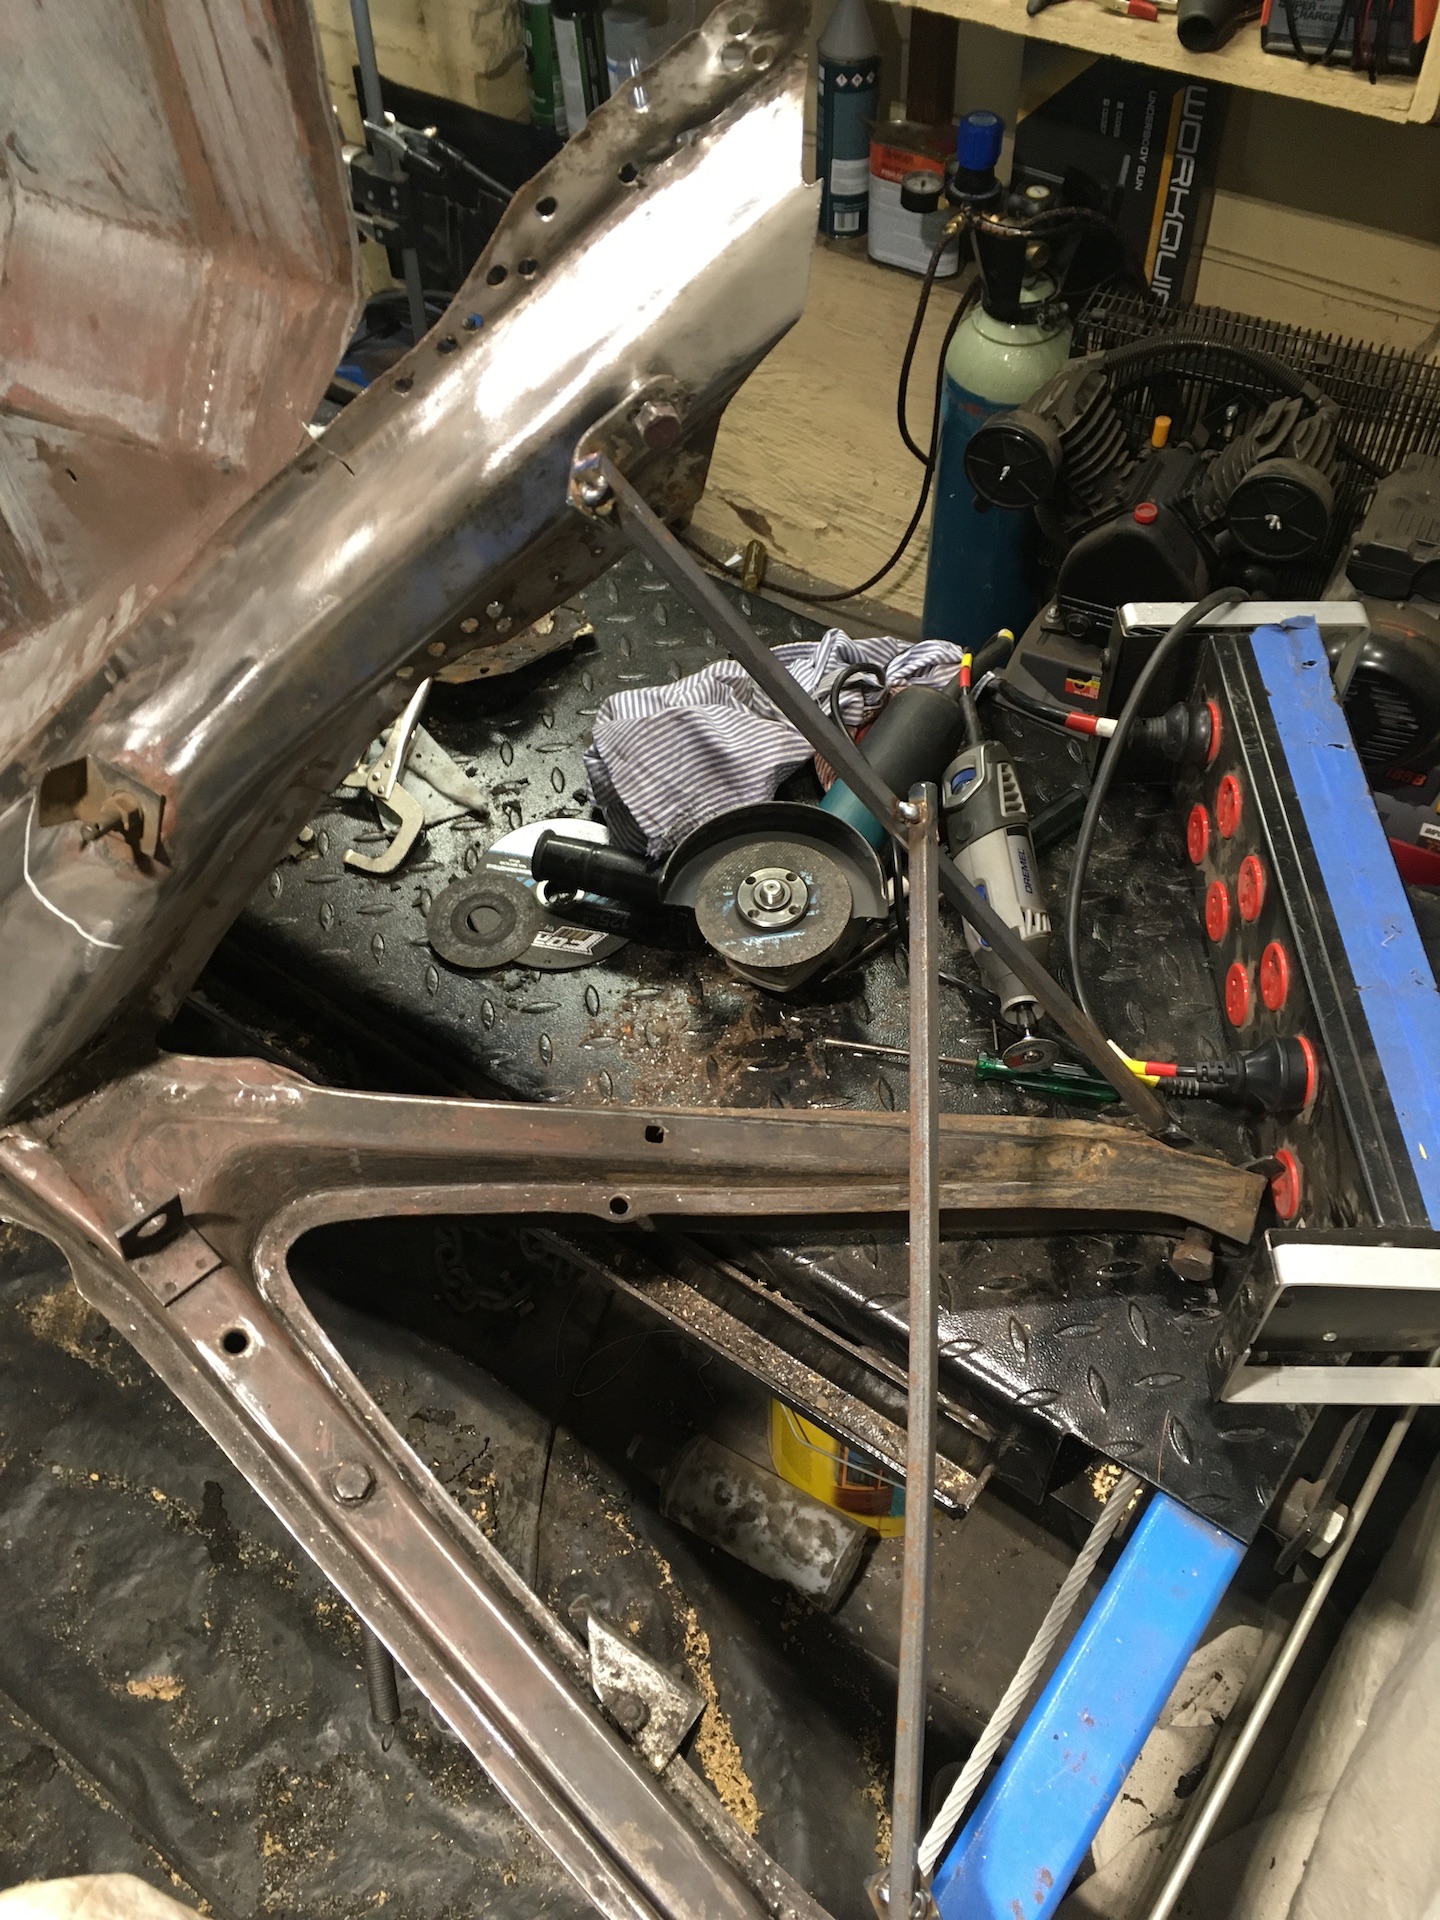
- IMG_8533.JPG (856.25 KiB) Viewed 825 times
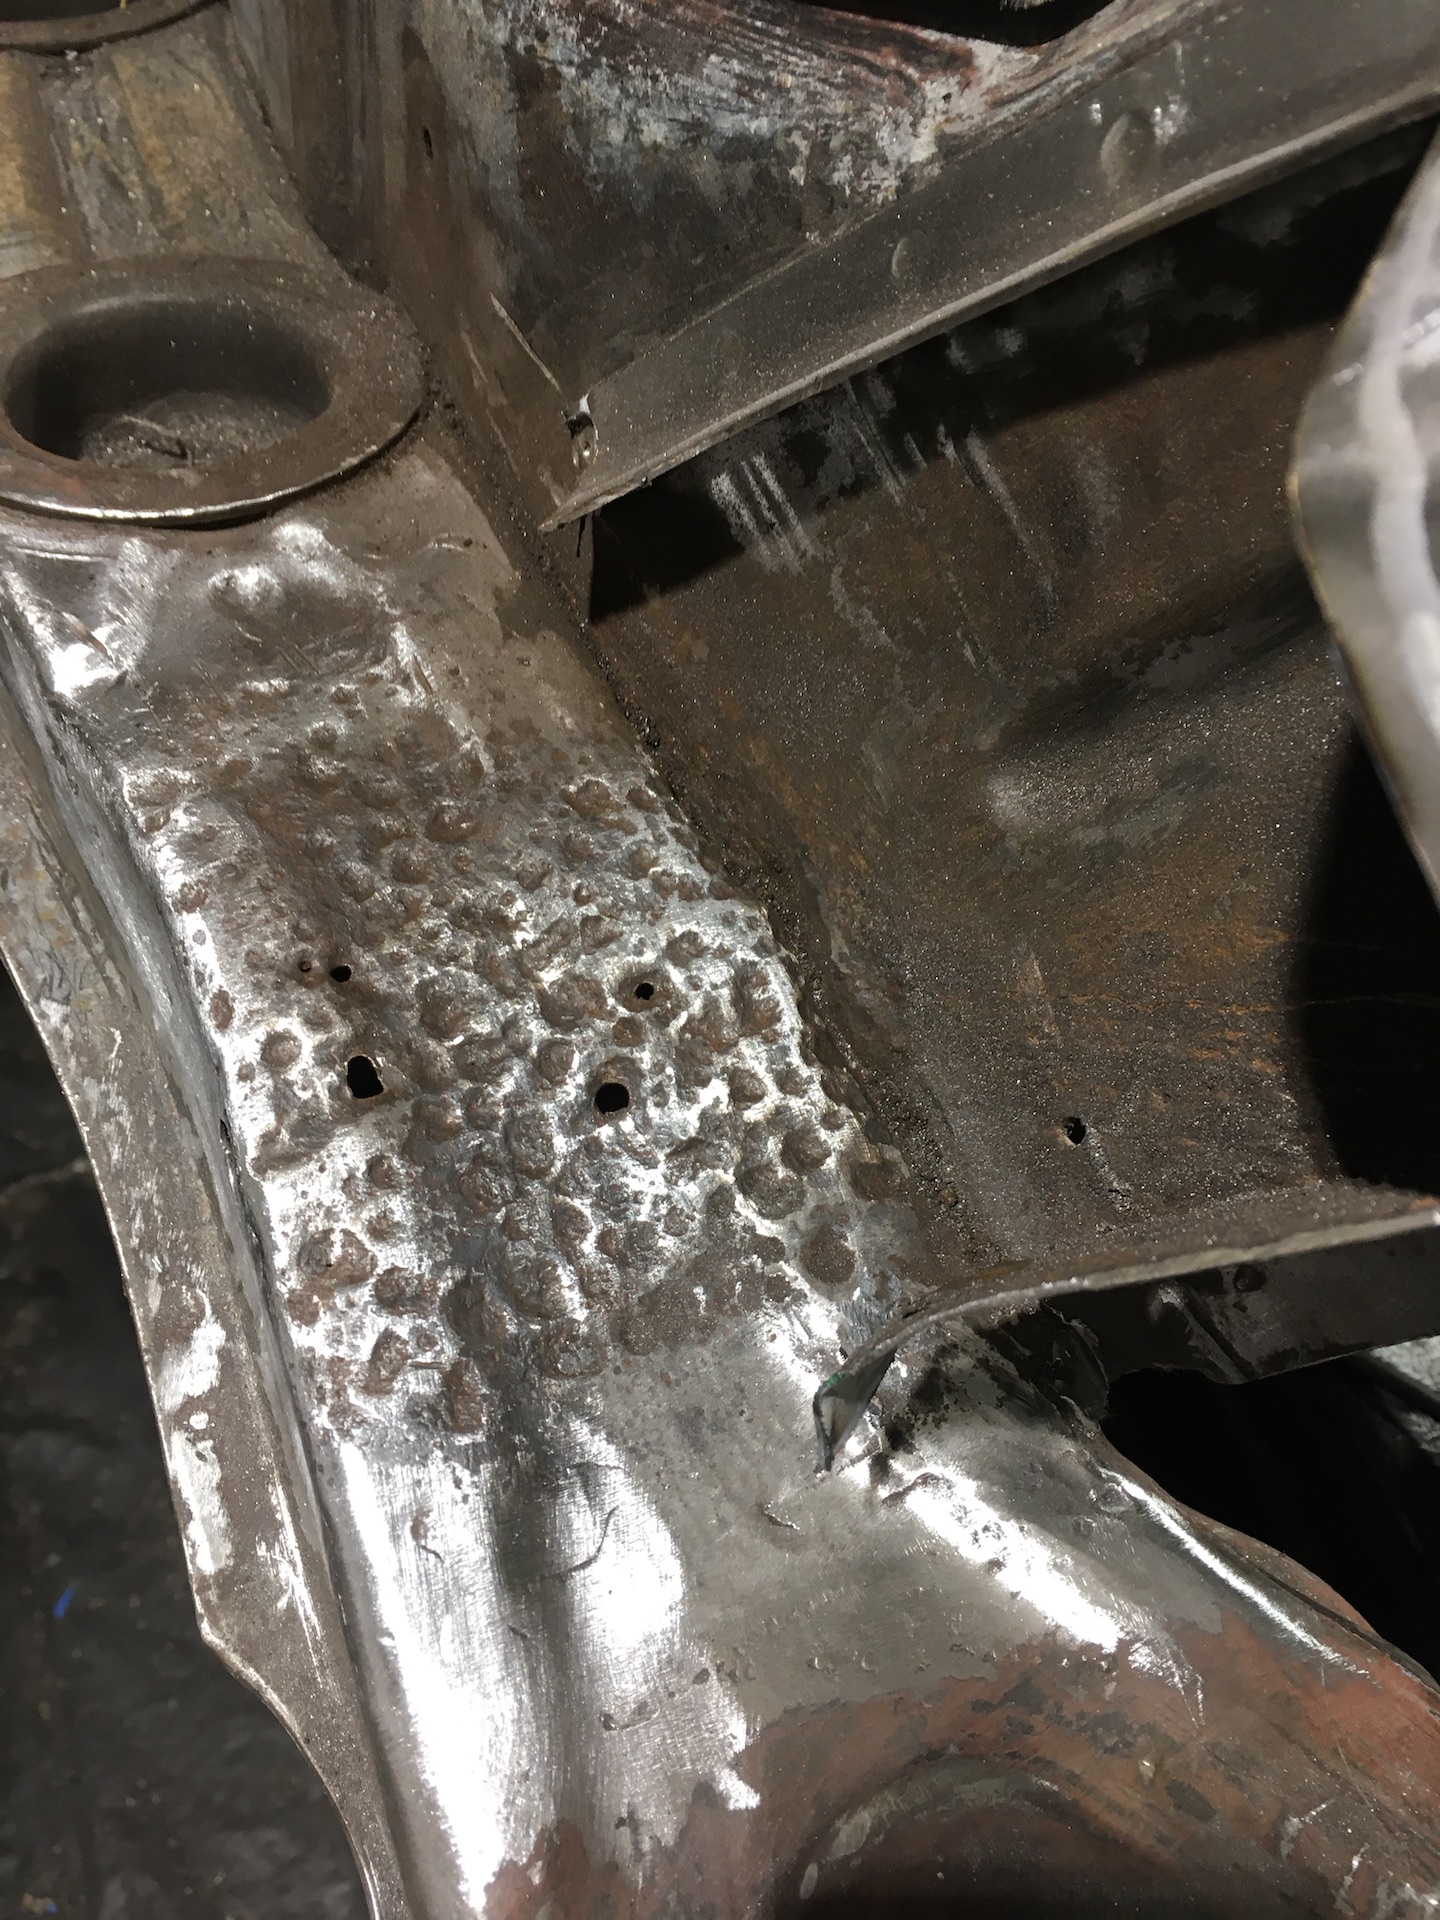
Cut an inspection hole out of the base. Tried to only cut good metal so I can weld it back in when done. Had a bit of a poke and a scrape. Doesn’t look so great. Really not liking all the rust between the engine bay wall and the frame.
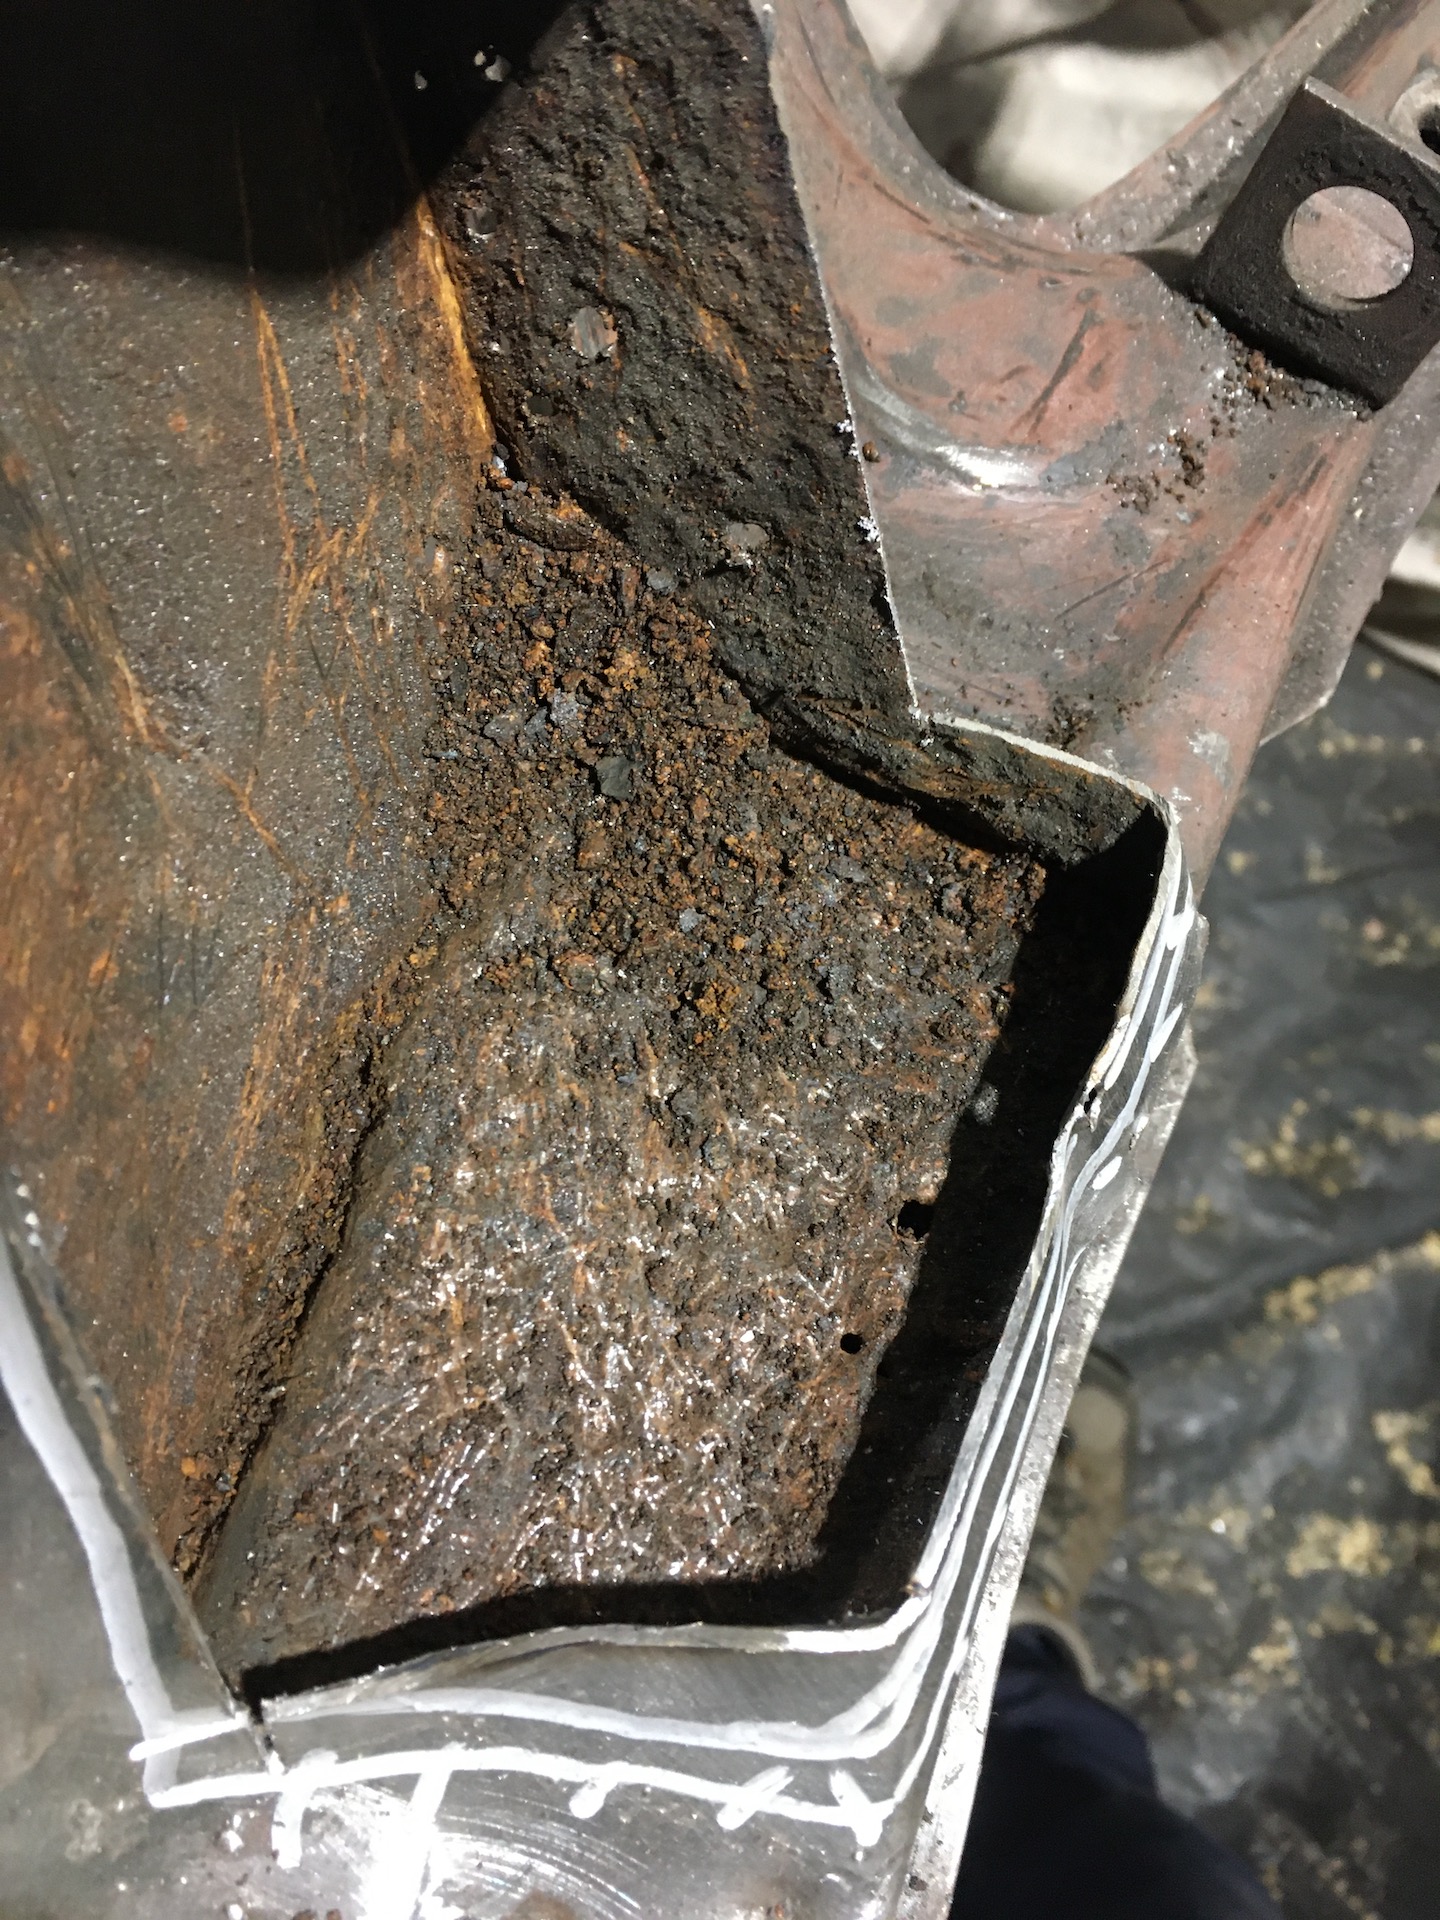
- IMG_8534.JPG (853.64 KiB) Viewed 825 times
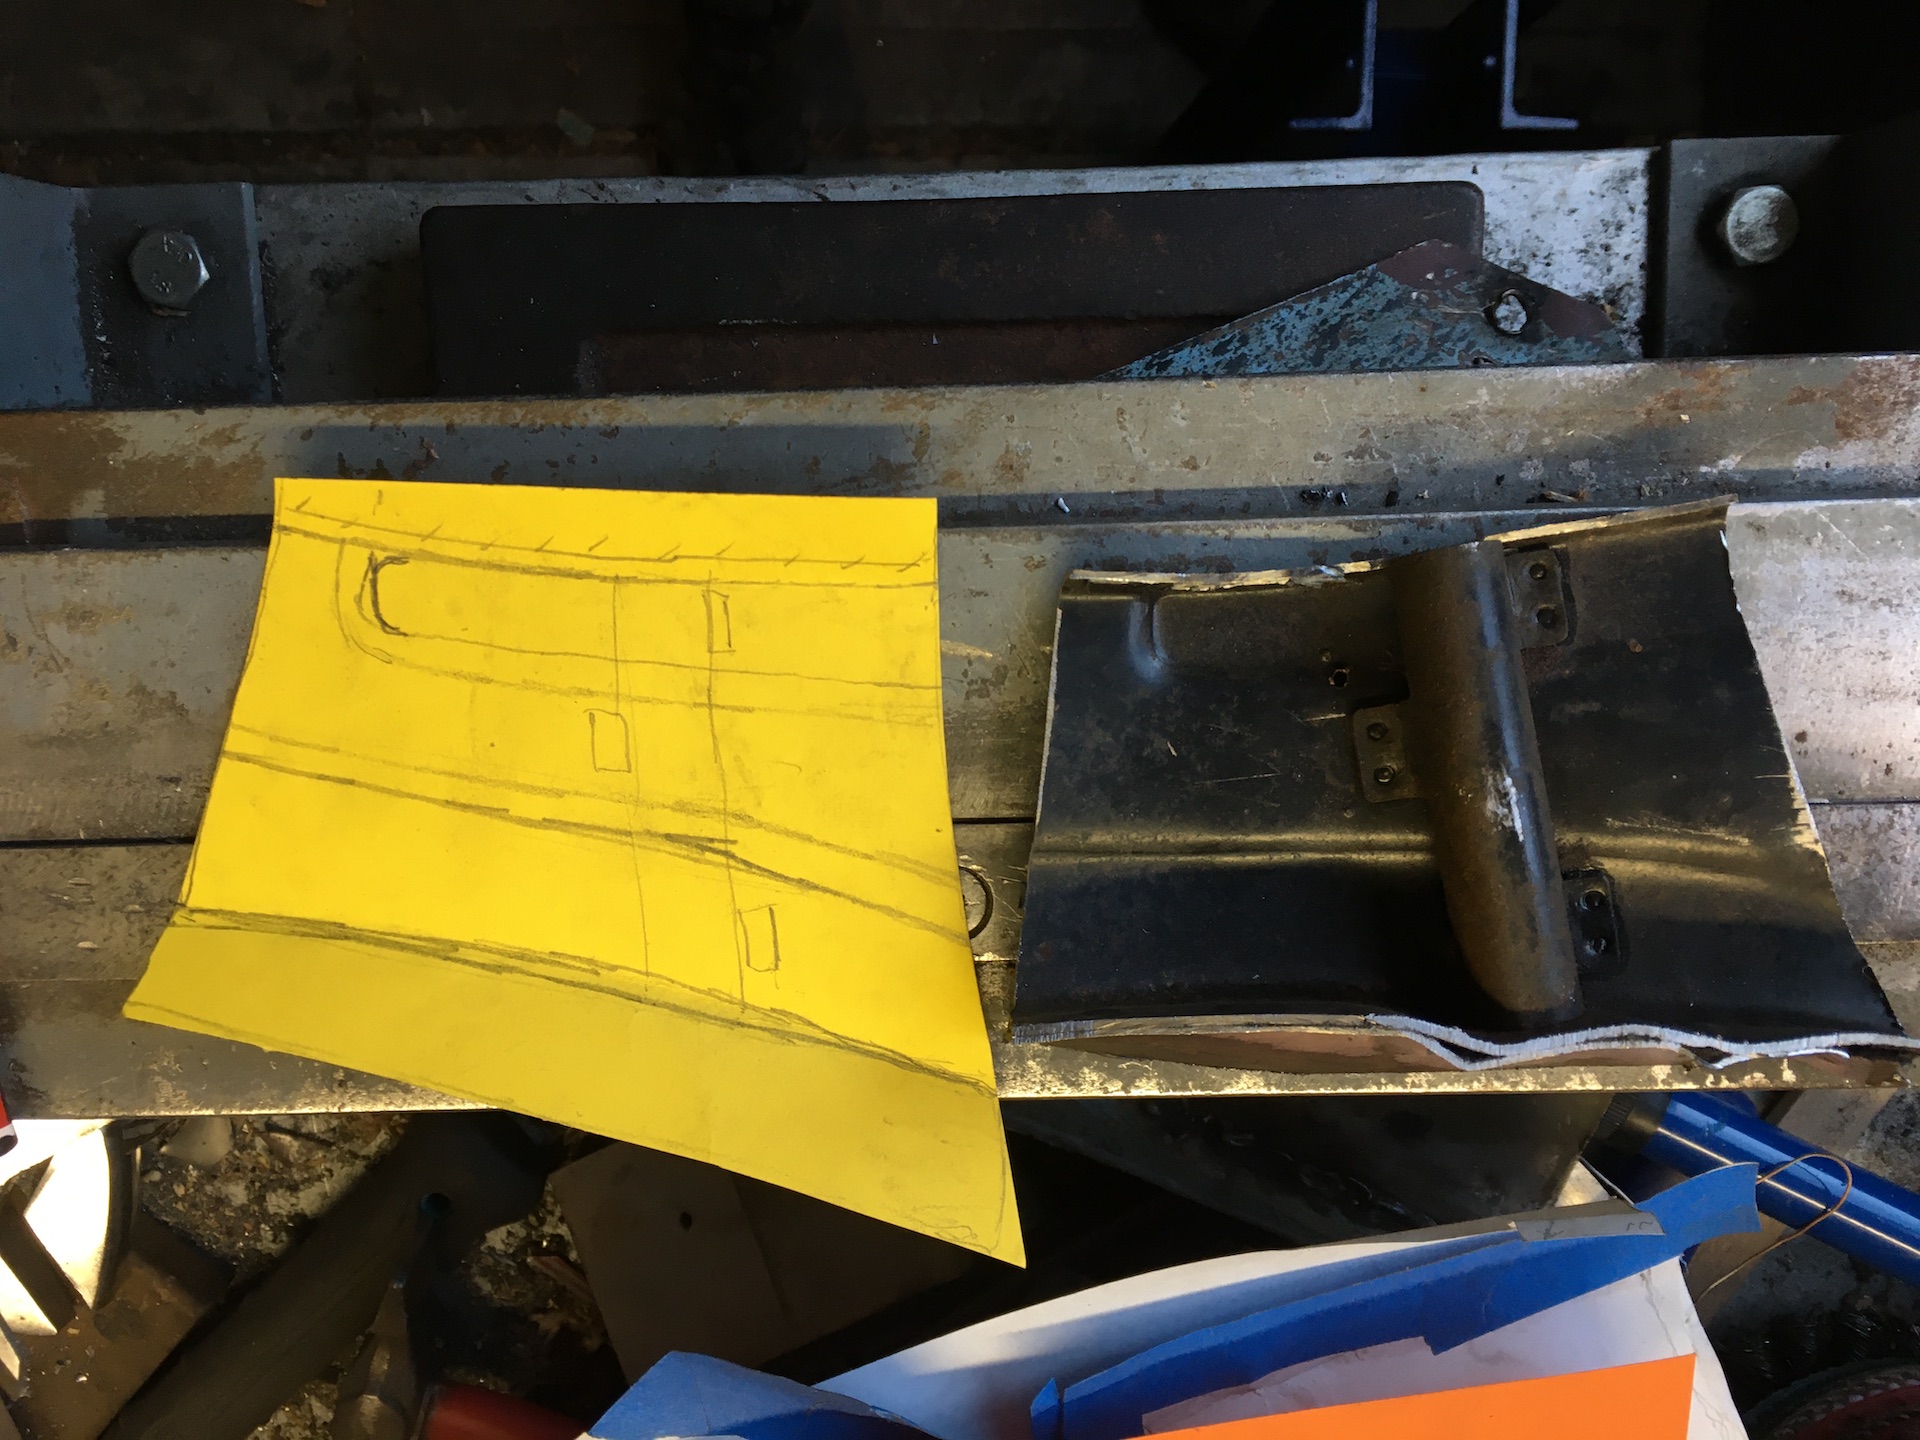
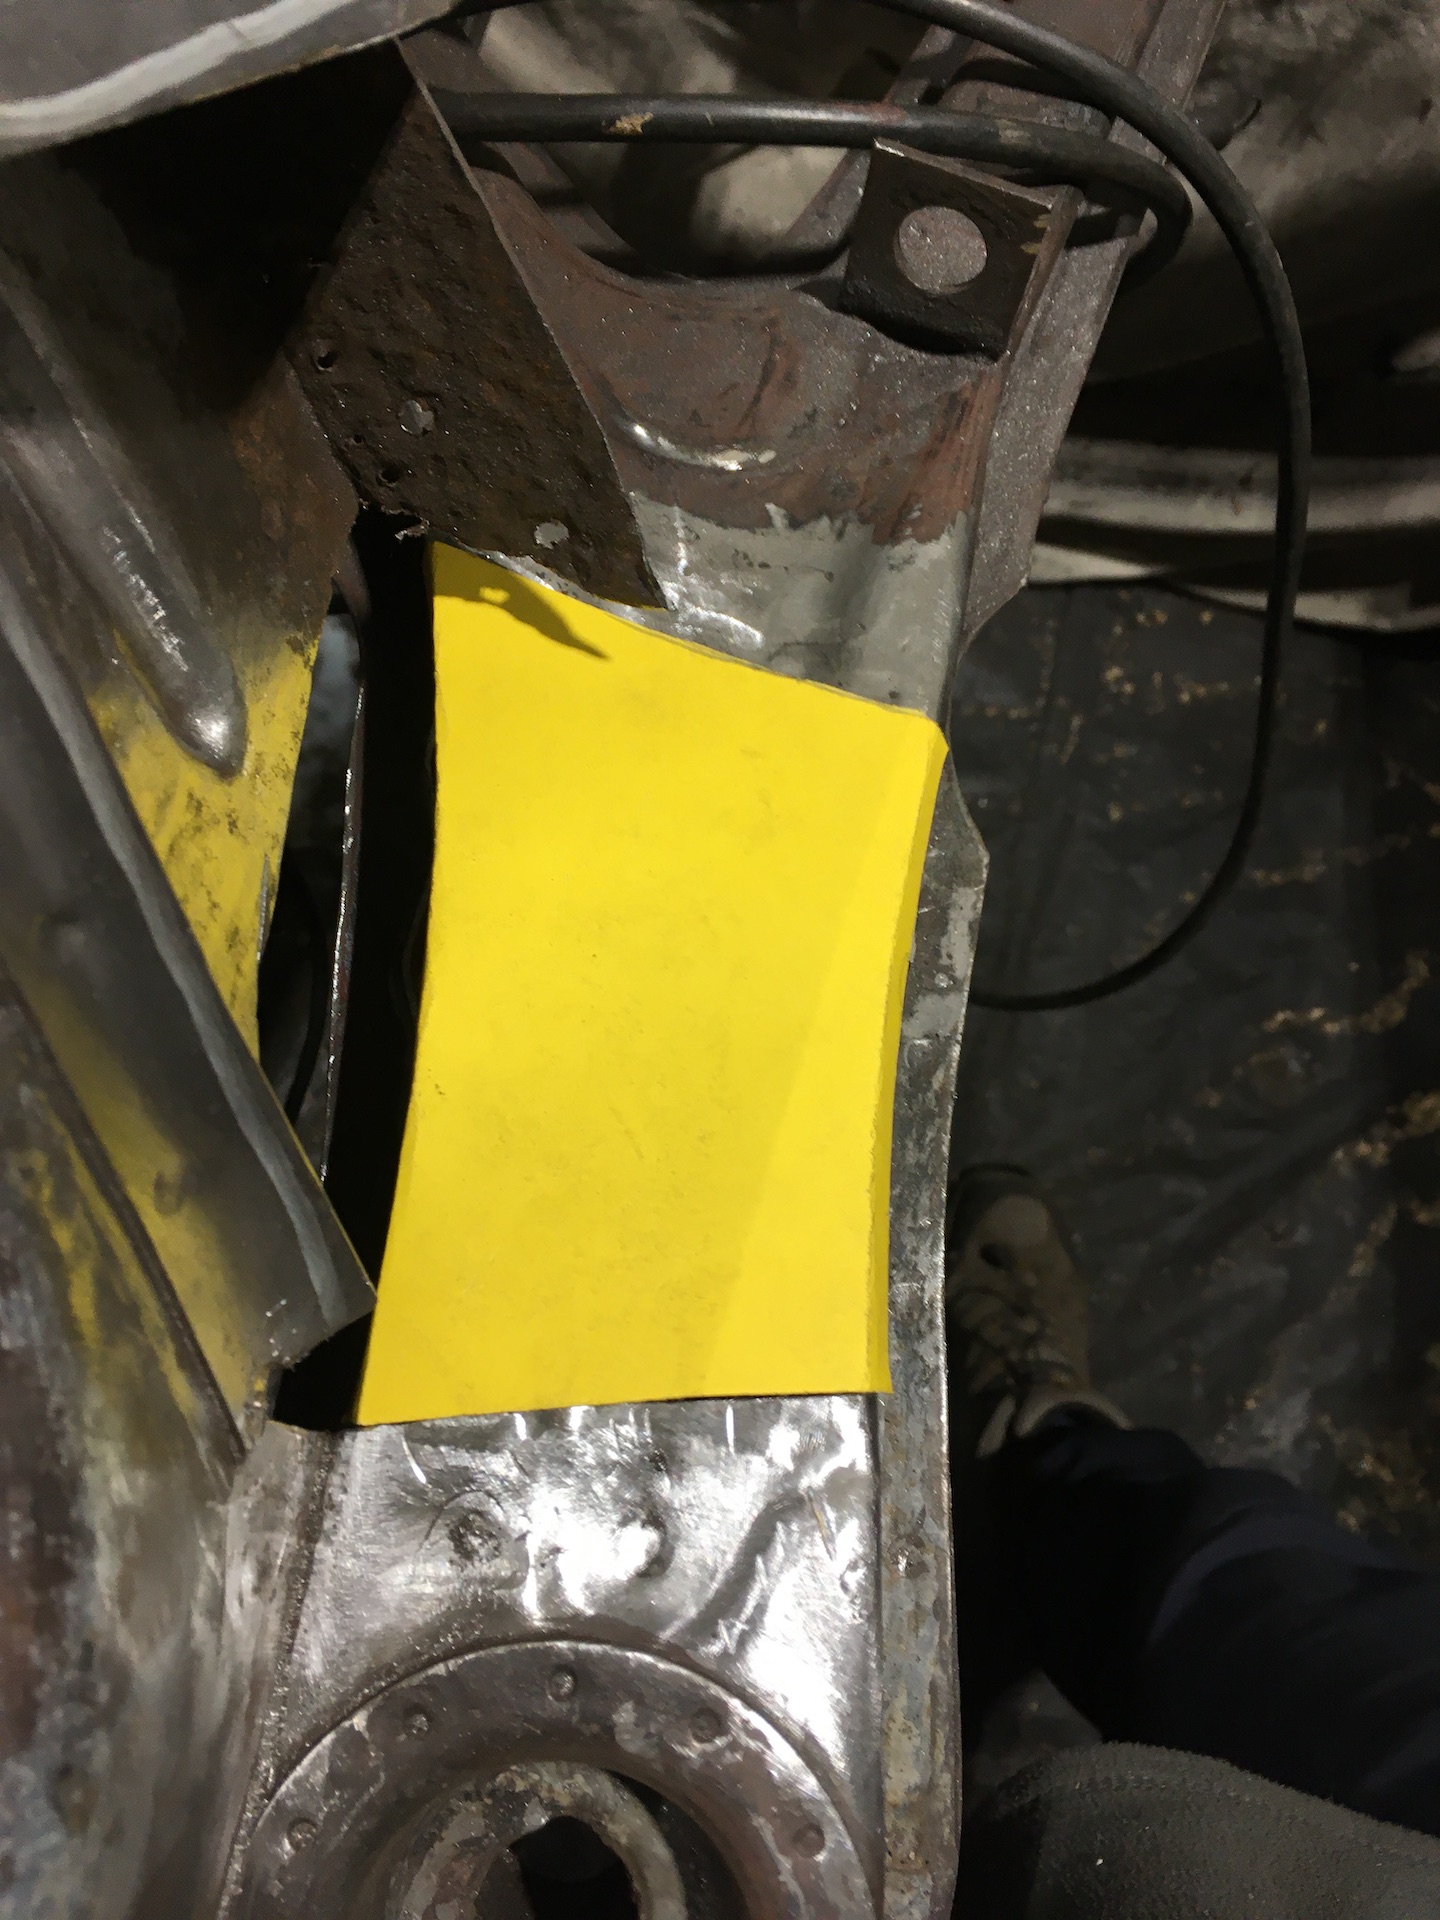
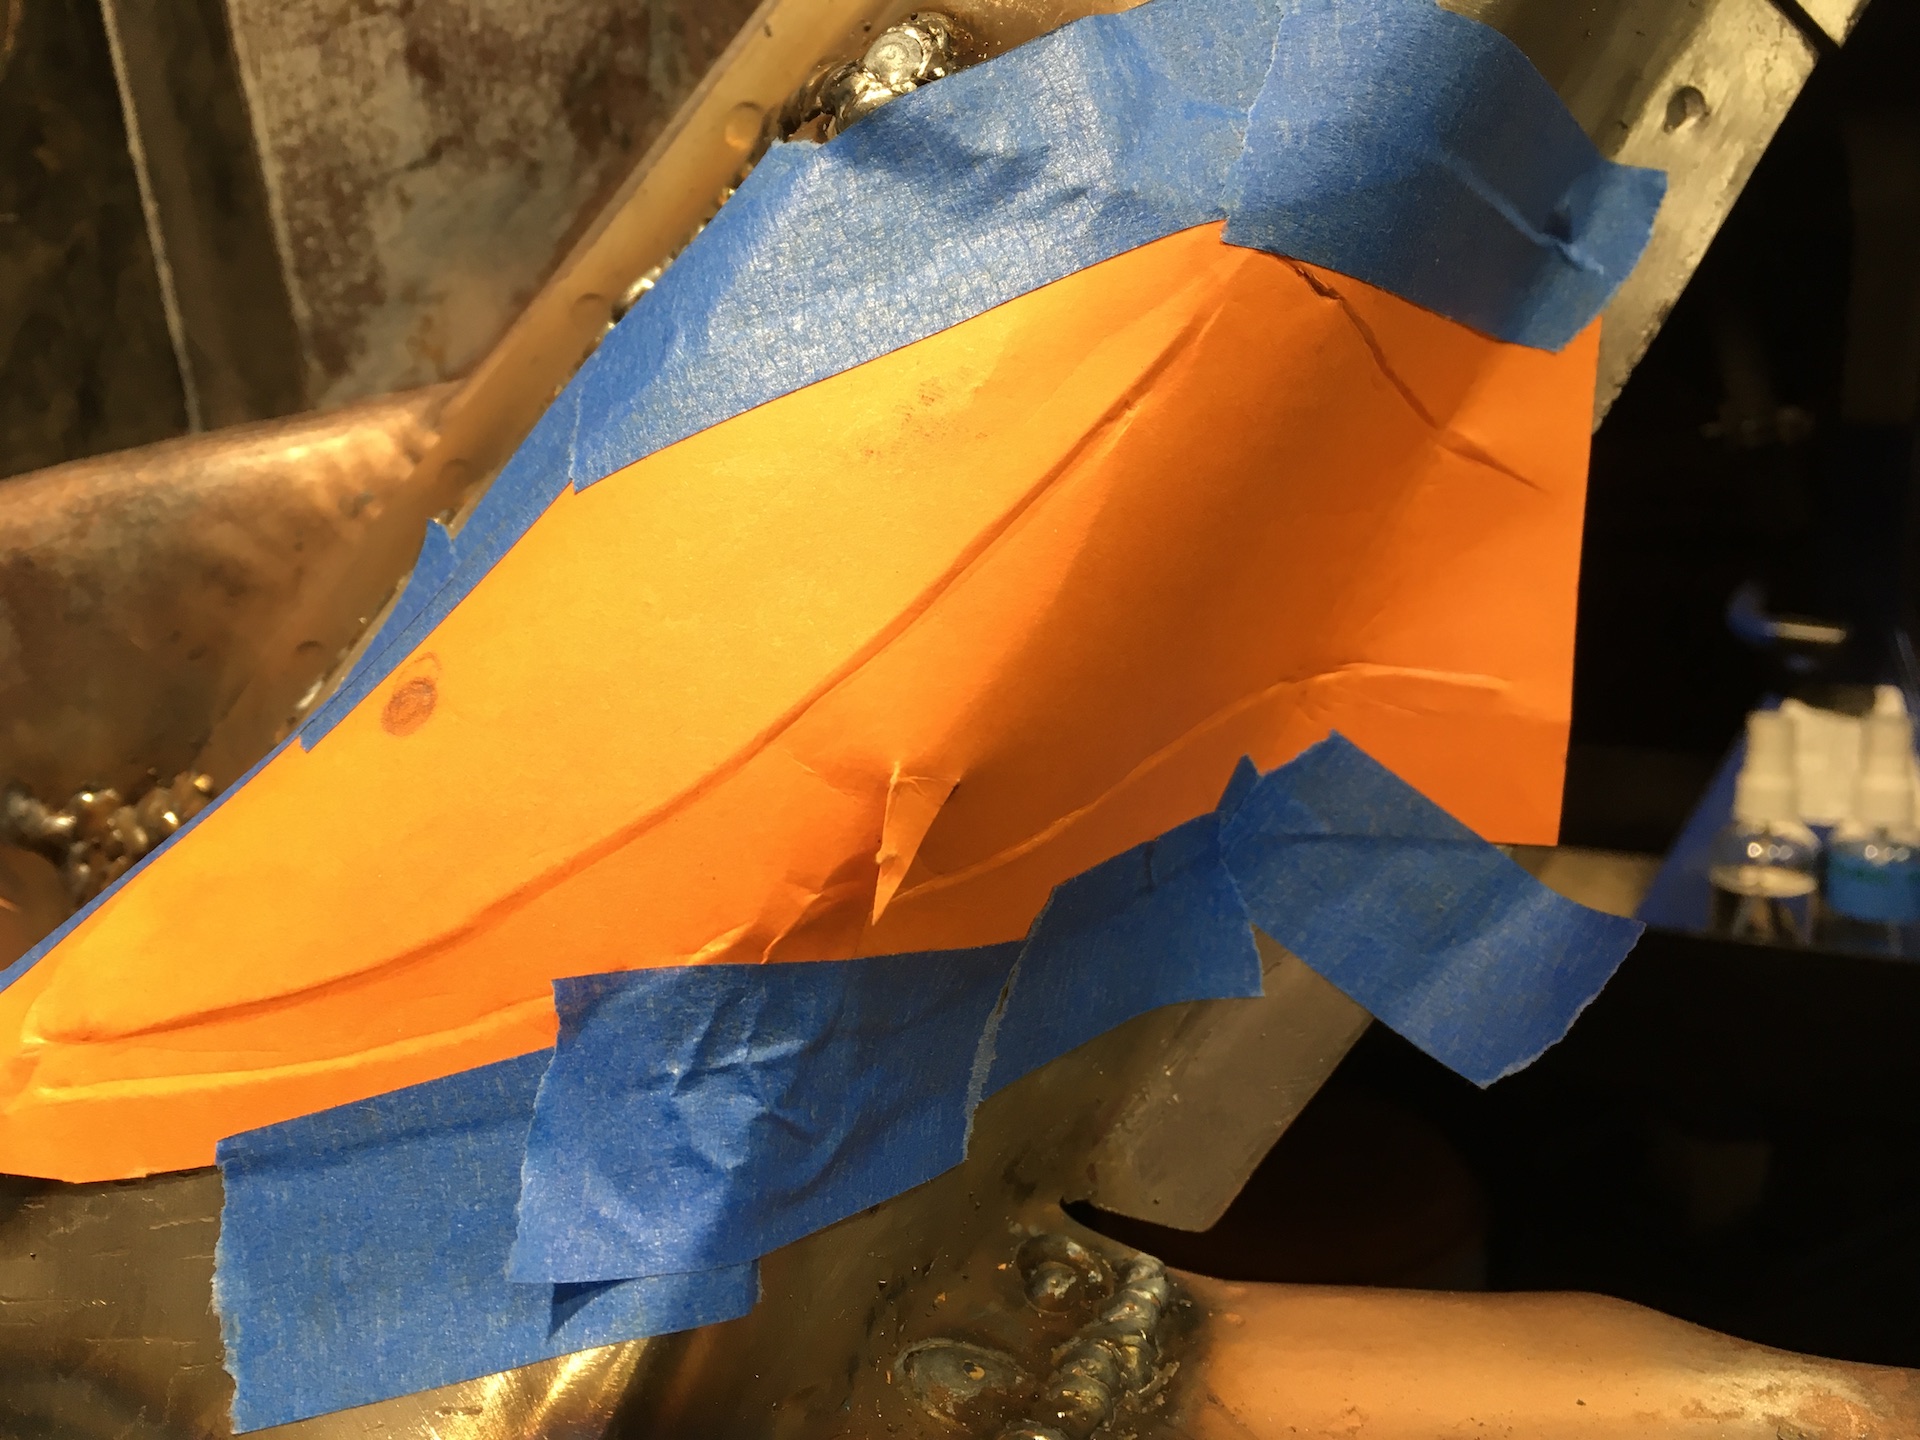
So to get to, and remove, the rusted metal, I need to cut and grind off the rest of the bottom of the up right. Making a template out of yellow card now to fabricate replacement metal later.
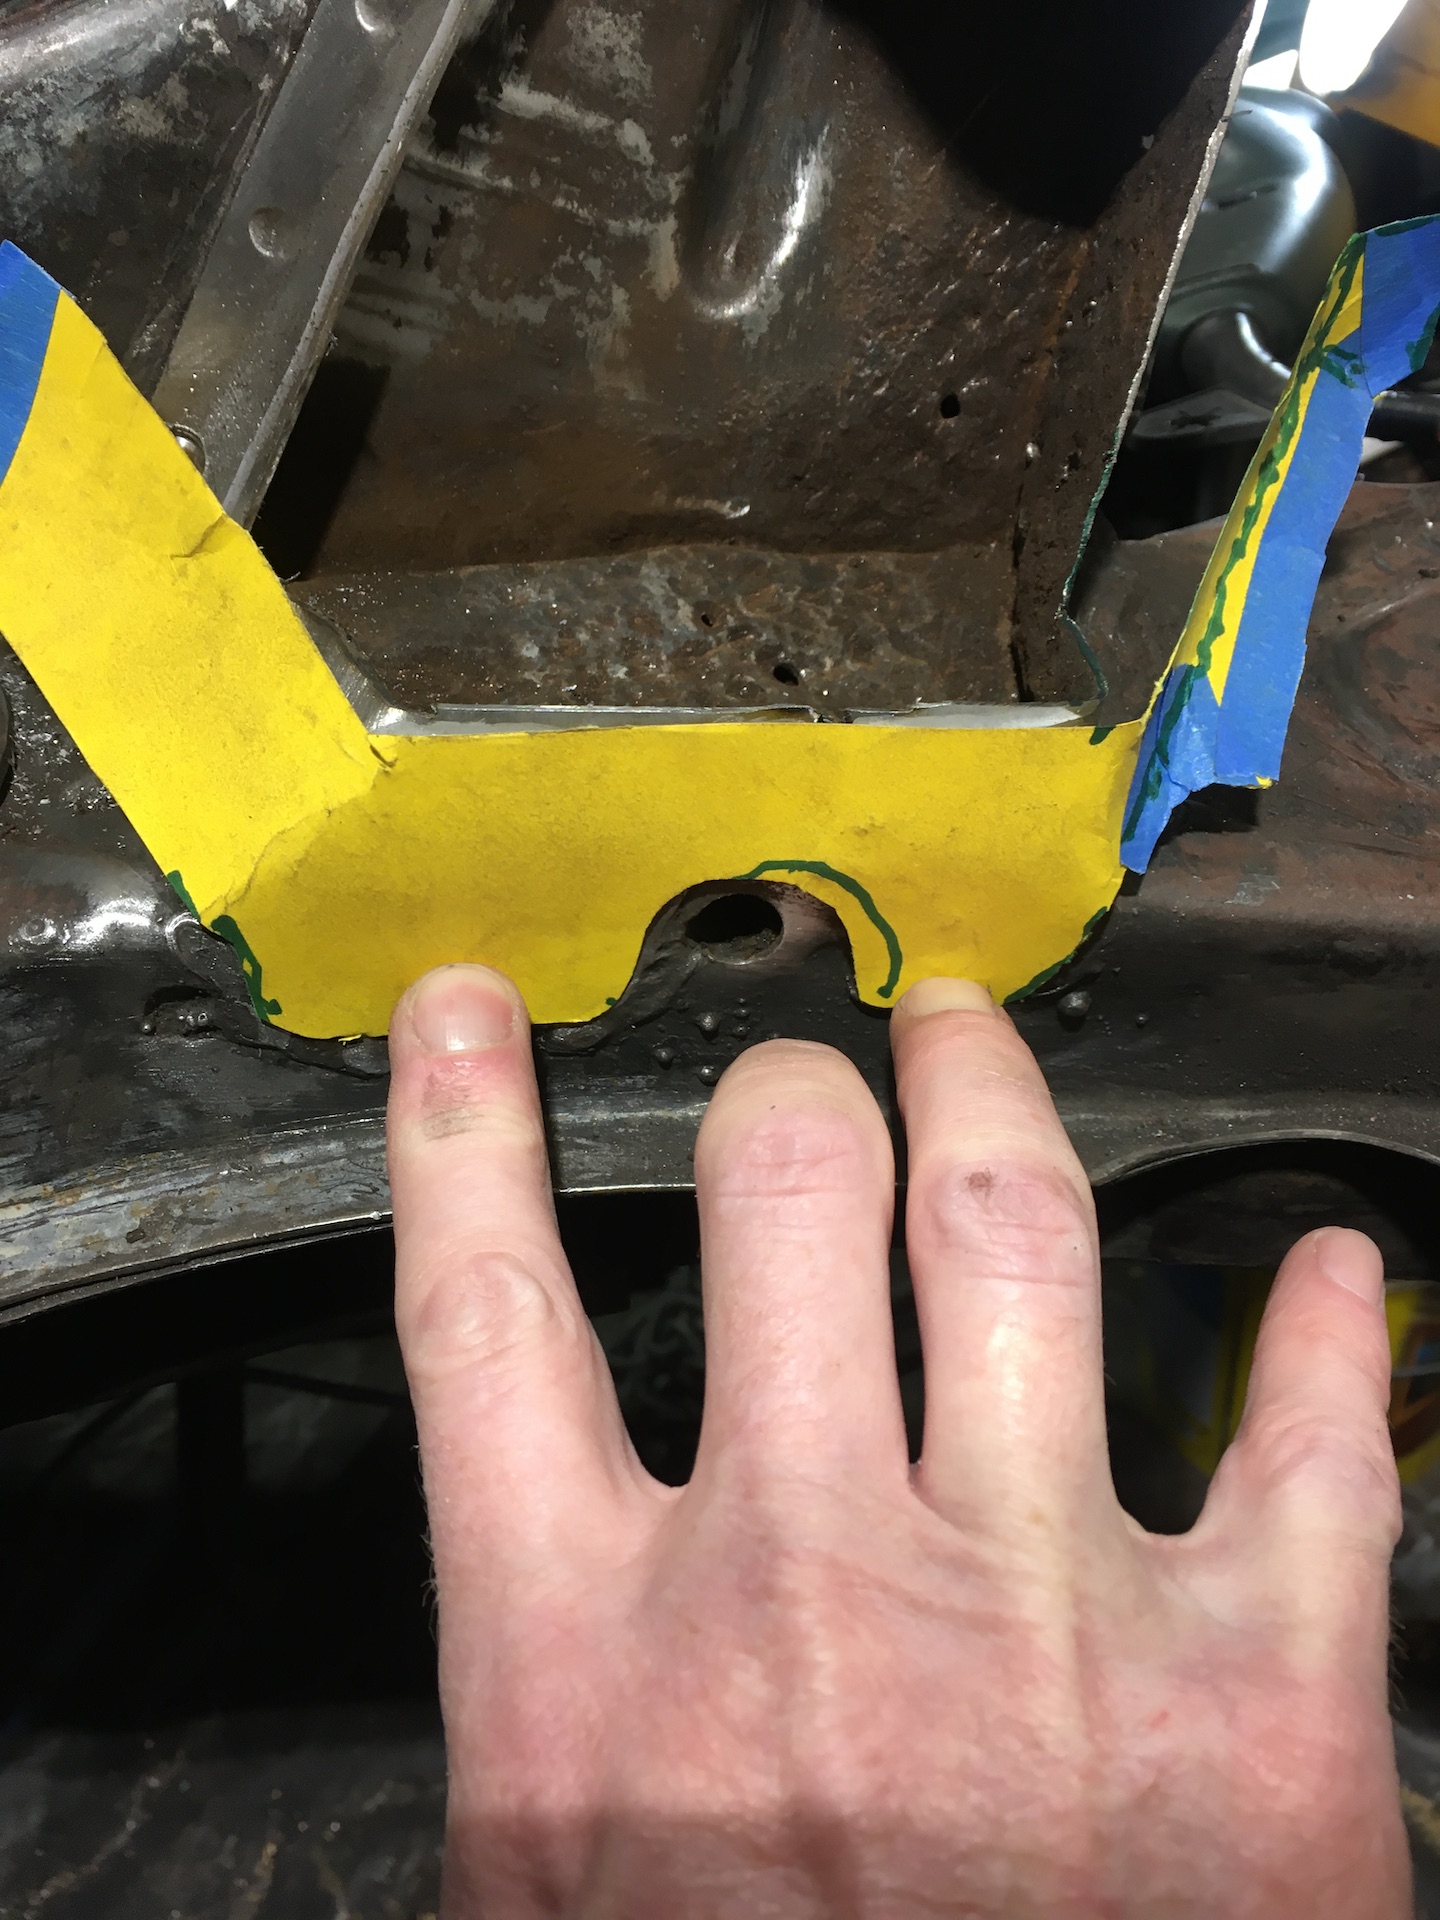
- IMG_8538.JPG (574.39 KiB) Viewed 825 times
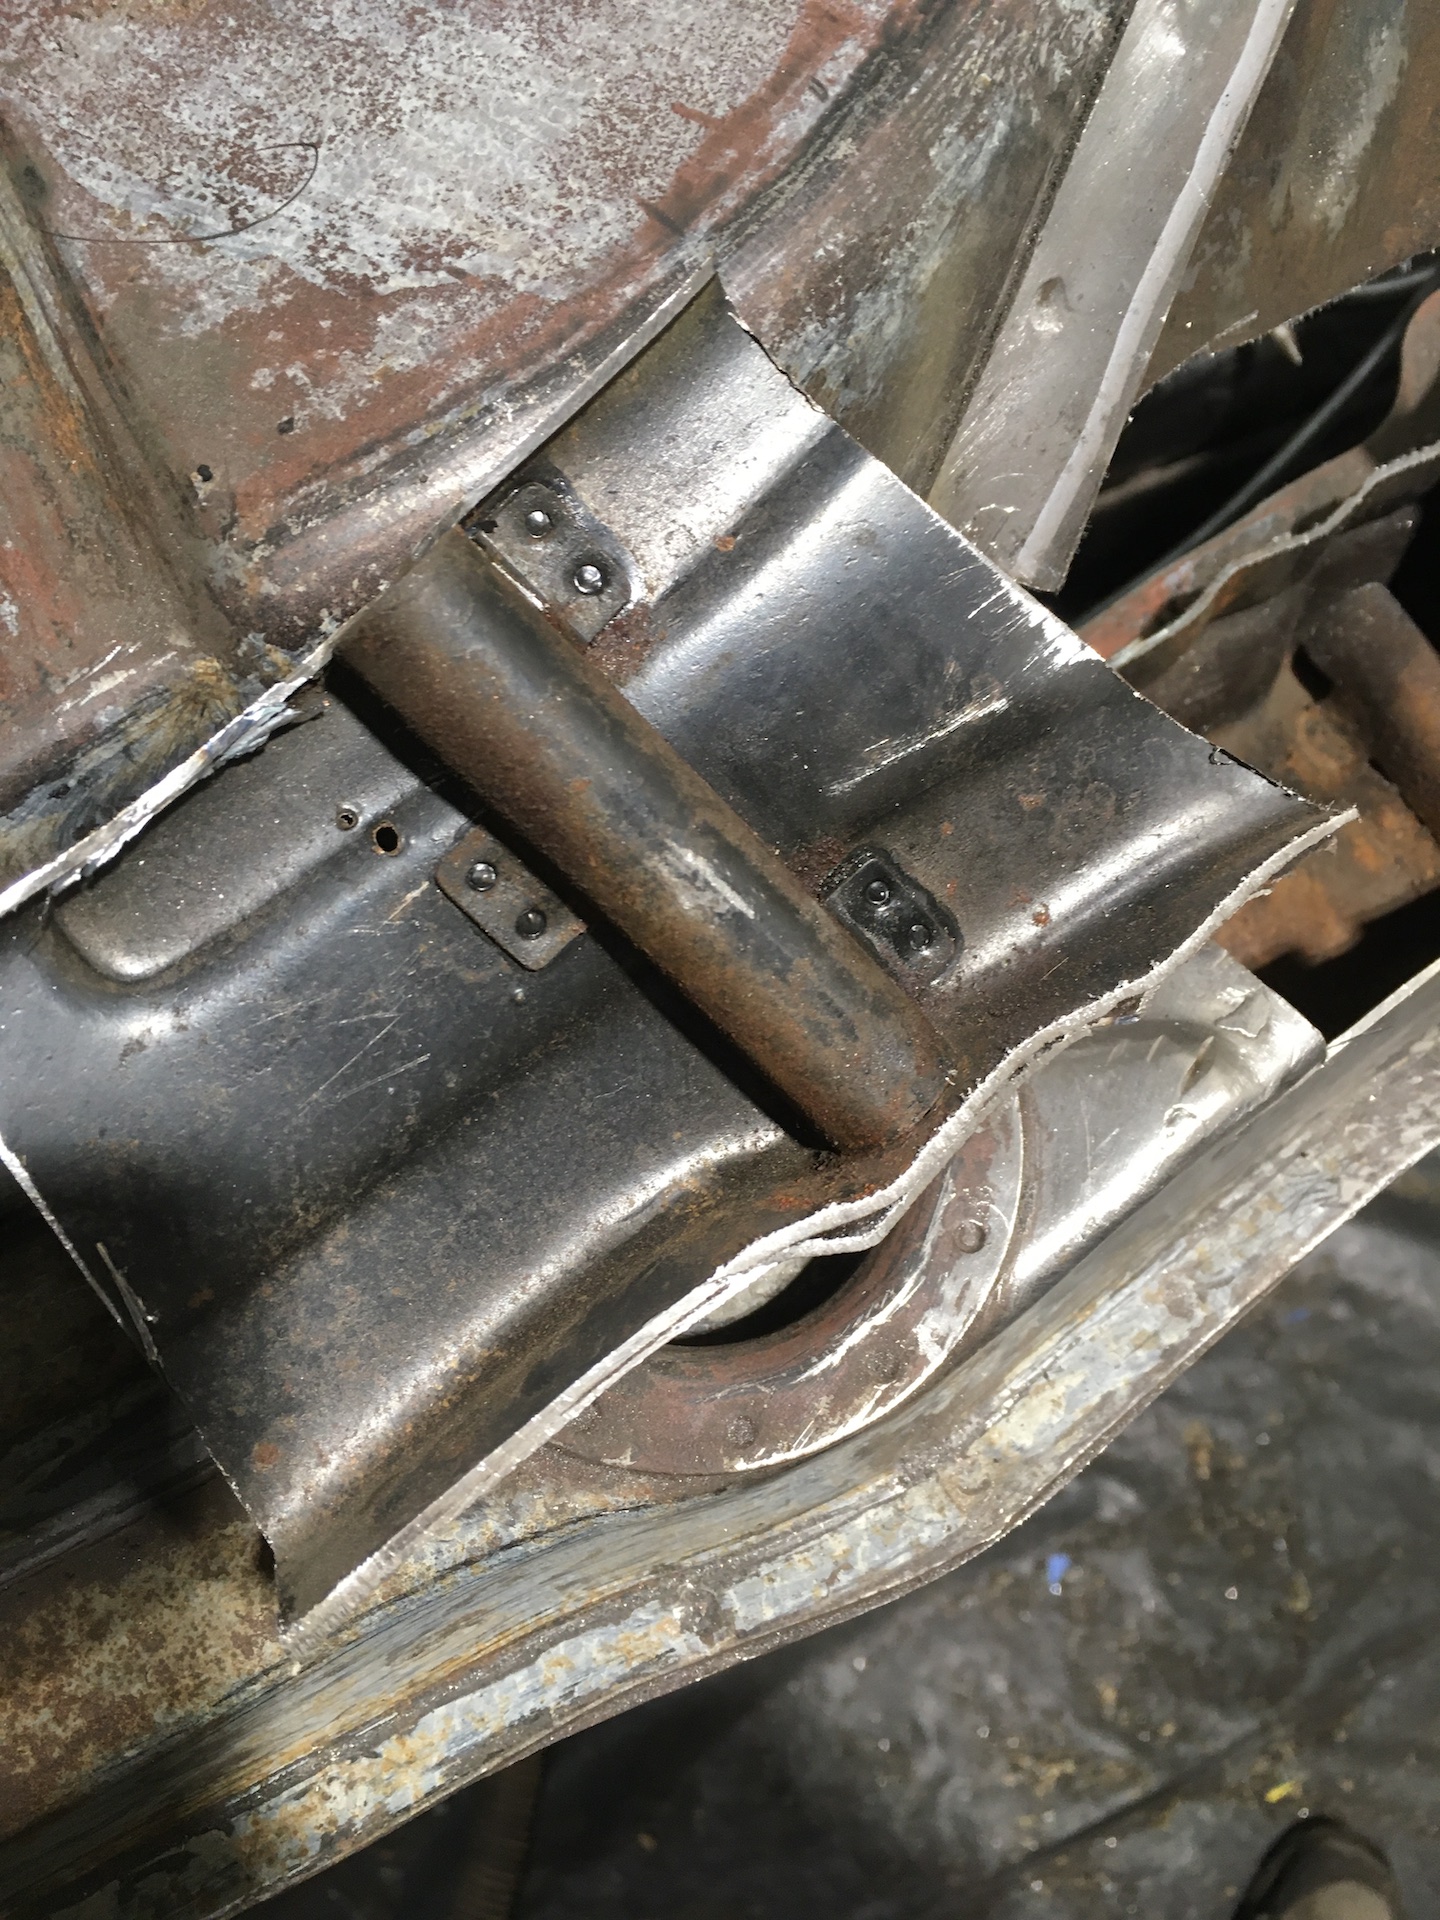
This bottom bit is spot welded AND welded in place. Cut a bunch of lines into the metal, twisted off most with pliers, then ground and power filed the rest.
- IMG_8549.JPG (746.41 KiB) Viewed 825 times
- IMG_8550.JPG (884.25 KiB) Viewed 825 times
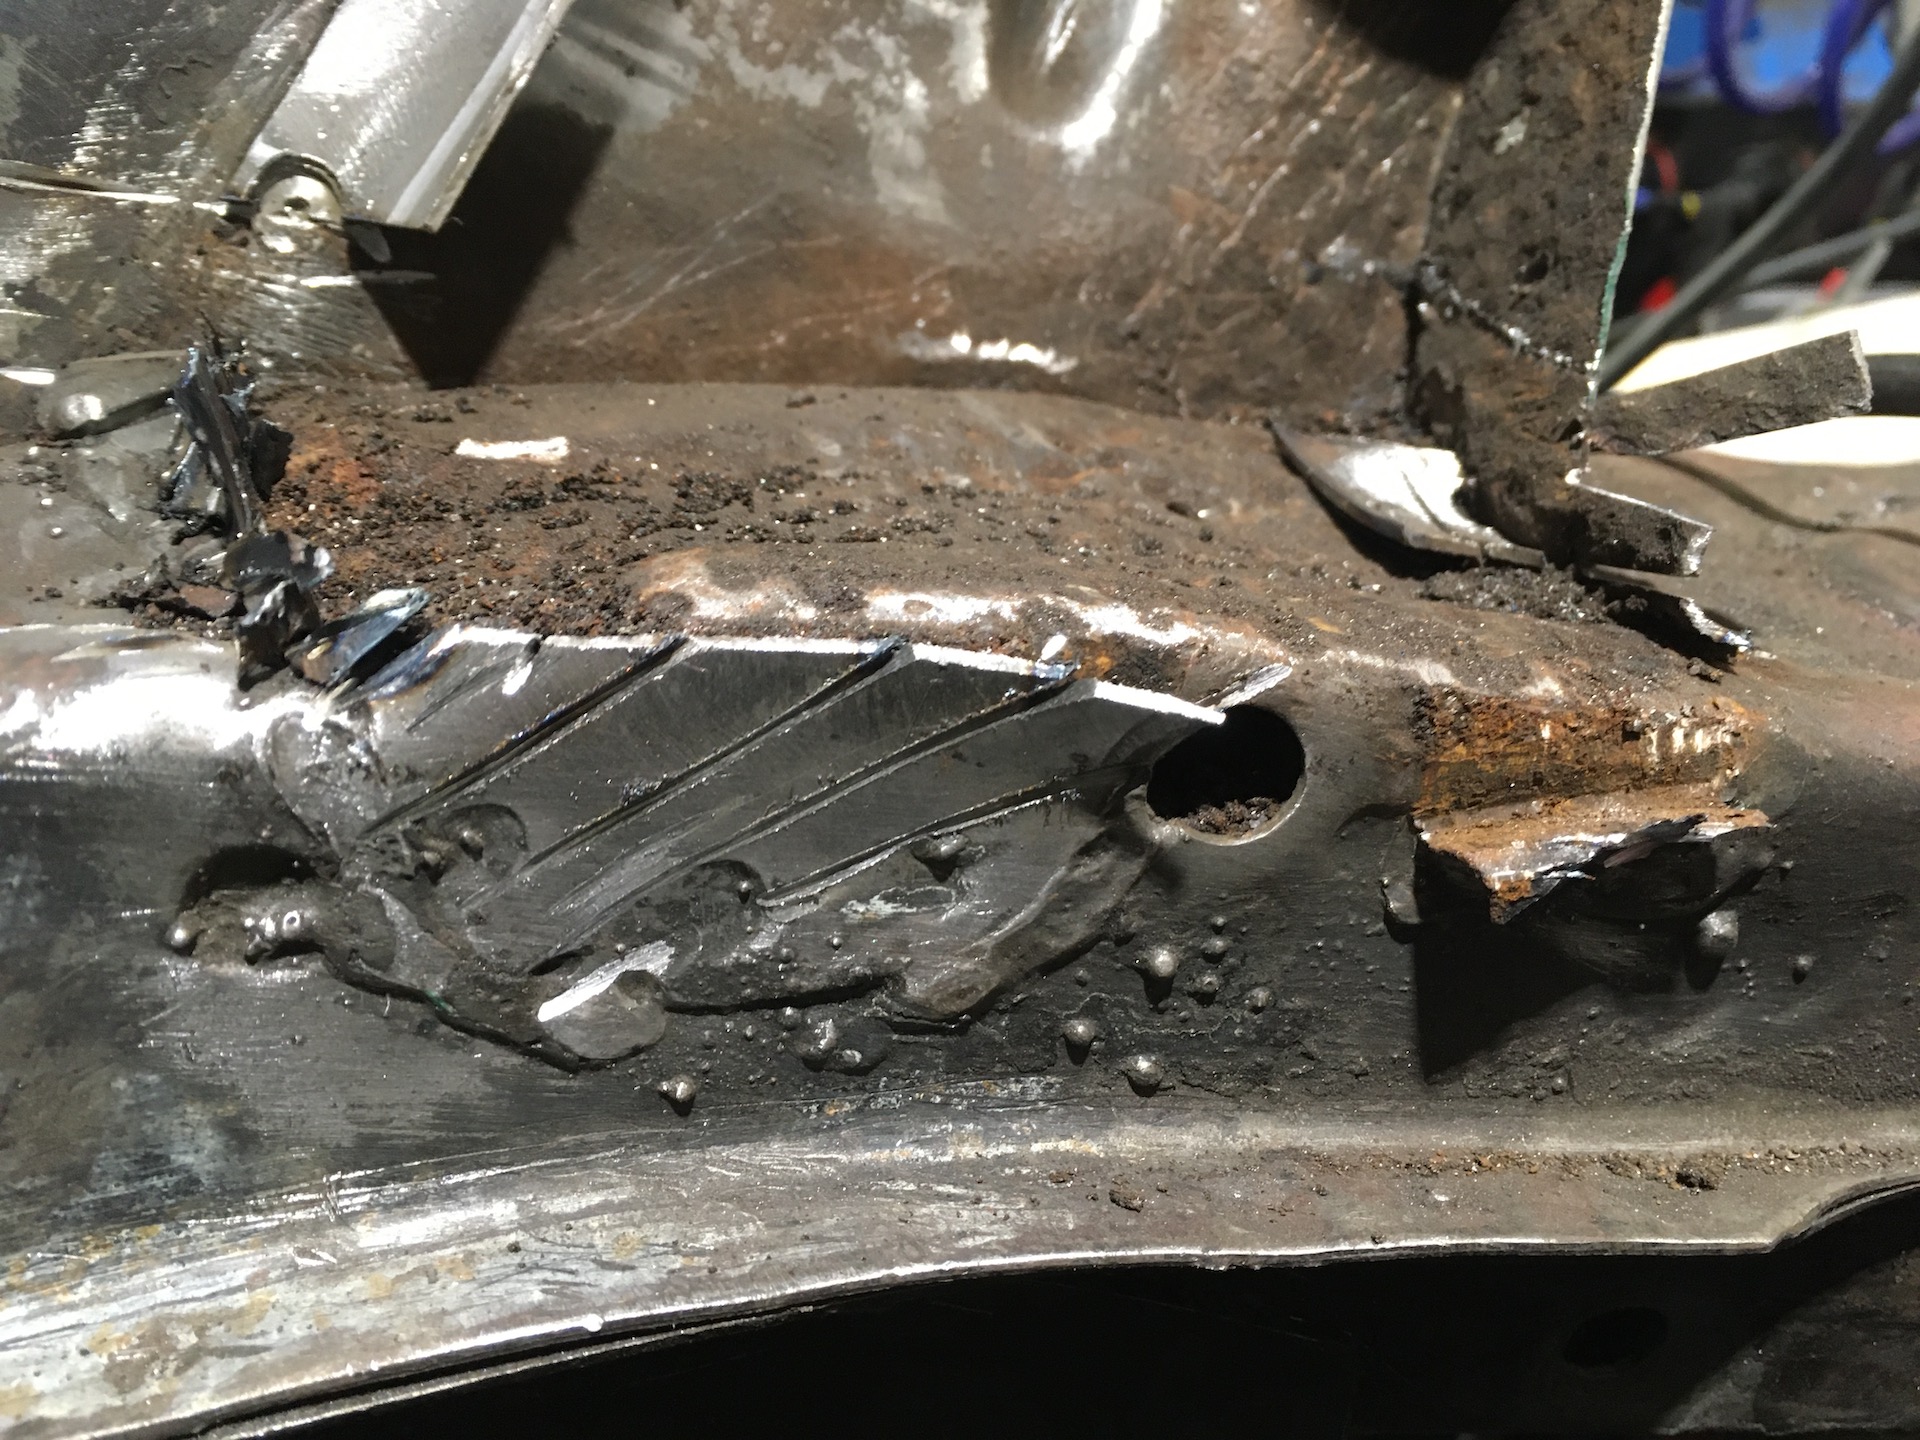
And finally, lifted the lid. Looks alright underneath. I’ll be reusing this crush tube. Inside, there’s a bit of surface rust but no pitting.
- IMG_8551.JPG (850.11 KiB) Viewed 825 times
- IMG_8553.JPG (805.1 KiB) Viewed 825 times
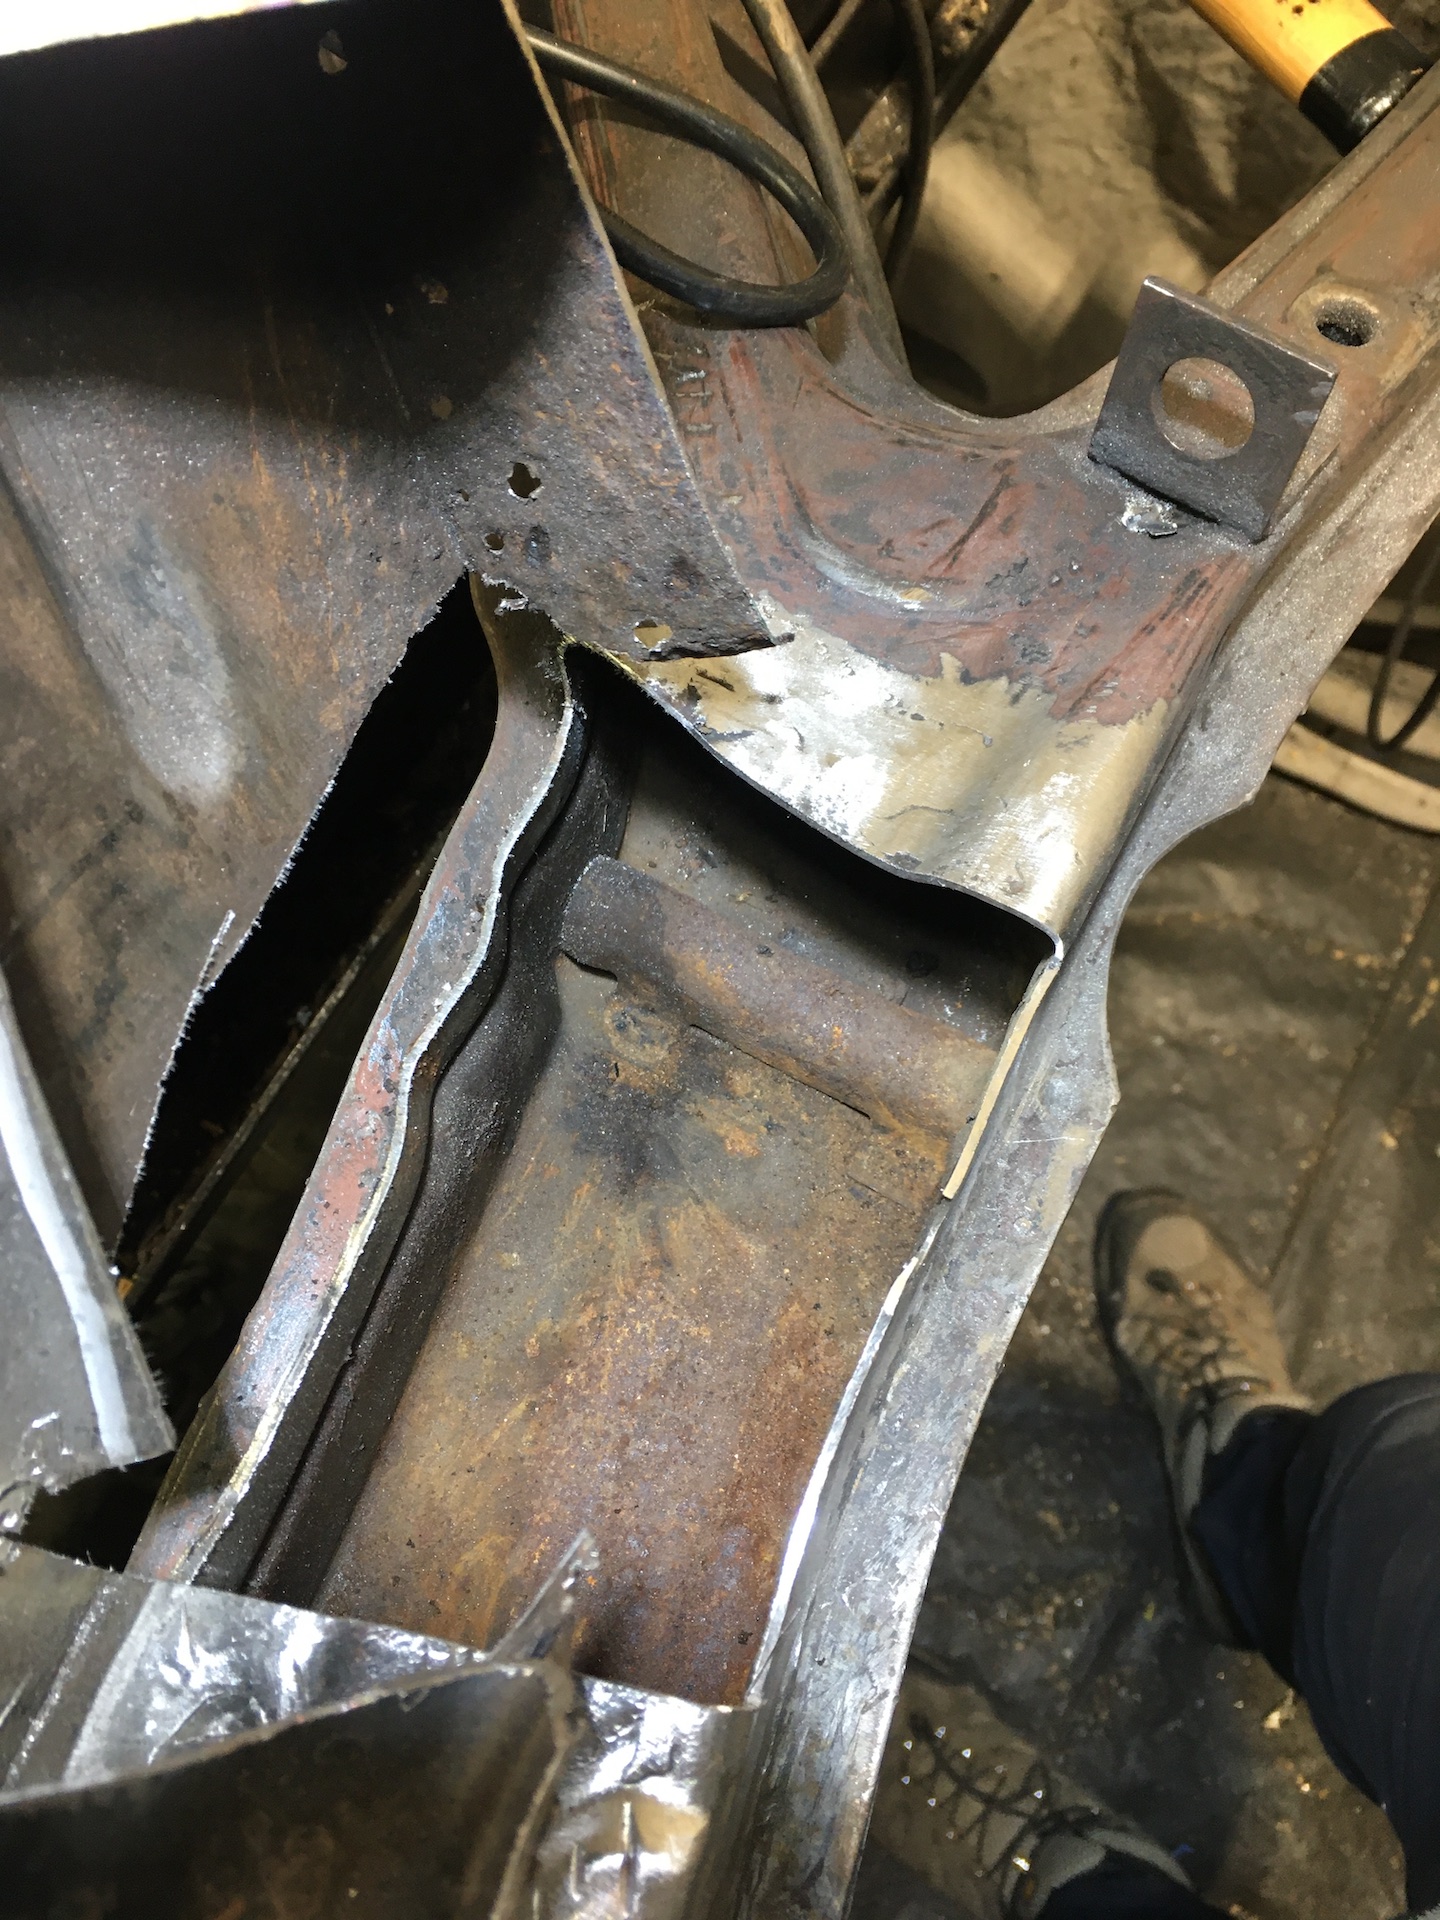
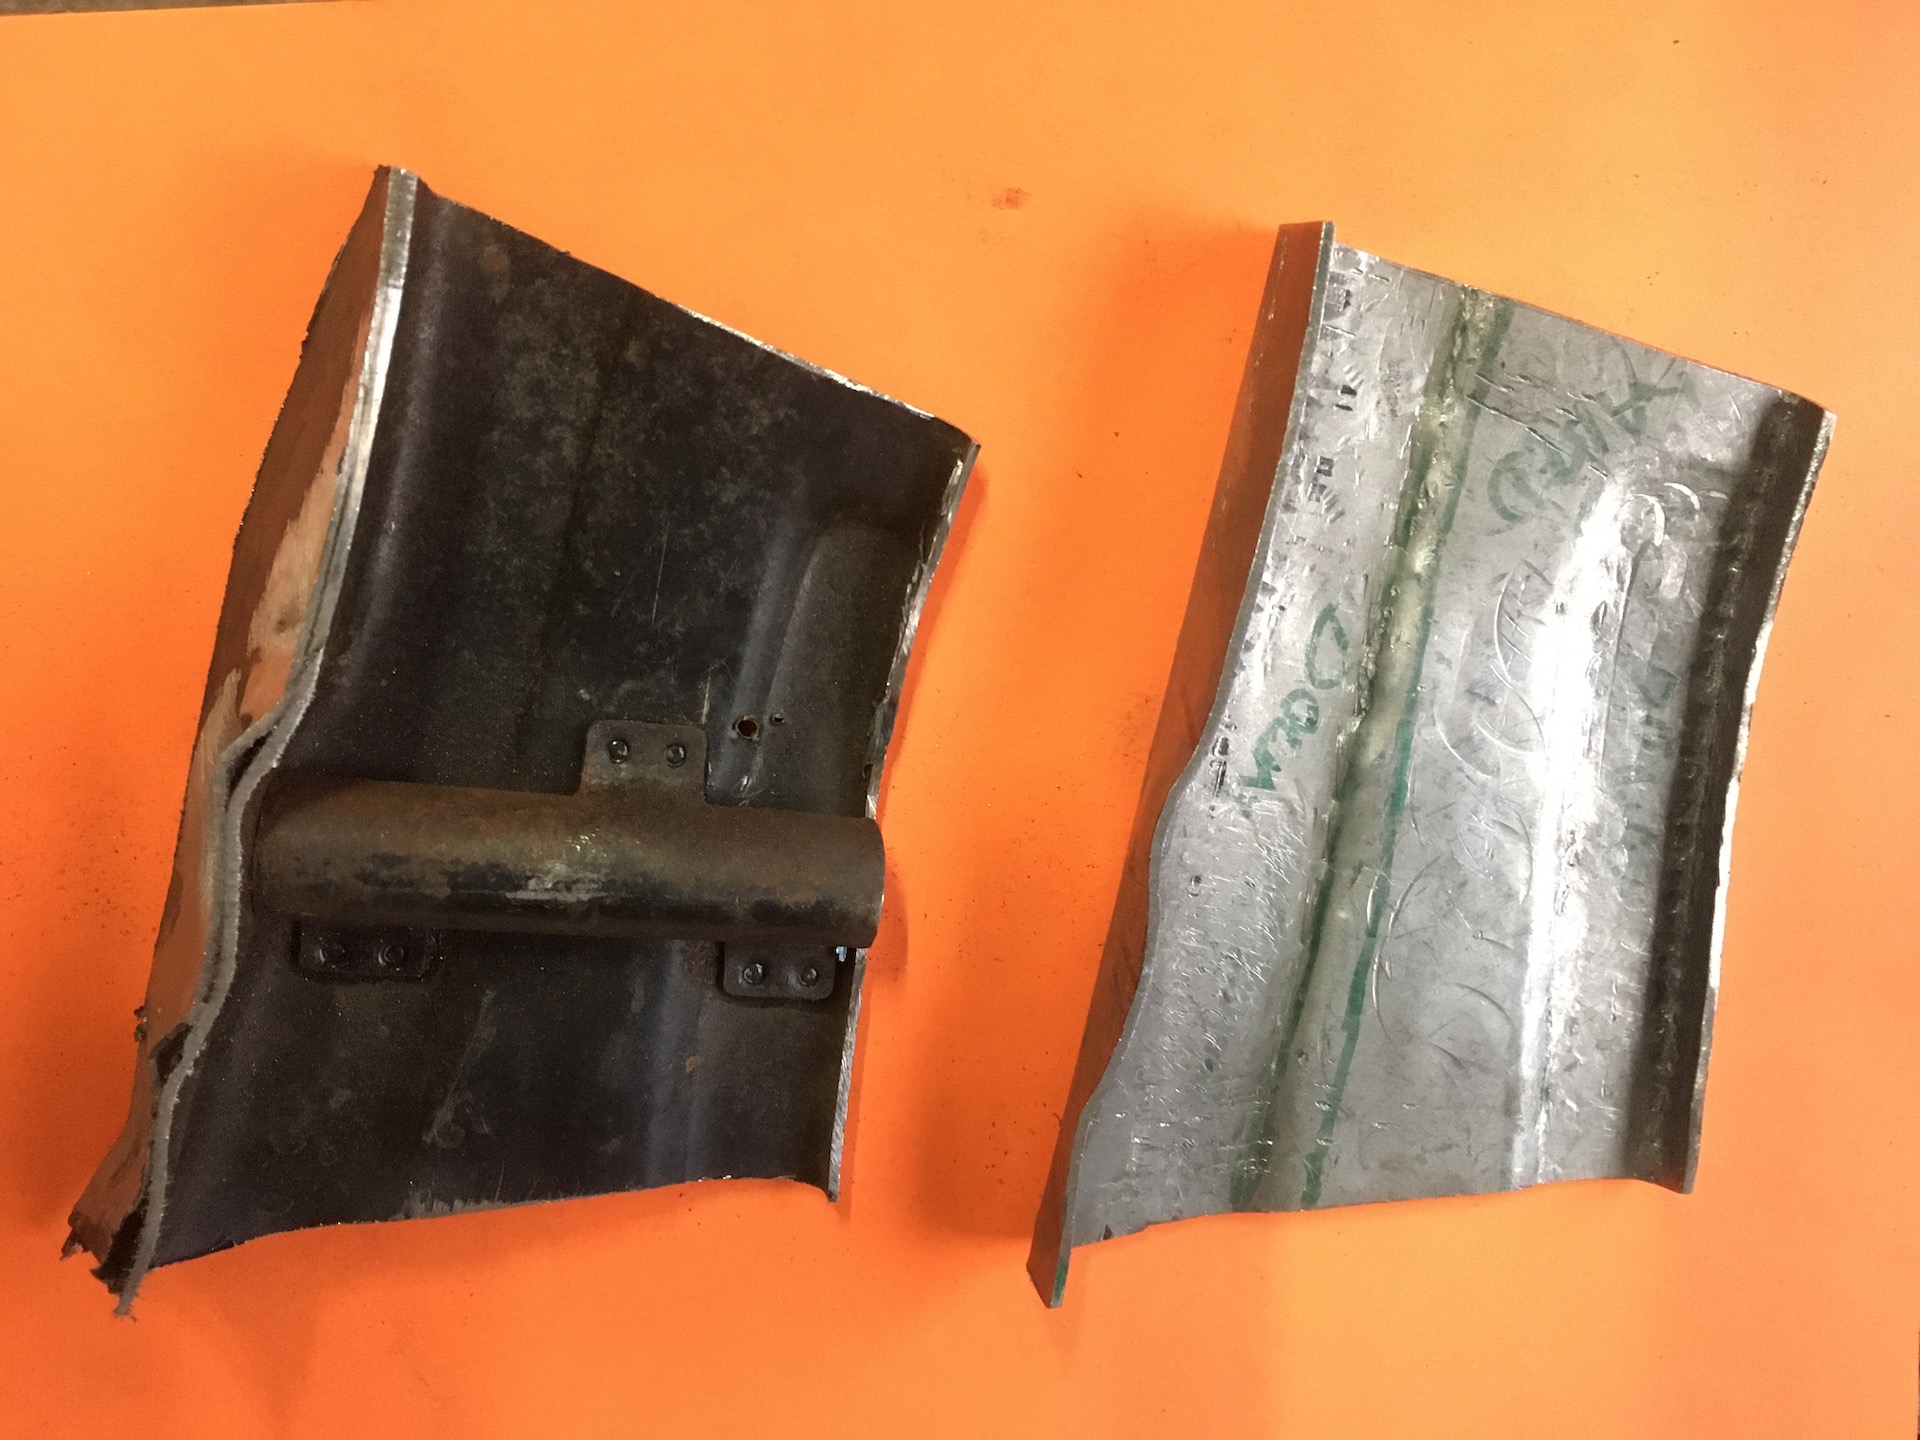
This is not a fun shape. It curves on both edges, has an overall curve through the middle, and then there is the pressing along the top for strength that also sets the height of the crush tube. Its also 1.4mm thick so won’t be easy to work. In my haste I didn’t take any accurate measurements for the location of the crush tube. Got plenty of photos, the piece I cut out, and the steering box as a guide though.
So plan is to fabricate and weld this piece back in. Patch the small bit of the engine bay side, then fabricate the bottom of the upright, weld it, and the original inspection plate, back it to give the upright some strength back. Then work up from there.
Re: Ol' Rusty - FB/EK Sedan
Posted: Thu Jul 08, 2021 8:18 am
by Brett027
Hi Scott,
I've got a k frame handy in my shed. Happy to help if you need any measurements or pics. B
Re: Ol' Rusty - FB/EK Sedan
Posted: Thu Jul 08, 2021 8:44 am
by funkyscooter
Brett027 wrote: Thu Jul 08, 2021 8:18 am
I've got a k frame handy in my shed. Happy to help if you need any measurements or pics. B
Thanks Brett!
Re: Ol' Rusty - FB/EK Sedan
Posted: Thu Jul 08, 2021 10:41 am
by ardiesse
Scott,
You're on very familiar territory there.
See
http://forum.fefcholden.club/index.php?topic=27433.240 for reference.
Rob
Re: Ol' Rusty - FB/EK Sedan
Posted: Thu Jul 08, 2021 3:48 pm
by funkyscooter
Hey that's awesome - great work Rob. Your pictures and detailed build notes are very helpful.
Re: Ol' Rusty - FB/EK Sedan
Posted: Fri Jul 09, 2021 4:50 pm
by funkyscooter
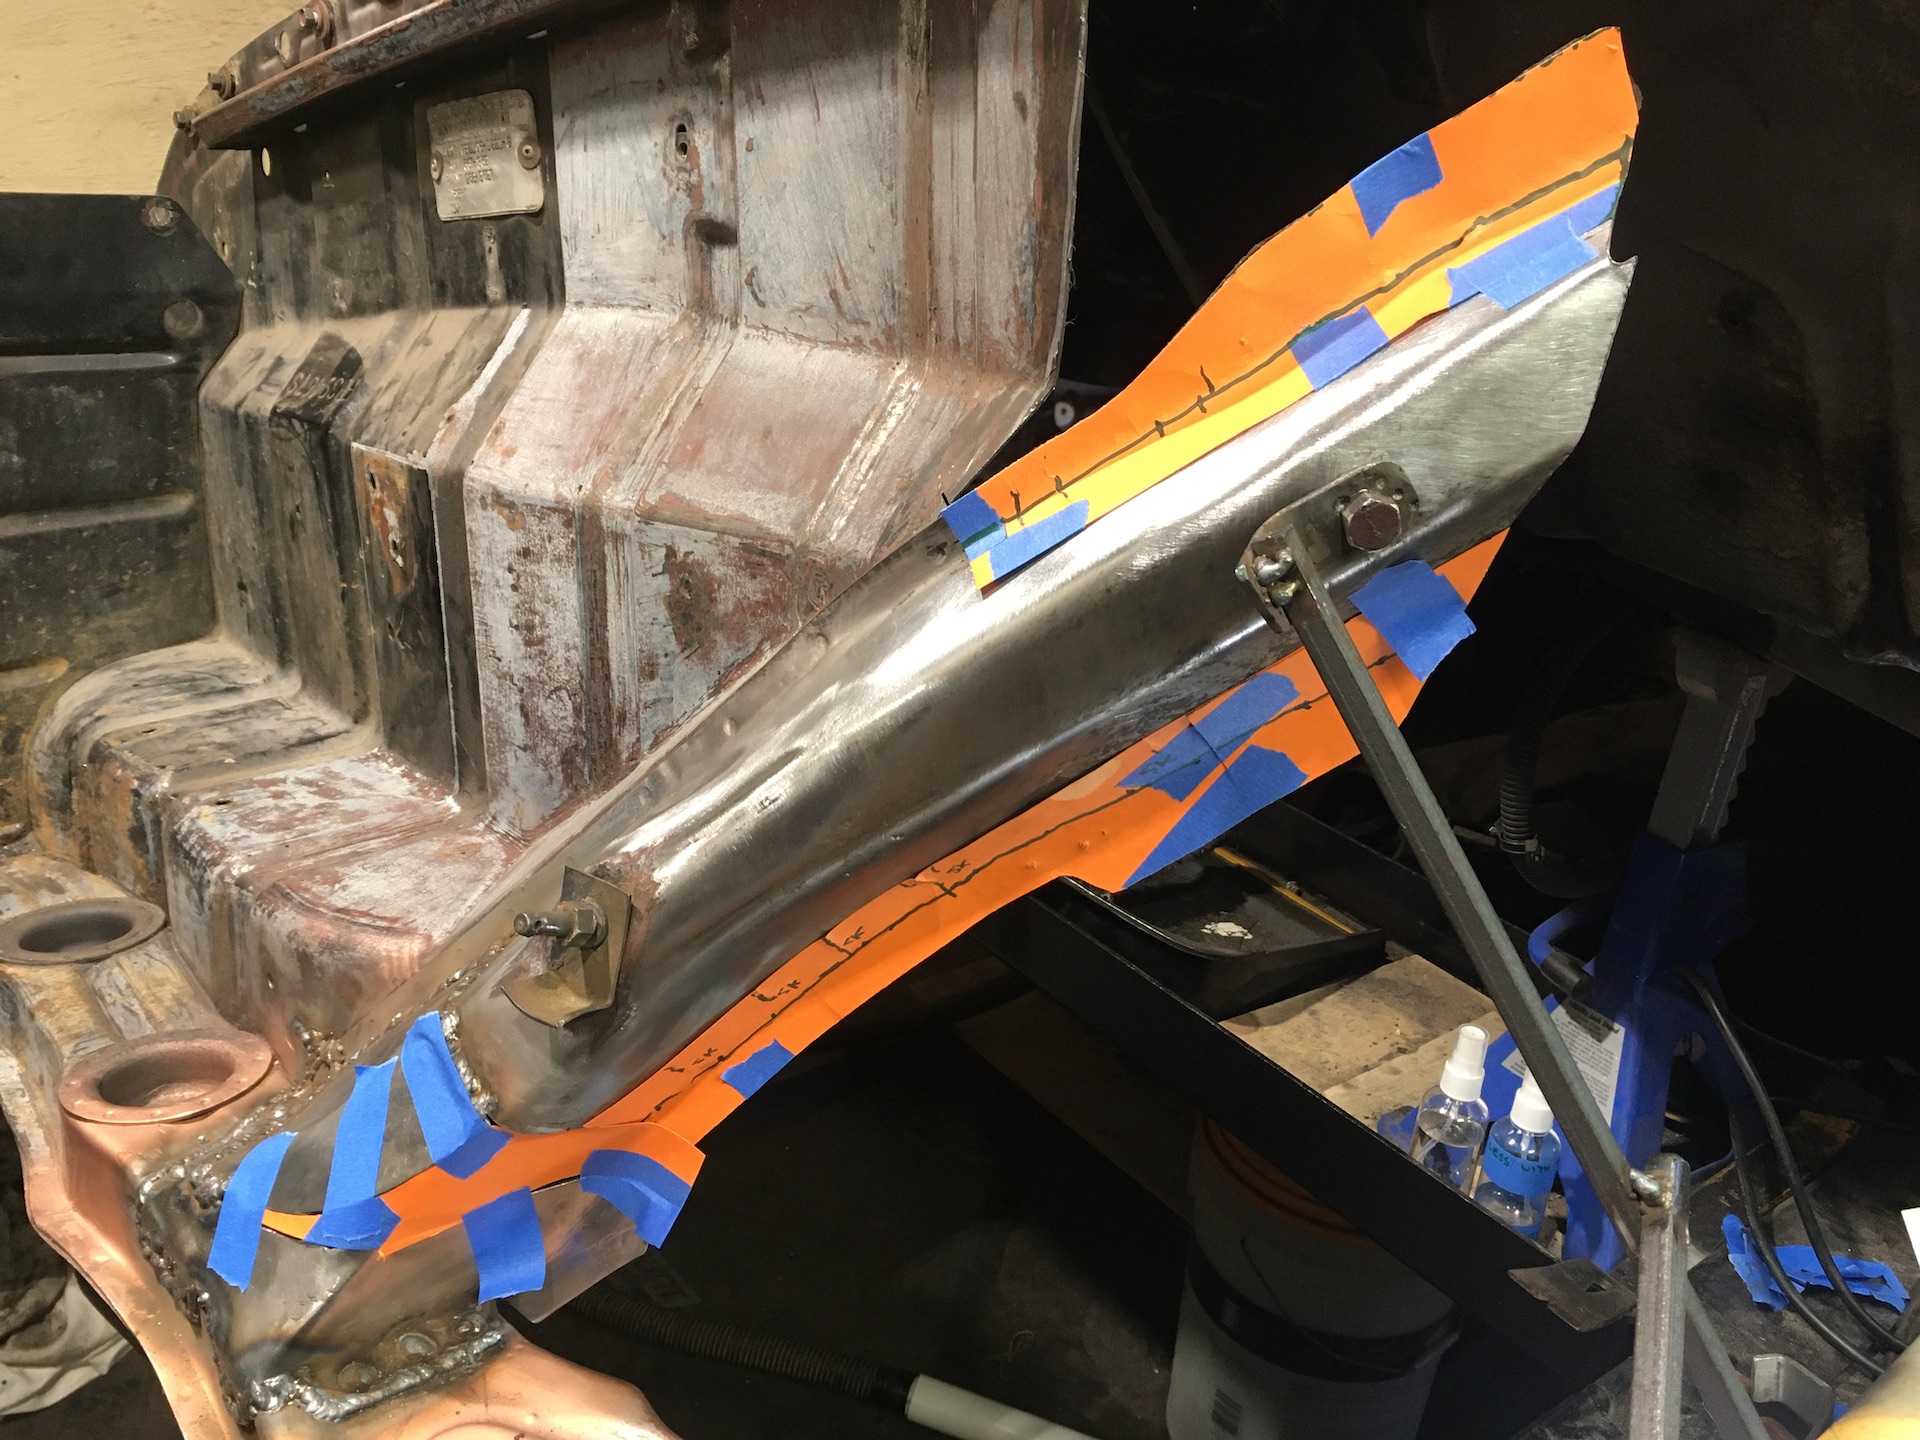
Fabrication day. Well the start of it anyway. Got a bit obsessive on this. You will never see it, but that’s what makes it a good place to practice some fabrication skills.
Paper template to start.
- IMG_8560.JPG (619.5 KiB) Viewed 753 times
I was hoping that the curves would all sort themselves out when I folded the paper. Sure enough….
- IMG_8563.JPG (604.85 KiB) Viewed 753 times
Metal is 1.5mm which is not fun to work. Not sure if I should have pressed the shapes, then folded the curve, but I opted for the curve as the shape are a bonus. Got the press into action to help get these curved lines started.
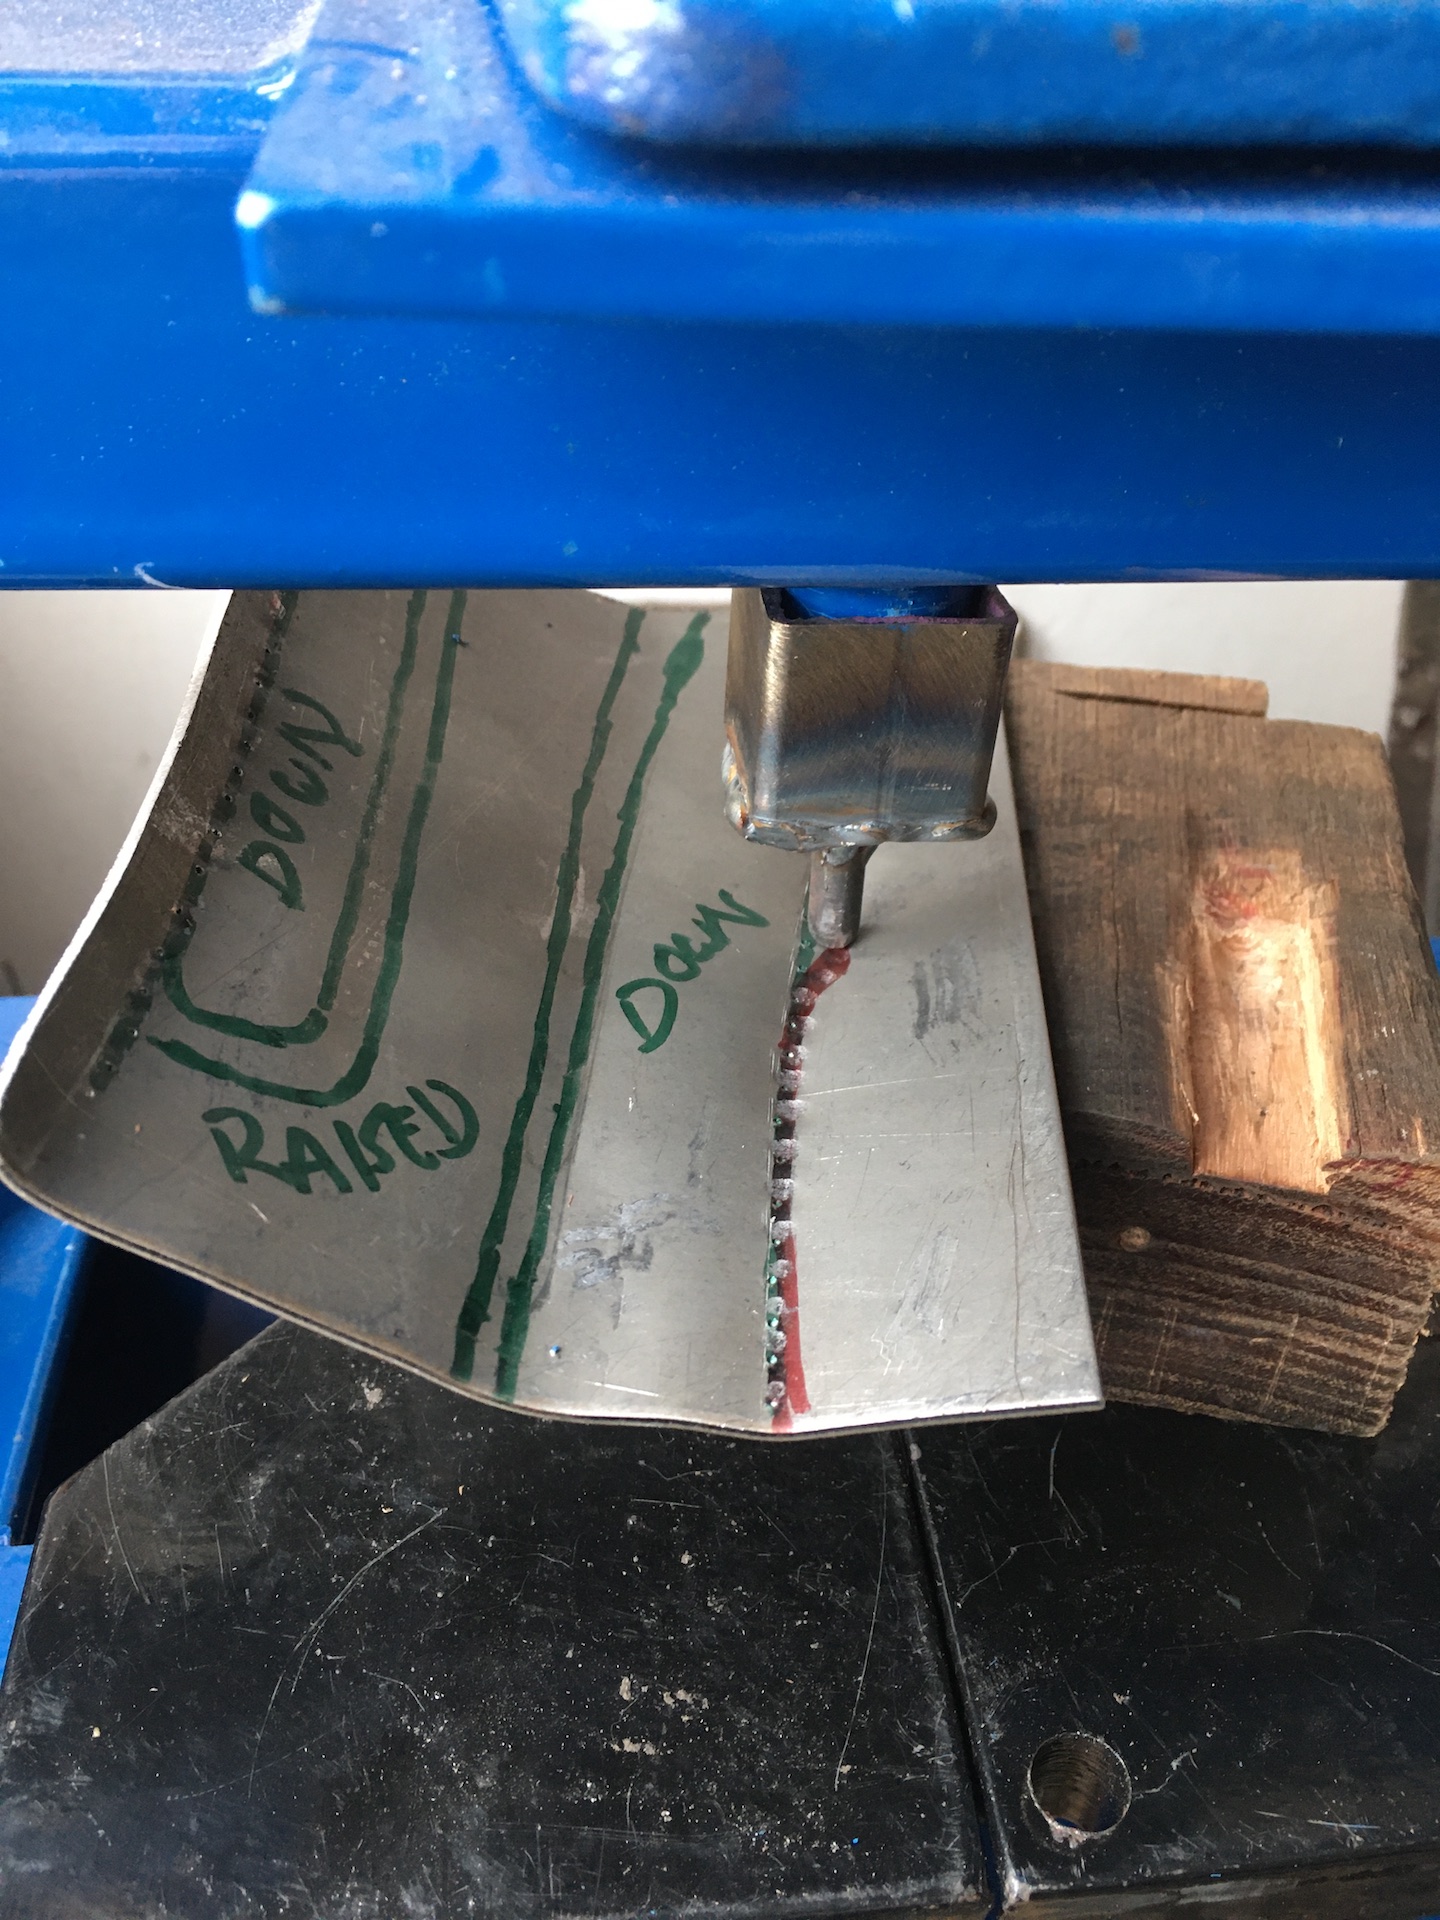
- IMG_8568.JPG (672.73 KiB) Viewed 753 times
Then it was all pretty much formed in the vice with a couple bits of hardwood sandwiching some 3mm bar to create a gap, and belting repeatedly it with a cold chisel. First one side, then the other, to create the raised areas. Those dimples on the curve annoyed me so spent a bit of time hammering them out later. Might sacrifice a supercheap cold chisel in the future for the press.
- IMG_8570.JPG (643.54 KiB) Viewed 753 times
Lines are nowhere near as sharp, but the idea is to get the height right for the crush tube tabs.
- IMG_8575.JPG (528 KiB) Viewed 753 times
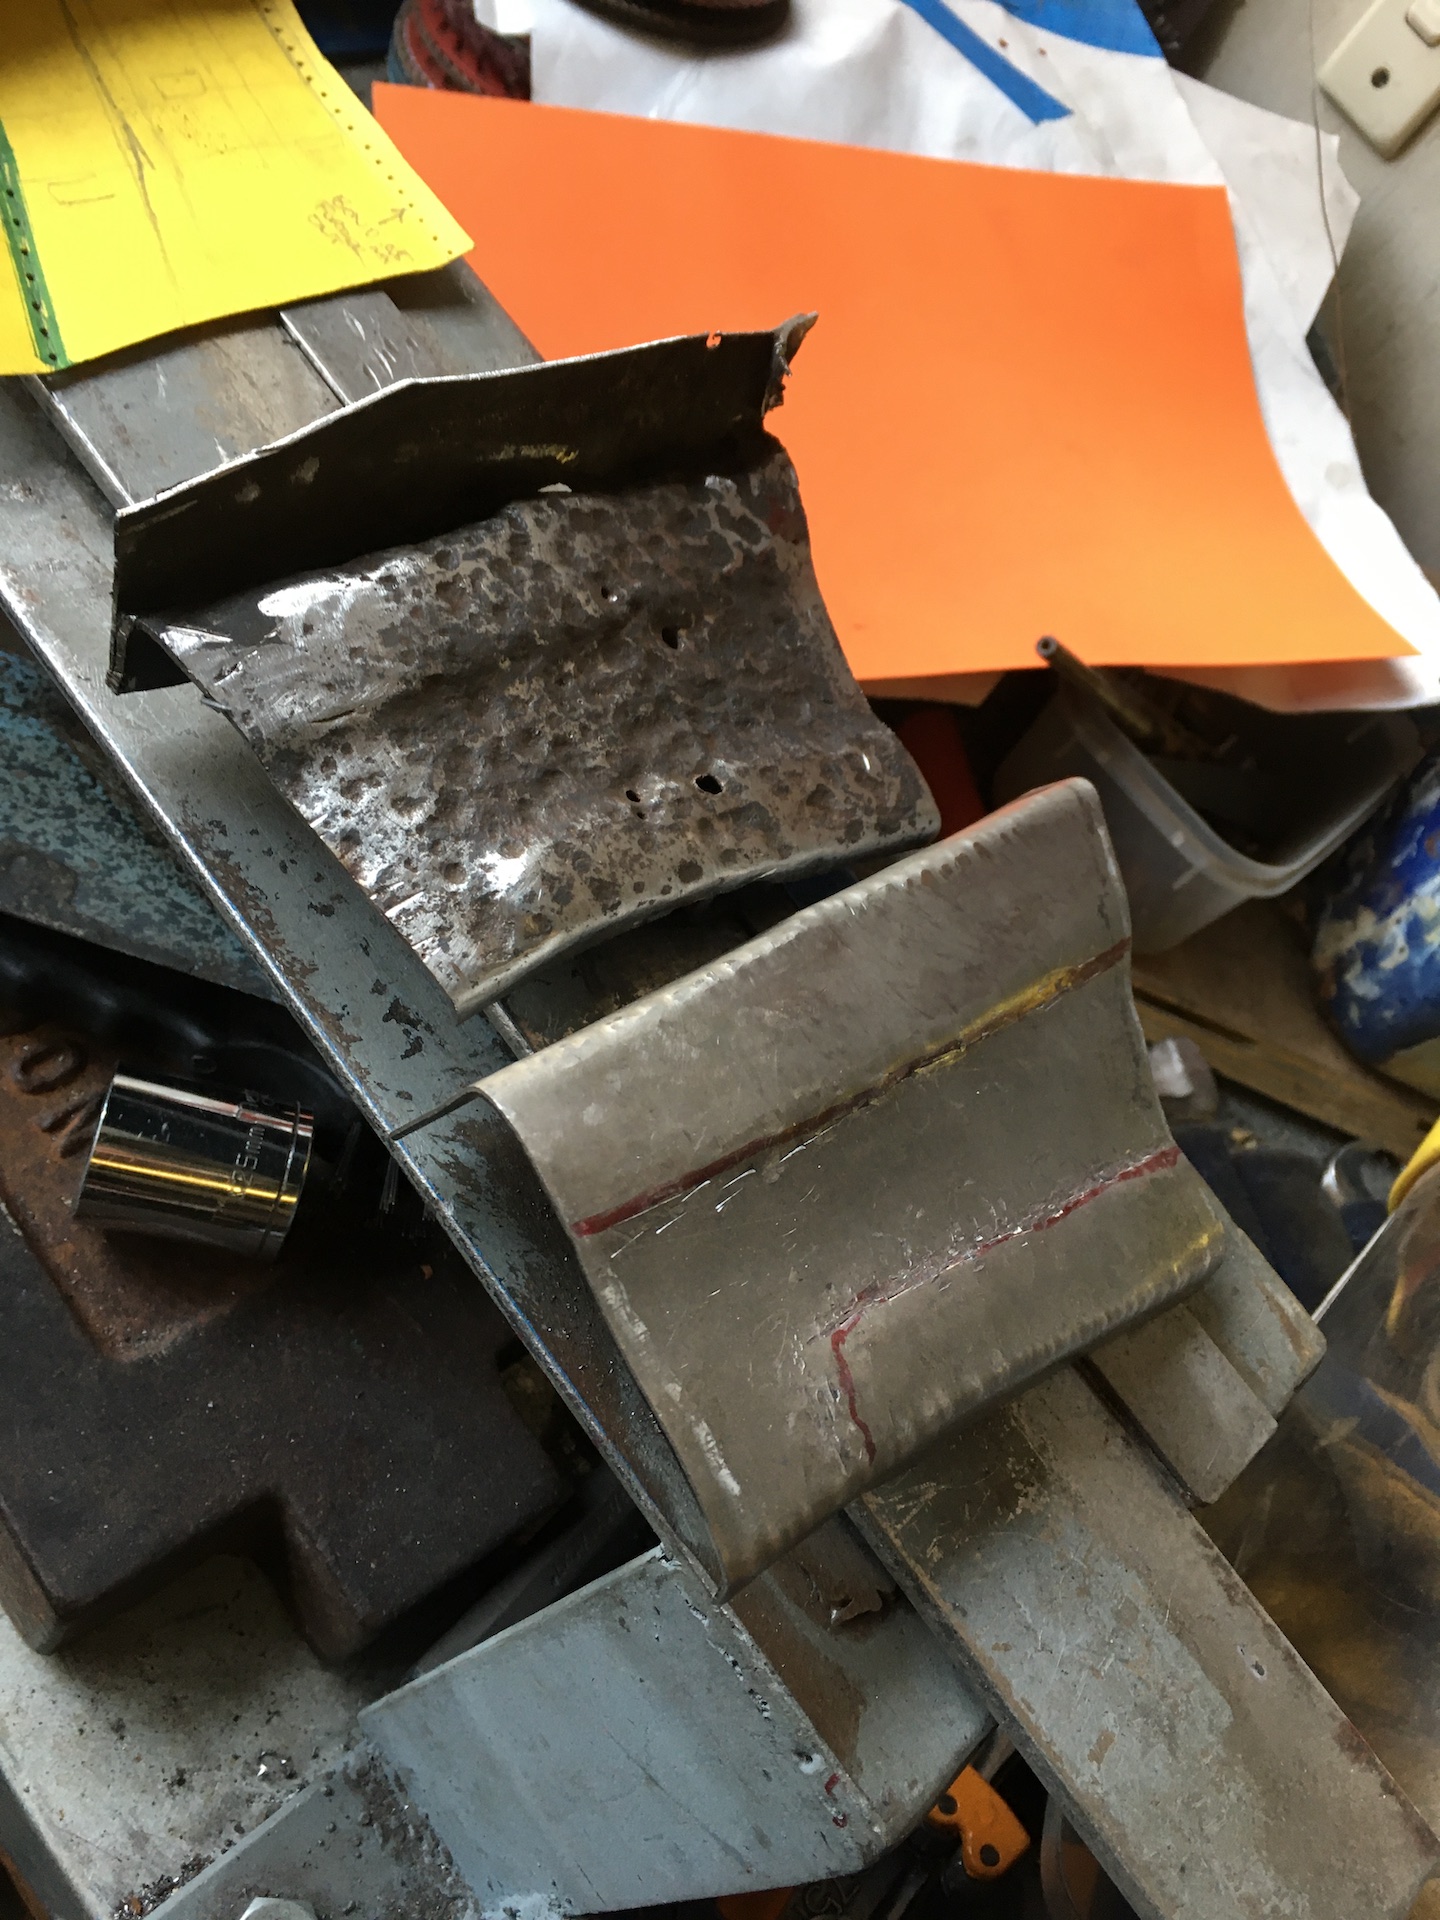
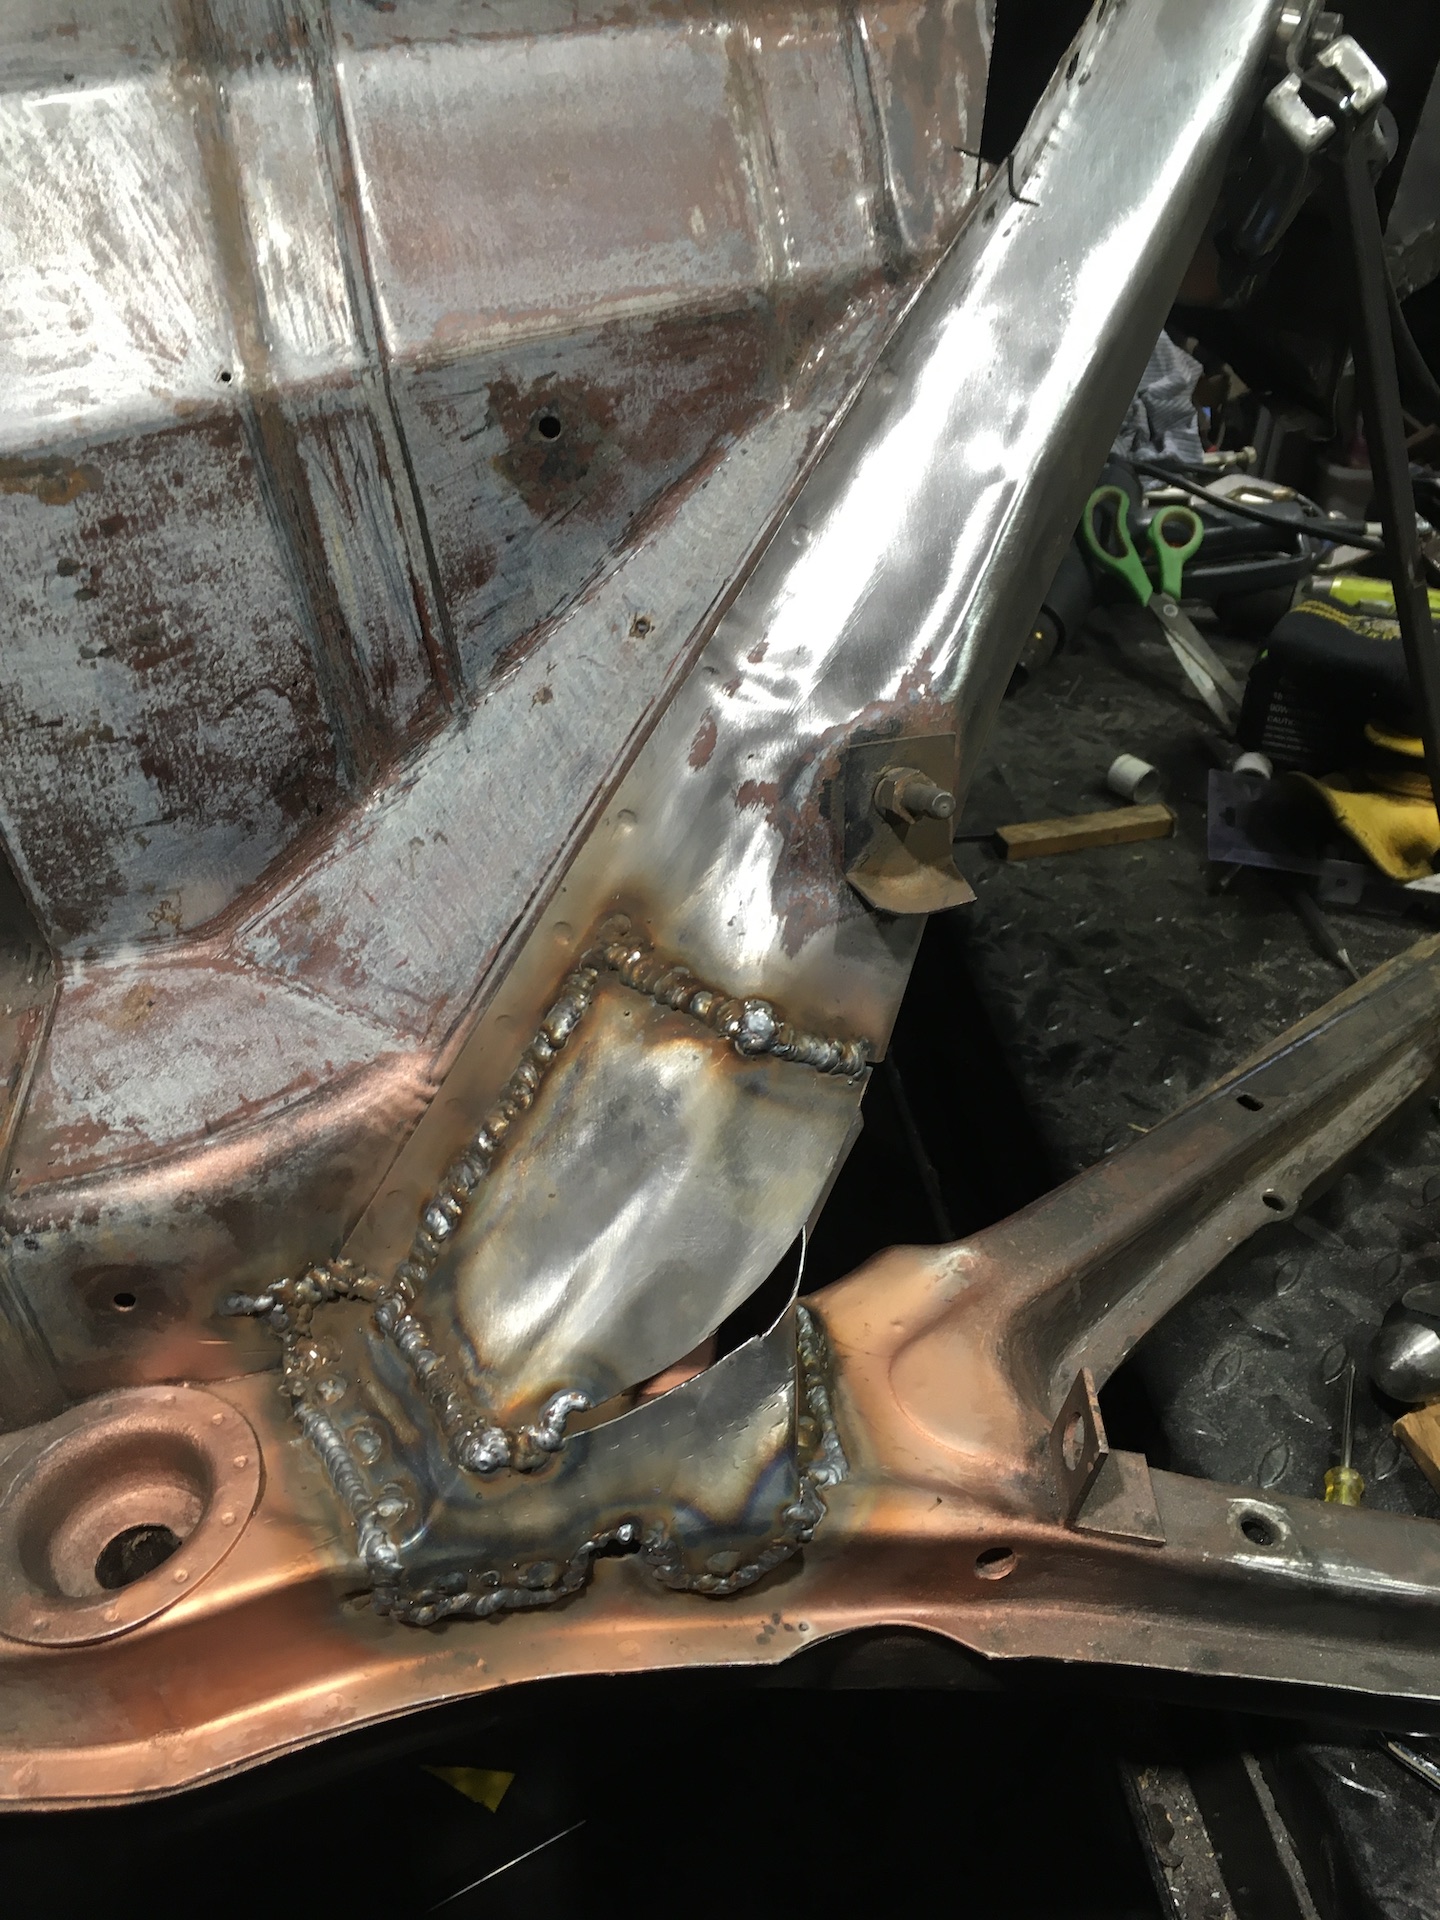
Welding in the repurposed crush tube, it was in top condition. Spent a bit of time measuring with the cut out piece, and the steering box, to get the crush tube in the right spot. I also wire brushed and vacuumed out the open subframe, then gave it a generous squirt of Rust Reformer.

- IMG_8583.JPG (552.4 KiB) Viewed 753 times
Laying dimes! My best welding yet. Hate forming 1.5mm, love welding it.
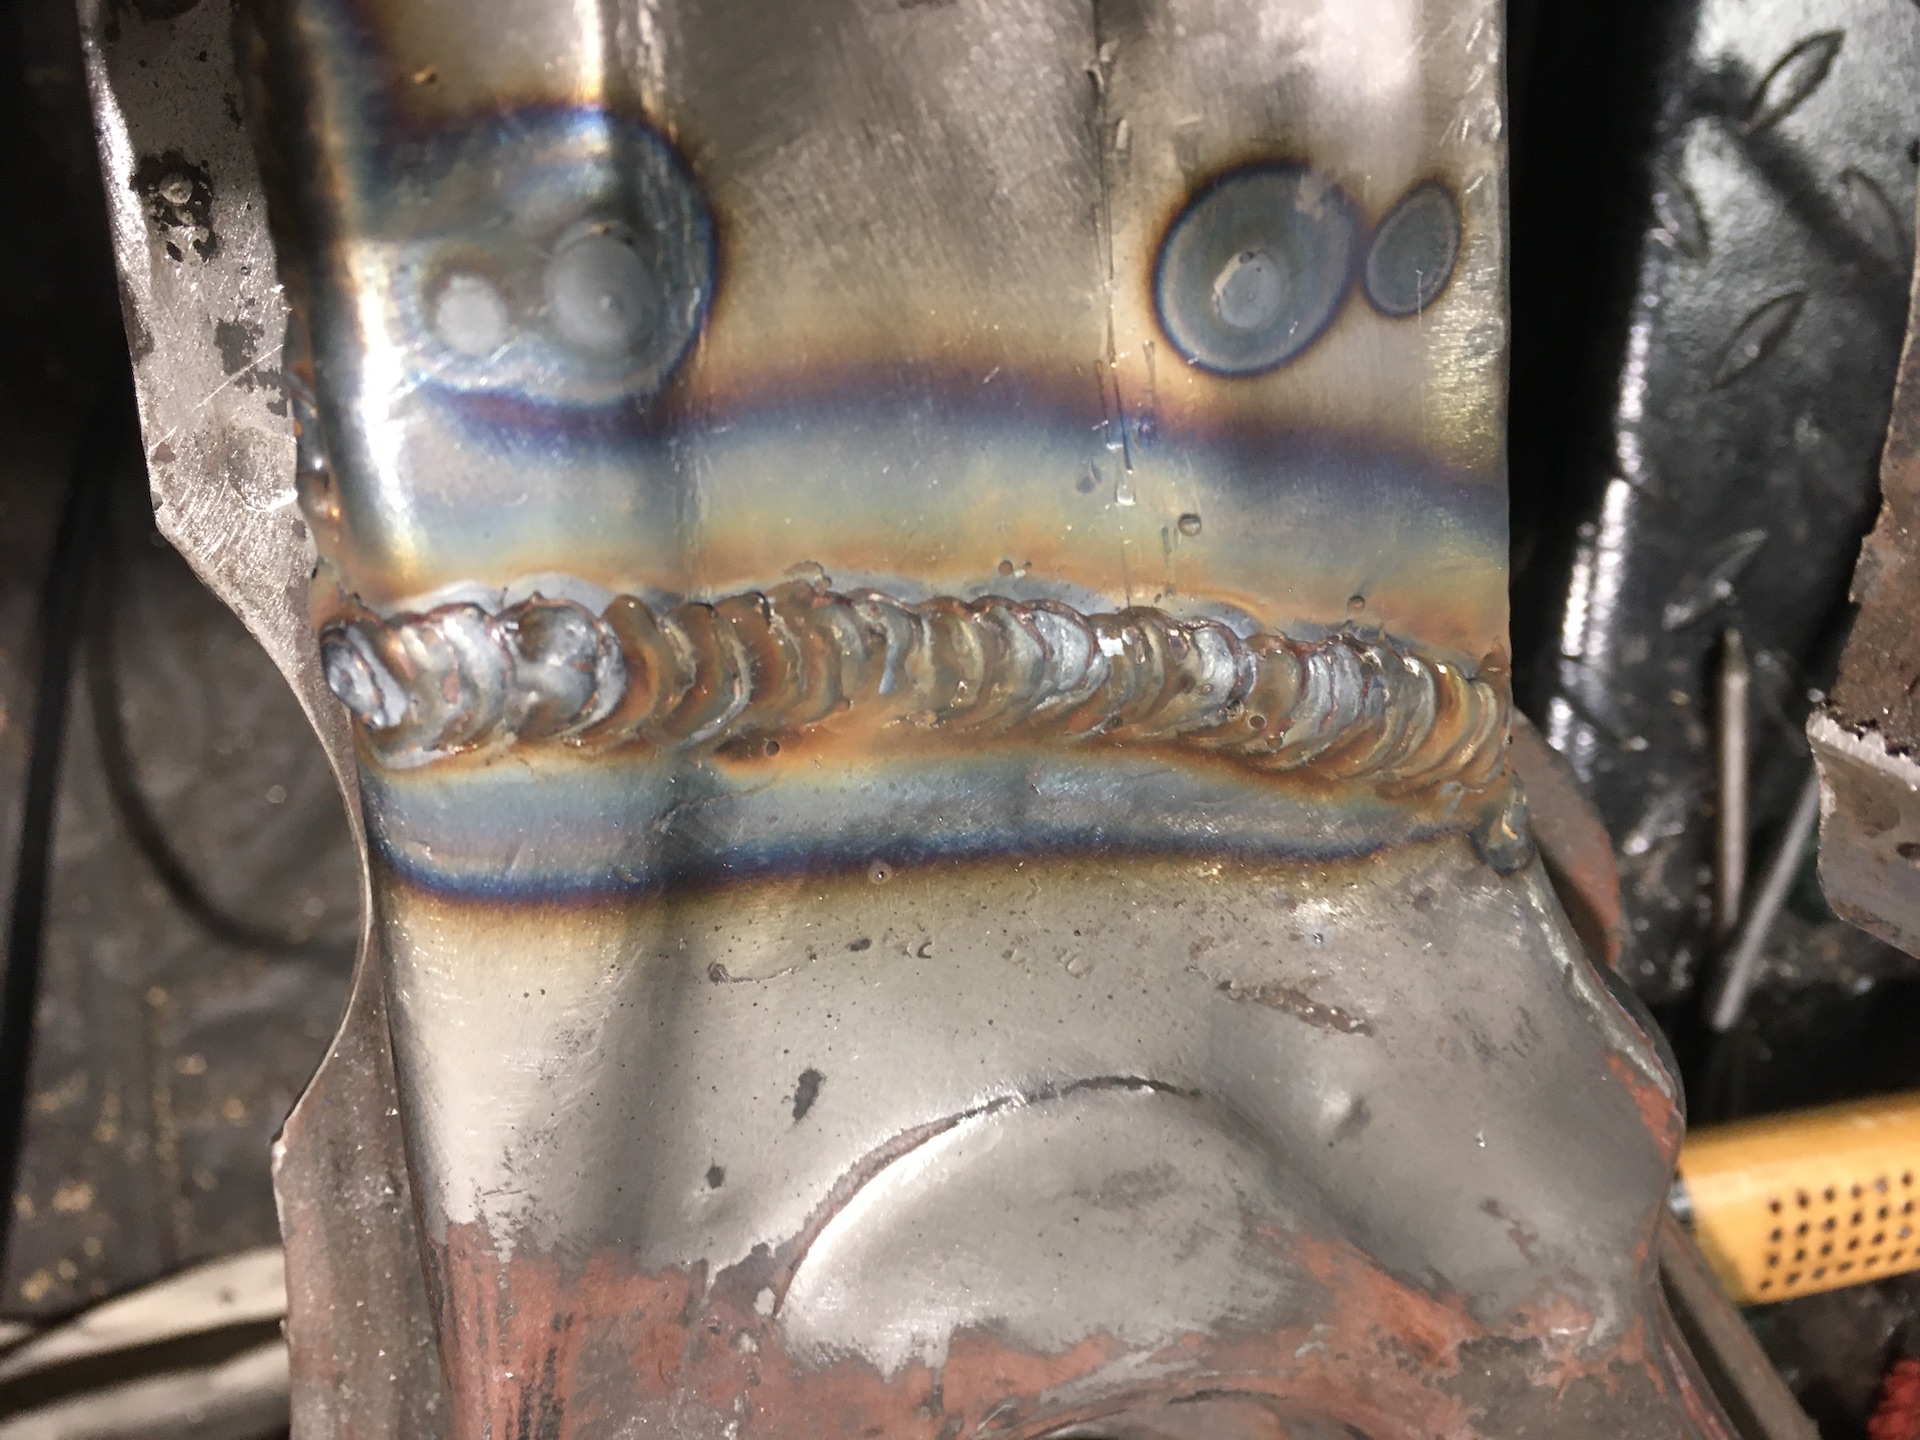
- IMG_8585.JPG (632.2 KiB) Viewed 753 times
All closed up. I’ll grind it off and get started on the vertical leg next.
- IMG_8586.JPG (786.61 KiB) Viewed 753 times
Re: Ol' Rusty - FB/EK Sedan
Posted: Fri Jul 09, 2021 5:36 pm
by Brett027
Wow- top job. Very much reflecting all the effort you have gone to. Those welds are looking very professional too. Enjoying this build a lot- thanks

Re: Ol' Rusty - FB/EK Sedan
Posted: Fri Jul 09, 2021 6:13 pm
by Blacky
Yup , what he said

Re: Ol' Rusty - FB/EK Sedan
Posted: Fri Jul 09, 2021 6:28 pm
by Errol62
Great work Scotty
FB ute driver, EK van project
Re: Ol' Rusty - FB/EK Sedan
Posted: Fri Jul 09, 2021 7:56 pm
by ardiesse
I am now very thankful that it was "only" the passenger's side subframe main member that rotted out on "Found Object". You have gone to way more trouble than I did.
Rob
Re: Ol' Rusty - FB/EK Sedan
Posted: Sun Jul 11, 2021 12:42 am
by Blacky
Took some pics of the mirror today , it has no mounting plate or rubber gasket to go between the mirror and the door


Sent from my iPhone using Tapatalk
Re: Ol' Rusty - FB/EK Sedan
Posted: Sun Jul 11, 2021 8:41 am
by funkyscooter
Looks the goods. Maybe not as 'spaceage' as Harv's with its floating mirror, but will tart up the old girl and way better than what it had on it. PM me a price.
Thanks
Scott
Re: Ol' Rusty - FB/EK Sedan
Posted: Thu Jul 22, 2021 8:10 pm
by funkyscooter
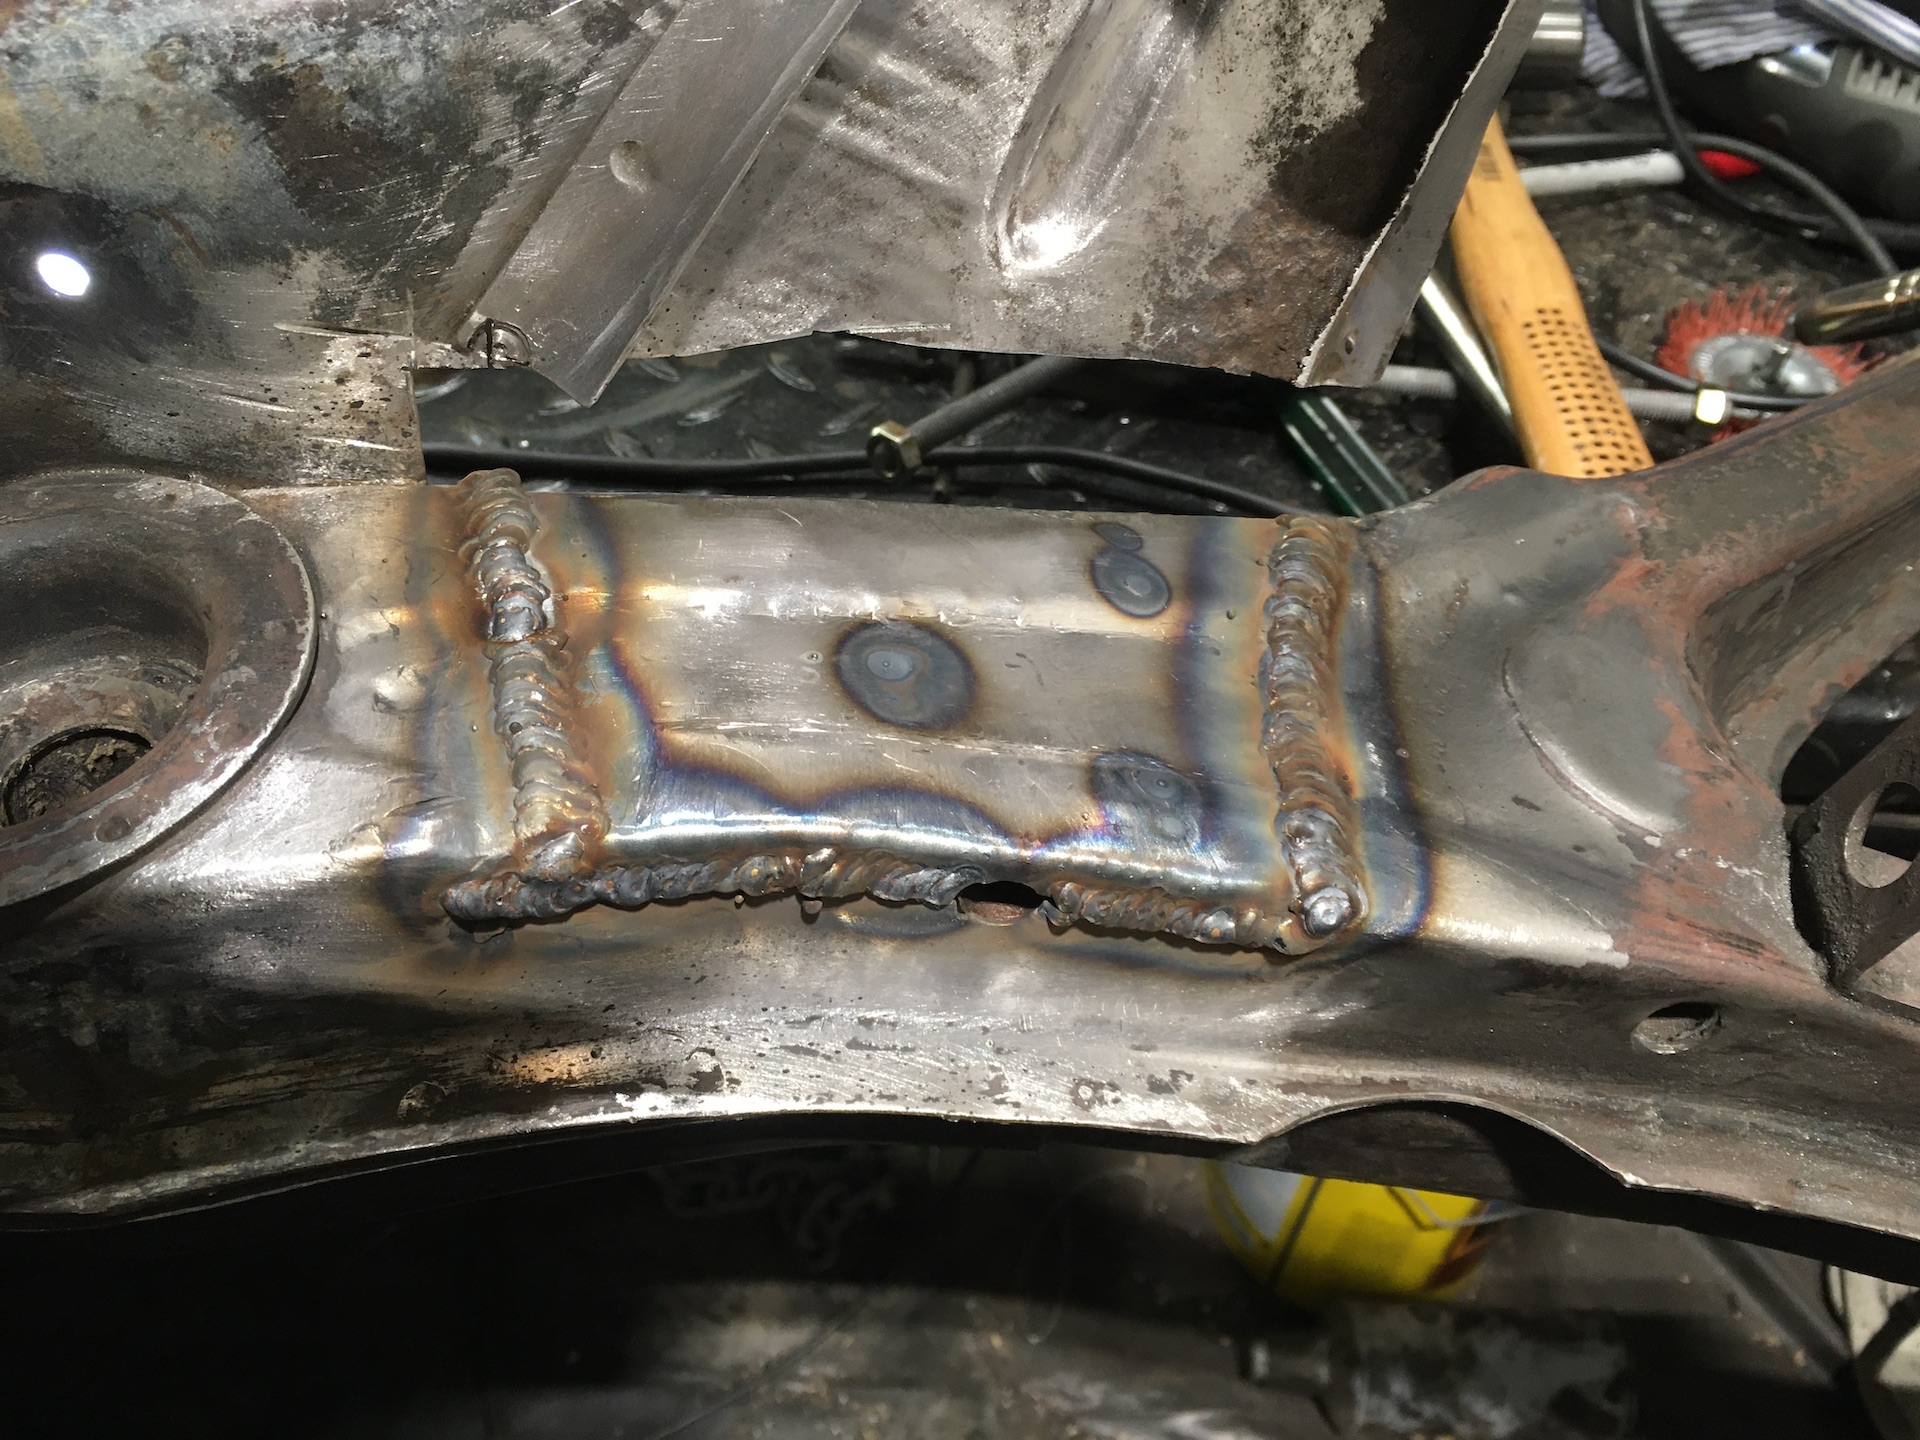
Meanwhile - back on the subframe. Never to be seen so might as well make it shiny.
- IMG_8590.JPG (568.63 KiB) Viewed 885 times
Cut replacement bottom section based on my yellow card template. I am using 1.6mm cold rolled on this as it’s the closest I have to the 1.4mm it is replacing.

- IMG_8591.JPG (484.74 KiB) Viewed 885 times
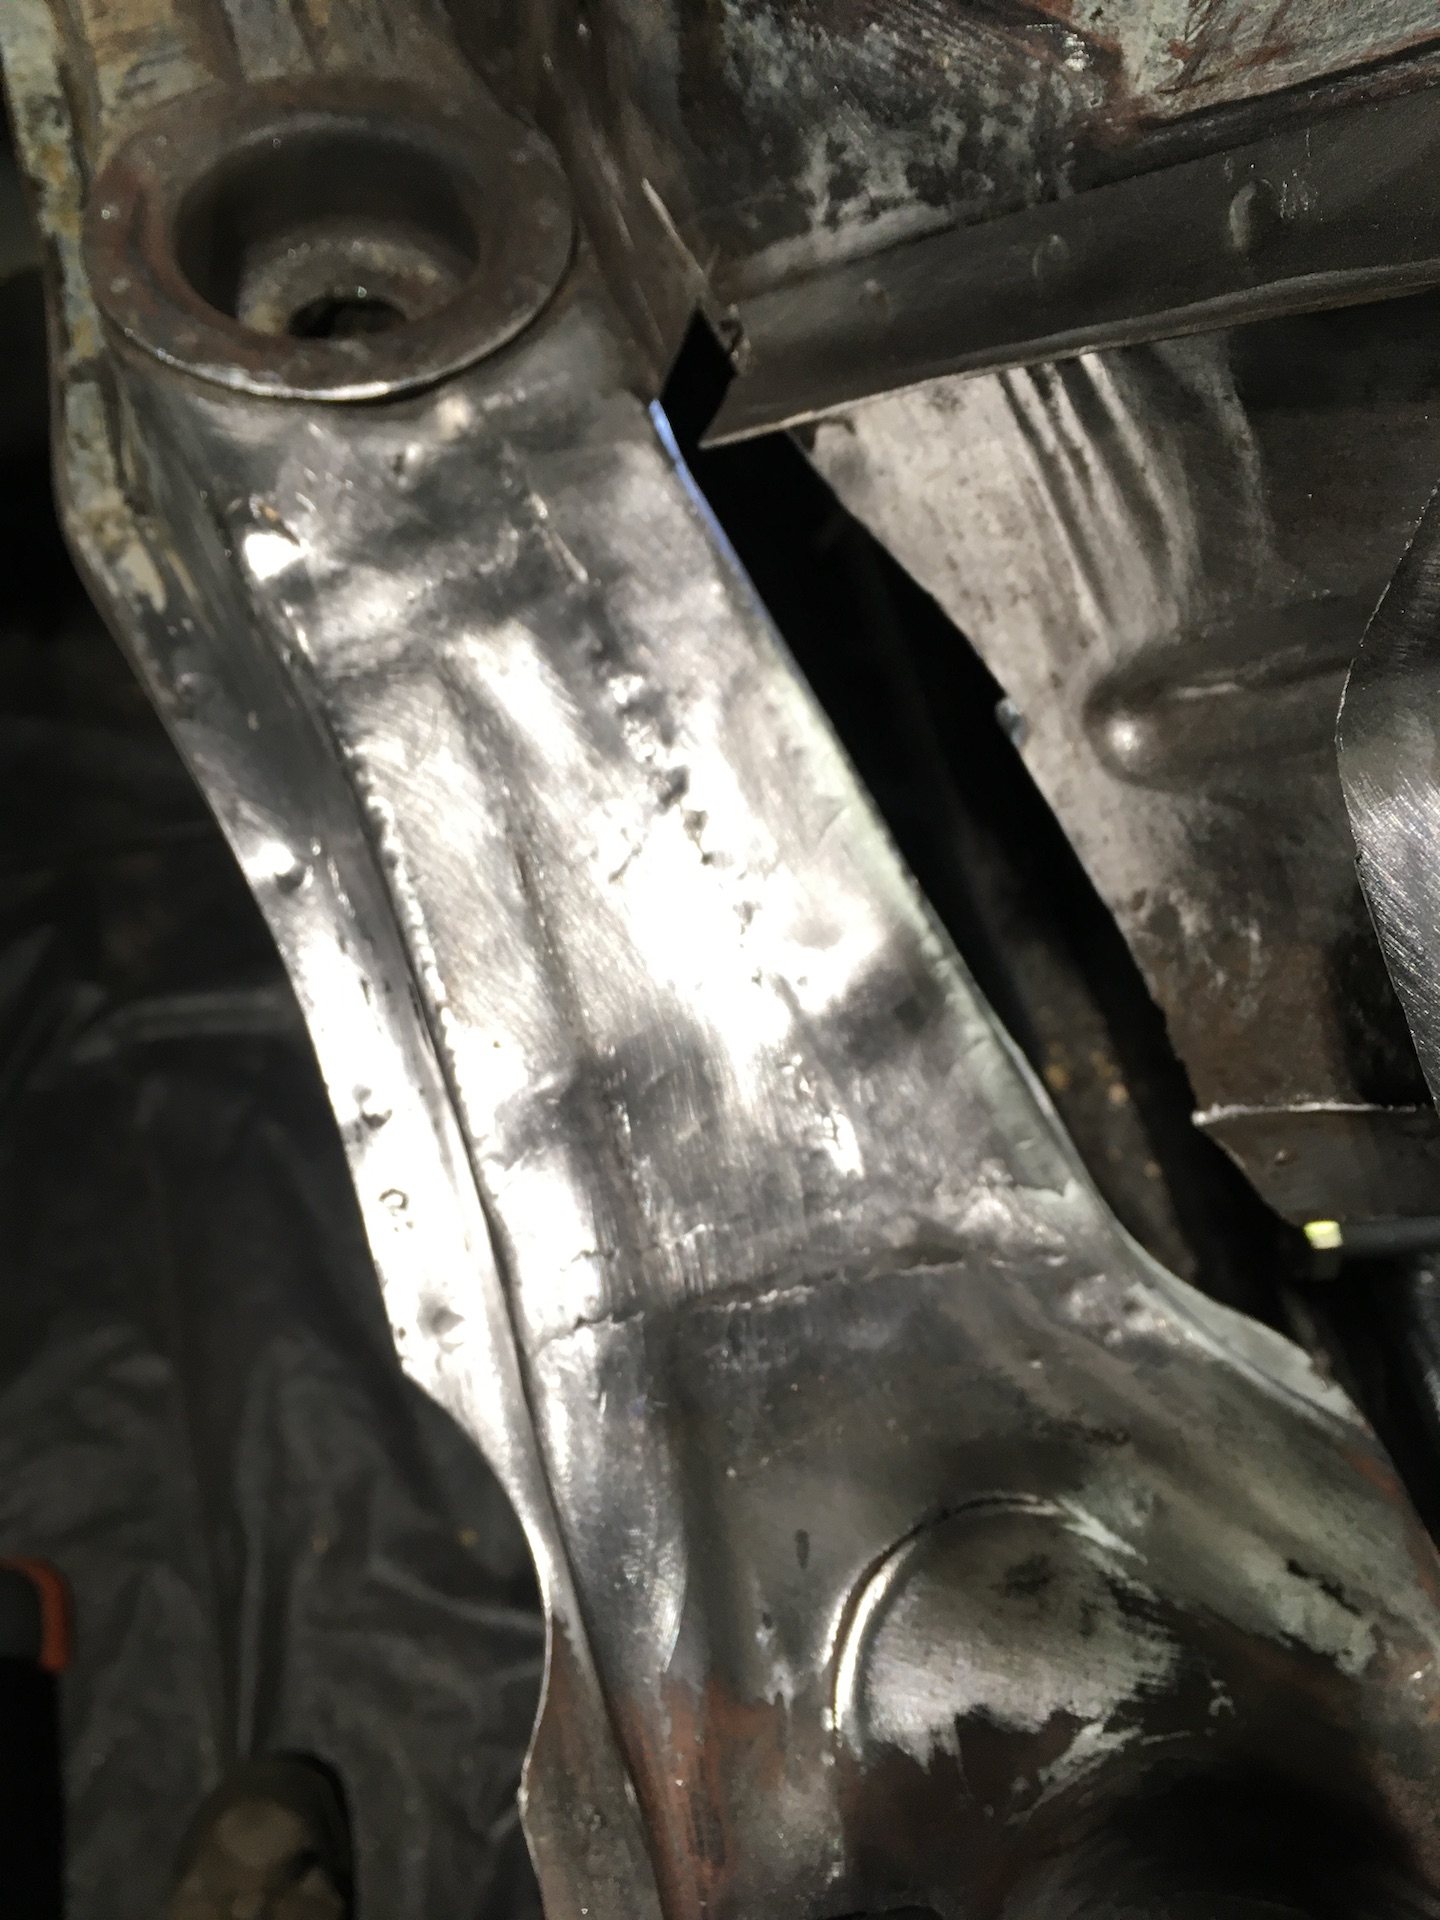
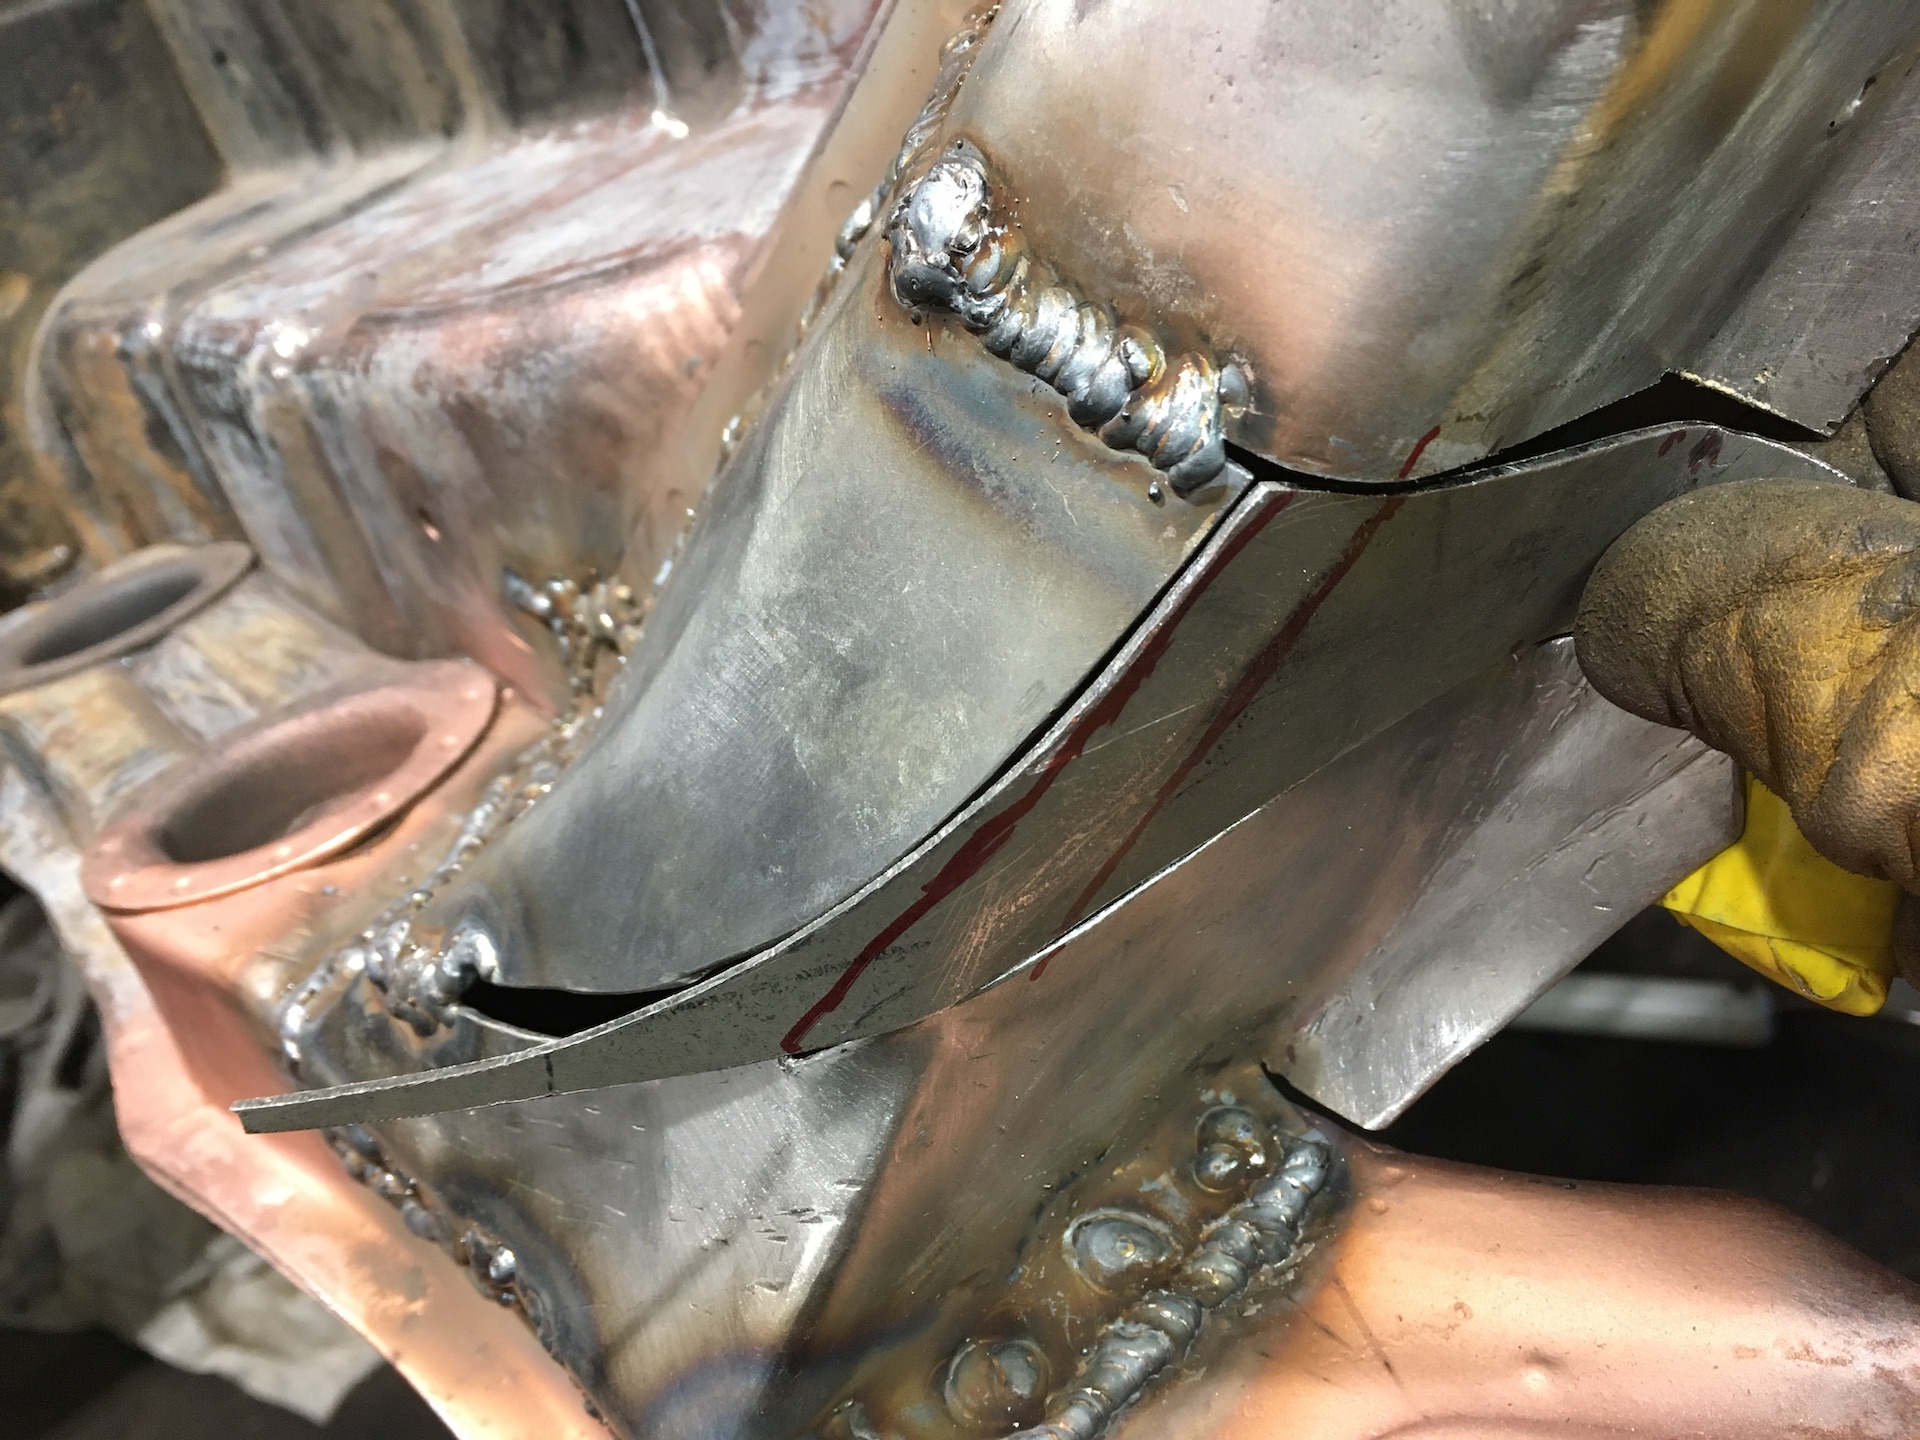
This is not easy to work with. Spanners help. In the background you can see I have the inspection hole piece back in place to help me line things up. Unfortunately the white line indicates more rust so once the bottom is sorted I’m cutting that out.
- IMG_8593.JPG (747.74 KiB) Viewed 885 times
I kept a little extra on the bottom piece to cover the cancer in the inspection piece - not enough though
- IMG_8620.JPG (841.25 KiB) Viewed 885 times
Welded in
- IMG_8621.JPG (732.21 KiB) Viewed 885 times
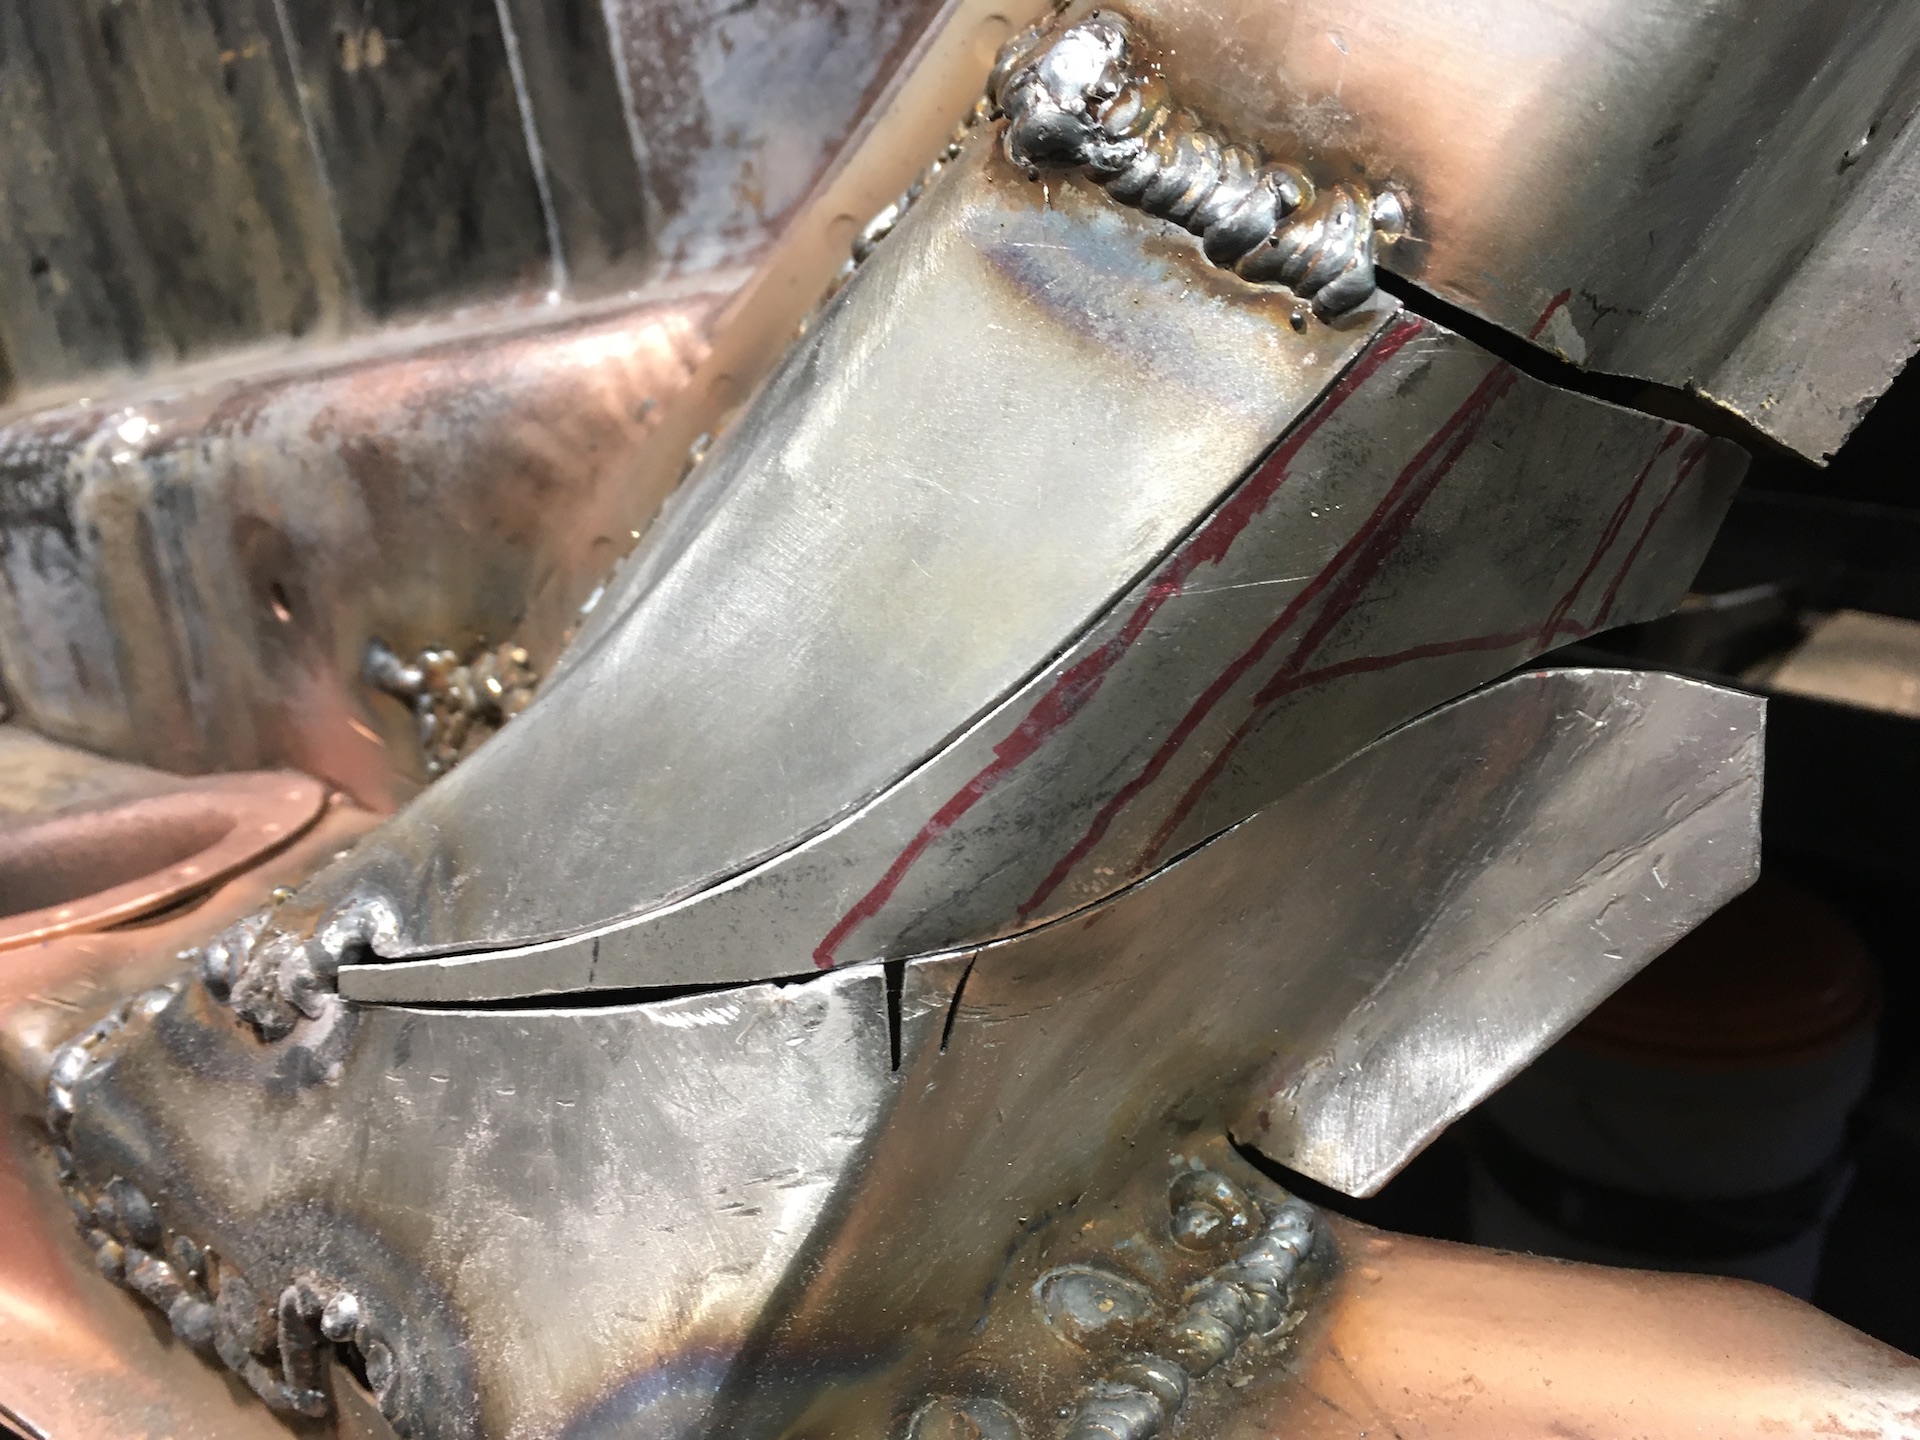
Now to fill in the gap. I ran a finger nail around some card to get the template. Had to make a little cut in the card to get it to fit. This should have been easy, but the shape is a bit complex - what you are seeing is my 3rd attempt at card and metal.
- IMG_8631.JPG (566.58 KiB) Viewed 885 times
While I had the card out I cut the other replacement templates
- IMG_8632.JPG (741.49 KiB) Viewed 885 times
Re: Ol' Rusty - FB/EK Sedan
Posted: Thu Jul 22, 2021 8:11 pm
by funkyscooter
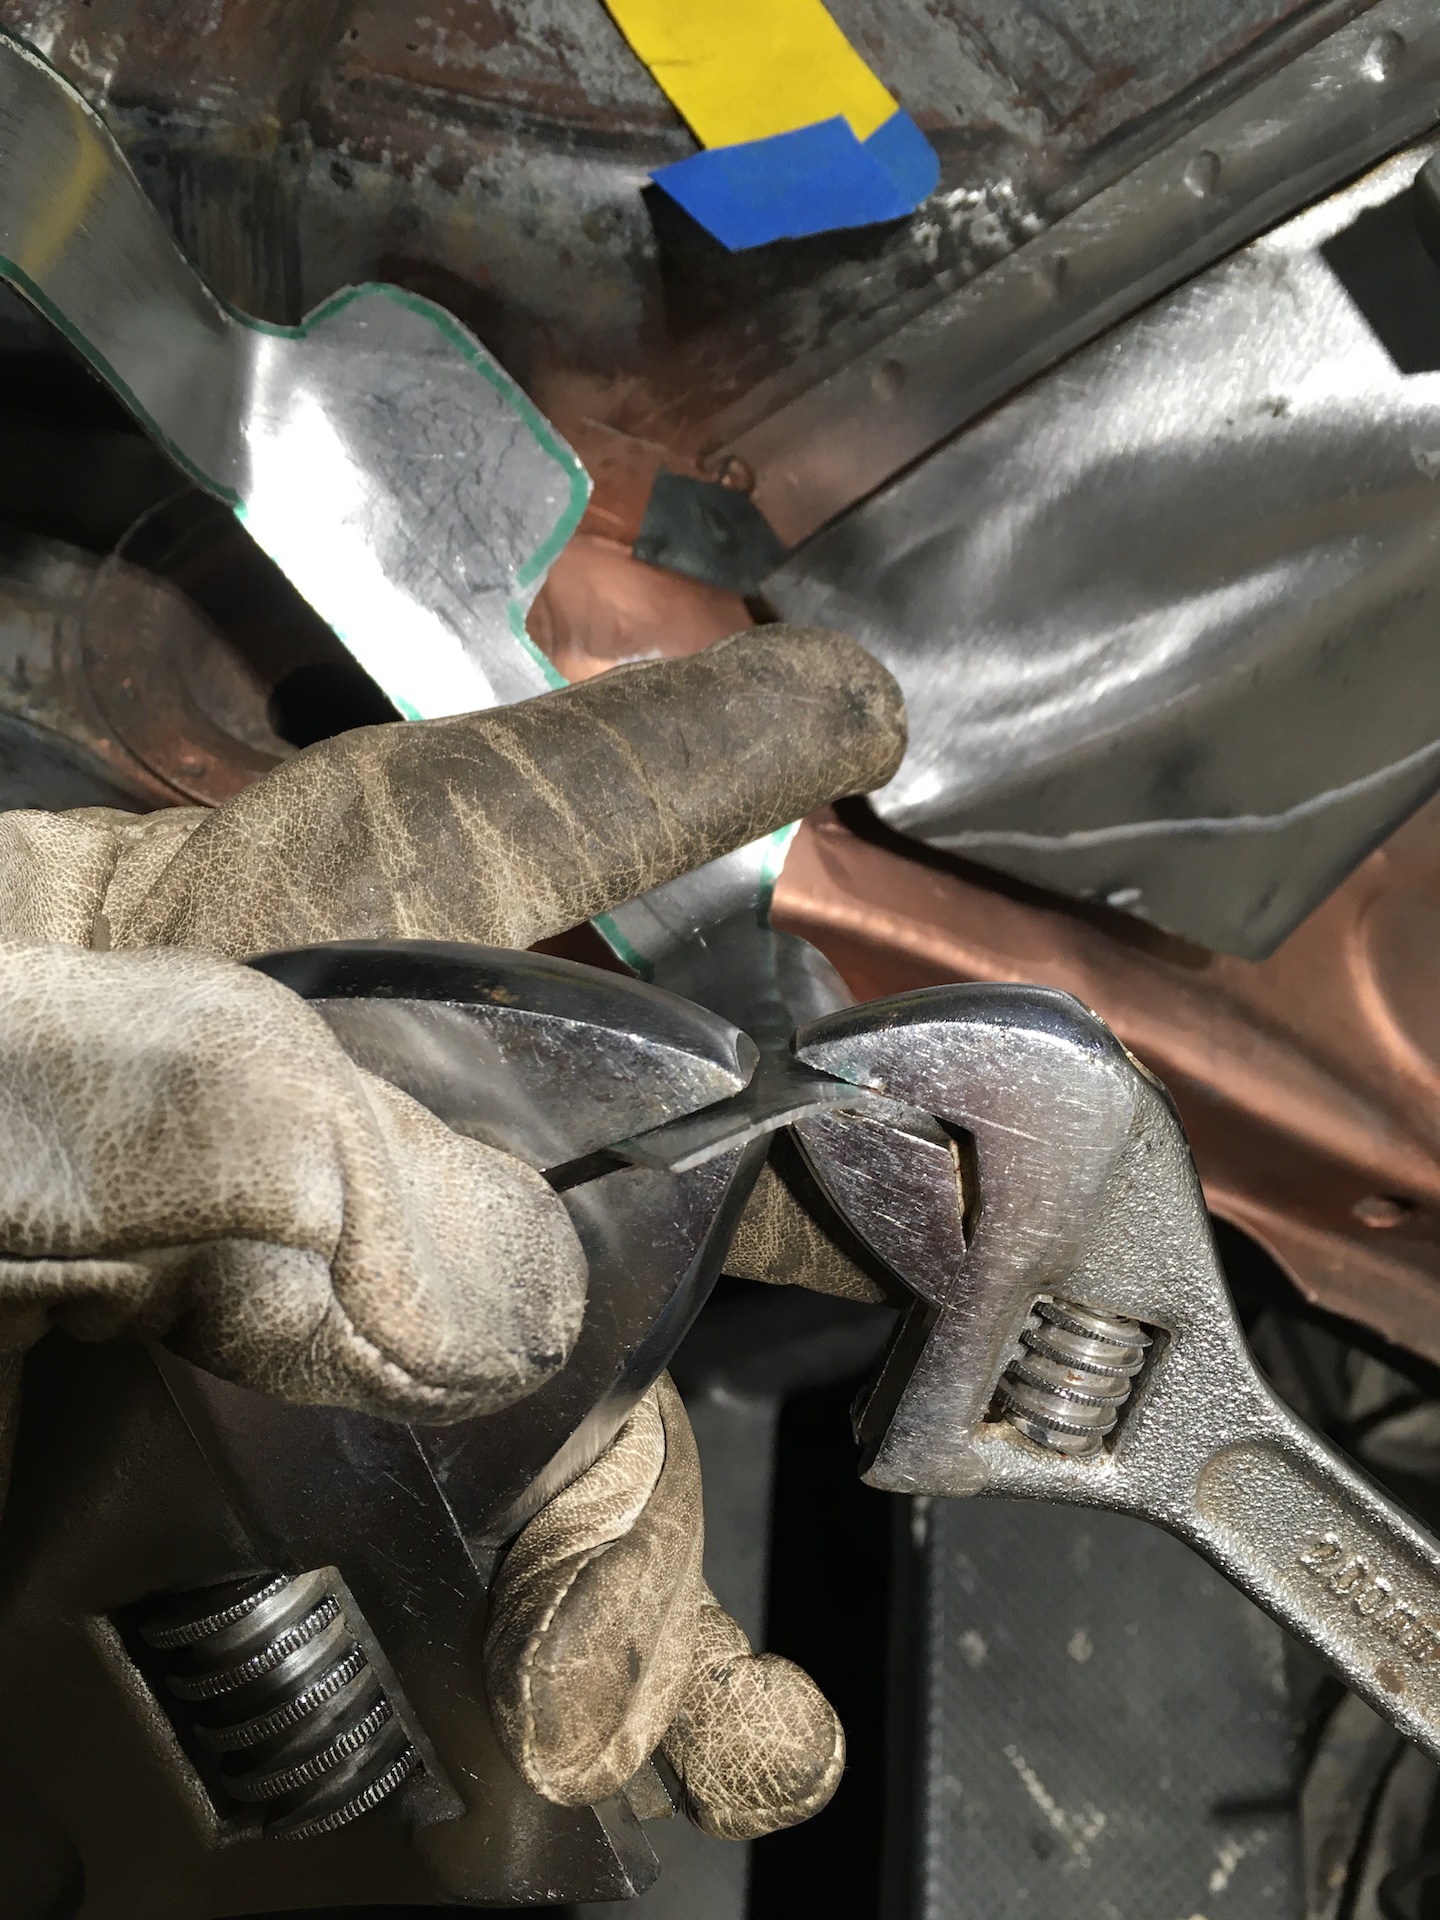
Start fitting the NIke swoosh.
- IMG_8634.JPG (704.2 KiB) Viewed 884 times
Pipe spanner was just the right radius
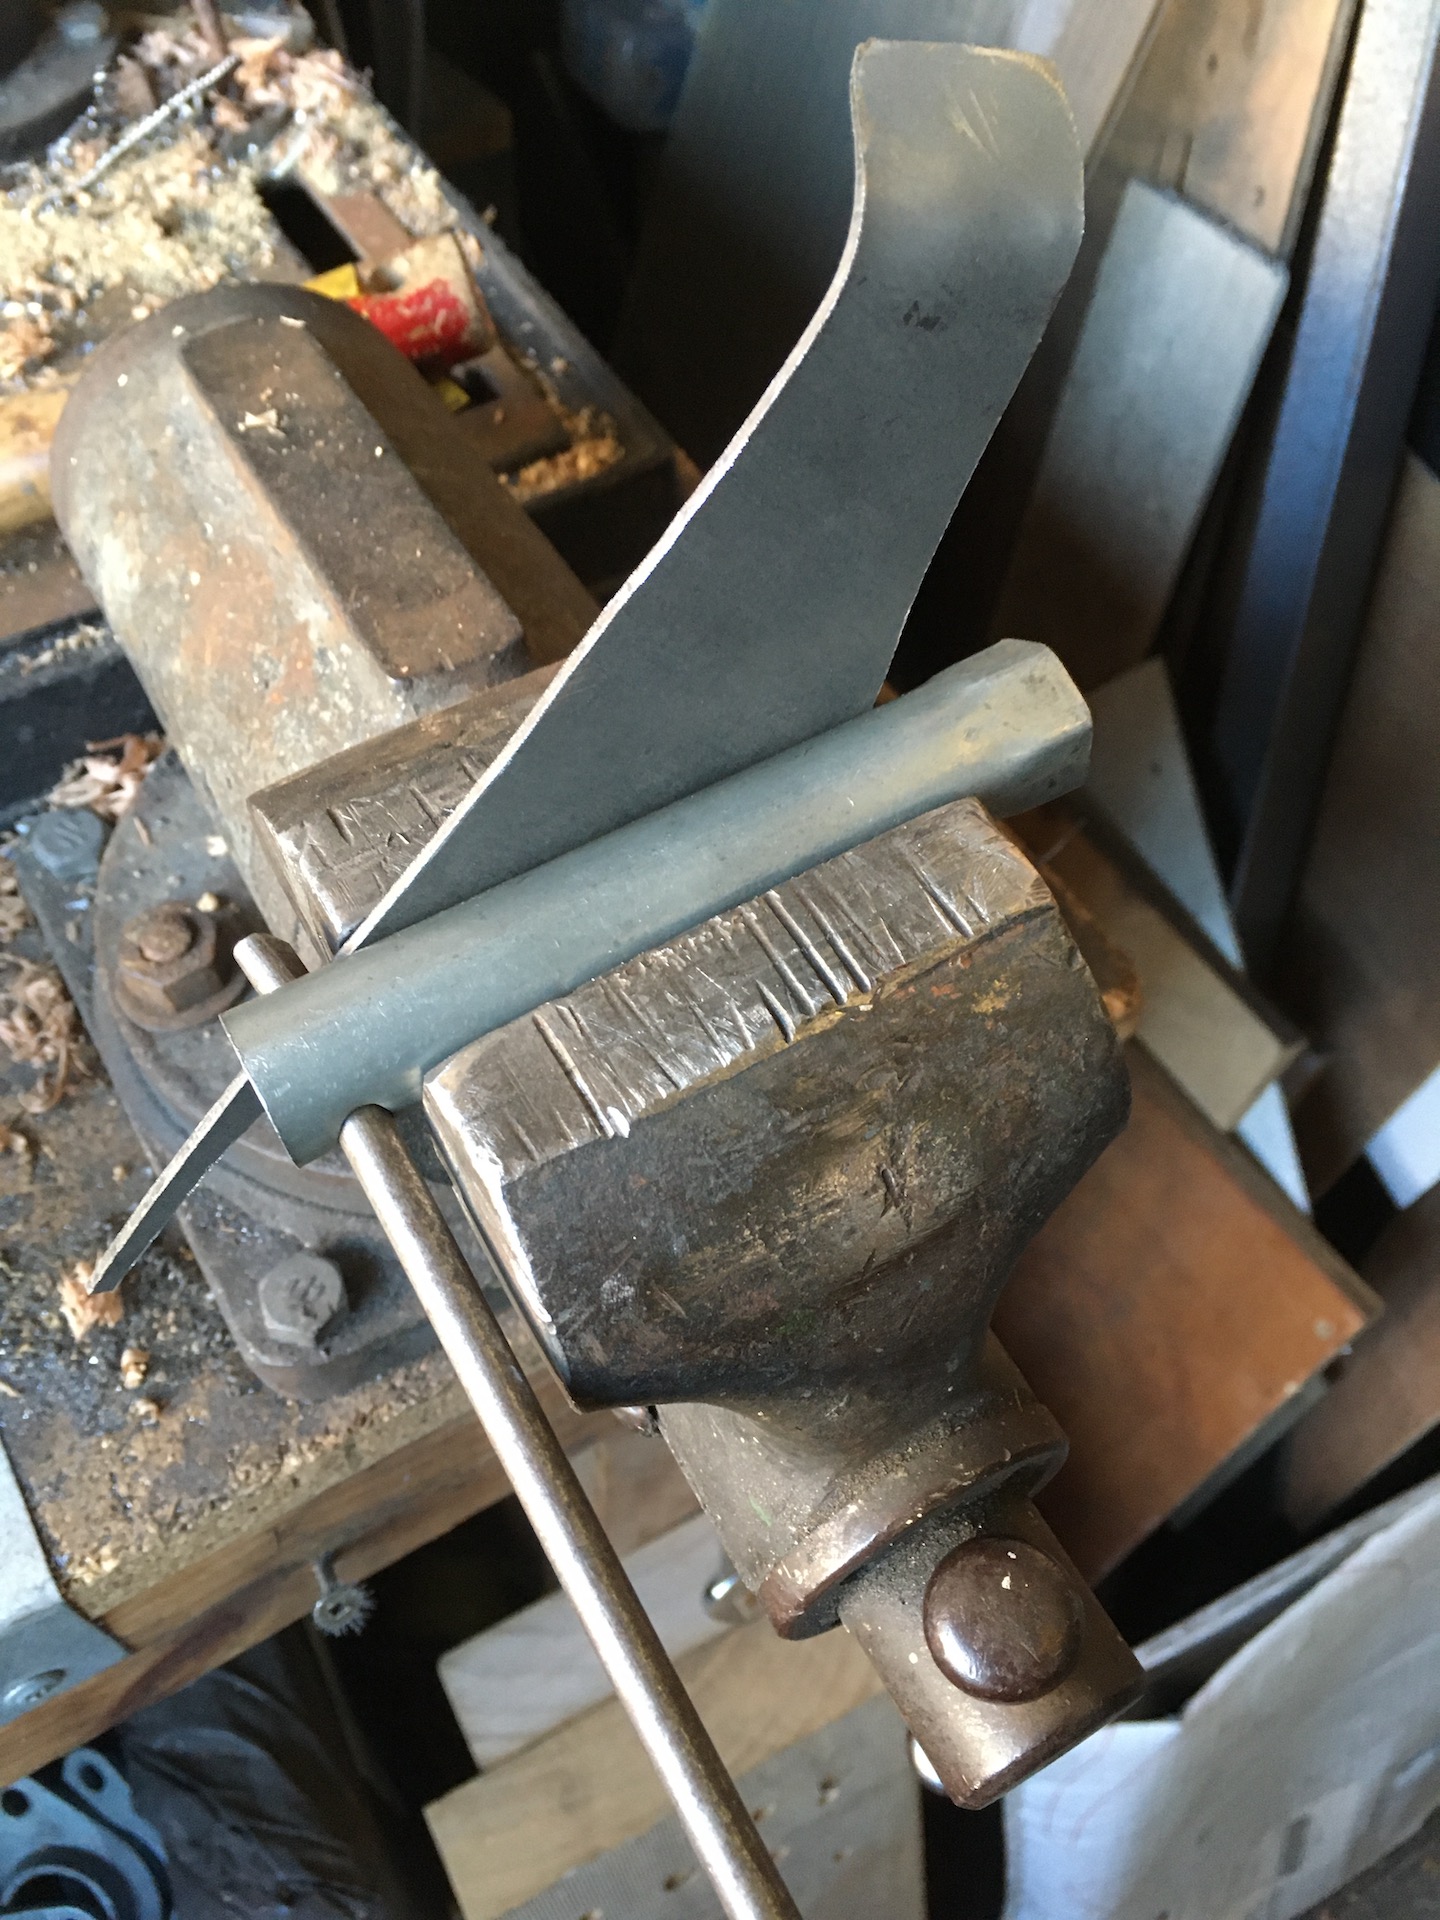
- IMG_8633.JPG (632.95 KiB) Viewed 884 times
Bit of twisting with the shifters and got it to fit.
- IMG_8637.JPG (675.36 KiB) Viewed 884 times


