
Looks great Scotty
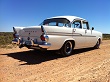
Sputzwagon 2 Scotty's EK standard sedan


-
Sputzwagon

- Posts: 2708
- Joined: Fri Dec 07, 2007 6:27 pm
- State: NOT ENTERED
- Location: Termeil, South Coast NSW
...the story so far...
spent all day yesterday blocking the new Seaforth Green paint back ready for the 'pearl coat' today...


...note the darker green I am using around the 'recesses' this is the same dark pearl geen I'll use in the 'laced flash kit'..
Scotty.
spent all day yesterday blocking the new Seaforth Green paint back ready for the 'pearl coat' today...
...note the darker green I am using around the 'recesses' this is the same dark pearl geen I'll use in the 'laced flash kit'..
Scotty.
[img]http://i249.photobucket.com/albums/gg211/scottyharrod/WOOFTOsmall.jpg[/img]
Woofto Car Club Member No 2
Woofto Car Club Member No 2
-
Sputzwagon
- Posts: 2708
- Joined: Fri Dec 07, 2007 6:27 pm
- State: NOT ENTERED
- Location: Termeil, South Coast NSW
NAH.. Timbo...the day's are shorter, but these photos were taken late arvo..just on dusk..I was too busy on the car to stop & take photos..'I made hay while the sun shone'SunnyTim wrote:looks like Autumn is definitely there down your way Scotty?
Looking good.
Tim
Scotty.
[img]http://i249.photobucket.com/albums/gg211/scottyharrod/WOOFTOsmall.jpg[/img]
Woofto Car Club Member No 2
Woofto Car Club Member No 2
-
Sputzwagon
- Posts: 2708
- Joined: Fri Dec 07, 2007 6:27 pm
- State: NOT ENTERED
- Location: Termeil, South Coast NSW
Re: Sputzwagon 2 Scotty's EK standard sedan
Not a bad day was had here (although not enough daylight  )..
)..
here's my 'HOW TO' do a pearl,lace,flaked painted Flash kit (part 1) ...
Firstly make sure you have the area prepared as in free of dust & cleaned ready for paint to go on. you'll need masking tape (I use 1 1/2" wide),fine line masking tape (for a nice edge and bending around corners), a rule, lots of old newspapers. a pencil & i large sheet of tracing paper..

Mark out where you want the flash line to go then make small pencil marks for the fine line tape to be placed..

..the best way to get a straight line is to stick one end of the tape down & lightly stretch the tape and lay it from one end to the other (always look lengthways down the car for any faults in the line..eye is best here..

Once you have the desired shape you want mask the area around the taped out line..

making sure to bend the wide tape edge around the rounded edges..

Next mask out the area with newspaper (poor man's masking here.. ) making sure that no exposed bits close to the painted area is exposed...

..then lay down your background colour..(I used Pearl white for my car).
Let the base colour dry (I mowed some of my lawn while I was waiting.. )..
)..
..next is to get out the lace curtain and tape it into position (make sure her that the pattern will run evenly along the length of the car)..also make sure the lace is slightly pulled tight as to open the holes enough to allow the paint to 'flow' past & not make the lace flap in the air pressure..


Now we are ready to add the second colour (I'm using a Green metallic/pearl of my own mix)..when spraying this use a wide 'fan' on the gun and stay about 30-40 cm's away from the surface (my air pressure is about 45-50 psi & the paint mix is more to the over thinned mix..about 65-70% thinners)..starting from one end apply the paint evenly across the whole area and then reverse your direction and paint back to where you started.

Once this is done carefully remove the lace from the freshly layed paint . Don't remove the making around the area though..we have NOT finished with it yet.

it should look something like this..

Once the lace has been removed we need to do an 'edge fade'..this is achieved by turning off the 'fan' on the touch-up gun and almost turning the medium control off..( basically making it an oversized airbrush). Paint a few practice lines on something..you'll notice the paint makes a line about 10-15mm's wide at about 20cm's away once you're happy with this follow the masked edge with this small fanned spray aiming the center of the needle just above the masked edge and apply about 2 coats..

..now you just have to add a small amount of flake (Gold flake in this case). I mixed about a 1/2 teaspoon of flake dust into 200ml's of clear then added about 500ml's of thinners..(I want only a small amount of flake as not to overpower the pearl lace). After testing the amount of flake I was getting through the gun (remembering to re-adjust the medium & fan on the gun) I sprayed two coats of this mix over the whole area.


Once this is done remove the masking tape & news paper leaving the fine line tape till last. Now carefully remove the fine line tape by folding it almost back onto itself..(this 'cuts' the paint and leaves a sharp edge & stops any paint lifting off the job).

This is the other side being duplicated..note the tracing paper to do a light 'rubbing' so it will mirror the drivers side..

and here's a better look at the flake over laced pearl..yummy..


Next time I'll show you 'how to' add the airbrushed "chrome strips"
Scotty.
here's my 'HOW TO' do a pearl,lace,flaked painted Flash kit (part 1)
Firstly make sure you have the area prepared as in free of dust & cleaned ready for paint to go on. you'll need masking tape (I use 1 1/2" wide),fine line masking tape (for a nice edge and bending around corners), a rule, lots of old newspapers. a pencil & i large sheet of tracing paper..
Mark out where you want the flash line to go then make small pencil marks for the fine line tape to be placed..
..the best way to get a straight line is to stick one end of the tape down & lightly stretch the tape and lay it from one end to the other (always look lengthways down the car for any faults in the line..eye is best here..
Once you have the desired shape you want mask the area around the taped out line..
making sure to bend the wide tape edge around the rounded edges..
Next mask out the area with newspaper (poor man's masking here..
..then lay down your background colour..(I used Pearl white for my car).
Let the base colour dry (I mowed some of my lawn while I was waiting..
..next is to get out the lace curtain and tape it into position (make sure her that the pattern will run evenly along the length of the car)..also make sure the lace is slightly pulled tight as to open the holes enough to allow the paint to 'flow' past & not make the lace flap in the air pressure..
Now we are ready to add the second colour (I'm using a Green metallic/pearl of my own mix)..when spraying this use a wide 'fan' on the gun and stay about 30-40 cm's away from the surface (my air pressure is about 45-50 psi & the paint mix is more to the over thinned mix..about 65-70% thinners)..starting from one end apply the paint evenly across the whole area and then reverse your direction and paint back to where you started.
Once this is done carefully remove the lace from the freshly layed paint . Don't remove the making around the area though..we have NOT finished with it yet.
it should look something like this..
Once the lace has been removed we need to do an 'edge fade'..this is achieved by turning off the 'fan' on the touch-up gun and almost turning the medium control off..( basically making it an oversized airbrush). Paint a few practice lines on something..you'll notice the paint makes a line about 10-15mm's wide at about 20cm's away once you're happy with this follow the masked edge with this small fanned spray aiming the center of the needle just above the masked edge and apply about 2 coats..
..now you just have to add a small amount of flake (Gold flake in this case). I mixed about a 1/2 teaspoon of flake dust into 200ml's of clear then added about 500ml's of thinners..(I want only a small amount of flake as not to overpower the pearl lace). After testing the amount of flake I was getting through the gun (remembering to re-adjust the medium & fan on the gun) I sprayed two coats of this mix over the whole area.
Once this is done remove the masking tape & news paper leaving the fine line tape till last. Now carefully remove the fine line tape by folding it almost back onto itself..(this 'cuts' the paint and leaves a sharp edge & stops any paint lifting off the job).
This is the other side being duplicated..note the tracing paper to do a light 'rubbing' so it will mirror the drivers side..
and here's a better look at the flake over laced pearl..yummy..
Next time I'll show you 'how to' add the airbrushed "chrome strips"
Scotty.
Last edited by Sputzwagon on Fri Apr 30, 2010 2:50 pm, edited 4 times in total.
[img]http://i249.photobucket.com/albums/gg211/scottyharrod/WOOFTOsmall.jpg[/img]
Woofto Car Club Member No 2
Woofto Car Club Member No 2
Re: Sputzwagon 2 Scotty's EK standard sedan
thats awesome scotty.....i really love it!!
aidan...
aidan...
i'll get there....
-
Dakam
- Posts: 1011
- Joined: Tue Jan 13, 2009 5:23 pm
- State: NOT ENTERED
- Location: Cranbourne, Victoria
Re: Sputzwagon 2 Scotty's EK standard sedan
COOL 'How To' Scotty. 
It has come up a treat. Love it!
Dave.
It has come up a treat. Love it!
Dave.
I'd rather drive something made of metal, not plastic!
Re: Sputzwagon 2 Scotty's EK standard sedan
Sweet as Scotty.............. why do I get this sudden urge to call you "Cagney"  ............. anyone that figures this out is showing there age
Re: Sputzwagon 2 Scotty's EK standard sedan
Very cool Scotty, bring on the chrome strips .
[img]http://i47.photobucket.com/albums/f177/trevwood/WOOFTOsmall.jpg[/img]
Woofto Car Club Member No3
Woofto Car Club Member No3
Re: Sputzwagon 2 Scotty's EK standard sedan
Nup i don't get it
That looks wicked scotty! I'm hangin out to see the front end back together in particular
That looks wicked scotty! I'm hangin out to see the front end back together in particular
'The best engine in the world is a vagina. It can be started with only one finger. It is self-lubricating. It takes any size piston. And it changes it's own oil every four weeks. It is a pity that the management system is so f*$king temperamental.'