Brodie's EK.

Post photos of your pride and joy, or updates on your rebuild!

Moderators: reidy, Blacky

Brodie
Posts: 447
Joined: Tue Feb 24, 2009 12:43 am
State: NOT ENTERED
Location: Perth, W.A.

Re: Brodie's EK.

Post by Brodie »

Thanks for the comments everyone...

Parisian62, got nothin to do with luck man! i've worked hard for it and gone with out a lot of things to get it :wink:


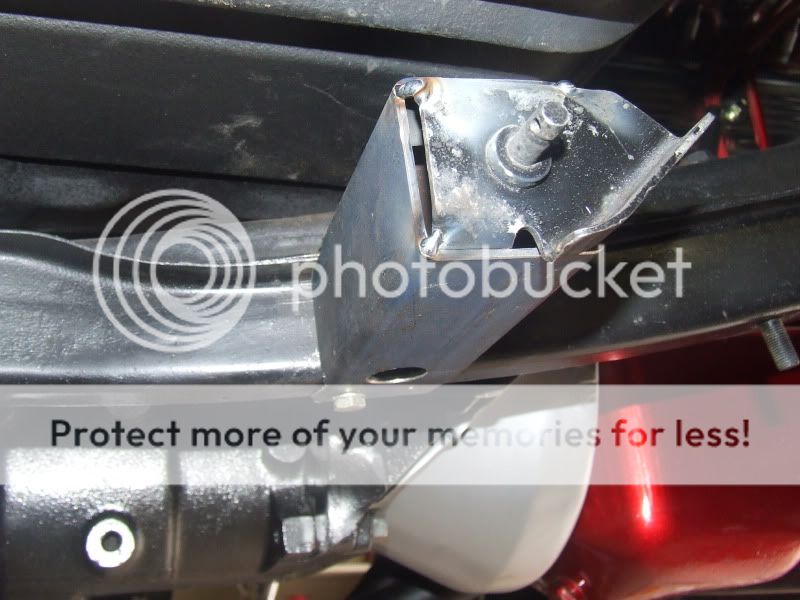
Underside is getting there. Re-routed the fuel and brake lines over the new chassis rail, threw away the old clip thingo's and used nutserts and P clips. New rear brake hoses, ran new rear lines etc. Handbrake and speedo cable mods done.. The list is getting shorter and shorter :)
Image


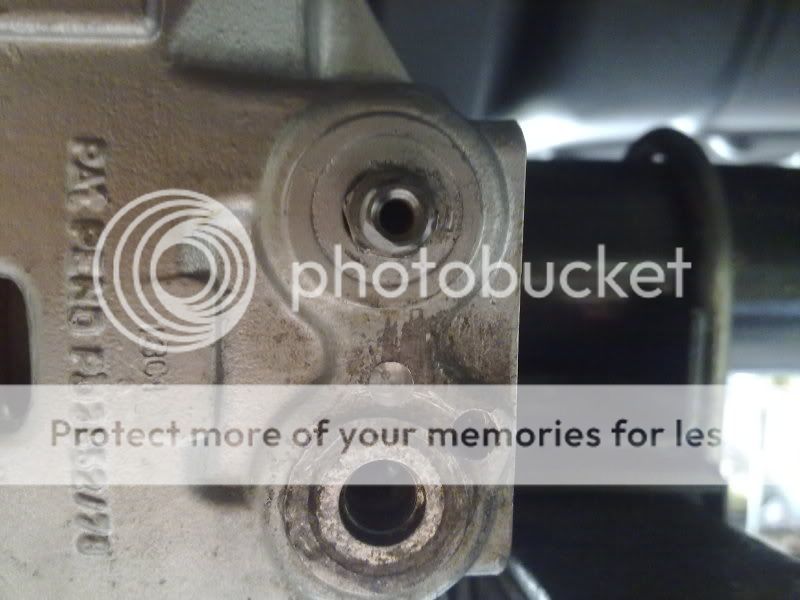
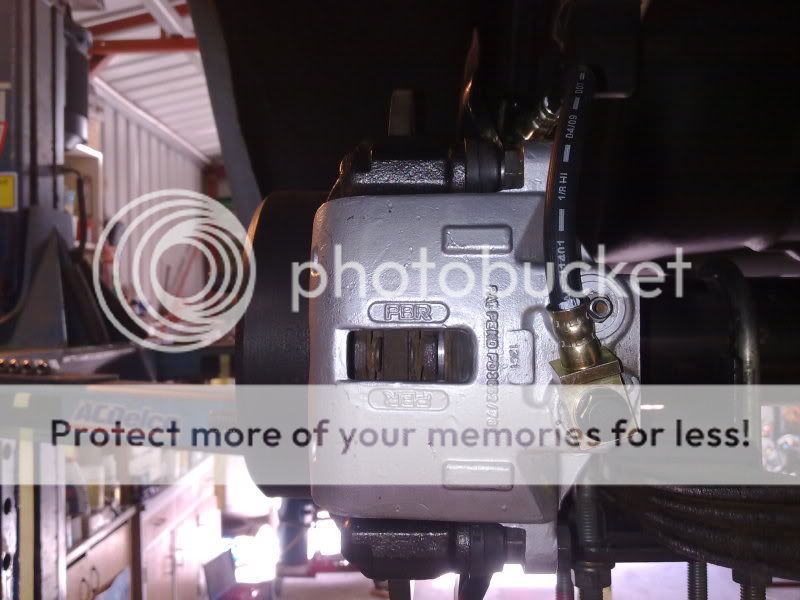
Under full suspension travel, the hoses came pretty close to the inner tub so i decided to move them inside the bleed nipple instead of curving around. On one side we just drilled another hole in the hose fitting and relocated the pin but on the other side we had to actually sink a small hole into the back of the caliper to move it inside.
Image

Image

Image


To keep things a bit more era, i bought a set of twin strombergs on a finned manifold. Also got a finned rocker cover thanks to Andy and some finned side plates from the old man. Pics to come........


I POR15'd the floorpan. The instructions are a little hard to understand so i thought i'd post up how i did it for anyone else that might go down this track one day.
The POR is a rust converter, preventer and permenant paint coating in one. It can be applied with a brush or out of gun but i just used a brush (it flows out to a near sprayed finish anyway, plus you'll never see it on a floorpan). You can smash it with a hammer and it wont chip, crack or peel. Pretty good stuff. USE GLOVES! basically you have to hit it with thinners instantly or only time can remove it.

I did the complete 3 stage process, marine clean, metal ready then POR. If you sandblast your floorpan or any other surface that you are going to POR paint over, then there is no need to do the marine clean and metal ready, sandblasting is the ideal preparation but as we all know it leaves a hell of a mess and i didnt want grit falling out of my car for the next 5 years.
Image

First i welded up any large pinholes then bare metaled the floor with a wire wheel on a grinder, painstaking process... literally. I learnt that thin shorts with little protection and wires breaking off the wheel meant youd soon be in tears, pulling stray wires from your ball bags. Not fun.
Image

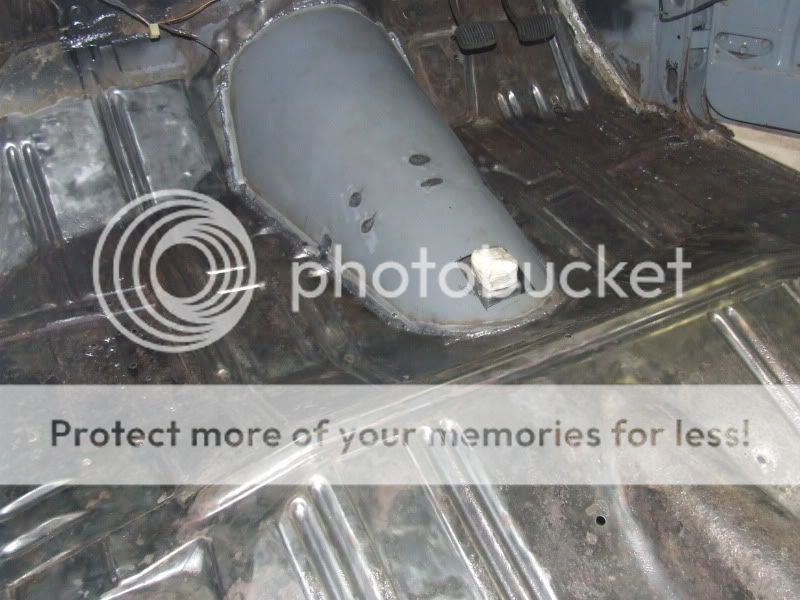
Once bare metal'd i then applied the marine clean (diluted approx. 10-1). I used a spray bottle to apply it then brushed any puddles around.Image
Image

You leave it for approx. half an hour and then i cleaned it off with a wet rag and water (i got told to use bottled water due to the contaminants in tap water), once the marine clean is removed, it has to be dried thoroughly. There should be a noticable difference in the appearance of your floor. It should be cleeeean!
Image

I then applied the metal ready (straight/undiluted), just like the marine clean i applied it with a spray bottle then brushed around any puddles.
Image
Image

Again, its left for approx. half an hour and cleaned off with a wet rag and water (you wont remove the coating, only the excess) then dried thouroughly. The metal ready leaves a 'toothed' zinc phosphate coating which helps the POR paint adhere to the floor. It will have a salt and pepper look along with some orange-surface rust looking areas but thats normal!
Image

Paint time :) i used a 2inch brush. I kept the brush strokes to a minimum because if you do too many then it will look like you've brushed it on. Other then that it flows well, finds it own levels and looks sprayed. If you want to give it a second coat you have to key it with 600 before doing so.
Image
Image
Image

Now your floorpan shouldnt rust! EVER! 8) 8)


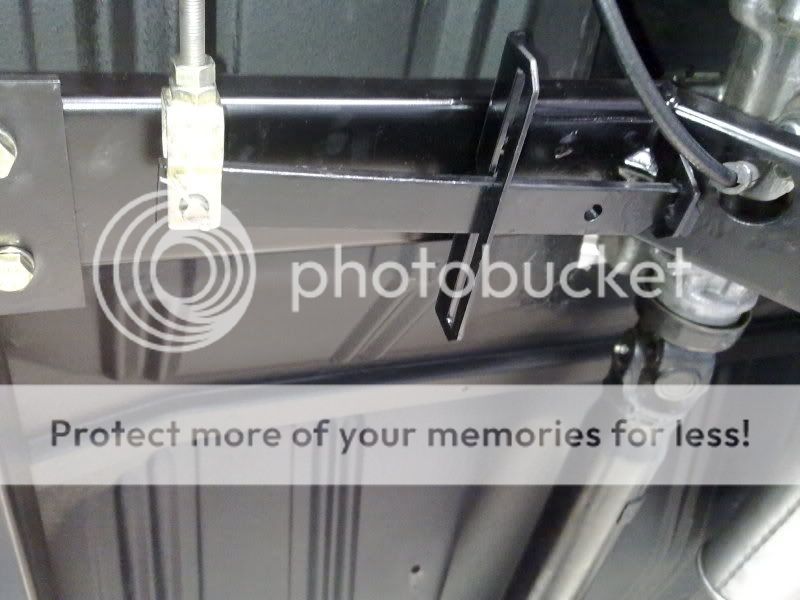
Adapted the Commodore rear handbrake cable to the EK front one.
To get it to pull straight we spaced the pulley out about 100mm from the subframe. It slides over the seams and bolts to the subframe.
Image
Image
Image
Image

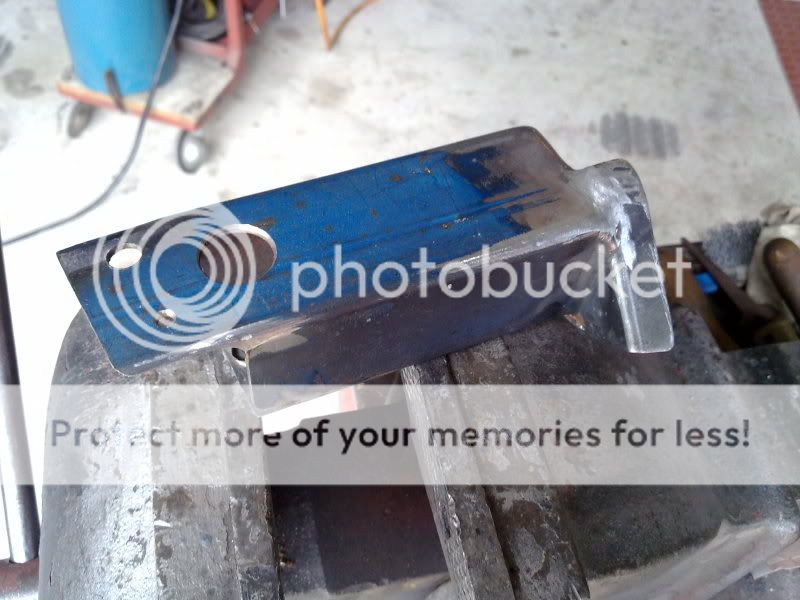
I Welded the pivot bracket thing to the gearbox crossmember and also recessed a tube in there for the speedo cable.
Image
Image

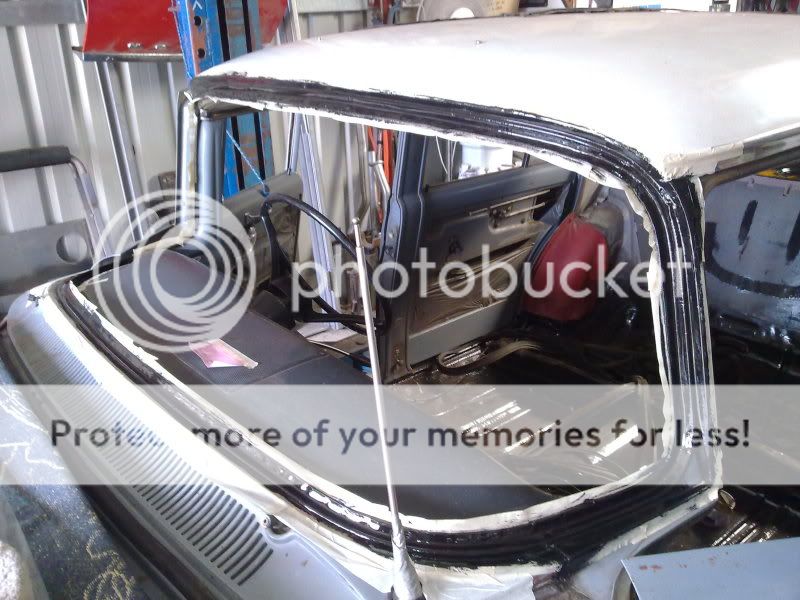
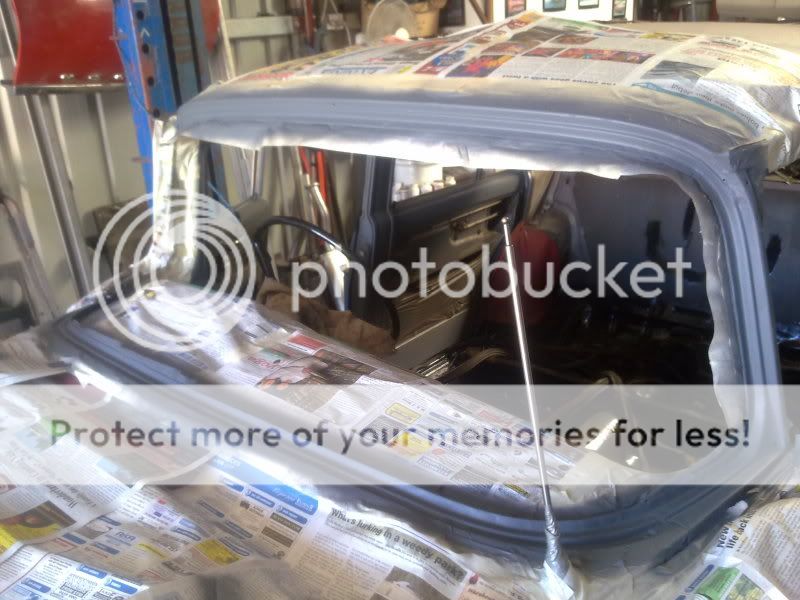
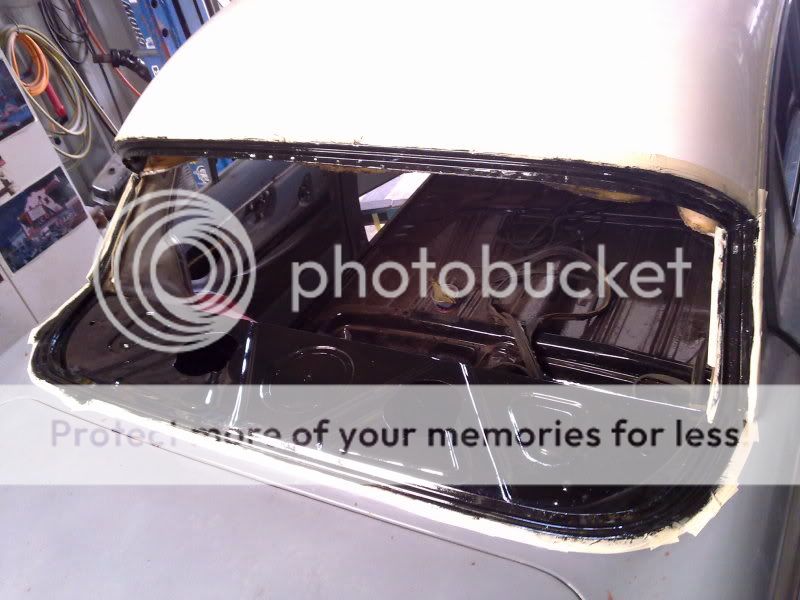
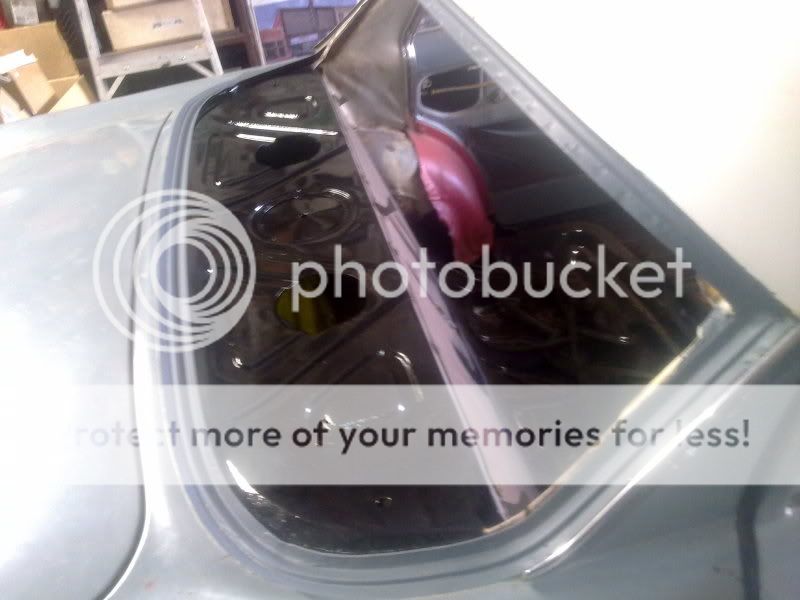
I popped the front and rear screens... no worms, pretty good nick, i pulled it back to steel, POR'd it then primed over that.
Image
Image
Image
Image
Image
Image
Image
[img]http://i716.photobucket.com/albums/ww162/brodie_mitchell/av-49951.gif[/img]
Blacky
Posts: 13477
Joined: Tue Jul 20, 2004 8:58 am
State: WA
Location: up in the Perth hills

Re: Brodie's EK.

Post by Blacky »

Getting there Brodie , doing it properly the first time saves you from doing it again :wink:
I started with nothing and still have most of it left.


Foundation member #61 of FB/EK Holden club of W.A.
User avatar
(AUST)Mod
Posts: 2272
Joined: Sun May 07, 2006 11:16 pm
State: WA
Location: Perth

Re: Brodie's EK.

Post by (AUST)Mod »

Awesome work!

Love your fabrication skills!
Craig wrote: Andrew you have a red so I wouldn't race it :wink:

Image
User avatar
EKfanPaul
Posts: 246
Joined: Fri May 14, 2010 3:53 pm
State: NOT ENTERED

Re: Brodie's EK.

Post by EKfanPaul »

Great engineering work. A craftsman. Don't ever get rid of theat car! You you want a rarer more exotic car or get bitten by the USA bug, keep that EK as well!

Paul K
parisian62
Posts: 3997
Joined: Wed May 11, 2005 2:19 pm
State: NSW
Location: Sydney
Contact:

Re: Brodie's EK.

Post by parisian62 »

Parisian62, got nothin to do with luck man! i've worked hard for it and gone with out a lot of things to get it
yep I hear you Brodie :)

Enjoyed the POR pics - it always freaks me out when you get to the metal ready stage and you get the orange rust look... :o
Feelin free in a '61 FB.
Member of FB-EK Holden Car Club Of NSW Inc.
Check out the Rebuild of Old Timer
User avatar
Devilrod
Posts: 7394
Joined: Fri Apr 30, 2004 12:55 pm
State: VIC
Location: Beaconsfield, Vic

Re: Brodie's EK.

Post by Devilrod »

Great work Brodie! 8) 8)
Speed and Style........... One day I'll get the speed bit.
User avatar
Sputzwagon
Posts: 2708
Joined: Fri Dec 07, 2007 6:27 pm
State: NOT ENTERED
Location: Termeil, South Coast NSW

Re: Brodie's EK.

Post by Sputzwagon »

Great 'how to' on the POR application!! 8)
It should be a 'sticky' :wink: :D .
If I ever had enough time off work I'd love to re-repair my floors and do that to it!
Especially like the POR added to the windscreen & back window lips...THAT'LL FIX IT for good! :wink: 8)

Keep up the great work, Brodie. :D

Scotty.
[img]http://i249.photobucket.com/albums/gg211/scottyharrod/WOOFTOsmall.jpg[/img]
Woofto Car Club Member No 2
User avatar
MR HP
Posts: 214
Joined: Fri Apr 09, 2010 8:00 pm
State: NOT ENTERED
Location: perth W.A
Contact:

Re: Brodie's EK.

Post by MR HP »

Great Work Brodie

Looks Good Mate Keep It Up

Cheers
Mike
Family Cars
Mum:Cream 64 EH Special
Dad:63 EH Premier (In The Build)
Mine:Blue 69 HK Kingswood Wagon
Family:White 98 VT Executive Commodore, 85 MK Patrol Turbo Diesel

[url]http://www.fbekholden.com/forum/viewtopic.php?f=15&t=11815[/url]
oldnek
Posts: 1518
Joined: Sun Nov 19, 2006 9:15 pm
State: NOT ENTERED
Location: Ulladulla NSW

Re: Brodie's EK.

Post by oldnek »

Thats a great write up Brodie. And That's a one super clean car you have scored as well.
There's nothing as Sweet as a EK V8
fe1957
Posts: 1
Joined: Wed Dec 09, 2009 11:17 pm
State: NOT ENTERED

Re: Brodie's EK.

Post by fe1957 »

Great work , I ope you dont have a petent on the chassis cause I am going to copy :twisted:
cheers
Grant
Brodie
Posts: 447
Joined: Tue Feb 24, 2009 12:43 am
State: NOT ENTERED
Location: Perth, W.A.

Re: Brodie's EK.

Post by Brodie »

Thanks for the posts guys! Definately gives you a kick to get back into the shed :P

Blacky, i'm thinking of tackling the booster next.. going to try and do the same as your old v6. I saw your post on here about fitting it all up and modifying the hinges, just wondering if you've got any more info or pics about it all? I think i got it pretty well sussed but still not exactly sure... :?

EKfanPaul, this ones definately staying with me for good mate :D

Thanks Scotty, yeah being a daily im trying to protect it as much as possible :wink: alot of people are still finding out about POR i guess so hopefully it can help a few people!

Go for it Grant thats what the forums about 8)
[img]http://i716.photobucket.com/albums/ww162/brodie_mitchell/av-49951.gif[/img]
steved57
Posts: 239
Joined: Tue Dec 08, 2009 5:01 pm
State: NOT ENTERED
Location: Cairns, Qld

Re: Brodie's EK.

Post by steved57 »

Hi ya Brodie

What's your plans for the booster mate? Are you sticking with the HK booster & offset bracket you showed us earlier in the thread? I'm looking around for ideas at the moment. Because i'm running the VT twin piston calipers I have to use the 1 1/4 inch VT master cylinder and I'm trying to figure out a way to mount something up using the original pedal box & master cylinder mount (or as close as I can) while still clearing the engine & bonnet hinge. The car is going from manual to auto, so at least that solves the problme of the cluch master cylinder being in the road. I tdo end to think i might be pushing the proverbial up the hill though.

I spoke to Terry at Hydroboost in Melbourne this morning who can supply an adaptor plate to mount a VT master onto most PBR boosters, but it's finding a booster small enough to fit, or with a suitable extension bracket, that's the tricky part. i'd be interested to know what you're doing.

Cheers, Steve :? :? :?
User avatar
J
Posts: 1692
Joined: Wed Mar 05, 2008 8:42 pm
State: WA
Location: Perth
Contact:

Re: Brodie's EK.

Post by J »

saw this in flesh today and it is one, very tidy ride...
In fact I think it will set a new standard for some of us WA EK/FB owners
Image
Brodie
Posts: 447
Joined: Tue Feb 24, 2009 12:43 am
State: NOT ENTERED
Location: Perth, W.A.

Re: Brodie's EK.

Post by Brodie »

Dunno about that but thanks Jay :D

G'day Steve,
I was never going to actually run the HK booster and offset bracket, that was a suggestion by Trev i think. Being a manual i cant use it (clutch master cylinder in the way). So i was just going to keep my 7 inch Gemini booster, i had a few different ideas on how to mount it.. initially i was going to space it out from the firewall with an extension tube as you said... then i decided i was going to mount it on the firewall and cut up the back of the hinge like Blacky did on his old V6 EK. But being a single diaphram booster a couple decent applications of the brakes and you got no vacuum left, especially if your running a bigger cam. Plus ive recently been told by the guys at work that Gemini boosters arent that efficient anyway, so vaccum or not your still gonna have a shitty pedal coz they cant cope with feeding a four wheel disc system. Then i had the issue of a Gemini master cylinder being too small aswell ( 20.64mm bore - basically 13/16") soooo, im ditching the lot and the guys have conned me into buying an aftermarket 7 inch dual diaphram booster and also stepping up to a matching 1 inch bore master cylinder. Question is how do i mount a dual diaphram booster to the firewall? you can only cut so much off the back of the original hinges.. I may have an answer but i need to go out to the shed and put my thinking hat on again to be sure, basically im going to try and do what a local dude did with his EJ van and throw away the original hinges completely and adapt VE commodore bootlid hinges. Wierd i know lol but ive seen it work on that EJ and me thinks it should also work on EK. This allows you to mount the booster directly to the firewall with no clearance issues anywhere. I'll throw up some pics as that progresses. But other than that being an auto you could simply do what a few others here have done (with 7 inch dualys) and move it over a bit on the firewall to clear the bonnet hinge and mount it that way, i think V8EK4US and NoMAD have done that so taking a look through their builds might help.

Hope that made sense,
Brodie 8)
[img]http://i716.photobucket.com/albums/ww162/brodie_mitchell/av-49951.gif[/img]
Blacky
Posts: 13477
Joined: Tue Jul 20, 2004 8:58 am
State: WA
Location: up in the Perth hills

Re: Brodie's EK.

Post by Blacky »

Brodie , get yourself over to Olden Holden and have a look at Tonys coupe he is building - he has got Pottsys bonnet hinge templates there - they will sort you out.
I started with nothing and still have most of it left.


Foundation member #61 of FB/EK Holden club of W.A.
Post Reply