EK Wagon project - Total rebuild

Post photos of your pride and joy, or updates on your rebuild!

Moderators: reidy, Blacky

Post Reply
lulu
Posts: 323
Joined: Mon Dec 24, 2007 3:20 pm
State: NOT ENTERED
Location: Mid North Coast NSW

Post by lulu »

Devilrod wrote:Whatever you do don't mess up the order of the support rods in the headlining. The only fit one way from what I've been told.
Almost got into trouble playing with the old headlining the other day..for reason above...lol

Lulu

PS> Nice work there Finny! 8)
-Never enough Chrome-
Finny
Posts: 1895
Joined: Tue Mar 18, 2008 10:30 pm
State: QLD
Location: Brisbane North
Contact:

Post by Finny »

Got the interior light out. Didn't break any of the tabs. :D

Finished removing the roof lining. :D Two of the bars were much thinner and clipped in at 5 or 6 places across the roof, didn't see that in the manual :shock: . Anyhow they are all out now. :D

Gave the engine bay and engine block a degrease and pressure clean in preparation to the disc brake front end and new engine head. Might even paint the engine. :?
Go to go to Adeliade next weekend so it may be another 2 weeks before anything else gets done. :cry:
Image
IT's LIKE WATCHING DRUNK MONKEYS TRYING TO HUMP A FOOTBALL.
Finny
Posts: 1895
Joined: Tue Mar 18, 2008 10:30 pm
State: QLD
Location: Brisbane North
Contact:

Post by Finny »

Got a little bit more done today, as won't be around tomorrow.

Thought I'd give her a bit of sun and push her out the front gate for a change. Would have liked to drive her out, but that will come later.
Image

Image

It was time to put the head back on. Start with a beautiful smooth block, add a head gasket. Line it all up and use lots of muscle to slowly place it in position.
Ended with a head attached. And a torque wrench that seemed to want to hit on everything in the engine bay. But it's tensioned up to specs now.

Image

Image

Did get a bit more added, but ended up too dark to take any more pictures. Still need to get all the rest back together. At this rate I'll be on the road in about 2020.
Image
IT's LIKE WATCHING DRUNK MONKEYS TRYING TO HUMP A FOOTBALL.
matches
Posts: 870
Joined: Mon May 26, 2008 6:08 pm
State: NOT ENTERED
Location: port macquarie, nsw

Post by matches »

damn nice job your doing there finny, good to see. i'm just starting mine now so i've got all that to look forward to. its going to be one hell of a nice wagon. L&K.
Finny
Posts: 1895
Joined: Tue Mar 18, 2008 10:30 pm
State: QLD
Location: Brisbane North
Contact:

Post by Finny »

You know what I really miss. Not having a real shed or even a spare garage to work on it in. :cry: :cry: :cry:

That's my shed in the second photo above. I white 6x3 garden marque. :( :( No concrete floor, just grass. :( :(

Can only work during the day, when it's not raining (and hasn't rained) or too cold or windy. :cry: :cry: Then cover it all up with a couple of tarps to keep the rain and moisture out.
Image
IT's LIKE WATCHING DRUNK MONKEYS TRYING TO HUMP A FOOTBALL.
Finny
Posts: 1895
Joined: Tue Mar 18, 2008 10:30 pm
State: QLD
Location: Brisbane North
Contact:

Post by Finny »

Got a few hours done this weekend, but nothing major. Had a few functions to go to and the ground is still too wet around the car. :cry: :cry: :cry: Need to get it moving.. :evil: :evil:

Decided to do a bit more on the motor. Got the Starter and Alternator off to give them a check over and a clean up.

Image

Will probably regret not taking the motor out completely and spraying the firewall :shock: :? . But the motor is starting to look good. Hope it runs just as well. :D :D :D
Image

Image

The rockers aren't on properly yet, just sitting there. I have recently read that the Pushrods and Valve tappets need to be re-installed in the same positions they came out of. But I have moved some of them :shock: :shock: :shock: Is this really a major issue ? I can see that one or two of the rockers have significant adjustments to be made. :? :? :? :?
Image
IT's LIKE WATCHING DRUNK MONKEYS TRYING TO HUMP A FOOTBALL.
EKSPCL
Posts: 794
Joined: Sat Mar 15, 2008 11:36 pm
State: NOT ENTERED
Location: Langwarrin, Victoria

Post by EKSPCL »

I found this out just before I pulled them out :shock:
I don't know what happen's if they are mixed up though :?:
Be interesting to find out though.........
My 6yr old daughter said
"Dad your car's looking great! Which end is the front?"
Finny
Posts: 1895
Joined: Tue Mar 18, 2008 10:30 pm
State: QLD
Location: Brisbane North
Contact:

Post by Finny »

Interesting :shock: ??? Yes :shock: ???

I'd prefer to not find out, as I don't think it will be a good thing... :cry: :wink:

I can probably get the Valve tappets almost back to original positions ? I only swapped 2 or them (4 in the wrong places) Just not sure what to look for, are they different lengths or what ? :?: :?:
Image
IT's LIKE WATCHING DRUNK MONKEYS TRYING TO HUMP A FOOTBALL.
EKSPCL
Posts: 794
Joined: Sat Mar 15, 2008 11:36 pm
State: NOT ENTERED
Location: Langwarrin, Victoria

Post by EKSPCL »

The push rods are all the same length.

The lifters would probably 'seat' to the cam a little different on each one.

The rockers I didn't pull apart, I just cleaned them as the two parts.
My 6yr old daughter said
"Dad your car's looking great! Which end is the front?"
FB MAD
Posts: 2725
Joined: Thu Jun 30, 2005 7:59 pm
State: NOT ENTERED
Location: Upper Hunter N.S.W

Post by FB MAD »

Best workshop practise says that you SHOULD NOT mix up the valve train components however I'm sure over the years that people have and continue to do so without major detriment to the reliability of the motor.

The cam lobe and lifter face do wear together as a matched pair and mismatched pairs will learn to get on together over time as well.

Doesn't always happen with marriages however I'm told :wink: :wink: :wink: :lol: :lol: :lol: :roll: :roll: :roll:

I've mismatched valve train parts accidentally over the years on various engines with no ill effects.

I do try to keep them in their proper running positions however.

As long as the lifter face case hardening is still OK and the cam lobe isn't too bad then I reckon it'll be OK.

The tappet clearance will have to be done as always when valve train components are removed and the refitted.

The rockers that need "significant adjustments" would be the ones that are on their valve opening action as per cam position.When adjusting valve clearances just follow the procedure that your workshop manual says to adjust the tappets and all should be well. :D
I can't think what to write here so this will do.
Finny
Posts: 1895
Joined: Tue Mar 18, 2008 10:30 pm
State: QLD
Location: Brisbane North
Contact:

Post by Finny »

Thanks for the feedback. Brilliant and complete as always. :D :D :D
Image
IT's LIKE WATCHING DRUNK MONKEYS TRYING TO HUMP A FOOTBALL.
User avatar
J
Posts: 1692
Joined: Wed Mar 05, 2008 8:42 pm
State: WA
Location: Perth
Contact:

Post by J »

funny lookin alternator :lol:
but i know what you mean :wink:

but they r lookin nice and clean 8) 8) cleaner then mine :oops:
Finny
Posts: 1895
Joined: Tue Mar 18, 2008 10:30 pm
State: QLD
Location: Brisbane North
Contact:

Post by Finny »

Funny looking :shock: :shock: Must be out of an FB. :lol: :lol:
Otherwise use Generator. :roll: :roll: :roll:
Image
IT's LIKE WATCHING DRUNK MONKEYS TRYING TO HUMP A FOOTBALL.
Finny
Posts: 1895
Joined: Tue Mar 18, 2008 10:30 pm
State: QLD
Location: Brisbane North
Contact:

Post by Finny »

Starter and Generator now all ready to go back into car. :D :D
Feels good to start putting things back together instead of always pulling bits off :cry: :cry: :( :( :) :) :D :D

Image

Image

Had to unsolder the connector on the starter and cut and strip the wire to rejoin. It was previously broken off and was being held on with an aligator clip. :shock: :shock: :shock:
She's now all back in and re-wired up.

Also cleaned up the side-plate and rocker cover, ready to go back on. They were chromed, and are still OK, but showing a bit of pitting and wear in places.

Image
Image
IT's LIKE WATCHING DRUNK MONKEYS TRYING TO HUMP A FOOTBALL.
Finny
Posts: 1895
Joined: Tue Mar 18, 2008 10:30 pm
State: QLD
Location: Brisbane North
Contact:

Post by Finny »

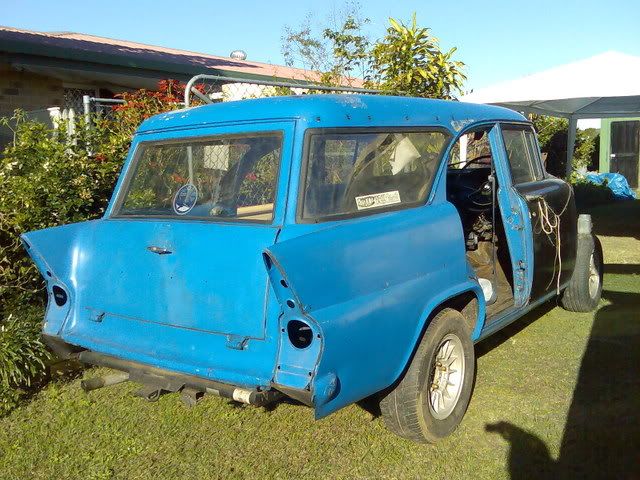
OK, I need a little advice again. :? :? :?
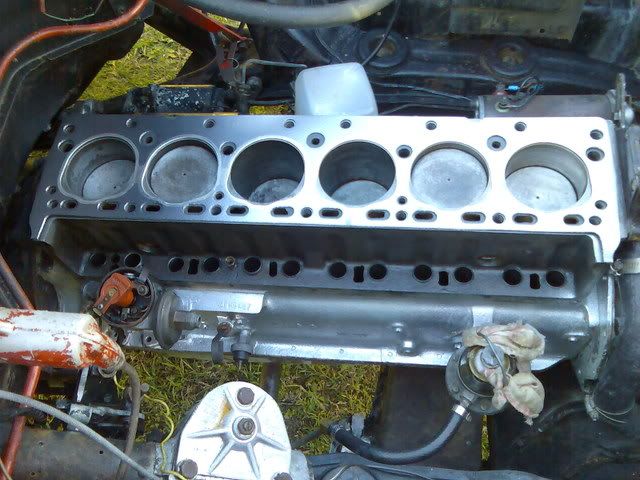
I did manage to get the lifters back into their original positions. :D :D

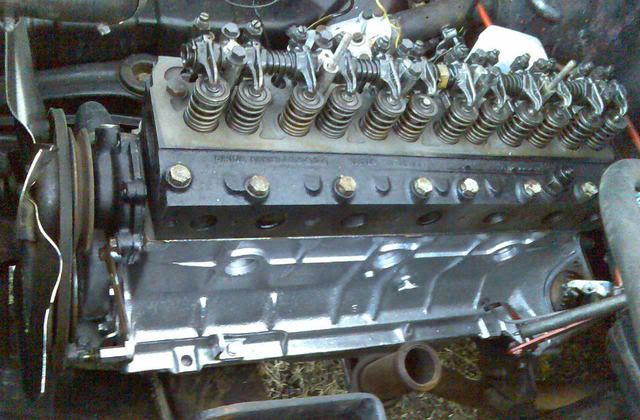
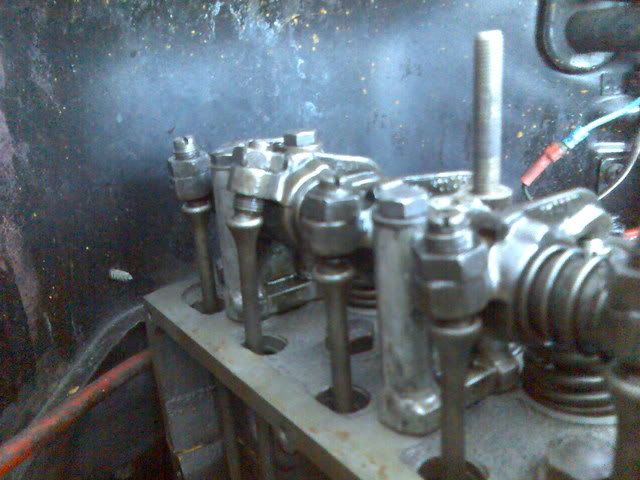
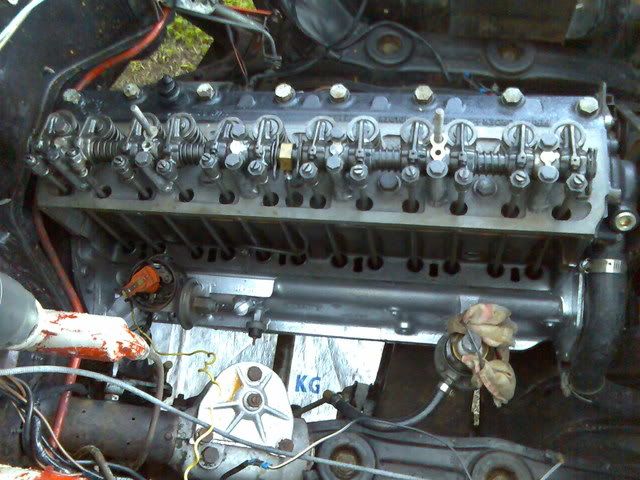
Have finished putting the rockers back on and tightening everything up. Adjusted the gaps to .015, until I can run the motor up and check the final measurements when hot.

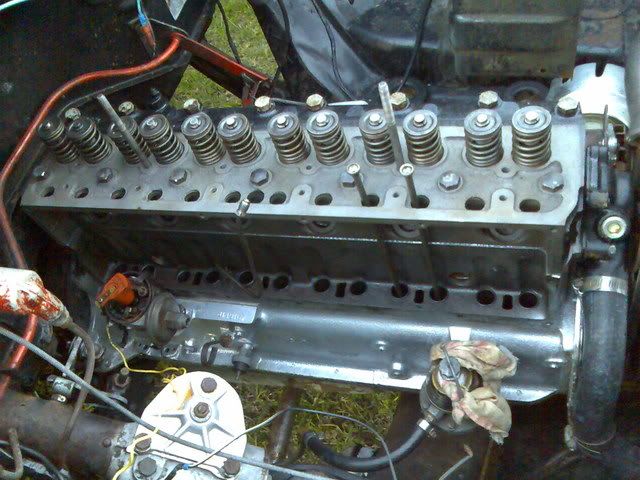
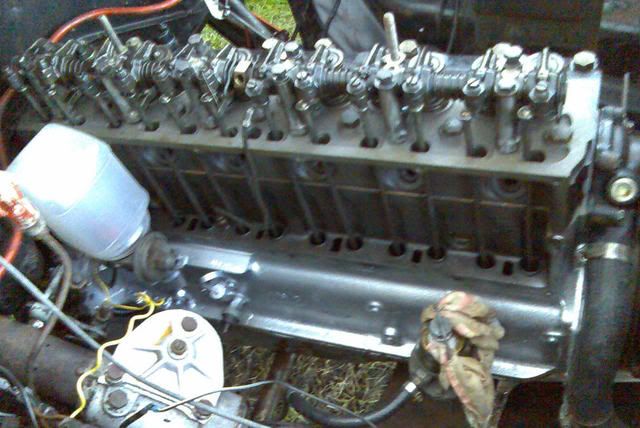
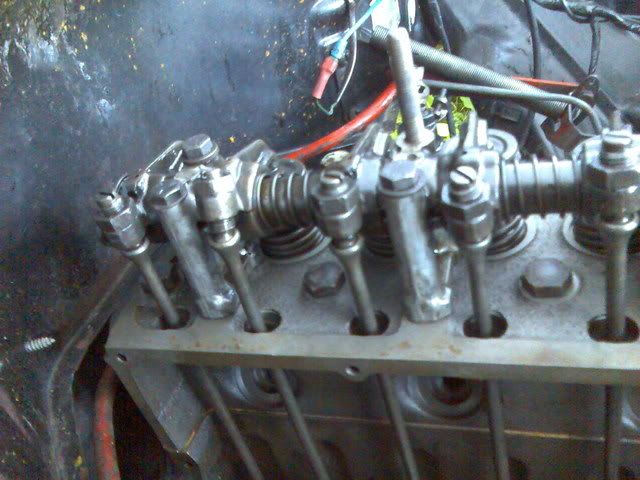
I found a couple of things strange about number 6 cylinders exhaust valve. This was the one that was previously locked open when I pulled it apart, and had one of the bent pushrods.

I couldn't get the spanner on over the nut, to loosen off the adjustment screw. Ring spanner was hitting the metal on the inside. Got a file in there to try to open it up more for the spanner, but didn't make much difference. Thought this was strange as all the others fitted fine. (It's only now that I'm starting to wonder if it's possible that the rocker arm has been bent upwards, caused by whatever bent the pushrod at the same time ? :?: )

It was also extremely loose. Had to screw it right in to take up the slack.

Manually turned the motor over a number of times by hand to ensure valves were all moving correctly. I am concerned about the amount of angle on the No'6 exhaust valve when in the fully open position, as you can see in the photo's. Don't want it coming out when running.

Image

Image

Image

Any ideas or suggestions, or am I worrying about nothing.
Image
IT's LIKE WATCHING DRUNK MONKEYS TRYING TO HUMP A FOOTBALL.
Post Reply