PPC - POR system

Includes sheet metal, rubbers, bumpers, badges and rust repairs.

Moderators: reidy, Blacky

rosco
Posts: 2569
Joined: Wed Feb 04, 2004 8:34 pm
State: VIC
Location: Melbourne

pix

Post by rosco »

Realised this morning that I hadn't thrown up pix of the finished (almost) sub floor paintwork....................
I haven't done from the rear axle housing back yet, nor under the wheel arches or front fenders................ it will happen, but not until the weather picks up again - car going to be up on blocks again for some months late Oct........... should be just about over by then - I can get on with finishing the body paint.......................

pix were taken today whilst shooting the luggage compartment............
There's plenty of dust on everything under there - but you should get an idea of how it comes up - by BRUSH! (tailshaft included!).

Spraying is much, much easier but if it gets airborne - and it does big time, it cannot be removed by solvent if it cures......

Finish of Black Cote is not quite as good as POR 15, but as I did not want to strip years and years of fishoil, primer and epoxy hammered metal paint - I used Tie Coat then three of Black Cote - you will see the tail-shaft difference - it is purely POR 15.
Black Cote is a UV proof top coating for POR 15 if it is to be subjected to UV........... it is just as hard and brushes much the same - except I feel it does not give the same incredible "sprayed" finish by brush.

so.............. pix..

Image

Image

another little job I have been wanting to do for some time is to fit a barbed hose fitting to the vent of the diff housing. this runs through a grommet in the rear seat base and then into a small fuel filter to keep nasties out of the diff.
I decided to do this after running through floods some years back.
I have had issue with the wheel bearings on our boat trailer sucking in water whilst hot and immersed into water and noted by the position of the diff front seal that this is where a hot diff would provide entry of water if submerged........

sorry folk, digressing -again.....

frats,
Rosco
KFH
Posts: 14
Joined: Wed May 30, 2007 12:41 pm
State: NOT ENTERED

Post by KFH »

Looking good Rosco. Did you do all of this lying on your back?

Keith
rosco
Posts: 2569
Joined: Wed Feb 04, 2004 8:34 pm
State: VIC
Location: Melbourne

Post by rosco »

It will look a lot better when I can't see it, Keith.
My back - it's as straight as the concrete floor I have polished for three months with my shirt or jumper..........
I love the way paint stays on the tip of your brush whilst painting overhead - NOT!

It's over now until October - I may now return to the hunchback most people know me as................. got to admit though, it was getting quite comfortable - for the first couple of hours of each "session", anyway...

frats,
Rosco
ipg

Post by ipg »

hi rosco, this thread is amazing

not only is your car looking fantastic, the detail that you have gone into is quite remarkable.

you have answered every single question i have about this product.

you have saved me many many countless hours and money.


kudos to you.
rosco
Posts: 2569
Joined: Wed Feb 04, 2004 8:34 pm
State: VIC
Location: Melbourne

Post by rosco »

thanks ipg,
it probably looks much better on your screen than it really does in the flesh - I have not edited any of the pix except to make them lighter or darker - depending on how my box brownie felt at the time of shooting................

There is probably a lot more I will work out as time goes on - I do not know how this priduct is going to behave beyond my driveway - be rest assured I will post it up as I learn of it....................

thanks again - always happy to share, just hope I don't mislead anyone by promoting the products I use............. I try to make accurate and unbiased reports - but get a bit chuffed at times - just goes to show how I feel let down by some previous "marvel" products............. we'll see, I'll pull it to bits if it doesn't meet up to the hype.....

frats,
Rosco
rosco
Posts: 2569
Joined: Wed Feb 04, 2004 8:34 pm
State: VIC
Location: Melbourne

Glisten PC

Post by rosco »

Hi all,
not big - not yet, just a few lines to touch on this arm of the POR range.

Glisten PC - its a clear coating designed along the same lines as other POR sytems, but is a dedicated coating for bare metals - not corroded/rusted ones.

It can be used on alloys - aluminium, brass, copper etc and will also perform happily on steel. The manufacturers state that unless bare steel is baked, "spider rust" may appear - they suggest contacting them prior to coating steel for advice.

I have used it on alloy, brass, stainless, chrome and also pieces coated with POR 15 paint..... all with potentially excellent results.

What I am about to post is my findings - from what I have achieved/failed using the product...... I take no responsibility on how others may find or react to what I post..... OK...?

It's not like any clear coating I have ever used. You must "forget" everything you have learned about paint/lacquer/varnish when using this product - those who have never held a brush or spray gun in their hands seem to achieve the best results...... guess that tells us backyard "experts" that we can't "wing" it as we go..... I stuffed up quite a few of my first attempts before going back to the instructions to find out where I went wrong........ get your kid to read the instructions and then paint something - watch what they do then copy them exactly.... it's a bit like what they do to us, but in reverse......

It can be brushed or sprayed. I have had excellent results using a brush and stuffed up other pieces I felt would come up a treat when I sprayed them .....

Now the acid.....

1/
If brushed on a day which is not humid, it will "flow out" and leave almost no brush marks...... if the day is humid, it WILL leave marks and also a somewhat "wavy" finish...... and also dull the coating to some extent.

2/
If you stuff up using this stuff and it cures - it has to be ground off - no chemical will remove it - ask me.

3/
It is a 2 pack component and DOES contain iso-cyanate.... the tech sheet states that it is safe to brush - spraying requires a respirator NIOSH approved....... I didn't get this information on the enclosed product information sheet... I found it on the POR website - and it very clearly states it is iso-cyanate...... be warned!


4/If you haven't sprayed a clear coat before - don't rush out and think you are going to create perfect protection with a mirror finish..... you won't!

5/
Drying - this stuff is as strange as the POR 15 - but also "weird".....
The more you thin it - the harder it is to spray.... and the shallower the gloss, regardless of how many coats you apply.

6/
Although it will "dry" in 30 minutes - it won't "cure" for at least four days - and that requires a minimum temperature of 20 deg C...... we don't get many of those down here in Vic in Spring..... sometimes not in Summer..... in a row, anyway...
If you touch it in those four days you WILL leave marks in it - it cures from the outside in...... again, ask me...
You MUST keep any air/dust/insects away from it until it dries...... minimum 1 hour - they ARE attracted to this stuff....... I have now given "permanent existence" to some of our bugs and gnats from the garden - don't be fooled into thinking they won't come into your garage even with the doors and windows closed.......

7/
If you get runs when spraying - DON'T use dry air to force it to dry - it WILL fog the finish.
You MUST leave an absolute minimum of 30 minutes between coats, up to two days is acceptable (if you can keep the above paragraph away from it).

8/
ONE coat at a time - double coat something and it WILL run......another blocking back.......

9/
They recommend two coats - three for Marine..... DON"T go over four - you'll end up with a plastic finish........ ask me.... another blocking back...

10/
If you get a run - leave it..... don't do anything - if you touch the surface with anything it will become a tacky, sticky gooey mess........ yes, again - ask me......

11/
This is the one you DON'T want to read.....
It will NOT give the same deep mirror finish on chrome or highly polished Alloy...... I have tried and tried - I got pretty close but had to "re-learn" my photography theory to understand why this "water clear" coating removed that deep dark mirror finish - it's to do with light refraction - the coating is a "thickness" and light is diffused.... hope this makes sense?....

Guess that has just about put most people off......? - read on..

The "good" bits.....

It is a permanent coating - it will "seal" out the elements from what is coated.

It is hammer tough..... not in the same way as POR 15 as it does not impregnate the substrate - but the coating becomes rock hard and won't chip, crack or peel.......... strangely, anything coated can be bent over - even doubled without it "letting go"........ I have some masking paper which I rolled up and it didn't crack......... as mentioned - weird stuff.

If, for some reason, the coating gets scratched (and you're going to love this) you can block it back and re-coat it and attain the original coating finish........ I was absolutely amazed at how it did it...... blocked back my badly pitted and faded over-rider to remove some runs and left it like it was covered in talcum powder - the first first re-coat and it came straight back to looking like I'd just sprayed it...... even though wetting it or washing it in POR thinners showed it up as being dulled.......

It won't (they say) yellow or fade - I coated some of my carburettor prior to Yamba and it looks as new as the day I painted it.

It is not susceptible to chemicals - great for petrol/brake fluid etc areas.

I do NOT know how it stands up to temperature - I have ground, sanded, buffed and highly polished an alloy intake manifold - it did loose some of it's depth but still resulted in an acceptable finish - I will have to post again when this is fitted and it has been subjected to some manifold heat......... watch this space.....

AND...... it is UV stable - it CAN be applied over POR 15 which is not UV stable - I have coated some parts (engine fan, alternator fan, fuel tank rear and mud flap bracket plates) which have been painted in POR 15 black and they have come up very nicely....... there are pitfalls here.... I'll have to explain them in the POR 15 post - it's not the fault of Glisten PC, but with POR 15 ...... I found out eventually - total of 15 Glisten PC coats with blocking backs on each third coat to remove "dimples and craters"........ got a nice looking engine fan now, though....... and still some "dimples"...... I gave up - not back to bare steel...... again (now six times).......

Brushing - easy as...... but READ the instructions!
One coat and don't play with it - it will "flow out and settle" - all that is required of you is to coat it evenly - the LEAVE IT...... I'm a tinkerer, and I don't know how many "blue" words were heard by my neighbours when I first tried to get that "mirror" finish...... I didn't until I did what I was TOLD........

Spraying - humidity is the key to this one..... do NOT spray this on a humid day - it won't settle properly - the surface will "dry" before it gets to flow out........

Leave it minimum 30 minutes before re-coating....... anything less and the whole lot will become a landslide........ yep - ask me...

Don't thin and spray at light pressure - it doesn't work with this stuff.... it will come out dull and I don't know how many times I self destructed because it left droplets on the finish - seemed to look like it had been left in the rain - water drops on it ........ hope that explains the effect...?

Spray it at 40 psi - you are going to create a "cloud" - tough luck - this is how the stuff seems to have to be applied - but make SURE you cover everything you don't want permanent rock hard dust to settle on - it doesn't dry for 30 minutes, remember.......... and it WILL settle on your car - a blocking back of my precious roof and rear end .....even though I "thought" I had them covered.....it was a thin throw over nylon cover - this stuff got through it.......

Now..... the tricks....... run your gun over the piece fast enough that you can see it get wet but not bring up a deep gloss - I think that's how I can best explain it...... bring up the deep gloss and it WILL run...... too fast and it will "dust".......

When it comes to the second, third or max fourth coat, put a little more POR Solvent into your mix - the surface tension of the previous coat will not allow addtional coats to flow out....... I know this seems a paradox when I stated not to thin it too much....... we must remember this stuff can be re-coated up to two days later..... I feel this has something to with why subsequent coats should be thinned (very slightly).....

Now..... the mixes which worked/failed for me.....

My first attempt was to thin at the maximum recommended and apply to bare pieces.......failure.... big time...... droplets.

I cut back the solvent ratio by half and got mixed results - it seemed to have been dependant on the type of metal....... alloy was a pain in the (think you know what).....

After just about using up my "kit" of 1 litre - the last few "mixes" have been (for spraying - at 25 deg C and 50% humidity).....

3 resin, 1 hardener and 1/2 solvent.
for second and subsequent coats I thin further by 1/4 solvent.......

That's just about all for now on Glisten PC - I don't think I have much further to add for now - think this "little" thread has reached its crescendo.......... I need to do some field testing before posting findings.......

I suppose you want a pic or two......?

see if I can find one.....

frats,
Rosco
parisian62
Posts: 3997
Joined: Wed May 11, 2005 2:19 pm
State: NSW
Location: Sydney
Contact:

Post by parisian62 »

wow! thanks for those 'few lines' Rosco... :D

I remebber at Yamba Nats - the result of the carby - fantastic finish - did you spray or brush the carby?

Stewart
Feelin free in a '61 FB.
Member of FB-EK Holden Car Club Of NSW Inc.
Check out the Rebuild of Old Timer
rosco
Posts: 2569
Joined: Wed Feb 04, 2004 8:34 pm
State: VIC
Location: Melbourne

Post by rosco »

Carb was brushed..... it will "flow out" you just have to let it do its stuff and not try to "force" it...... keep your eye on the humidity - this stuff does not cure by temperature or air - it cures by humidity in the air - that's where most people get into trouble with the entire POR system - it's just about all humidity curing - something most of us know nothing about....... until now..

Some pix coming up in a couple of minutes - we're dial-up here and the pipe gets pretty well clogged up - between my "novels" and these pix....... we're getting good value for the cost of a local call......

frats,
Rosco
rosco
Posts: 2569
Joined: Wed Feb 04, 2004 8:34 pm
State: VIC
Location: Melbourne

continued......

Post by rosco »

Ok - there's two big issues I didn't mention in the "guidelines" above.......

moisture - whatever you decide to coat - it MUST be 150% dry - absolute..... I had a couple of failures and all I could put it down to was the alloy may have contained some moisture - even though I had pressed a paper towel into it to see......... what resulted was again those dreaded droplets in places where perhaps the rinses of fresh clean water were absorbed into the metal.......

Two BIG suggestions (which have worked for me since).....

1.
You must dry the metal thoroughly - I now use a heat gun - don't melt the metal, but bring it up to a slightly uncomfortable feel to the touch......

2.
POR don't demand it - but for alloys (brass, copper, aluminium and castings etc) they SUGGEST using thier preparatory product called AP 120..... for us wet behind the ears people - I now feel it a MUST......
I don't know what's in it - I can't find out - but have found it makes life a lot easier when the coating just sticks and flows out on its own without bucking back at you and wrinkling or beading..........

WARNING........ you MUST rinse this stuff (AP120) off - or the coating will fail......

AND

when using it on aluminium (castings included) do NOT leave it on for more than two minutes OR allow it to self dry.........

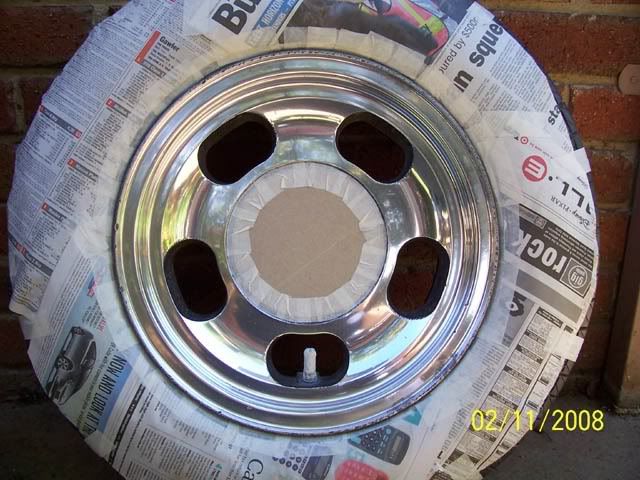
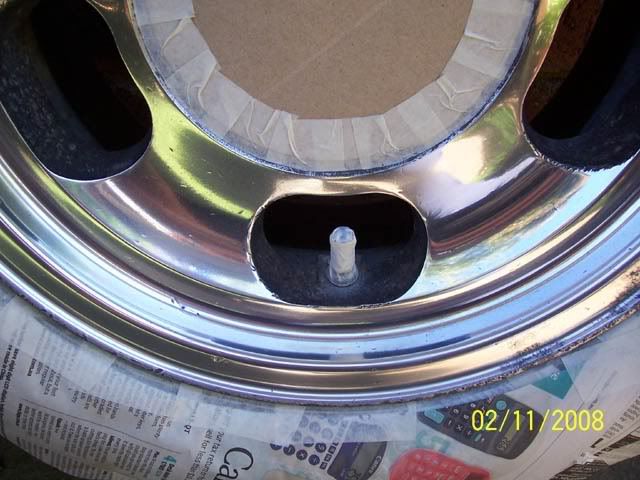
I found that on the inner casting of the Dragways - it literally kept the coating in place without any hint of running down the walls of those spokes........ again ONE coat and leave it alone for minimum 30 minutes......then the next - 30 minutes then ....etc..etc..

OK.... pix.

As mentioned, this will not faithfully keep the deep dark mirror finish of chrome or highly polished alloy - it goes close - but looks like a coating not a polishing ..... think that makes sense....

Below are some before and after shots - camera work not good - but should show how much "depth" will be lost.

First pic is of a Kryal Kasting thermo cover (made by same company as my rocker cover and side plates) purchased from Bursons.....
I ground, blocked down and polished it over a few days and was quite happy with the result...... then decided to hit it with Glisten PC..... it's now permanently "polished".....

Pic 1 - raw "as supplied" state

Image

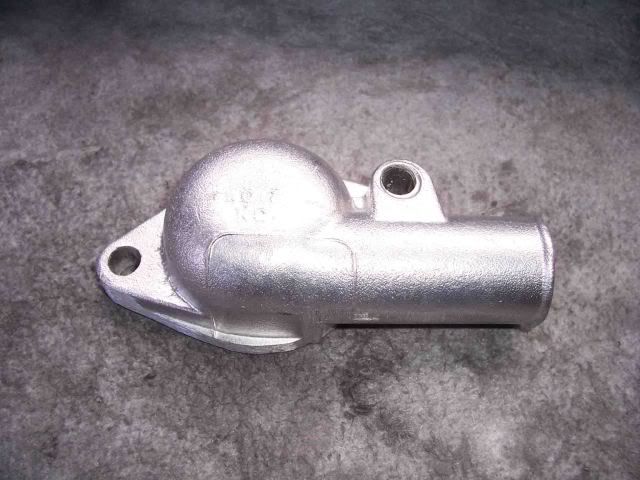
pic 2 - after relentless grinding, blocking down and polishing - wet and dry, pastes, and finally a buff......

Image

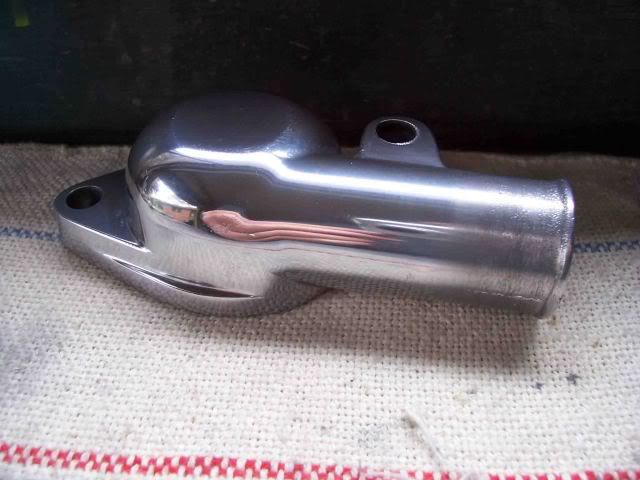
pic 3 - this is coated with three (3) coats of Glisten PC - in my early experiences of spraying it - I go a bit better now and I believe the AP 120 and heat gun help with this - you will note that the "depth" of mirror is somewhat diminished - as we said - light refraction which is diffused through the coating....... that's as good as I can explain it from my knowledge of such things.......

Image

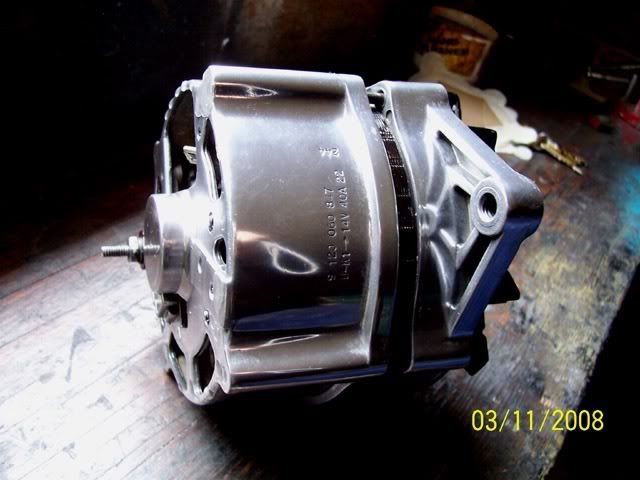
Now the alternator..... this one took me a long time to do - I wanted it as you will see it, fortunately - and I know not why..... the Glisten PC retained more of the depth on this piece....... my assumption is that I probably sprayed it on a day where there was less humidity - this was NOT treated with AP 120 nor a heat gun....... just lucky, I guess.......

pic 1 - as polished

Image

pic 2

coated with three (3) coats of Glisten PC..... following the instructions (this time.....) the pic is probably a little unfair - the depth is slightly better than shown - you can see the strap of the camera and that is probably the overall finish - the pic seems to show much of it as returned to an unpolished state.........sorry

Image

hope someone gets something out of this......

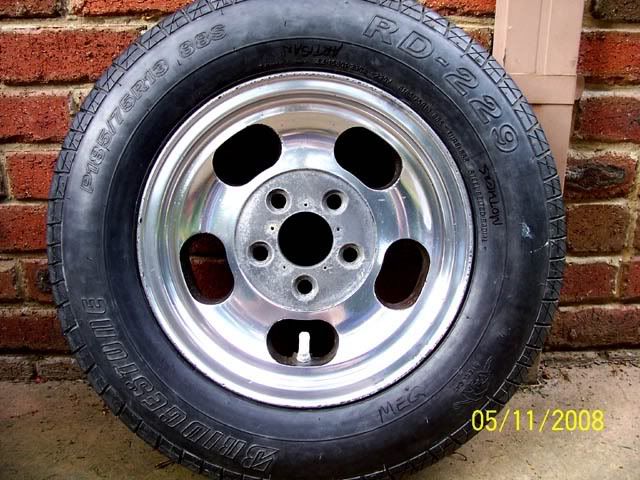
I still haven't decided whether I am going to coat the outer rims and centres of these dragways..........

frats,
Rosco
rosco
Posts: 2569
Joined: Wed Feb 04, 2004 8:34 pm
State: VIC
Location: Melbourne

Post by rosco »

oops - I really shouldn't stay up this late........

guess I double dipped on the above.... sorry

frats,
Rosco
EKSPCL
Posts: 794
Joined: Sat Mar 15, 2008 11:36 pm
State: NOT ENTERED
Location: Langwarrin, Victoria

Post by EKSPCL »

Legend :wink:
Nothing more to say...........
My 6yr old daughter said
"Dad your car's looking great! Which end is the front?"
Dee
Posts: 143
Joined: Sun Aug 10, 2008 8:53 am
State: NOT ENTERED

Post by Dee »

Double dipped.... are we talking about the paint.. or the pix..?

We need more of this stuff - thanx Rosco

Dee
User avatar
stinky
Posts: 902
Joined: Tue Oct 11, 2005 10:06 pm
State: SA
Location: Willaston, South Australia

Post by stinky »

I did the inlet manifold, rocker cover and alternator on the FE with this stuff. It was all good until I tried a second coat with the brush :roll: still looks OK though.
This pic was taken in 2005 and after a couple of long trips and few more kms in between it still looks like this with minimal cleaning.

Image
parisian62
Posts: 3997
Joined: Wed May 11, 2005 2:19 pm
State: NSW
Location: Sydney
Contact:

Post by parisian62 »

Hi Rosco,

Many thanks for posting up all this information and your experiences on the product. Nothing beats hearing about a product from someone who has actually used it.

regards
Stewart
Feelin free in a '61 FB.
Member of FB-EK Holden Car Club Of NSW Inc.
Check out the Rebuild of Old Timer
rosco
Posts: 2569
Joined: Wed Feb 04, 2004 8:34 pm
State: VIC
Location: Melbourne

Post by rosco »

Thanks for adding to this Stinky - much appreciated ..... I seem to be the only one running this....

Stewart - I'm happy to put up my experiences - it is a very pricey product, but from what I have found - well worth the expense, so far - anyway.........

OK more to add..

Alloy wheels - I was "donated" some 13 x 6 "Indy" wheels from a tyre supplier a few years back - they were going to be "trashed" until I put my hand up for them....... a woman had replaced them for standard steel rims on a horse float - apparently she tired of them leaking and having to pump them up every time they wanted to move the horse........

I didn't do anything with them for quite some time - not really my style, but had a bit of a play experimenting with some "new" polishes and "wonder" new products ...... all to no avial.....

As I am in the process of fitting dragways to my old bus, I want to get to them prior to putting them out on the road..... I have successfully coated the inner wheels and also the inner (tyre side) of the rim....... post a pic later some time......

I did not know how the polished alloy of a wheel would come up after coating it with Glisten PC - so spent a day or two polishing up one of these very badly pitted and corroded Indy wheels....... wet/dry and an arsenal of various grades of polishing compounds and pastes - all by hand..... what was that word....... Amish....

I prepped the wheel with AP120 and dried it using the air gun and finally a very generous attack with a heat gun.........masked it up and decided to hit the wheel with three coats (as is the suggested for Marine applications) of Glisten PC.......

Four shots here - the first two show the "polished" state - one of the entire wheel and the other an insert pic......

The second two as above, but with the coating ......

You will observe that the coating does diffuse the mirror depth and we spoke of that previously above in light refraction....... well, until someone comes up with a more scientific explanation beyond my comphrension at this point in time - it's as I see (no pun intended) it.........

pix

polished.....

Image

Image

Three (3) coats of Glisten PC - following instructions..... sprayed at 22 deg and 50% rel humidity......

Image

Image

Hope this helps.......

I don't think I am going ahead with coating the alloy outer of my dragways at this point in time - I will mask it off and coat the outer chrome rim.......

I feel I can get a lot more "shine" and "depth" from the supplied "polished" alloy yet........ they are good, but I would like better...... probably block them down using wet and dry and go up through the alloy polishing steps I have learned from other attempts.....

frats,
Rosco
Post Reply