Thanks guys, it was on my list, but I hope I remember it BEFORE I Finnish installing the last bolt onto the guards.
And I stick a big rag into the bottom of the guard hole.
So anything that falls I can easily collect.
Before it hits the bottomless pit.
EK Wagon project - Total rebuild
Re: EK Wagon project - Total rebuild

IT's LIKE WATCHING DRUNK MONKEYS TRYING TO HUMP A FOOTBALL.
Re: EK Wagon project - Total rebuild
A little more progress. 
Dash is now back in and connected.
Need to check a few of the connections, but it's nice to have it back.


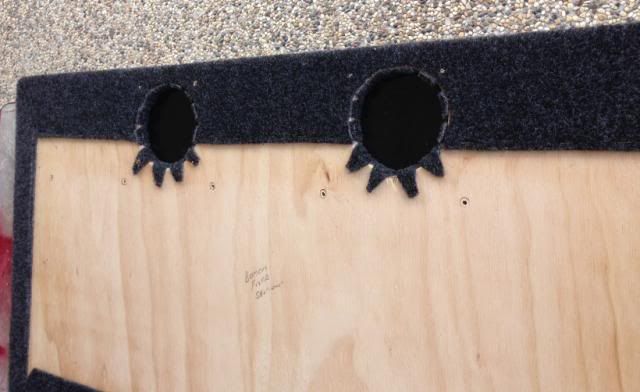
Also got the middle sections of the cargo area covered.
Just need to finished the sides.


These came out of an FB, and have been sitting/waiting for a year or two.
Add a little bit of extra bling and chrome. 


And the last door in finished, just waiting for someone to help put it back on the car.
Dash is now back in and connected.
Need to check a few of the connections, but it's nice to have it back.
Also got the middle sections of the cargo area covered.
Just need to finished the sides.
These came out of an FB, and have been sitting/waiting for a year or two.
Add a little bit of extra bling and chrome.
And the last door in finished, just waiting for someone to help put it back on the car.
IT's LIKE WATCHING DRUNK MONKEYS TRYING TO HUMP A FOOTBALL.

Re: EK Wagon project - Total rebuild
Make sure when you put the engine back in you earth it to the body,,, 
Wayne Chambers
President
FB EK Holden Car Club of N.S.W
President
FB EK Holden Car Club of N.S.W
Re: EK Wagon project - Total rebuild
Back at the parts wagon today.
But the bar for the cargo area, looks like it will need a bit of work.
So I cut it out anyhow and will weld in some new metal and it should be good as new.
Maybe a lot of new metal.
Why the hell you anyone take it out in the first place.
This car certainly had a lot of half done's.

Had another son offer to help, so the last door is on the car.
And of course a bit more chrome.


And finished the two side sections in the cargo area.
Now just have to do over the wheel arches and the side panels, with speakers.


But the bar for the cargo area, looks like it will need a bit of work.
So I cut it out anyhow and will weld in some new metal and it should be good as new.
Maybe a lot of new metal.
Why the hell you anyone take it out in the first place.
This car certainly had a lot of half done's.
Had another son offer to help, so the last door is on the car.
And of course a bit more chrome.
And finished the two side sections in the cargo area.
Now just have to do over the wheel arches and the side panels, with speakers.
IT's LIKE WATCHING DRUNK MONKEYS TRYING TO HUMP A FOOTBALL.
-
bumper
- Posts: 717
- Joined: Mon Dec 31, 2007 10:07 am
- State: TAS
- Location: Devonport tasmania
- Contact:
Re: EK Wagon project - Total rebuild
Looking good mate 
wanker????
I'd rather consider myself as an "owner operator"!!
FBEKHOLDENFANS page
https://www.facebook.com/groups/253705454864/
I'd rather consider myself as an "owner operator"!!
FBEKHOLDENFANS page
https://www.facebook.com/groups/253705454864/
Re: EK Wagon project - Total rebuild
Youre doing a bloody good job Finny - its looking great 
I started with nothing and still have most of it left.
Foundation member #61 of FB/EK Holden club of W.A.
Foundation member #61 of FB/EK Holden club of W.A.

Re: EK Wagon project - Total rebuild
Nice work Finny.
Speed and Style........... One day I'll get the speed bit.
Re: EK Wagon project - Total rebuild
Looking bloody great!!!!
Not all chemicals are bad. Without chemicals such as hydrogen and
oxygen, for example, there would be no way to make water, a vital
ingredient in beer
oxygen, for example, there would be no way to make water, a vital
ingredient in beer
Re: EK Wagon project - Total rebuild
Slow progress again.
Finishing off lots of little items, like hood cable, finding bolts and matching nuts, Getting contacts onto the back of door switches, looking for electrical faults, etc, etc.
Thanks to feedback from forum members I got the interior dome light reconstructed.
Started off with a few missing parts and unsure how it worked.

Cleaned up, removed the old parts and installed some insulated Perspex and a bolt to make the switch contact.

Installed a LED light and contacts for all the working parts.

All reinstalled.
Unfortunately the power still isn't connected.
But that will just be the end of the power lead.

-------------
Looking at getting a new exhaust done, but need to swap over to the extractors.
Raw power, well maybe a little more from the grey.

"Sonic" brand.
However I notice that the original equipment is a combined in and out setup under the carby. 
Wonder if that means I need a different Carby or just a plate.
For those that have done this before, is there an easy solution.
More unplanned changes......
Finishing off lots of little items, like hood cable, finding bolts and matching nuts, Getting contacts onto the back of door switches, looking for electrical faults, etc, etc.
Thanks to feedback from forum members I got the interior dome light reconstructed.
Started off with a few missing parts and unsure how it worked.
Cleaned up, removed the old parts and installed some insulated Perspex and a bolt to make the switch contact.
Installed a LED light and contacts for all the working parts.
All reinstalled.
Unfortunately the power still isn't connected.
But that will just be the end of the power lead.
-------------
Looking at getting a new exhaust done, but need to swap over to the extractors.
Raw power, well maybe a little more from the grey.
"Sonic" brand.
However I notice that the original equipment is a combined in and out setup under the carby.
Wonder if that means I need a different Carby or just a plate.
For those that have done this before, is there an easy solution.
More unplanned changes......
IT's LIKE WATCHING DRUNK MONKEYS TRYING TO HUMP A FOOTBALL.
Re: EK Wagon project - Total rebuild
As Tim states, Finny - you'll need to split the inlet/exhaust - there is every chance that the "heat flap" was frozen in the "hot" position - I remember mine was.
Yes - a thick manifold gasket - the standard one usually doesn't have enough meat to seal extractors properly.
I haven't done the dome light LED panel replacement yet - I did the one in the little Corona - with just 12 5060 SMD LED's - they aren't bright enough for my old eyes - when trying to read a map etc at night..... when I do the EK - it will be with as many super-bright LED's on one panel that I can fit in there...
I might also fit a diffuser to spread the beams onto the dome light cover.
Have you considered fitting door switches to your rear doors - the added advantage is that they can be used for your alarm system.
I have also fitted one under the bonnet catch and boot spring link.
If you wanted to go insane, you could find another dome light and fit it to the "cargo" area, as you call it - roof..... or even some "mood" lighting strip LED's behind a pelmet above the rear side windows... extremely thin LED strip of about 30 ultra-bright LED's each side, and a slim, thin black pelmet to blend in with the window rubber.
I made one up for my rear high level brake light - sits on top of the bottom section of sedan rear window rubber - is barely noticeable - until the brakes go on!
I also ran a strip of them under the drain channel in the engine bay - they can't bee seen unless you look up under the channel - they are connected to the parking light lead.
If I get caught needing to work under the hood on the side of the road at night - these light up the engine bay .... and have my tail and parking lights on.
Nah, I'm getting stupid.... LED's are just so versatile, and use so little power - you can leave them on all day with doors open, and they won't burn out or flatten your battery.
But, if you wanted to modify the dome light you have just restoe'd - you could add an "off" position. Power runs to the supply at all times, it's earth that is switched - simple job to break the earth with an additional push button on/off latched micro switch.
All looking good - you must be getting pleased with your build....?
frats,
Rosco
Re: EK Wagon project - Total rebuild
The final panel painting.
Or so he thought.
Had everything done up and ready for Saturday but it was far too hot.
So today was much better, but a little cloudy.
I had purchased retarder for the paint, so expected it all to go OK.
2 coats of Base coat - White.
Beautiful

3 coats of Metallic Red
Beautiful, apart from hitting the bonnet with the gun hose and having to sand it back and re-paint.

Clear coats x 5.
And upon the third coat noticed a bit of shine variation, which I thought may have been limited coverage or a bit of dry area.
But no it was paint blush, even with the retarder.
So the panels are all painted, but I'll be sanding them back and redoing a clear coat at some stage in the future.
But not for a week or so if the weather forecast is correct.
Or so he thought.
Had everything done up and ready for Saturday but it was far too hot.
So today was much better, but a little cloudy.
I had purchased retarder for the paint, so expected it all to go OK.
2 coats of Base coat - White.
Beautiful
3 coats of Metallic Red
Beautiful, apart from hitting the bonnet with the gun hose and having to sand it back and re-paint.
Clear coats x 5.
And upon the third coat noticed a bit of shine variation, which I thought may have been limited coverage or a bit of dry area.
But no it was paint blush, even with the retarder.
So the panels are all painted, but I'll be sanding them back and redoing a clear coat at some stage in the future.
But not for a week or so if the weather forecast is correct.
IT's LIKE WATCHING DRUNK MONKEYS TRYING TO HUMP A FOOTBALL.
Re: EK Wagon project - Total rebuild
Bugger - its still progress though Finny
I started with nothing and still have most of it left.
Foundation member #61 of FB/EK Holden club of W.A.
Foundation member #61 of FB/EK Holden club of W.A.
Re: EK Wagon project - Total rebuild
it may just buff out Adrian
looking good and in the home stretch now
looking good and in the home stretch now
EK JAY SINCE 1990
Re: EK Wagon project - Total rebuild
Still looks good to me, Finny - but you have to be happy....
5 coats of clear... hmmm.... was there any humidity on the day you sprayed..... might have re-sprayed one of the coats just a bit early - and trapped it.
As above, it might buff out for you... try a bit - then leave it... see if it finds its way out... if you get down to the first coat of clear - you were going to have to any way... so it's a bonus if you manage to buff it out on the way down.....
In perfect position for a re-spray - a lot harder once you put the panels back on....
all looking good..
frats,
Rosco
Re: EK Wagon project - Total rebuild
Checked them again today and they all had some bloom.
One guard was about 80% bloom.
Yes I think the humidity must have crept up as the day went on.
But once I started I just kept going, and thought the 20% retarder addition would have compensated.
So a couple of shots of the cloudy bloom.
You can see the correct colour on the edges.
The second one shows a section across the middle and the side of the bonnet


Figured I had to sand it back anyhow, and with 1200 was amazed that it cleared up.
So went to 1500 then 2000 and then compounded, and that's a keeper.

I did learn something else today, which goes with my previous experience with leaving doors lying of rags on the ground.
I tried sanding a few test spots on the bonnet and on one of the guards.
They were both in the sun.
I didn't wash the residue away, and it was VERY HOT.
After a minute or two, the residue marks (sanded clear coat) had dried and etched themselves into the paint below.
The paint was obviously still wet underneath and affected very easily.
WARNING.
So my sanding was a quick attempt to fix what looked like becoming another paint disaster.
Thank god for the forgiving acrylic.
It looks like I may save this one after all.
One guard was about 80% bloom.
Yes I think the humidity must have crept up as the day went on.
But once I started I just kept going, and thought the 20% retarder addition would have compensated.
So a couple of shots of the cloudy bloom.
You can see the correct colour on the edges.
The second one shows a section across the middle and the side of the bonnet
Figured I had to sand it back anyhow, and with 1200 was amazed that it cleared up.
So went to 1500 then 2000 and then compounded, and that's a keeper.
I did learn something else today, which goes with my previous experience with leaving doors lying of rags on the ground.
I tried sanding a few test spots on the bonnet and on one of the guards.
They were both in the sun.
I didn't wash the residue away, and it was VERY HOT.
After a minute or two, the residue marks (sanded clear coat) had dried and etched themselves into the paint below.
The paint was obviously still wet underneath and affected very easily.
So my sanding was a quick attempt to fix what looked like becoming another paint disaster.
Thank god for the forgiving acrylic.
It looks like I may save this one after all.
IT's LIKE WATCHING DRUNK MONKEYS TRYING TO HUMP A FOOTBALL.