chassis fabrication

If it doesn't fit below then post here and see if another FB EK fanatic can help you out.

Moderators: reidy, Blacky

Post Reply
User avatar
CHOPPED
Posts: 1193
Joined: Mon Feb 20, 2006 12:09 am
State: NOT ENTERED
Location: PERTH WA

chassis fabrication

Post by CHOPPED »

hey there guys
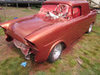
thought id post up some info on how i did the chassis on the chopped ute
there is litraly 100s of ways to go about this
but this is my way we tackkled it
hope this is of help to some one contemplating similar things
i was not a fan of the crs set up and with rods as my back ground i thought this was a much cleaner look
paul

this first photo shows the lazer cut flat bar arches we made to make up the chassis wheel arch
this is 75x75 rhs after we made a pattern to fit
Image
next shot shows how we tied in the main rails again 75x75 joining up to the origanal y frame pick up points
(this is what my engineer requested)
Image
the next shot shows how we set up the four bar back end nine inch had been cut to size at this point and wheel tubs fabricated to fit the 265 / 15 / 60
75x50 rhs on these to pieces (again what was requetsed by my engineer
Image
ill skip all the bouring bits the next shot shows months and months of work on the rotissery filling bloacking filling welding to get the under side to the same quality as what the outside would end up being
you will be able to see the entry holes for the exhast through the front out riggers
i didnt want any of the exhast to sit below the rails you can also see the hq holden hand brake set up on the out rigger and main rail
rear of the tunnel is the incorporated tail shaft loop
required by law over this side of the world
Image
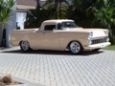
this last shot is basicly the finished product of 12 months of chassis fabrication tubbs finished and ready to start brake lines
i was forever having people drop in the workshop only to say mate its under the car
it wont be seen
Image
but hey thats just me
i never had intention of showing this car just built it this way for me but sort of got talked into it once it was finished
im a cabinet maker by trade so dont ever let any one tell you it cant be done
just go out and have a go
you may surprise your self
paul
HEY IT WASNT ME
User avatar
Thommo
Posts: 3687
Joined: Mon Feb 05, 2007 4:42 pm
State: NOT ENTERED
Location: Adelaide

Re: chassis fabrication

Post by Thommo »

Excellent post Paul 8)

It gives a great overview of a very solid foundation to build from.
Does look more substantial than the CRS Kit.

Cheers
Jeff
User avatar
Rusty EK
Posts: 830
Joined: Thu Feb 04, 2010 10:58 pm
State: NOT ENTERED
Location: Hobart , Tas

Re: chassis fabrication

Post by Rusty EK »

G,day Paul , looks nice and strong , its good to see how other people do their cars .

Looks a treat 8) any more pics??
User avatar
CHOPPED
Posts: 1193
Joined: Mon Feb 20, 2006 12:09 am
State: NOT ENTERED
Location: PERTH WA

Re: chassis fabrication

Post by CHOPPED »

finished diff housing incorporating the adj panhard bar with adjustable aldan coil over shocks
Image
the bracket at the back is the spare wheel mount that sits under the floor in the tray area
HEY IT WASNT ME
Blacky
Posts: 13344
Joined: Tue Jul 20, 2004 8:58 am
State: WA
Location: up in the Perth hills

Re: chassis fabrication

Post by Blacky »

Shoulda got FAB to do it for ya mate :wink:
I started with nothing and still have most of it left.


Foundation member #61 of FB/EK Holden club of W.A.
User avatar
Devilrod
Posts: 7394
Joined: Fri Apr 30, 2004 12:55 pm
State: VIC
Location: Beaconsfield, Vic

Post by Devilrod »

Some really nice work there chopped. Thanks for showing us.
RollinLow
Posts: 132
Joined: Sun Feb 07, 2010 7:19 pm
State: NOT ENTERED
Location: Melbourne

Re: chassis fabrication

Post by RollinLow »

Have you got some better shots of the 4 link?
Post Reply