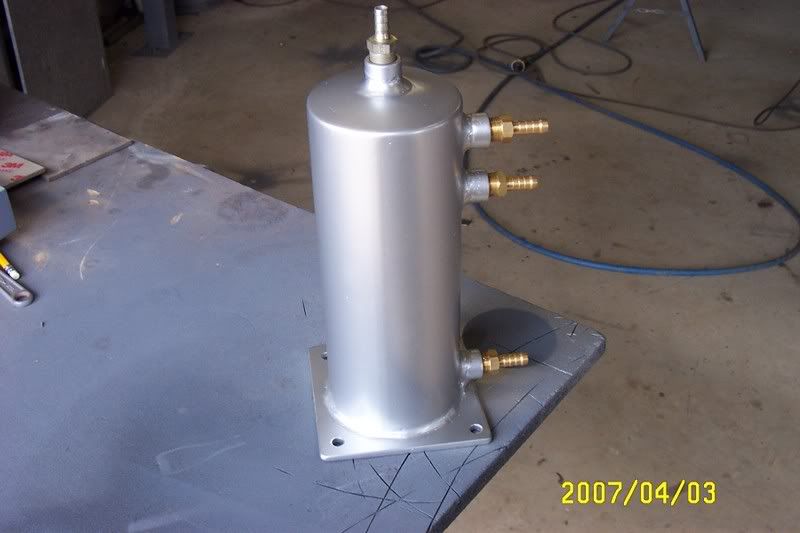
I've always been known for over kill when I do anything. Anyway I've finished the surge tank, I guess its shinney if you look at it in the sun and squint but you won't see it either.
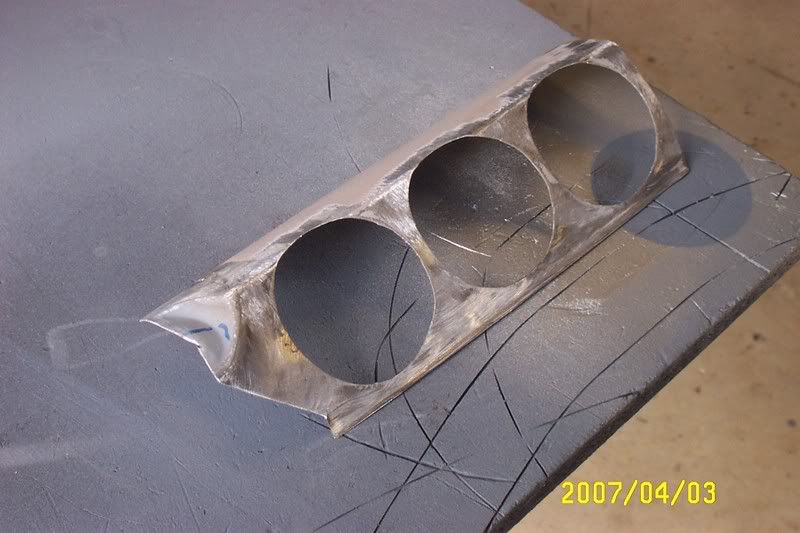
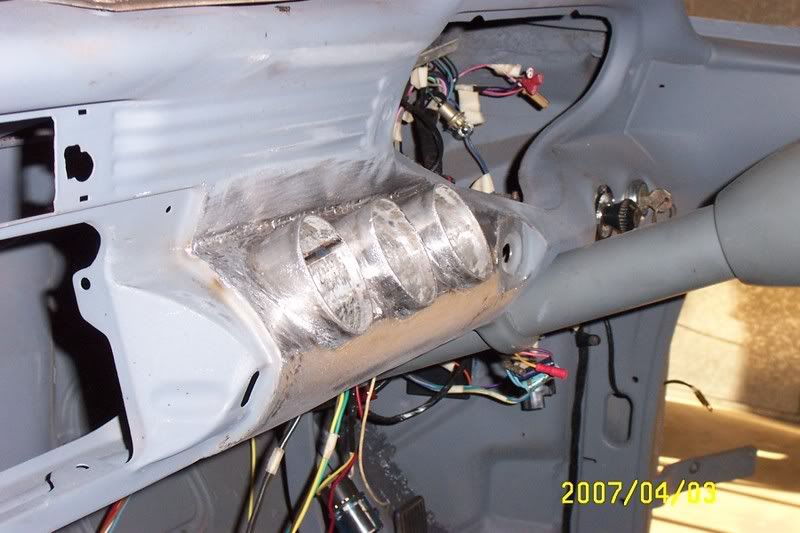
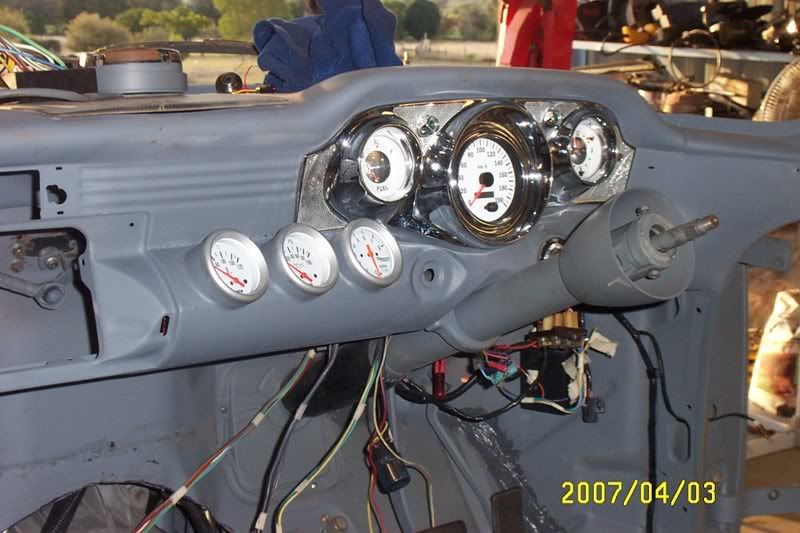
Just a couple more pickies, I have a few guages that I wanted to fit but didn't know where to put them.
So what I come up with was, I don't need a choke anymore or choke insert and I can do something else for the heater controls, so I got a spare glove box lid for the profile and welded in a few bits of tube to house the guages and welded it into the dash.
Thats a really neat job there Mal, sure beats the old under dash add on ones.
I personally wouldn't do it to my car but it fits with the modern style that your going for, keep up the good work ,
Trev
[img]http://i47.photobucket.com/albums/f177/trevwood/WOOFTOsmall.jpg[/img]
Woofto Car Club Member No3
i guess if the surge tank doesn't leak then who cares if its shiney
very nice gauges, i have been wondering what to do with the choke and wiper controls as they wont be needed, i was thinking of just filling them over the same shape as the rest of the dash, if i do i will definately be chasing a spare glove box lid!
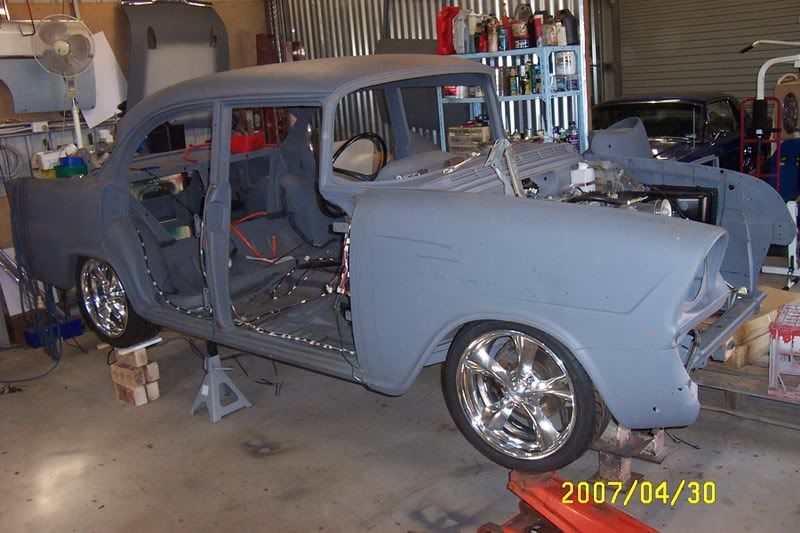
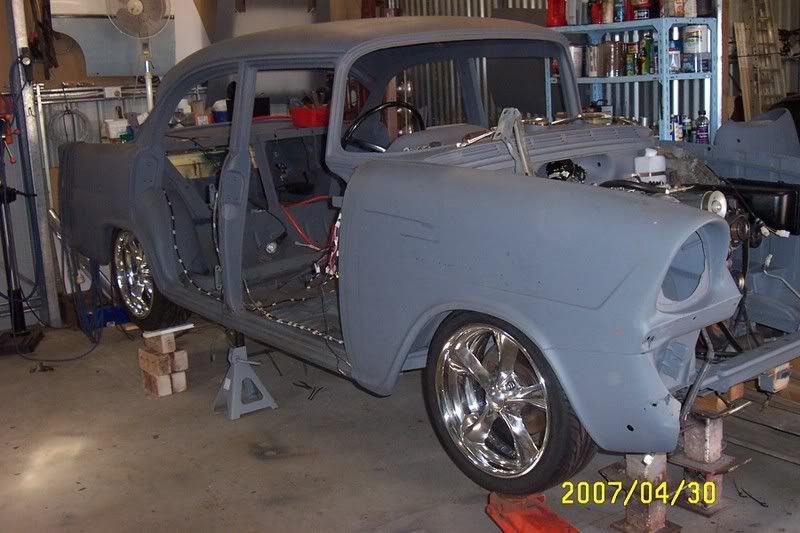
Not a great deal of progress but still on the little things that take time.
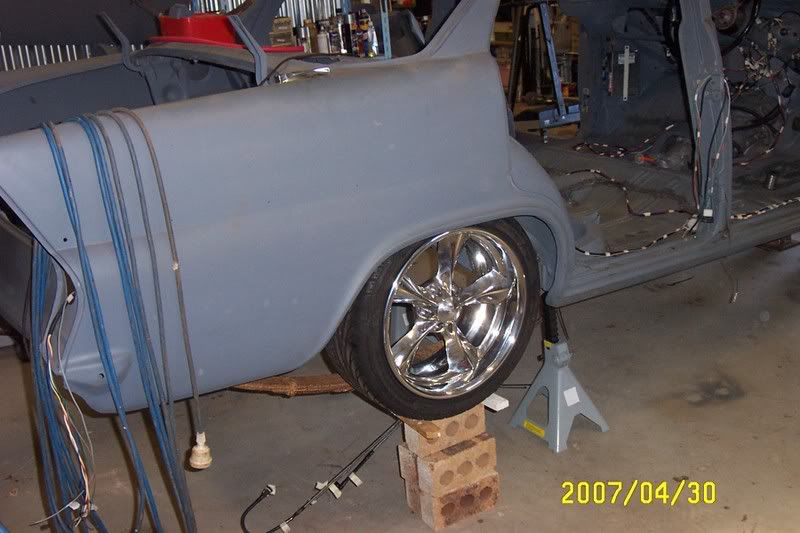
Finally I got my wheels from the US, fitted tyres now just trying to get an idea of ride height.
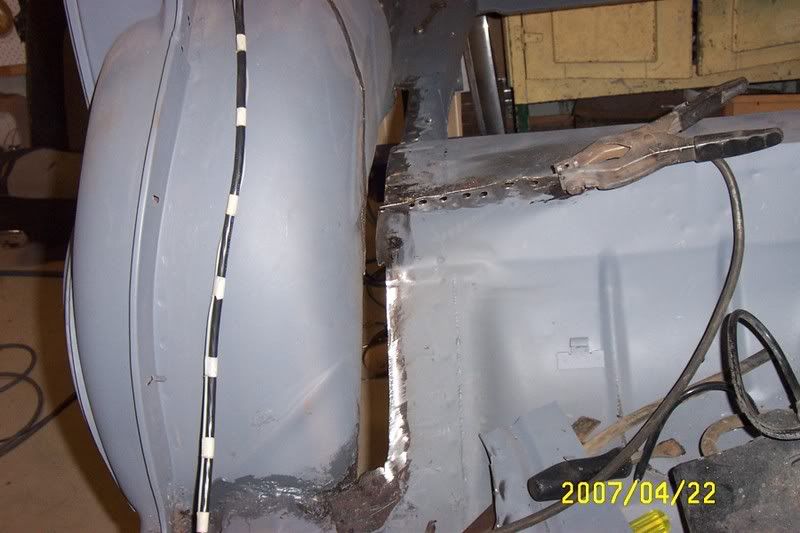
Greg, I went with your idea and widened the rear tubs for clearence. I removed the lip on the chassis totally and pushed the wheel arch out to suit.
The wheels are Boyd Coddington Junk Yard Dogs 17x7 with 205/40/17 up front and 17x8 with 235/40/17 on rear. With the rear inner guards done I've got heaps of room both sides of the wheels now.
I've also got the surge pot and pumps mounted, just have to finish running the fuel lines and fit the charcoal canister somewhere. Then it will nearly be time to turn the key and see if it all works.
Finally finished the wiring now with all electric windows and central locking done.
So just a few pickies.
Hey Mal,
The pumping of the inner certainly works a treat! In actual fact the wheel tub is larger the higher the wheel goes up from factory. Removing the lip just squares it off ( Like I said now 300mm from tub to lip ). The tub job is relatively easy and your diff width is now easy to obtain and no wheel scrubbing tops!
Got to love the wheels Mal and I think low is the go!
Don't blow yourself up on the maiden start up. Have you chosen a colour yet? What about a roof chop go on you can do it!
It appears that you are on track for a end of Winter finish cant wait!
Progress has stalled with mine but will update soon.
Regards Greg
Last edited by EK283 on Mon Apr 30, 2007 4:59 pm, edited 1 time in total.
mal do you have colours in mind, shame you have a blue car already some sugestions, blueprint with pearl white flash, hothouse green with a darker green metalic/pearl flash
people say i work fast but like i've said i have time on my side not working and i only do cosmetics, but you have a day job and seem to be doing A1 quality work you are the true speed worker
I must say that she is going to look just great when you finish her and you are doing a great job. The new rims look fantastic and are going to really set the car off. Keep up the great work and keep the photos coming mate.
WOW I love your work Mal , I hadnt checked in for ages and its great to see you taking the bull by the horns , The wheels are absoloutely fantastic , I was just considering setting my ride height today aswell , this ute project is a little different in that respect but I was considering having the sill level with the rim bottom and a 4 inch tyre to keep it legal .
Your rim choice is terrific , you just cant beat having American rims on a classic aussie , and they make or brake it hey .
Any other mods on the cards ?
Thanks for the comments, I've been off the air for a while as I've been waiting nearly a week for Telstra to fix a line problem.
Ratbox, I'm still looking at colours but can't make up my mind on what will suit. I want to do it a solid colour as its going to be my daily driver and I want something that I can touch up stone chips easily.
Harko, maybe you should to an air suspension setup, that would be cool.
I'm going to do a few body mod to the sedan as well, giving it that chev look, but I'm still setting up the mechanicals at this stage and then I'll get into the body work.
Finally the old girl has taken its first breath. YES I FINALLY GOT IT STARTED.
After much swearing and cursing, pulling things apart and checking it does go, now I'm really keen to get it finished after hearing it run.
The diff is away getting shortened, the springs are away getting lowered, and hopefully, in about 2 weeks it will be back on all 4's.
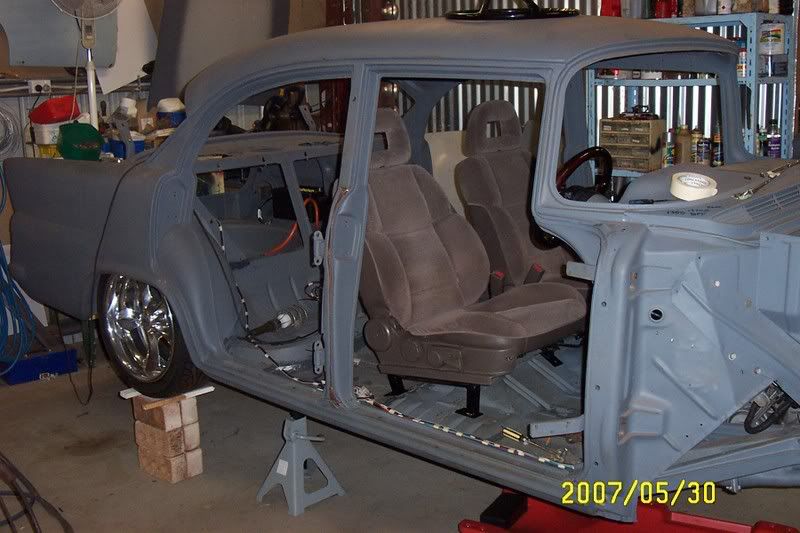
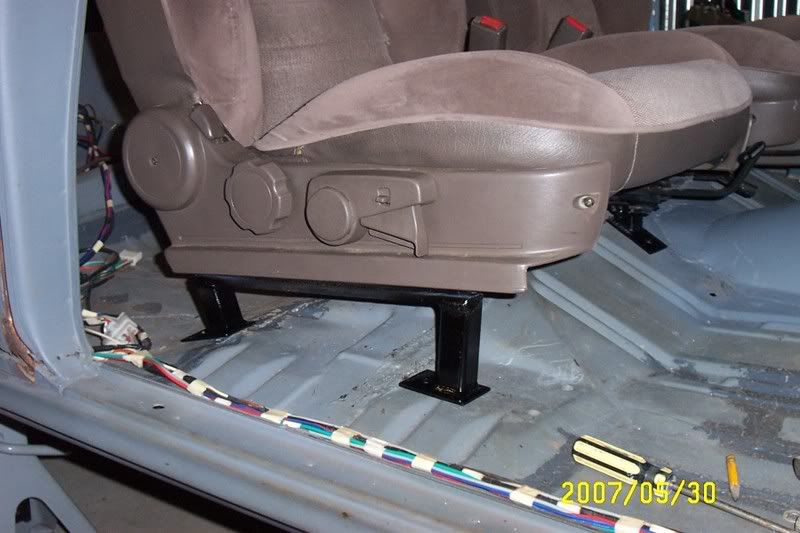
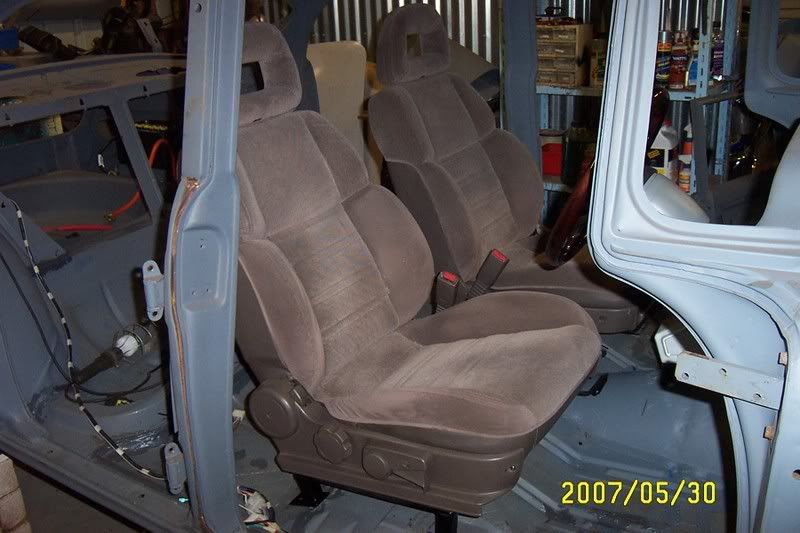
Once again I copied another forum members great idea and have now got the front seats fitted. I ended up using Mazda 626. They were really easy to fit and are ever so cumfy.
You will be happy with the seats Malcolm they are very comfortable with heaps of adjustment (which I needed for the ute).
I lost the headrests on mine when they were reupholstered-see if your engineer will allow it!
I reckon headrests look a bit out of place on old cars even tho bucket seats weren't original also, but if you keep them the ones you have are a better look than tombstone type!