Idiots Guide To Polishing Stainless Trim

Includes sheet metal, rubbers, bumpers, badges and rust repairs.

Moderators: reidy, Blacky

Post Reply
User avatar
funkyscooter
Posts: 555
Joined: Wed Aug 16, 2017 8:12 am
State: NSW
Location: Sydney

Idiots Guide To Polishing Stainless Trim

Post by funkyscooter »

The idiot in question here is me, as I have never polished anything in my life but watched a couple you tube videos and decided I would give it a go.

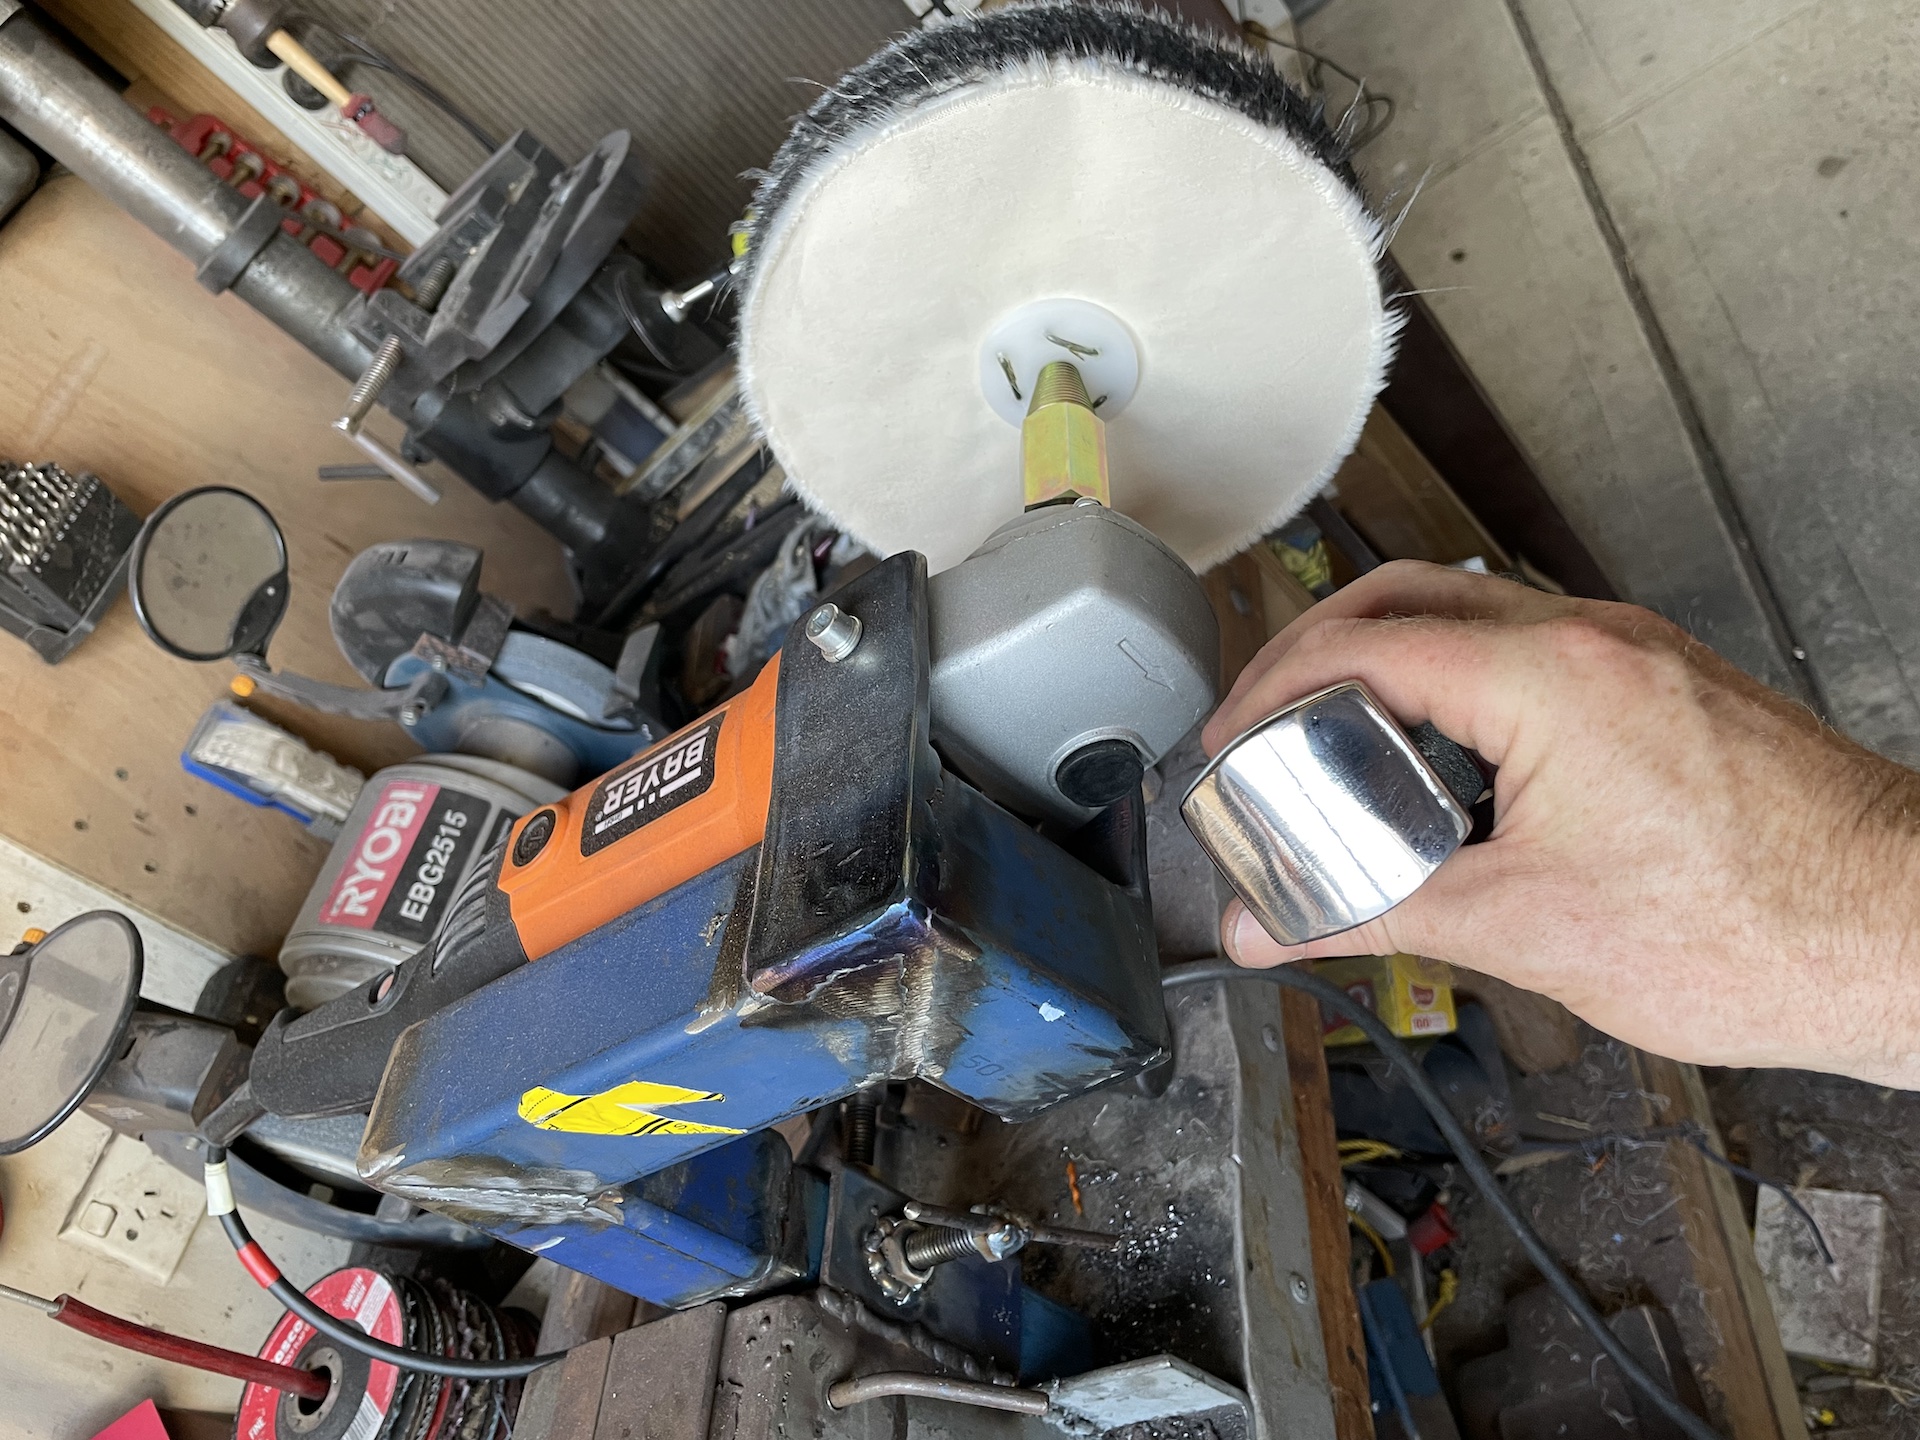
Much uming and ahing, and eventually I bit the bullet and bought a bunch of stuff from a site call polish up. Cost was $400 inc shipping and for that I have all the various cutting compounds, 200mm polishing wheels from the roughest (treated sisal), to the smoothest (swansdown which is essentially flannelette sheets), in multiples of each so as to not cross contaminate between polishing stainless, steel, chrome and aluminium. Put the various compounds and wheels in separate old pillow cases. Also got a 14mm attachment to screw the wheels onto my variable speed polisher which I originally got to use with shrinking disks.

First thing - make a bracket to bolt the polisher to my bench which was made out of scrap from the rotisserie build. Quick test polishing up one my cheap dollies with grey and blue compounds.
IMG_3233.jpeg
IMG_3233.jpeg (917.38 KiB) Viewed 398 times
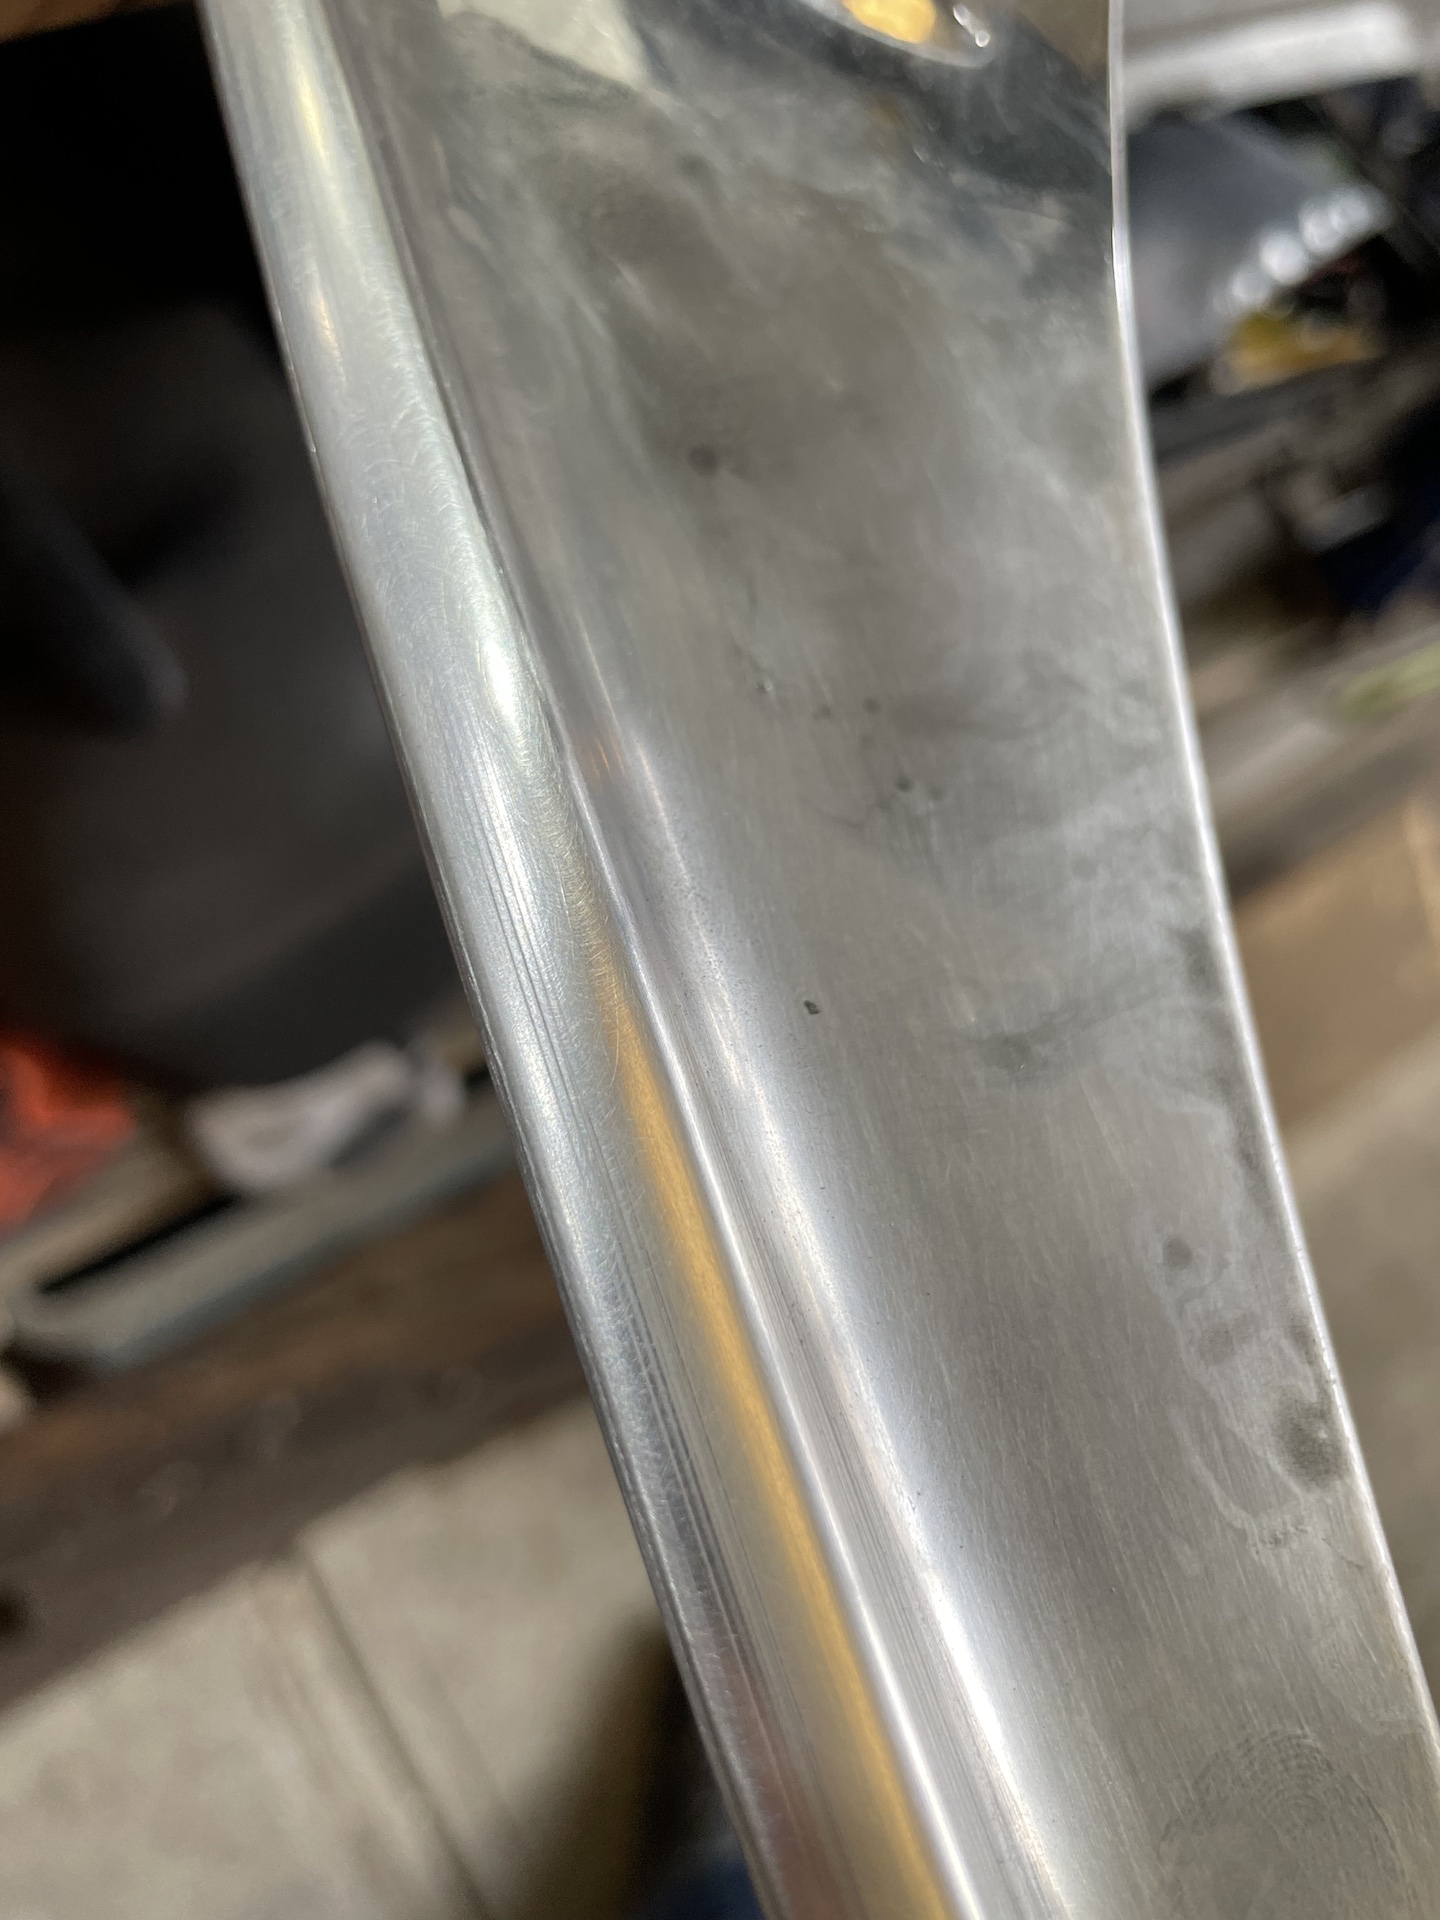
First lesson (still being learnt), must sand out all the scratches, not just the deep ones, as what was not visible after a quick run over with 320 in the DA, becomes very visible when polished.

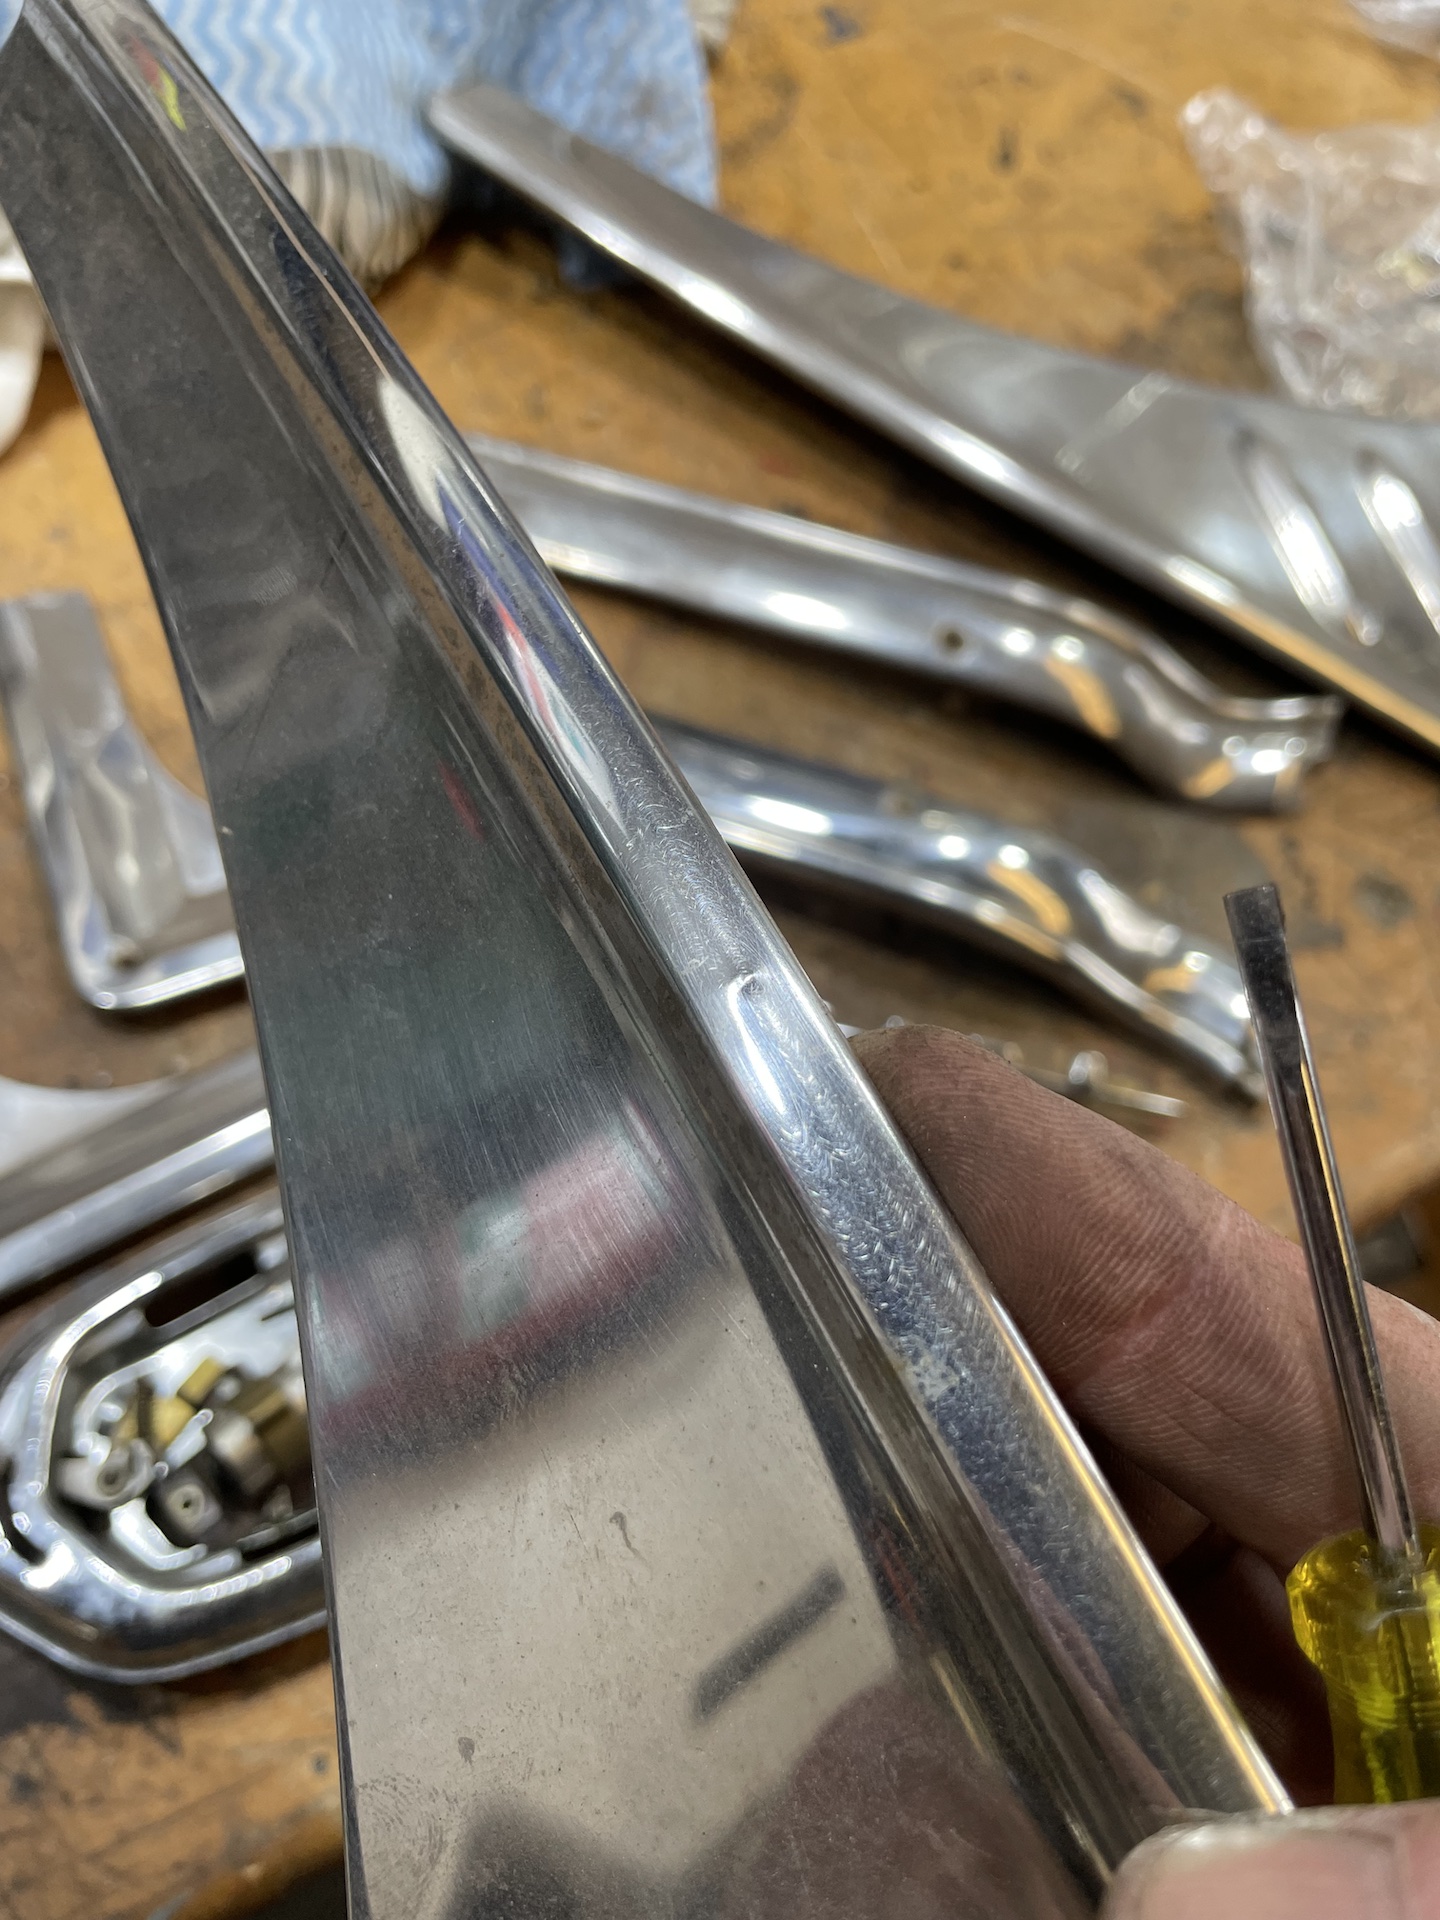
Jumped straight in and grabbed a bit of bling off the car. This piece has a dimple in it which I want to try and get out.
IMG_3170.jpeg
IMG_3170.jpeg (726.73 KiB) Viewed 398 times
Got a thin piece of hardwood in the vice and gave it a few taps with a soft mallet which ended up a wavy mess worse than the dimple ever was. Pretty annoyed I had ruined this piece so no progess pic of this state.
Decided what I need is a planishing hammer, which I don't have, so I came up with a low rent solution.
IMG_3172.jpeg
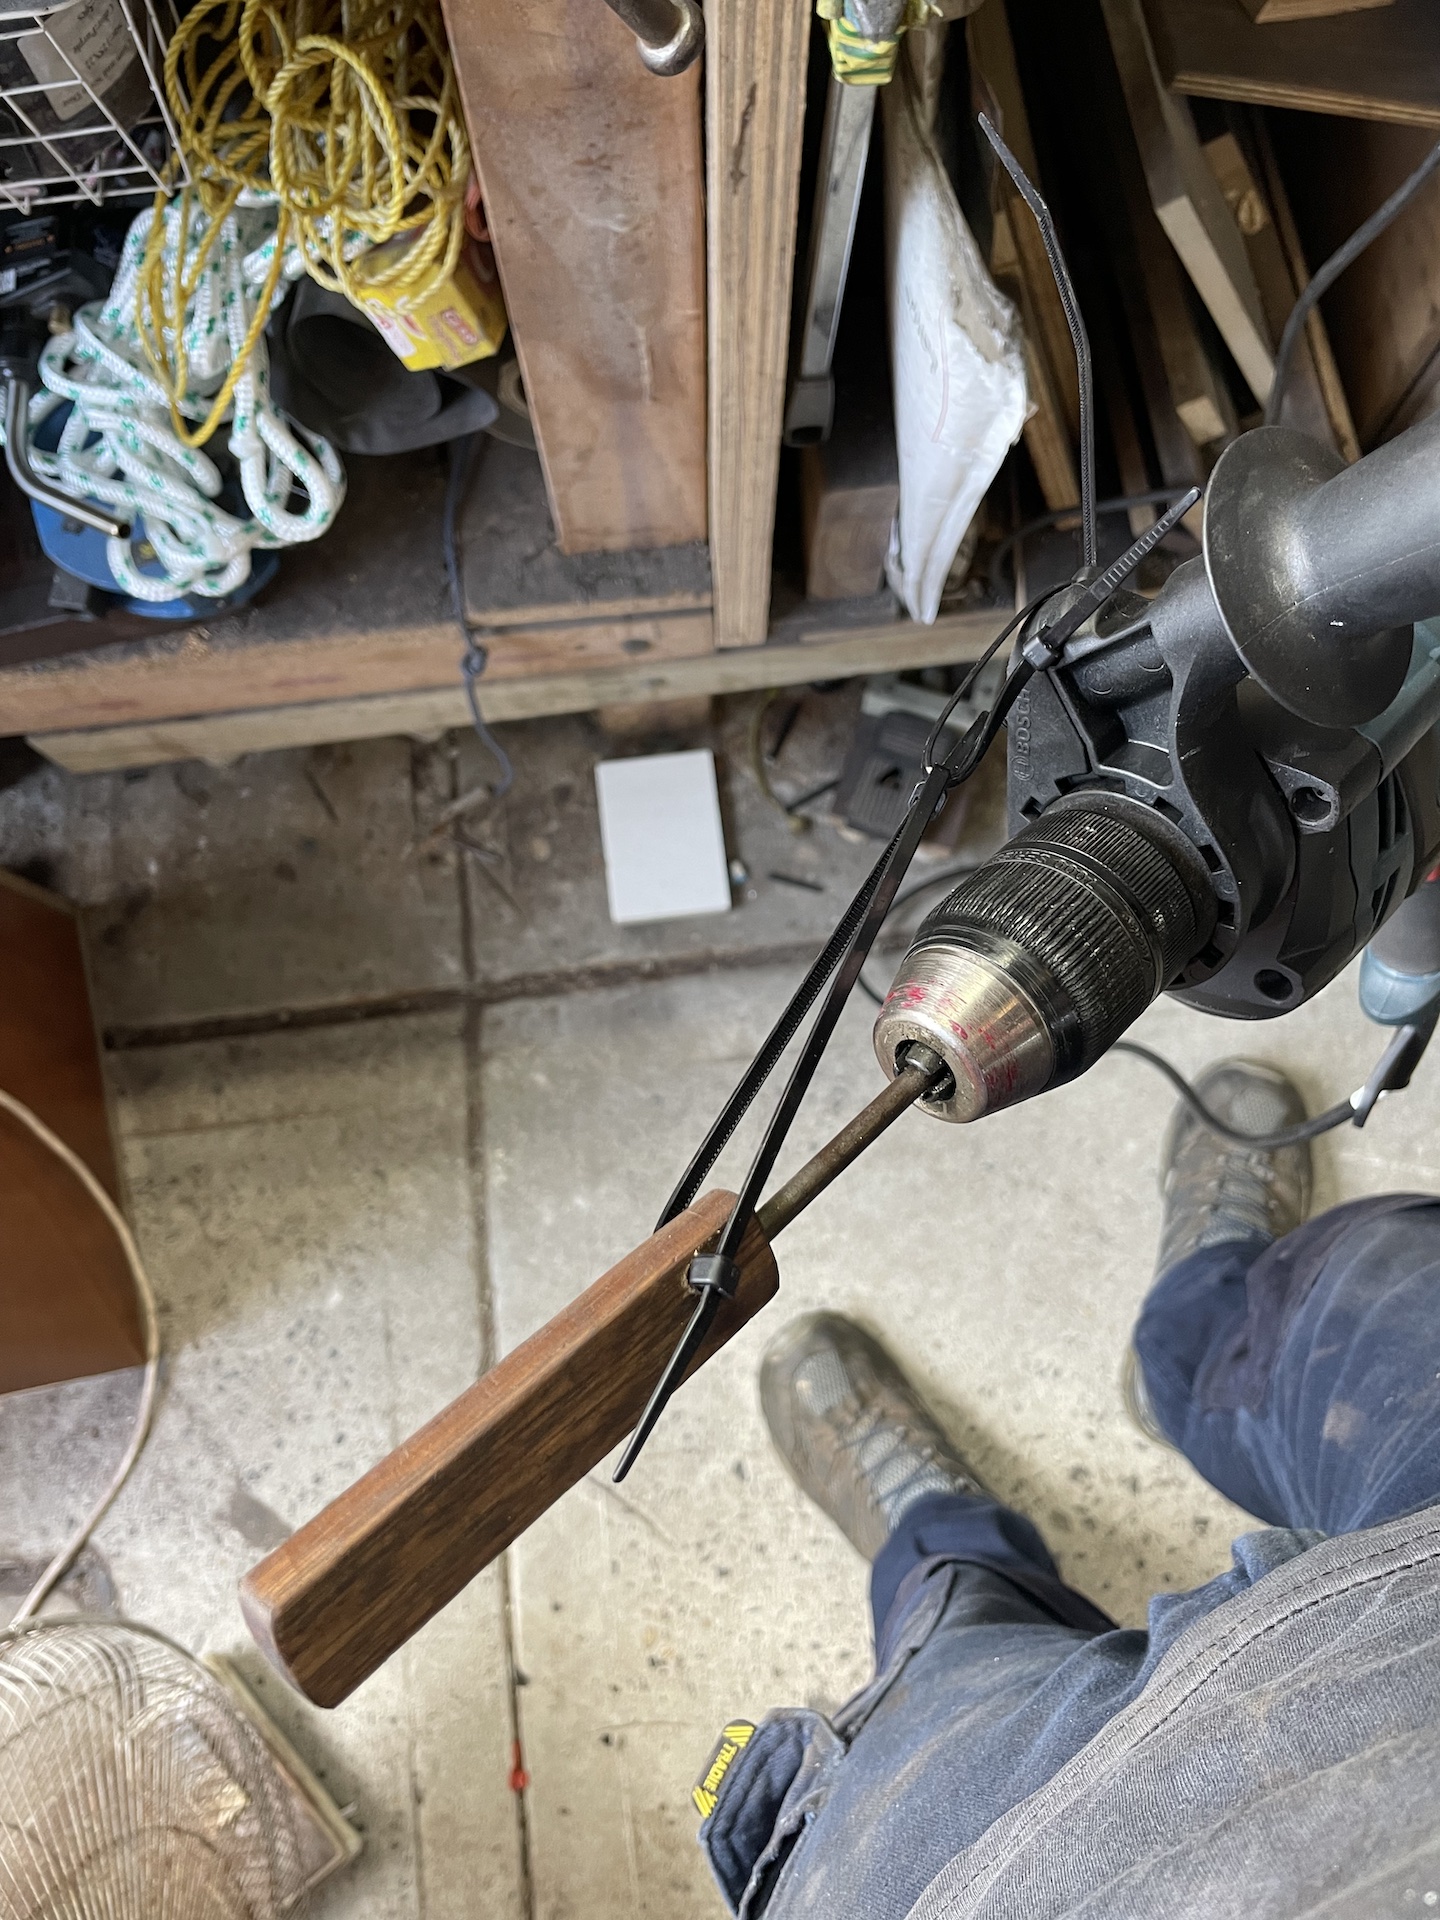
IMG_3172.jpeg (925.24 KiB) Viewed 398 times
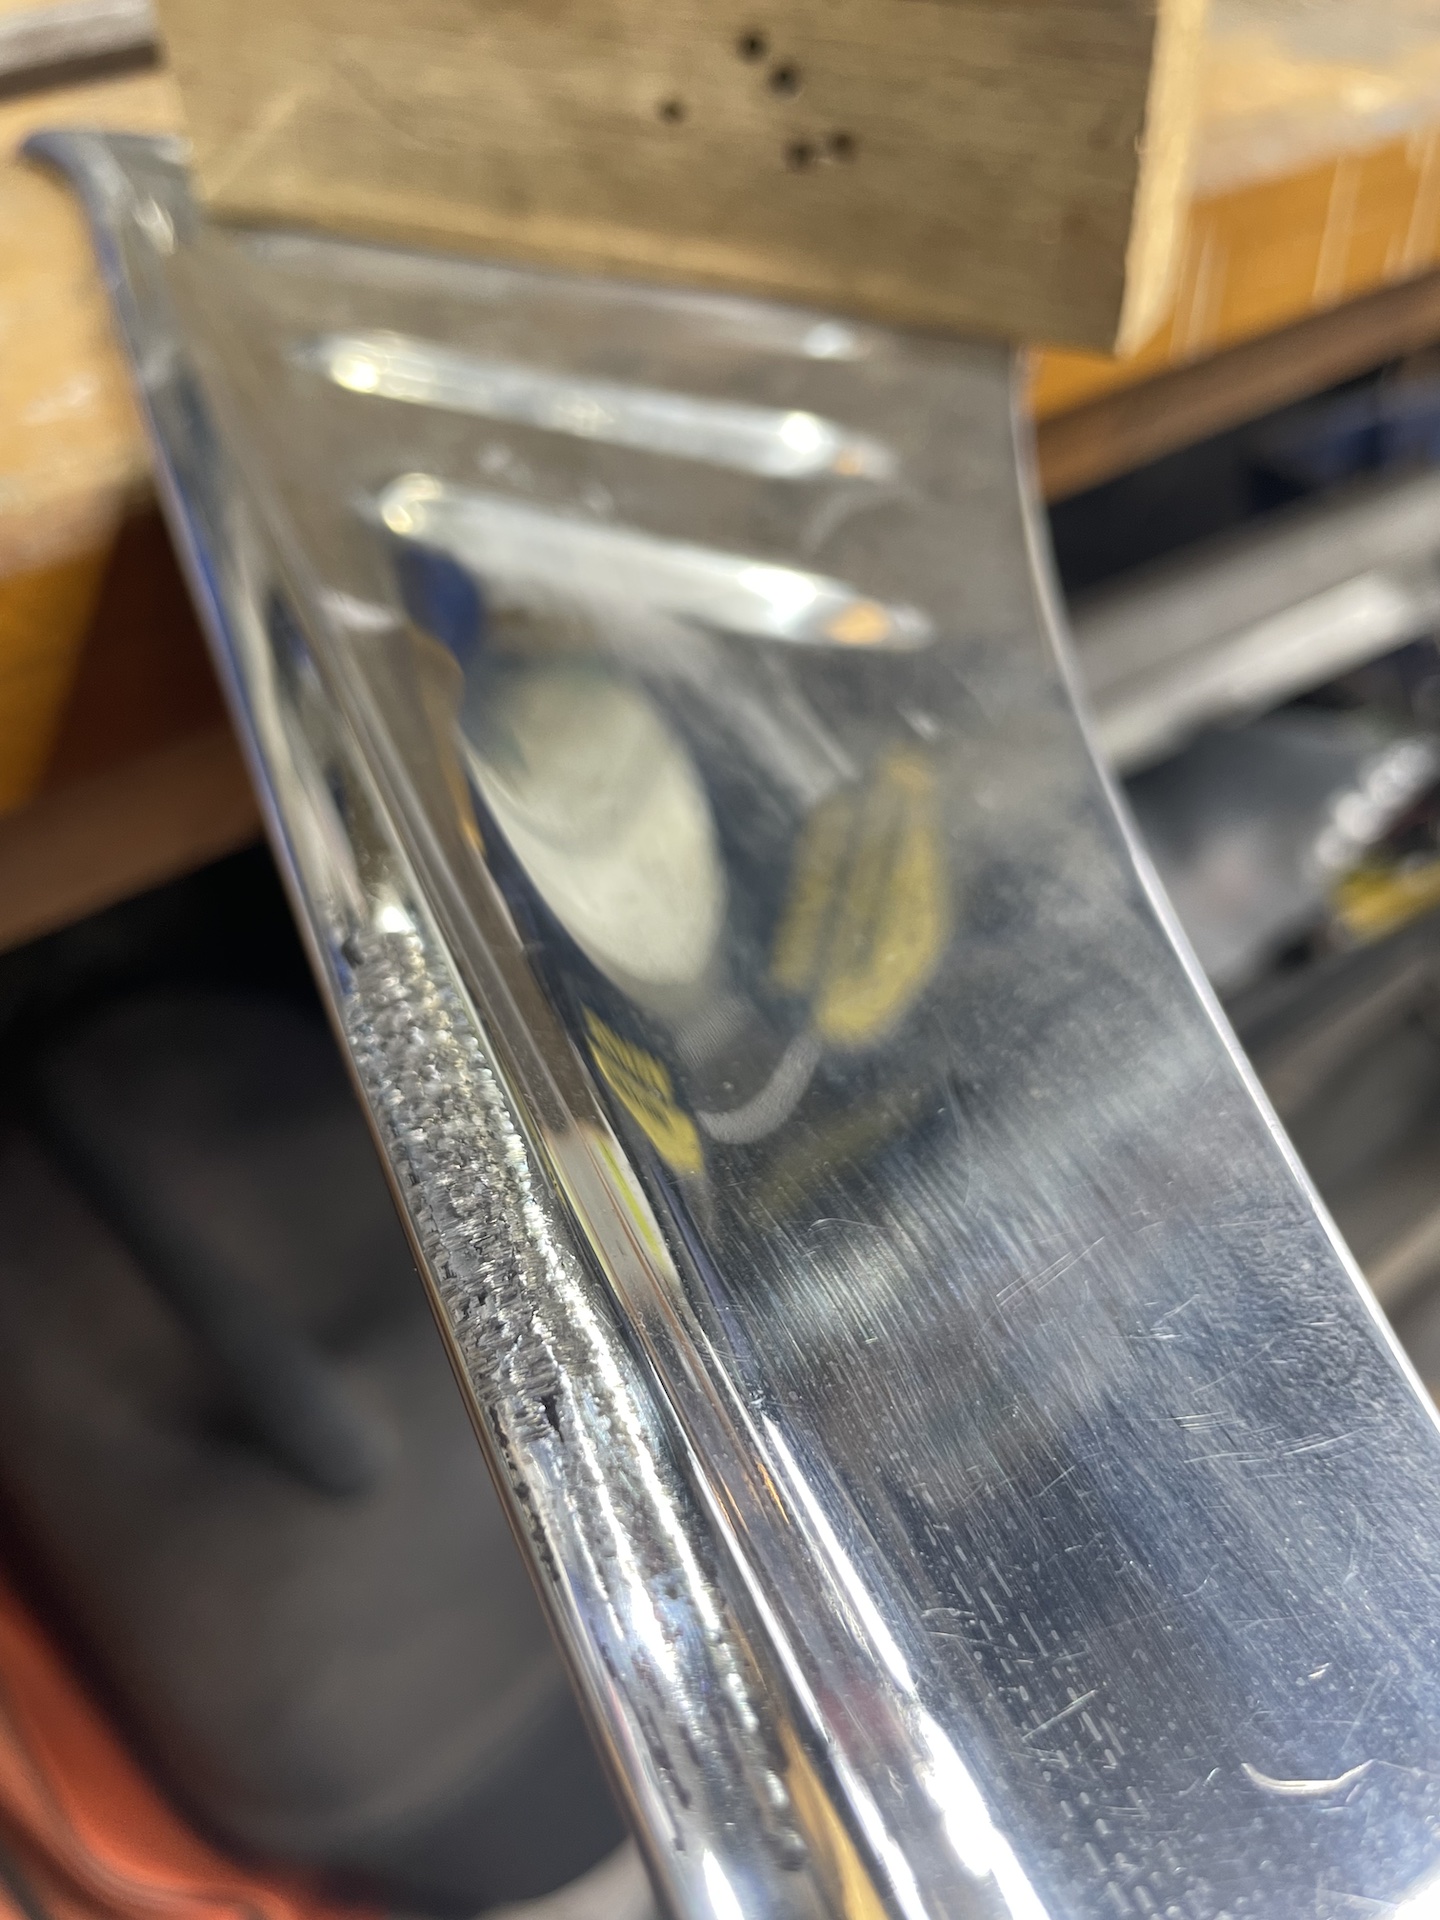
Bit of machine oil down the shaft, set to hammer and off I go. Really have no idea what I'm doing and really hard to operate drill, hold piece, and make sure I'm sandwiching it between the two bits of wood, so potential to totally cock this up are high. But pressure was light and after much tapping, a quick sand and polish it looks like this.
IMG_3173.jpeg
IMG_3173.jpeg (683.4 KiB) Viewed 398 times
Probably should have stopped here but I thought the shrinking disk might help even things out even more. It did, but not as intended. Too much heat, not enough lubricant, galling.
IMG_3175.jpeg
IMG_3175.jpeg (670.32 KiB) Viewed 398 times
Nothing to lose now, went aggressive, sanding the area with 120, 180, 180DA, 240DA, 320DA, 320/400/600/800/120 wet and dry, each grit spreading the sanded area bigger and bigger as I feathered the edges and sanded the previous grit out.
IMG_3179.jpeg
IMG_3179.jpeg (584.97 KiB) Viewed 398 times
Finally onto the polishing. Started with grey (fast cut) compound on the treated sisal wheel. This really does most of the work and is the equivalent of blocking a car when prepping for paint.
Then onto white (SS) compound, with a white stitch, then a loose leaf, and finally the swansdown. These three final steps take very little time.
Here is the result.
IMG_3281.jpg
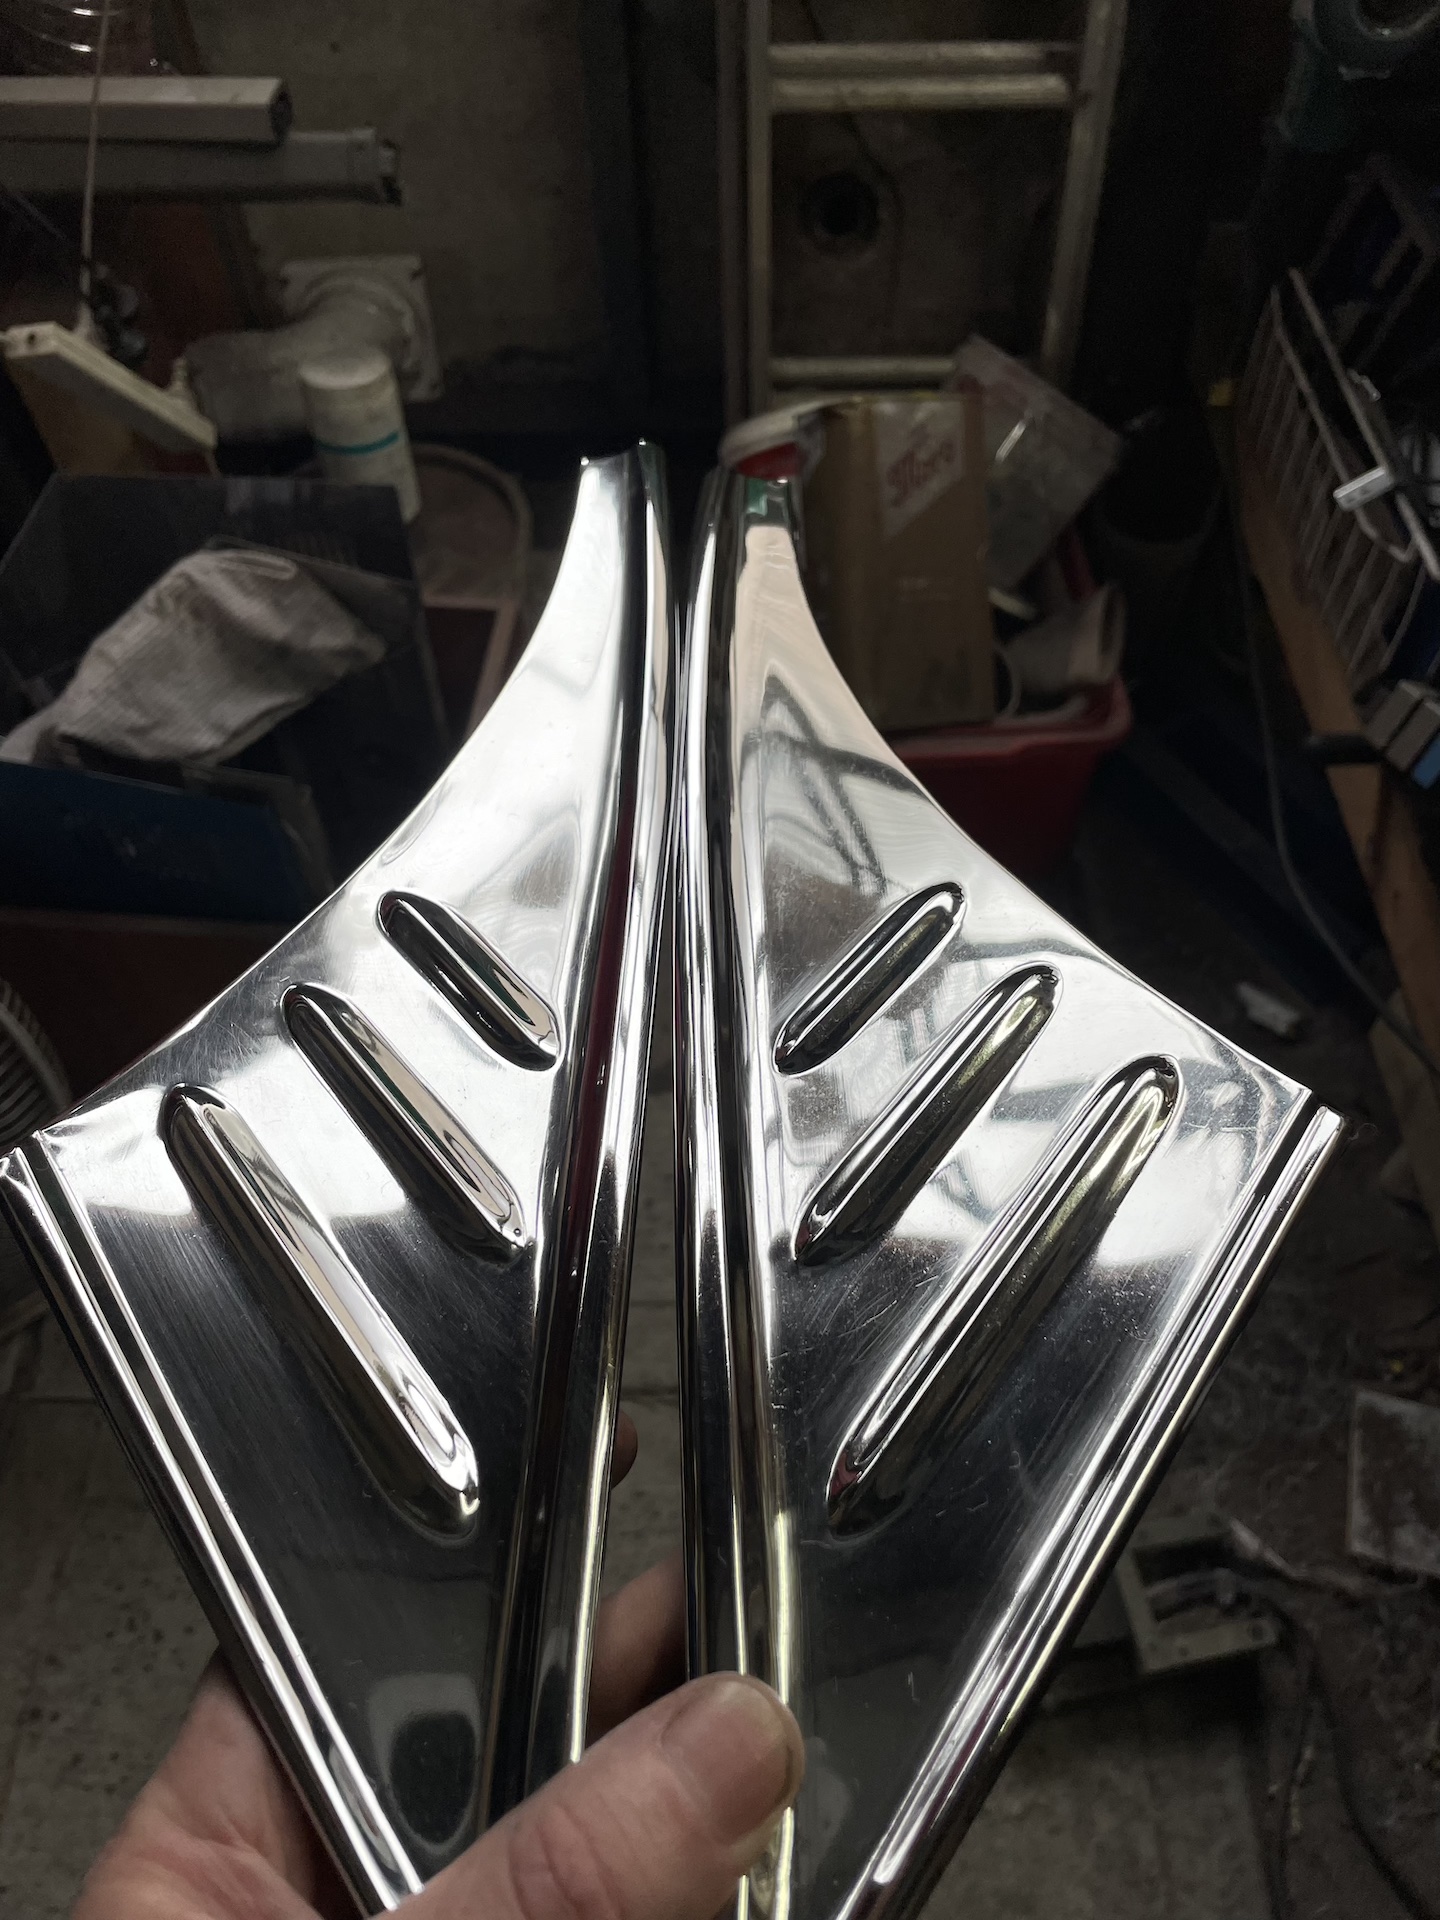
IMG_3281.jpg (782.2 KiB) Viewed 398 times
It's good enough for me, but for a great finish you can see that I needed to spend more time on the cut stage. As I have subsequently found on the few other pieces I have done, sometimes that means even going back to the DA to remove scratches that you thought were gone.
Scott
(Not so rusty) Ol' Rusty - FB/EK Sedan
User avatar
funkyscooter
Posts: 555
Joined: Wed Aug 16, 2017 8:12 am
State: NSW
Location: Sydney

Re: Idiots Guide To Polishing Stainless Trim

Post by funkyscooter »

Here is another example. Int rear trim. Has a deep scar on it, which you can see in the broken line of the light reflection.
IMG_3284_2.jpg
IMG_3284_2.jpg (675.72 KiB) Viewed 396 times
Tap, hammer drill, shrinking disk (more lubricant this time), sand to180 DA, cut with grey compound (too lazy to go to 1200 wet and dry), re sand (to 320 DA), cut, cut other light scratches (should have sanded first but got there in the end), polish.
IMG_3287_2.jpg
IMG_3287_2.jpg (768.3 KiB) Viewed 396 times
Can still see some sanding marks but I'm ok with it. This piece probably took 1.5 hours.

A slightly different approach, which I tried before going down the sanding route. This piece had a few rust marks all over it.
IMG_3187.jpeg
IMG_3187.jpeg (1.24 MiB) Viewed 396 times
Tried aluminium foil and 0000 steel wool, but in the end sandblasted it. Kinda liked the matte steel finish but it felt too much like aluminium. Cut and polished, now it looked shiny but with a 2k paint orange peel look, so but through all the sanding steps, cut and polish and have these. Again, still a few marks, but good enough. One on the left was sandblasted. One on the right had a few dents removed which were self inflicted - the wheel ripped the piece out of my hand, sending it ping ponging around the workshop when I was on the final phase of polishing.
IMG_3279_2.jpg
IMG_3279_2.jpg (1.18 MiB) Viewed 396 times
Take away is as long as you get fairly close with what ever hammer dolly technique you choose then its just a matter of sanding smooth and polishing. I'm sure by the time I have finished my last piece that the method will have changed, but this is working for me.

Anyone got tips that they would like to share for DIY?
Scott
(Not so rusty) Ol' Rusty - FB/EK Sedan
User avatar
Harv
Posts: 5063
Joined: Mon Oct 08, 2007 2:00 pm
State: NSW
Location: Sydney, Australia

Re: Idiots Guide To Polishing Stainless Trim

Post by Harv »

Things I learned the hard way:
If you are doing a whole cars worth of trim, get a comfy respirator. Those black boogers are not doing your lungs any good.
Screw the trim to timber, or a scrap of metal. Helps prevent the grinder throwing it.
When (not if) it catches, ensure there is nothing you care about in the flight path, including where it will ricochet to. Newly painted cars are not good stablemates. Stand to one side, grab it so that when it exits your hand at the speed of light it does not take your finger with it.
Polishing generates heat, but leather gloves are a bad idea near grinders. Polish a little, move to the next piece, return to the first. Screwing to a holder helps here too.
When that sisal buff gets too short for chrome work, it will do an awesome job of leaning bare steel parts, including gearbox shafts and bearing areas.

Cheers,
Harv
327 Chev EK wagon, original EK ute for Number 1 Daughter, an FB sedan meth monster project and a BB/MD grey motored FED.
In the Shed
Posts: 1885
Joined: Wed May 16, 2012 10:18 pm
State: SA
Location: South Australia

Re: Idiots Guide To Polishing Stainless Trim

Post by In the Shed »

Love ya work Scott, never afraid to have a go. Did I miss the explanation of “DA”?

Most of my polishing to date has been on my bike parts and done manually! I usually start with a course grade wet & dry and step my way through the grade finishing at 1500 or 2000. (Mind you some twit had laid into the gearbox outer case with a farkin hammer so had to start with a file :roll: )

Then I use Brasso and finish with Autosol polishing cream.

Stephen
Attachments
A7ACCA06-6DEA-45F1-ACBF-07E9FC9A04E2.jpeg
A7ACCA06-6DEA-45F1-ACBF-07E9FC9A04E2.jpeg (2.71 MiB) Viewed 371 times
A day in the shed beats a day at work!
User avatar
funkyscooter
Posts: 555
Joined: Wed Aug 16, 2017 8:12 am
State: NSW
Location: Sydney

Re: Idiots Guide To Polishing Stainless Trim

Post by funkyscooter »

Harv wrote: Sun Feb 11, 2024 7:02 pm Things I learned the hard way:
If you are doing a whole cars worth of trim, get a comfy respirator. Those black boogers are not doing your lungs any good.
Screw the trim to timber, or a scrap of metal. Helps prevent the grinder throwing it.
When (not if) it catches, ensure there is nothing you care about in the flight path, including where it will ricochet to. Newly painted cars are not good stablemates. Stand to one side, grab it so that when it exits your hand at the speed of light it does not take your finger with it.
Polishing generates heat, but leather gloves are a bad idea near grinders. Polish a little, move to the next piece, return to the first. Screwing to a holder helps here too.
When that sisal buff gets too short for chrome work, it will do an awesome job of leaning bare steel parts, including gearbox shafts and bearing areas.

Cheers,
Harv
Good tip screwing the piece to timber Harv. And yes should have mentioned PPE. Face shield, respirator, ear muffs. Been wearing leather gloves too - will re assess that as that's something I don't want to learn the hard way.
In the Shed wrote: Sun Feb 11, 2024 11:03 pm Love ya work Scott, never afraid to have a go. Did I miss the explanation of “DA”?

Most of my polishing to date has been on my bike parts and done manually! I usually start with a course grade wet & dry and step my way through the grade finishing at 1500 or 2000. (Mind you some twit had laid into the gearbox outer case with a farkin hammer so had to start with a file :roll: )

Then I use Brasso and finish with Autosol polishing cream.

Stephen
Nice job on the bike Stephen. I also have done some test with autosol and liked the result. Figured I would wait until I am ready to fit to the car before going over them with that. I in the mean time wrapping everything in old cotton sheets and storing. Will no doubt look at my efforts and redo it all when I unwrap them in the future.
DA - dual action sander.
Scott
(Not so rusty) Ol' Rusty - FB/EK Sedan
User avatar
Errol62
Posts: 9751
Joined: Sat Dec 06, 2014 2:44 pm
State: SA
Location: Adelaide

Re: Idiots Guide To Polishing Stainless Trim

Post by Errol62 »

Great stuff Scotty. I spoke to a metal polisher guy at all Holden day a couple of years ago and he uses 0000 steel wool to finish off stainless. What are your thoughts mate?


FB ute fixer upper, EK van on rotisserie
getting my FB ute on the road
EK van on rotisserie
User avatar
funkyscooter
Posts: 555
Joined: Wed Aug 16, 2017 8:12 am
State: NSW
Location: Sydney

Re: Idiots Guide To Polishing Stainless Trim

Post by funkyscooter »

Interesting - I primarily got the 0000 to remove rust spots on chrome (because I read it somewhere - not from some deeper understanding). Next piece I tackle I'll give it a go at the end to see what it does.
The photos show up every flaw. At the time I finished I thought they were good - well better than what they look in the pictures.
But you have to stop at somewhere - no point getting a mirror finish only to scuff it all with a dirty sponge the second time you wash it.
Scott
(Not so rusty) Ol' Rusty - FB/EK Sedan
Blacky
Posts: 12264
Joined: Tue Jul 20, 2004 8:58 am
State: WA
Location: up in the Perth hills

Re: Idiots Guide To Polishing Stainless Trim

Post by Blacky »

I use 0000 Steel wool and rainex to clean glass , brings it up perfect. :thumbsup:
When you're faced with an unpleasant task that you really don't want to do, sometimes you just have to dig deep down inside and somehow find the patience to wait for someone else to do it for you.


Foundation member #61 of FB/EK Holden club of W.A.
EK DAZ
Posts: 389
Joined: Tue Nov 07, 2006 7:21 pm
State: NOT ENTERED
Location: Bay of Plenty, New Zealand.

Re: Idiots Guide To Polishing Stainless Trim

Post by EK DAZ »

That's a beautiful outfit mate. Had a "51 Ajay 500cc single before my Ariel collection. Regards Daz.
EK DAZ
In the Shed
Posts: 1885
Joined: Wed May 16, 2012 10:18 pm
State: SA
Location: South Australia

Re: Idiots Guide To Polishing Stainless Trim

Post by In the Shed »

EK DAZ wrote: Mon Feb 12, 2024 5:44 pm That's a beautiful outfit mate. Had a "51 Ajay 500cc single before my Ariel collection. Regards Daz.

:thumbsup:
A day in the shed beats a day at work!
User avatar
funkyscooter
Posts: 555
Joined: Wed Aug 16, 2017 8:12 am
State: NSW
Location: Sydney

Re: Idiots Guide To Polishing Stainless Trim

Post by funkyscooter »

Errol62 wrote: Mon Feb 12, 2024 8:03 am Great stuff Scotty. I spoke to a metal polisher guy at all Holden day a couple of years ago and he uses 0000 steel wool to finish off stainless. What are your thoughts mate?
Did a quick test today with a rear chrome door handle and the stainless strip off the rear door glass channel. Only 0000 steel wool and a bit of elbow grease. No more than a minute on each test.
Door handle is pretty janky, with pot metal pox bubbling behind the chrome on the top of the handle.
IMG_3370.jpeg
IMG_3370.jpeg (1.01 MiB) Viewed 221 times
IMG_3371.jpeg
IMG_3371.jpeg (1.26 MiB) Viewed 221 times
Stainless has a line of rust along one edge which has transferred from the rusty door glass channel. The steel wool would not remove some of the bigger chunks - I scraped them off with a knife.
IMG_3373.jpeg
IMG_3373.jpeg (1.13 MiB) Viewed 221 times
IMG_3374.jpeg
IMG_3374.jpeg (1.05 MiB) Viewed 221 times
Pretty impressed with the level of shine. Doesn't really do much in the way of removing existing scratches, but for parts where access would be difficult with a polishing wheel, or if you just want to tart up parts bolted to a finished car, then I think 0000 wool is the way to go.
Scott
(Not so rusty) Ol' Rusty - FB/EK Sedan
User avatar
Errol62
Posts: 9751
Joined: Sat Dec 06, 2014 2:44 pm
State: SA
Location: Adelaide

Re: Idiots Guide To Polishing Stainless Trim

Post by Errol62 »


Sent from my SM-G781B using Tapatalk

getting my FB ute on the road
EK van on rotisserie
Blacky
Posts: 12264
Joined: Tue Jul 20, 2004 8:58 am
State: WA
Location: up in the Perth hills

Re: Idiots Guide To Polishing Stainless Trim

Post by Blacky »

Nice work , I will send mine over for you to practice on :D :D :D

You're welcome ......... :lol: :lol:
When you're faced with an unpleasant task that you really don't want to do, sometimes you just have to dig deep down inside and somehow find the patience to wait for someone else to do it for you.


Foundation member #61 of FB/EK Holden club of W.A.
User avatar
funkyscooter
Posts: 555
Joined: Wed Aug 16, 2017 8:12 am
State: NSW
Location: Sydney

Re: Idiots Guide To Polishing Stainless Trim

Post by funkyscooter »

Blacky wrote: Mon Feb 19, 2024 12:02 am Nice work , I will send mine over for you to practice on :D :D :D

You're welcome ......... :lol: :lol:
:lol: :lol: :roll:
Scott
(Not so rusty) Ol' Rusty - FB/EK Sedan
Post Reply