Page 10 of 12
Re: Dave's Orange Betty EK Sedan
Posted: Wed May 31, 2023 1:11 pm
by Orange Betty
Some progress on the rear qtr panel patch. Couldn't get the Rares patch to fit and ended up maiming the top RH section of it bashing it around. Anyway fitted a donor patch there and cut the Rares panel down the guts to persuade it to fit. It's out by that gap you can see below - and the wheel arch profile is not even close. Plug welded at the bottom and tacked at the top ready to "cut n butt".

- IMG_20230531_124739.jpg (71.69 KiB) Viewed 867 times
Dave
Re: Dave's Orange Betty EK Sedan
Posted: Wed May 31, 2023 2:50 pm
by Errol62
Those panels are a bit of a starting point aren't they? Hope you don't need too much weld grinding in the concave corner section.
Sent from my SM-G781B using Tapatalk
Edit
I was thinking of the bit in front of the wheel arch. Was tricky on the ute from memory.
Re: Dave's Orange Betty EK Sedan
Posted: Wed May 31, 2023 9:02 pm
by Blacky
I can’t understand how they can be so far out of whack , how can they sign off on that design by their suppliers???
Re: Dave's Orange Betty EK Sedan
Posted: Sat Jun 03, 2023 4:50 pm
by Orange Betty
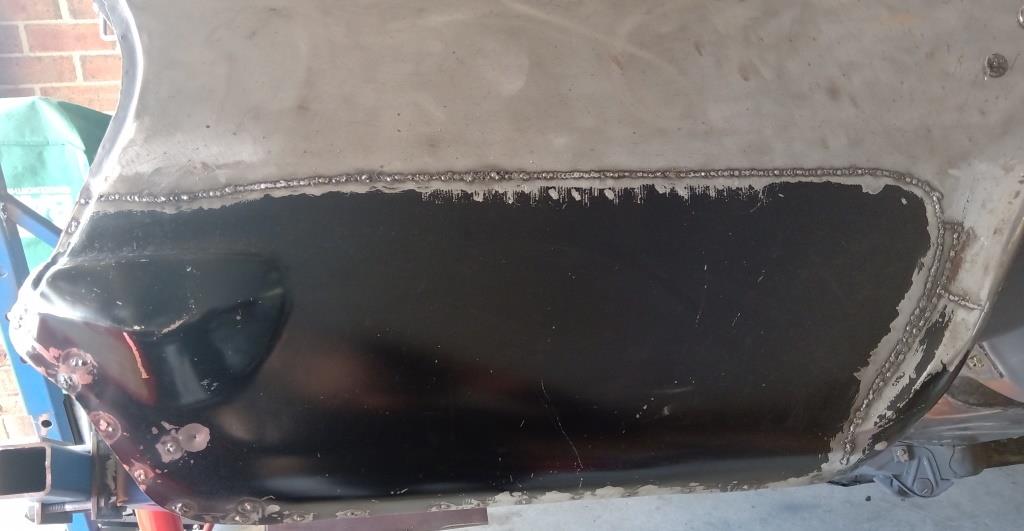
Fully welded in the Rares Patch and the patches for Rares patch....
- 1.jpg (58.58 KiB) Viewed 806 times

- 2.jpg (86.98 KiB) Viewed 806 times
lots of grinding later.

- 3.jpg (82.55 KiB) Viewed 806 times

- 4.jpg (80.95 KiB) Viewed 806 times
Not too bad. The panel at the top weld is a bit wavy, there is shallow low in the middle of the patch and a bit of dent/hollow where I blended the original wheel arch to the Rares one.
Will now have my first go at using filler!
Dave
Re: Dave's Orange Betty EK Sedan
Posted: Sat Jun 03, 2023 6:40 pm
by Errol62
Great work Dave. Some say to seal the metal with 2k etch prior to filler.
Sent from my SM-G781B using Tapatalk
Re: Dave's Orange Betty EK Sedan
Posted: Sat Jun 03, 2023 7:24 pm
by Orange Betty
Errol62 wrote: ↑Sat Jun 03, 2023 6:40 pm
Great work Dave. Some say to seal the metal with 2k etch prior to filler.
Sent from my SM-G781B using Tapatalk
Thanks Clay. Yeah, have heard that, but 'others' say filler adheres best to bare metal.... And I'm using glass fibre in the first instance so waterproof. One of those "6 of one and half-a-dozen of the other" things.
Dave
Re: Dave's Orange Betty EK Sedan
Posted: Tue Jun 06, 2023 4:38 pm
by Orange Betty
Orange Betty wrote: ↑Sat Jun 03, 2023 7:24 pm
Errol62 wrote: ↑Sat Jun 03, 2023 6:40 pm
Great work Dave. Some say to seal the metal with 2k etch prior to filler.
Sent from my SM-G781B using Tapatalk
Thanks Clay. Yeah, have heard that, but 'others' say filler adheres best to bare metal.... And I'm using glass fibre in the first instance so waterproof. One of those "6 of one and half-a-dozen of the other" things.
Dave
Ok, rethunk it and have invested in epoxy primer... some $500 later (including a gun and bits and bobs). But before I attempt spraying primer...
How is the rear taillamp unit supposed to interface with the rear qtr panel?
- taillight fit.jpg (101.76 KiB) Viewed 766 times
It looks like I've got to straighten out the lumpy bits on the edge and cut a slit in it???
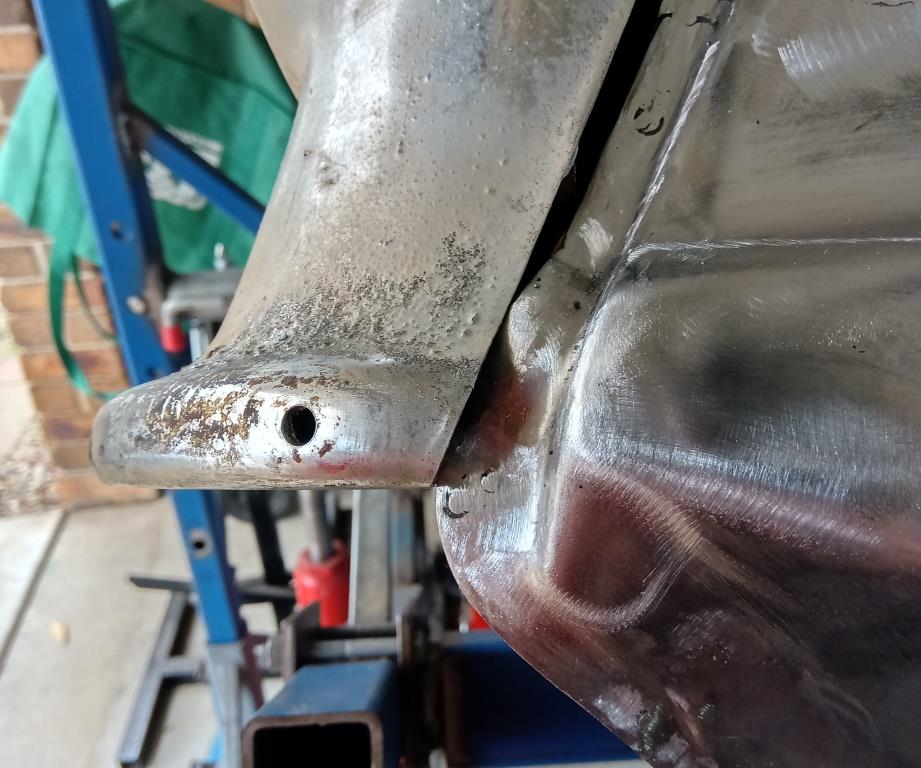
Also, what is this hole for?

- hole.jpg (71.52 KiB) Viewed 766 times
Cheers
Dave
Re: Dave's Orange Betty EK Sedan
Posted: Tue Jun 06, 2023 4:45 pm
by Errol62
Let me slither out into the yard snd check my couch cut.
I’m guessing the hole is for retaining the end of the stainless trim, but I’ve never owned a special, couch cut included.
FB ute fixer upper, EK van on rotisserie
Re: Dave's Orange Betty EK Sedan
Posted: Tue Jun 06, 2023 5:12 pm
by Errol62
Re: Dave's Orange Betty EK Sedan
Posted: Tue Jun 06, 2023 6:38 pm
by Orange Betty
Errol62 wrote: ↑Tue Jun 06, 2023 4:45 pm
Let me slither out into the yard snd check my couch cut.
I’m guessing the hole is for retaining the end of the stainless trim, but I’ve never owned a special, couch cut included.
FB ute fixer upper, EK van on rotisserie
Awesome, thanks Clay. Looks like my Rares qtr panel patch is about 10mm too high but I think after some massaging it won't be noticeable.
I've decided not to use the EK trim so will be welding up the holes.
Cheers
Dave
Re: Dave's Orange Betty EK Sedan
Posted: Thu Jun 08, 2023 5:24 pm
by Orange Betty
Rear lamp fits pretty well now

- Taillight fit.jpg (65.4 KiB) Viewed 730 times
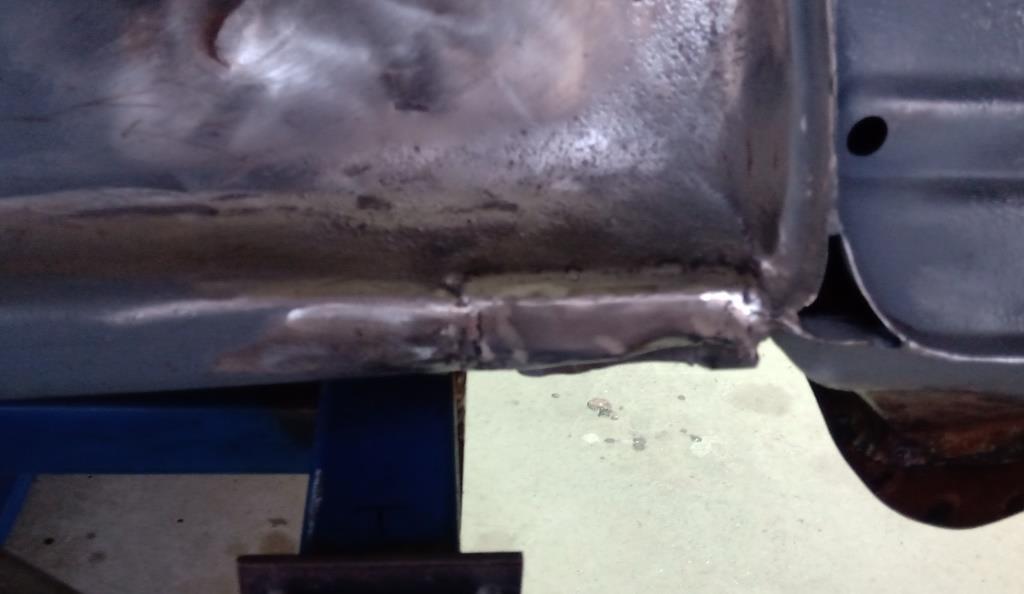
But have to deal with a few more rust repairs

- 1.jpg (105.86 KiB) Viewed 730 times

- 2.jpg (66.09 KiB) Viewed 730 times

- 3.jpg (123.53 KiB) Viewed 730 times
Dave
Re: Dave's Orange Betty EK Sedan
Posted: Sat Jul 01, 2023 7:02 pm
by Orange Betty
Patches done, mostly. Bit more finishing required before filler (definitely required...). Filled in trim holes.

- 1.jpg (61.53 KiB) Viewed 695 times
- 2.jpg (50.93 KiB) Viewed 695 times

- 3.jpg (80.93 KiB) Viewed 695 times

- full qtr panel.jpg (70.46 KiB) Viewed 695 times
Next is to fix this bit of the gutter above RH rear door.

- 4.jpg (66.34 KiB) Viewed 695 times
Then onto fitting a Mustang fuel tank thanks to Brett027.
Dave
Re: Dave's Orange Betty EK Sedan
Posted: Sat Jul 01, 2023 8:34 pm
by Brett027
I have had the pleasure of seeing this work first hand over the last few months. Very impressive metal work and rust repairs are quietly conquering this car. Congrats Dave.
Re: Dave's Orange Betty EK Sedan
Posted: Sat Jul 01, 2023 8:47 pm
by In the Shed
Tidy work Dave

Re: Dave's Orange Betty EK Sedan
Posted: Sat Jul 01, 2023 9:23 pm
by Errol62
Outstanding mate. You are on a roll.
Sent from my SM-G781B using Tapatalk


