EK Wagon project - Total rebuild

Re: EK Wagon project - Total rebuild
Well Done, and congrats Adrian! It must be a good feeling.
He who dies with the most toys wins!!

Re: EK Wagon project - Total rebuild
Well done Finny! .. Congrats 
Re: EK Wagon project - Total rebuild
Thanks for all your comments and suggestions. 
It really has helped on a number of occasions to get me over a few hurdles.
Yes I will continue working through the list.
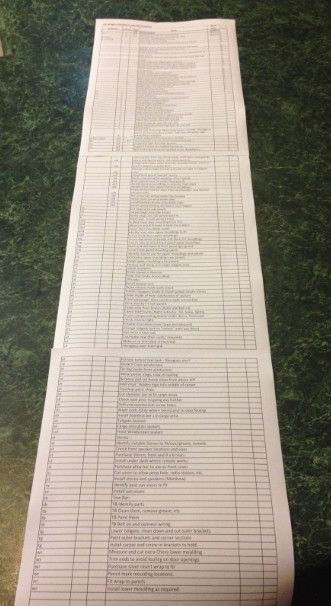
And I actually do have a list.
Some minor stuff and some major stuff.
I culled it today and this is what's still to do.
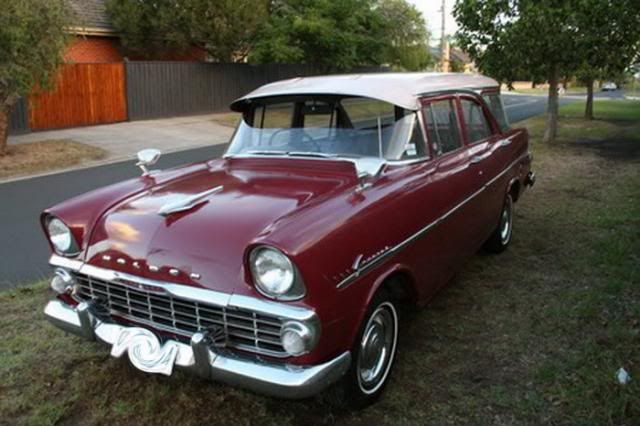
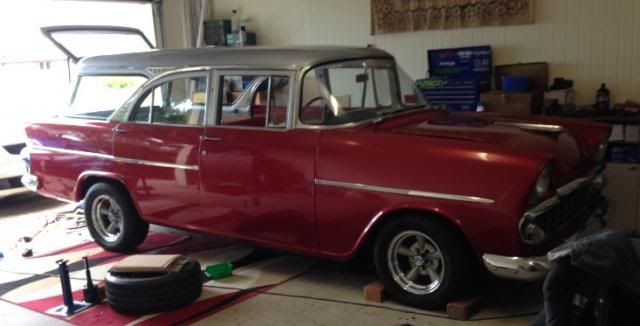
A comparison of the original colour scheme to the current one.
Another focus I always had in the back of my mind.
Dusk Plum and Cameo Beige plated wagon, not your normal white roof version.
Borrowed photo from an earlier post.

Picking up a moulding from Tim tomorrow, and exhaust booked for Thursday morning.
Just need a buy a few clips, and a nice stereo so I can get the music flowing.
It really has helped on a number of occasions to get me over a few hurdles.
Yes I will continue working through the list.
And I actually do have a list.
Some minor stuff and some major stuff.
I culled it today and this is what's still to do.
A comparison of the original colour scheme to the current one.
Another focus I always had in the back of my mind.
Dusk Plum and Cameo Beige plated wagon, not your normal white roof version.
Borrowed photo from an earlier post.
Picking up a moulding from Tim tomorrow, and exhaust booked for Thursday morning.
Just need a buy a few clips, and a nice stereo so I can get the music flowing.

IT's LIKE WATCHING DRUNK MONKEYS TRYING TO HUMP A FOOTBALL.
Re: EK Wagon project - Total rebuild
That looks familar , now i'll have to get mine looking as good as yours (one day)!!. Great job BTW congrats
Re: EK Wagon project - Total rebuild
It would appear that in a previous life I must have done something very wrong. 
Just wish I wouldn't have to keep paying for it in this life.
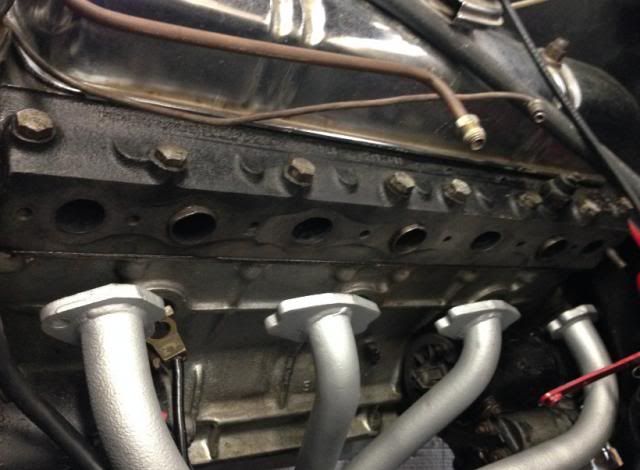
Discovered that something was missing from my car.
Time to perform a fairly simple procedure of separating the fuel and exhaust, so I could get the extractors on.
Pulling it out was very simple.
But getting in back on was a nightmare.
Lots of soaking with RP7, but the bolts weren't going to let go.
Snapped all four of them.
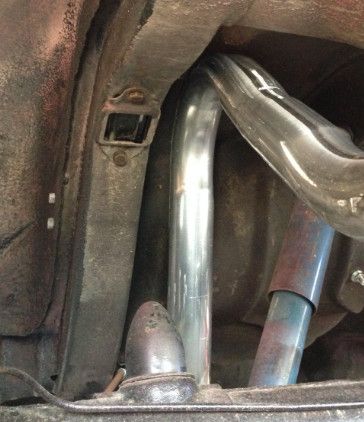
Then the old exhaust pipe was in the way and couldn't get the extractors on.
Tried to separate it at a joint, but it would NOT let go.
So had to cut through the pipe is a very confined space.
Then had to tie it up so it didn't come loose and hit the ground.
Built up a few new muscles and lost a lot of sweat.
So now I can look at putting the extractor in position.
But they come out a lot further and the accelerator linkage fouls on them and won't move.
So need to bend the bar to clear it and make up a whole new connection.
That was a challenge, probably need to do it again at some stage in the future.
Now time to apply a sealant, but it has gone off at the top, and impossible to use.
So back to the shop to swap it over.
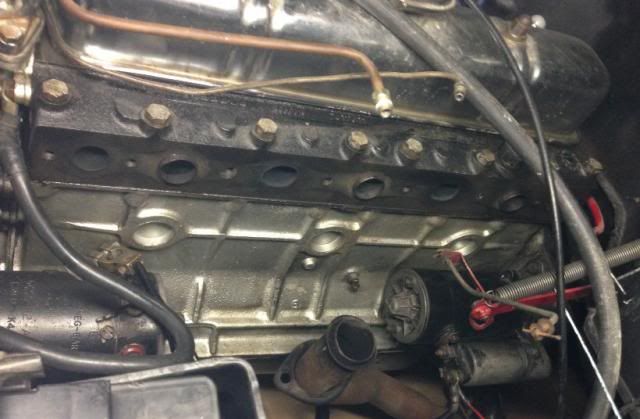
Sealant on, Gasket on, Extractors on, Carby on.
Eight bolts to go in, six go in well.
Two of them refuse to take.
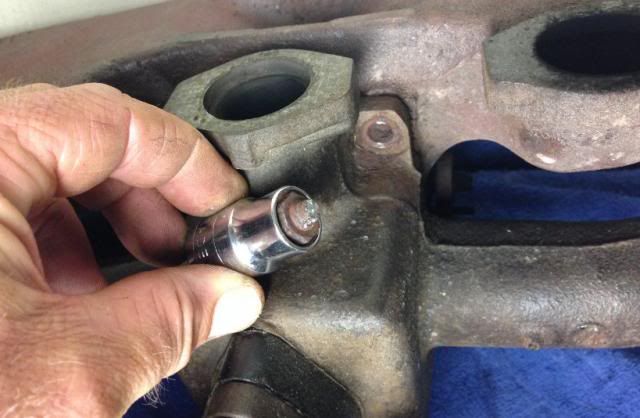
No room for a socket driver, only just enough room to get your fingers onto them.
Used the tried and proven, swear, curse, and increase intensity as time goes on.
Threaten to quit, then determined to keep going until I get them.
The longer it takes the more concerned that the sealant will be going off.
Drop the bolts a number of times, and a few times can't find where they have gone.
Tried different spanners, loosened off all bolts, tried a screwdriver to line up gasket and hole, used a screwdriver for leverage on the bolts.
Finally got them using a crowbar for the little bit of extra leverage.
All back in and connected, with special bracket for throttle linkage.
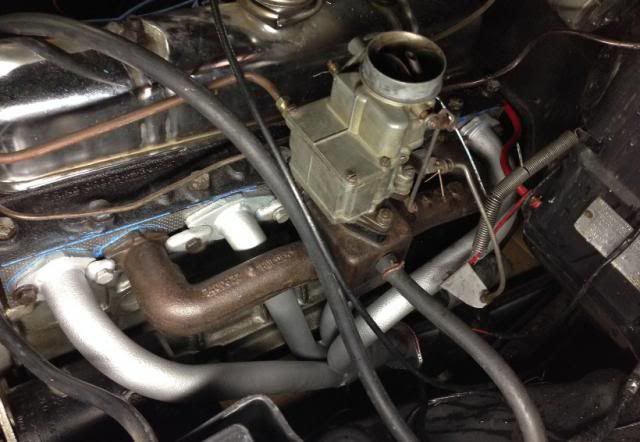
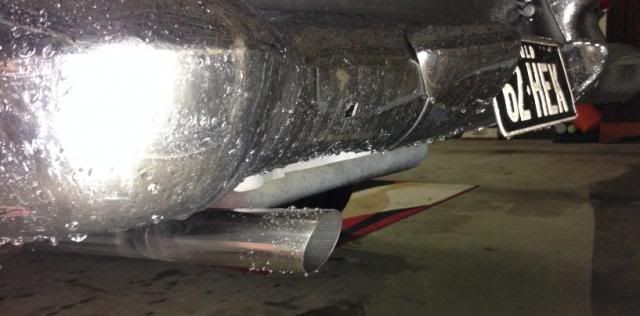
And a bit of chrome on the end.
Slightly different sound.
When I drove it down with just the extractors and no exhaust, it really have a nice, but loud, almost V8 burble.
Reasonable quiet inside (which is what I wanted for a daily driver) with just a nice little rumble on the outside.
One more item off the list.
Just wish I wouldn't have to keep paying for it in this life.
Discovered that something was missing from my car.
Time to perform a fairly simple procedure of separating the fuel and exhaust, so I could get the extractors on.
Pulling it out was very simple.
But getting in back on was a nightmare.
Lots of soaking with RP7, but the bolts weren't going to let go.
Snapped all four of them.
Then the old exhaust pipe was in the way and couldn't get the extractors on.
Tried to separate it at a joint, but it would NOT let go.
So had to cut through the pipe is a very confined space.
Then had to tie it up so it didn't come loose and hit the ground.
Built up a few new muscles and lost a lot of sweat.
So now I can look at putting the extractor in position.
But they come out a lot further and the accelerator linkage fouls on them and won't move.
So need to bend the bar to clear it and make up a whole new connection.
That was a challenge, probably need to do it again at some stage in the future.
Now time to apply a sealant, but it has gone off at the top, and impossible to use.
So back to the shop to swap it over.
Sealant on, Gasket on, Extractors on, Carby on.
Eight bolts to go in, six go in well.
Two of them refuse to take.
No room for a socket driver, only just enough room to get your fingers onto them.
Used the tried and proven, swear, curse, and increase intensity as time goes on.
Threaten to quit, then determined to keep going until I get them.
The longer it takes the more concerned that the sealant will be going off.
Drop the bolts a number of times, and a few times can't find where they have gone.
Tried different spanners, loosened off all bolts, tried a screwdriver to line up gasket and hole, used a screwdriver for leverage on the bolts.
Finally got them using a crowbar for the little bit of extra leverage.
All back in and connected, with special bracket for throttle linkage.
And a bit of chrome on the end.
Slightly different sound.
When I drove it down with just the extractors and no exhaust, it really have a nice, but loud, almost V8 burble.
Reasonable quiet inside (which is what I wanted for a daily driver) with just a nice little rumble on the outside.
One more item off the list.
IT's LIKE WATCHING DRUNK MONKEYS TRYING TO HUMP A FOOTBALL.
Re: EK Wagon project - Total rebuild
Trip down memory lane back into 1975 for me, Finny - I remember doing all of that except the bolts shearing off, mine let go probably just before they sheared.
I didn't ever get the throttle linkages working properly - there was always a rattle, and the pedal always felt heavier...
When the red motor went in, the water heated alloy manifold stuck out further under the carby - I went to the wreckers and picked up all the later model bits for a shaft running forward from the firewall - I tried, and failed... so I just made up a simple connecting rod up from the original lever to the carby plate and connected it with washers, springs and split pins at both ends - it works an awful lot better than the plate I made or the mess I was making with the later model bits.
Took a couple of goes at getting the angles and off-sets right, but there hasn't been an issue since.
I had to fit an additional spring and anchor from the carby horn to the throttle plate to get it to come back to a consistent idle - but that is the only mod I have had to do since....
Yes, the grey has a bit of a "bark and rumble" without a muffler - but it's subtle with a single carby and standard cam.
One more off your list.... probably a zillion to go..... just an ongoing part of any build..
frats,
Rosco
Re: EK Wagon project - Total rebuild
Car has spent a few days sitting up in the air.
Too many bumper stops.

Removed and bolted the plate back on so no holes.
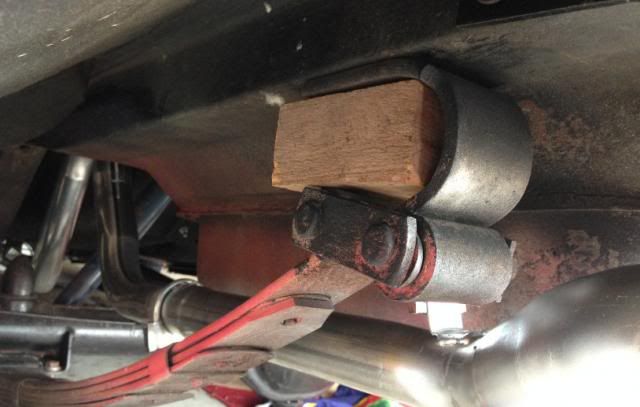
Workshop manual actually says to use a 2 x 2 x 5 block of wood. very handy idea.
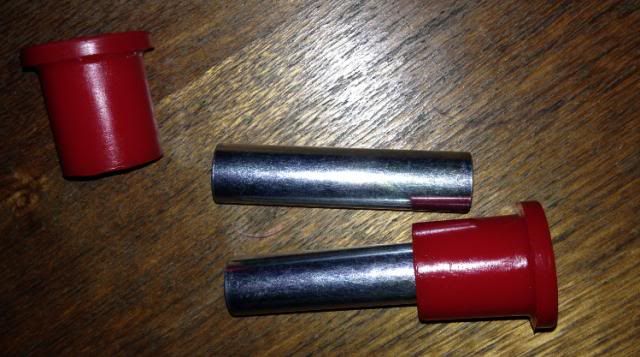
Didn't end up using these for the front of the rear spring, Repco product does not fit.
But did use them for the rear springs.
Certainly sat very low while it was in this condition. Springs Gone.
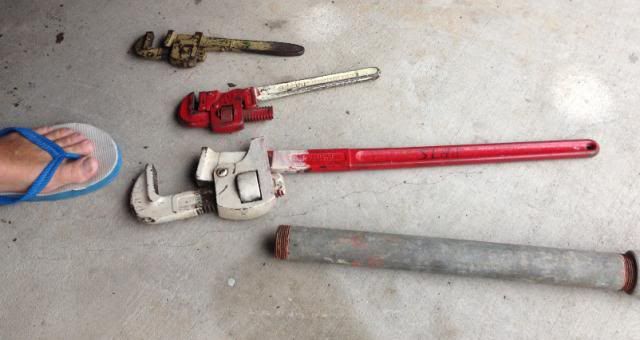
Getting the front pin out was a major pain, thank for the advice Tim.
Tried the monkey wrench, and kept going bigger, but wasn't enough material to get a good bite.
Ended up using a long iron bar with a pointed end.
The point sat inside the nut up against the bolt.
Hit it with a sledge hammer, over and over again and it finally let go.
And because it was always hitting on the end and not the thread it came out without damage.
Just be careful at the end not to knock the bolt completely out of the nut.
Yes you can remove leafs from the spring and rebuild them.
A few of the other posts of the topic really helped, along with the workshop manual.
These suckers weighed a ton, and flexed up so high.
Big difference after I reduced them down to just 5 leafs.
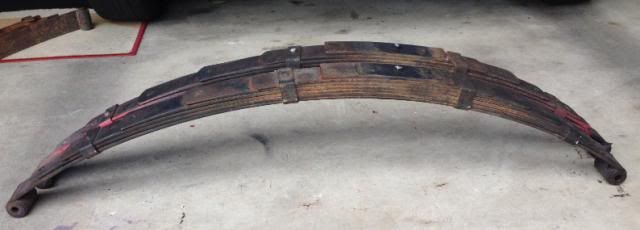
All cleaned and ready to go back on.
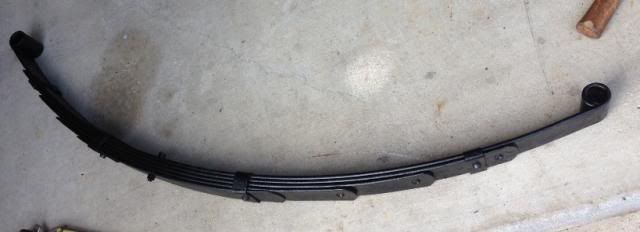
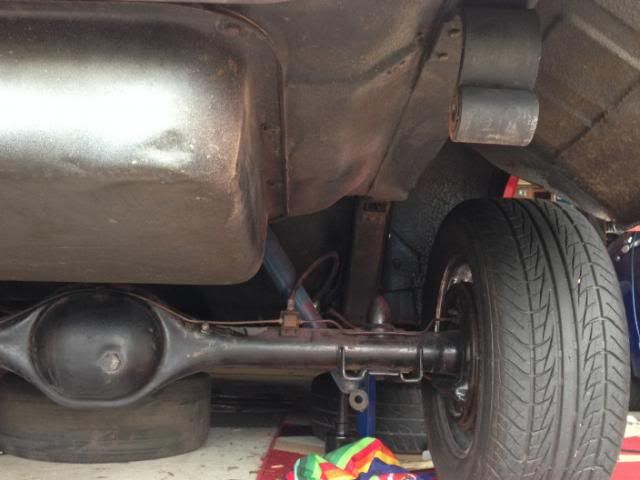
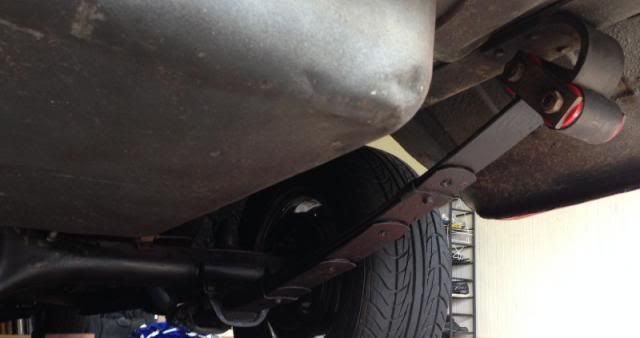
Finally all back together and tensioned.
Bushes on the rear springs are all done and now the rear end is nice a tight, and no gaps or movement.
And the red matches the car.
And it does sit a bit lower, and almost matches the front now, so really happy with that added benefit.
Tick one more off the list.
Add one new one to the list.
I have found that since the new exhaust has been fitted that the car doesn't run as well as before.
It seems to be missing under load. Actually missed all the time but especially under load
It also doesn't start quite so easy or rev as freely.
It also now has the generator light glowing at idle, which was set just higher before this.
Tightened up the gasket seal but didn't seem to make any difference.
Too many bumper stops.
Removed and bolted the plate back on so no holes.
Workshop manual actually says to use a 2 x 2 x 5 block of wood. very handy idea.
Didn't end up using these for the front of the rear spring, Repco product does not fit.
But did use them for the rear springs.
Certainly sat very low while it was in this condition. Springs Gone.
Getting the front pin out was a major pain, thank for the advice Tim.
Tried the monkey wrench, and kept going bigger, but wasn't enough material to get a good bite.
Ended up using a long iron bar with a pointed end.
The point sat inside the nut up against the bolt.
Hit it with a sledge hammer, over and over again and it finally let go.
And because it was always hitting on the end and not the thread it came out without damage.
Just be careful at the end not to knock the bolt completely out of the nut.
Yes you can remove leafs from the spring and rebuild them.
A few of the other posts of the topic really helped, along with the workshop manual.
These suckers weighed a ton, and flexed up so high.
Big difference after I reduced them down to just 5 leafs.
All cleaned and ready to go back on.
Finally all back together and tensioned.
Bushes on the rear springs are all done and now the rear end is nice a tight, and no gaps or movement.
And the red matches the car.
And it does sit a bit lower, and almost matches the front now, so really happy with that added benefit.
Tick one more off the list.
Add one new one to the list.
I have found that since the new exhaust has been fitted that the car doesn't run as well as before.
It seems to be missing under load. Actually missed all the time but especially under load
It also doesn't start quite so easy or rev as freely.
It also now has the generator light glowing at idle, which was set just higher before this.
Tightened up the gasket seal but didn't seem to make any difference.
IT's LIKE WATCHING DRUNK MONKEYS TRYING TO HUMP A FOOTBALL.
Re: EK Wagon project - Total rebuild
You've lost your back-pressure with the extactors, Finny....
I wouldn't blame the exhaust on your miss just yet.. but it will certainly make the car a little more sensitive when picking up the throttle after coasting.... mine used to feel like it was lean until the inlet manifold got charged up.... and then the old grey would beat like a drum.... as it "leaped" into action.
In really cold weather - it took ages for everything to warm up .... no heat riser to de-ice the carby main body.... ok for you lucky Qld'ers.... not a lot of joy when your car has been siting in frost all night.....
Your issue could be an air leak yet..... try some soapy water over everything - look for bubbles at the exhaust/head manifold gasket.
If you have a vac gauge, it will show up any air leak in the inlet system.... should idle at around the 20 in/Hg mark... or better. Check your booster vacuum line and the vacuum advance connections to the carby and distributor..... there's got to be some reason it's "missing'.... I don't believe it's exhaust related.. unless one of those extractor pipes is partially blocked off.....
Big advantage of running an almost stock system... they just work.
frats,
Rosco

Re: EK Wagon project - Total rebuild
G'day Finny,
I agree with Tim and Rosco.
The extractors will definitely affect the way the wagon runs when cold. Even though the old inlet manifold heat valve was probably seized, the heat conducted up through the steel makes a big difference to how the car runs for the first few minutes. When I put a set of Myers headers onto the FB, it started missing and farting on cold mornings for the first few kilometres. Once it's warm, all is well.
If the miss is still there when it is warm, it's time to go looking for vacuum leaks. Most likely place is where the inlet manifold meets the head. Normally the extractors and the old inlet manifold are different thicknesses in the flanges, and the oval washers that hold them on do not sit square (the fix is to notch them on one end of the oval). Get the car to idle in the driveway, then spray some WD40 into the suspect areas (not a bad idea to check the vacuum booster hoses as Rosco suggests too... I'm not a big fan of the old wire-type clamps). If the idle comes up with the WD40, then you've found your leak. Be careful doing this on a hot motor though.
If the old girl is not revving up as well as it used to, check that your new (bent) linkages are still getting WOT (need a helper for this... use the pedal, not pulling the linkages under the bonnet). I bent my llinkages too for the Myer headers, and lost WOT. Felt like it went like a rocket once I found the problem
 . If you had the choke cable disconnected, it's not a bad idea to check that you now have full choke (don't need a helper for this one) as this may be part of your starting issue.
Cheers,
Harv.
I agree with Tim and Rosco.
The extractors will definitely affect the way the wagon runs when cold. Even though the old inlet manifold heat valve was probably seized, the heat conducted up through the steel makes a big difference to how the car runs for the first few minutes. When I put a set of Myers headers onto the FB, it started missing and farting on cold mornings for the first few kilometres. Once it's warm, all is well.
If the miss is still there when it is warm, it's time to go looking for vacuum leaks. Most likely place is where the inlet manifold meets the head. Normally the extractors and the old inlet manifold are different thicknesses in the flanges, and the oval washers that hold them on do not sit square (the fix is to notch them on one end of the oval). Get the car to idle in the driveway, then spray some WD40 into the suspect areas (not a bad idea to check the vacuum booster hoses as Rosco suggests too... I'm not a big fan of the old wire-type clamps). If the idle comes up with the WD40, then you've found your leak. Be careful doing this on a hot motor though.
If the old girl is not revving up as well as it used to, check that your new (bent) linkages are still getting WOT (need a helper for this... use the pedal, not pulling the linkages under the bonnet). I bent my llinkages too for the Myer headers, and lost WOT. Felt like it went like a rocket once I found the problem
Cheers,
Harv.
327 Chev EK wagon, original EK ute for Number 1 Daughter, an FB sedan meth monster project and a BB/MD grey motored FED.
Re: EK Wagon project - Total rebuild
Had a bit of a think about this overnight, Finny -nah.... not exhaust related - it won't make one jot of difference at idle - it will idle just fine without any pipes at all.
The fact that your idle speed has dropped tells me one or more of the pots is not getting the right mix.
But because it's idling slower - I'm inclined to believe it's not sucking air at idle.....they tend to hunt a bit if that is the case with a very lumpy idle.
Does it idle smoothly? or does it "hunt" - with a stock cam, it should tick over very smoothly at around the 500 rpm mark. If you can't get it down to that at a constant beat - somethings up.
I noted you have played with the throttle linkages - to clear the extractors. I'm trying to think what is in the vicinity which might have got dislodged or knocked out of kilter.
Check your air-horn to carby body gasket screws - especially the back four, the carby flange to manifold nuts and the two screws which hold the main carby to carby body together.
Float level and a sticking needle and seat can cause the two symptoms you have as well...the float level would have to be out a bit, but it is possible.
And yes - as Tim has stated - at the 500 rpm mark, my gen light just shows up as a very dim glow.... any lower than that, and the light starts to pulse brighter according to fluctuations in engine idle speed.
Of course - we can all jump onto it being a fuel issue...... and mustn't fall for the trap that it might just be electrical or vacuum....that would explain a miss under load...... check your vacuum advance and see that it is working freely - and that there isn't a leak in the line from the carby.
Vacuum won't make any difference to idle - but it would explain the miss you get under load - if there is any sticking of the action plate. It could be that it comes to the rest stop when idling, but is binding when on the road..... all speculation - I can't be there with you, so I'm just throwing up things to check....
it's been a huge build, Finny - and most of it was removed and either replaced or re-fitted..... track back through your work on what you have played with... the answer is somewhere within the detail of that....
The motor was fine before the re-build, so we assume (makes an ass out of u and me) we can rule out mechanical.
If you have a timing light - just run it over the ball mark and check that it is where it was previously.
You should be able to disconnect the vacuum line at the distributor and place your finger over the end of it, then run up the engine a bit and feel for a constant vacuum.
Find a piece of hose - connect it to the vacuum nipple on the dizzy, remove the cap and suck on the hose... see that the action plate moves freely and will hold at a constant drawing of vacuum.
Finally, pull all the plug leads of and just leave them loosely fitted to the plugs. Start the engine and pull one off at a time with some insulated long nosed pliers before putting it back on...... any plug lead which is disconnected and makes less difference to the idle speed will show up any one cylinder which isn't quite right.
If all this fails to find a fault - I'd re-visit the manifold/extractor gasket... it won't be exhaust - if it's at fault - it will be inlet and sucking air to two of the pots.... which would have shown up in the plug lead test a little.
Let us know what you find..
frats,
Rosco
Re: EK Wagon project - Total rebuild
Didn't do a complete check but started it up and checked a couple of things.
I wasn't worried about the generator light being on at idle. It's actually a solid light not a light glow.
Just that it is obviously idling a lot lower than before,
Tried spraying some WD40 on the gasket joints, didn't seem to make any difference.
It does rev, especially when not driving. But seems to be delayed/retarded.
But when under load seems to have a spluttering effect.
Change down to second, slow down and it struggles to have any power.
Like its just not quite getting there.
Disconnected leads one at a time and noticed big change on the front 4 cylinders and small change on the back 2.
After spending a few minutes doing these checks I parked it and left it running so I could check if it was different when warm.
I would occasionally go back to it and give it a rev.
It seems to be running rough and surging a little.
The last time, the surging got so bad that it stalled.
Started again straight away, and drove around the block.
Seemed to be spluttering and lacking power.
I could also hear the exhaust knocking against something. possibly the rear spring bracket.
I mention that because it's obviously not running smooth.
The car drove several kilometres to get the rego done, and it drove and ran perfectly.
That was before I removed the carbi, inlet, etc and put the extractors in.
I did have the carbi upside down when removing the bolts underneath, and well as disconnecting the vacuum advance, choke cable, throttle linkage, fuel inlet and brake booster vacuum.
I didn't notice the reving issue until a few days later, but it wasn't being used.
Will do a few more test and see what I find.
Last edited by Finny on Wed Jan 29, 2014 11:18 pm, edited 1 time in total.
IT's LIKE WATCHING DRUNK MONKEYS TRYING TO HUMP A FOOTBALL.
Re: EK Wagon project - Total rebuild
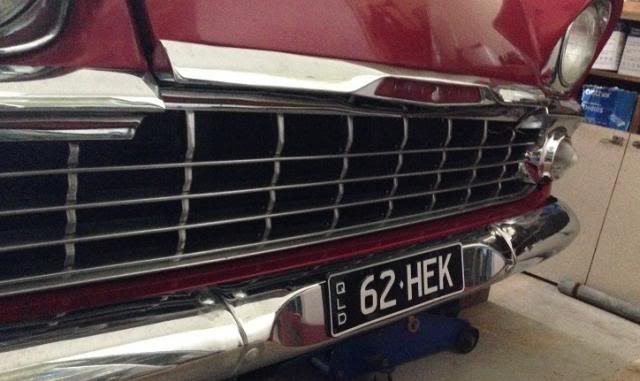
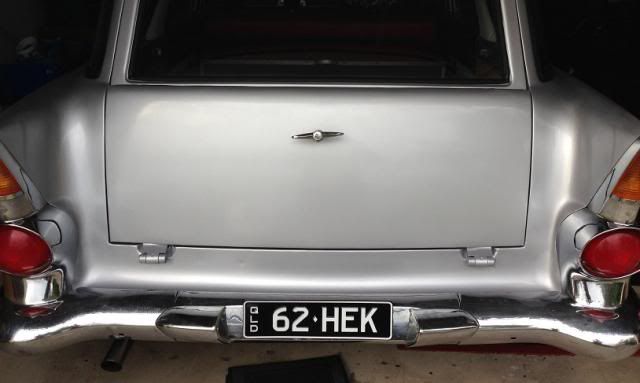
Package arrived today.
Number plates are finished.
Hopefully the number plate police will be off my case now.
Number plates are finished.
Hopefully the number plate police will be off my case now.
IT's LIKE WATCHING DRUNK MONKEYS TRYING TO HUMP A FOOTBALL.
Re: EK Wagon project - Total rebuild
Ok Finny - check your inlet manifold mount to the head at the firewall end of the manifold.... #'s 5 & 6 didn't make much difference.. my first "guess" is that it is sucking air there.
Do you have any tappings into the rear of the inlet manifold?....... vacuum gauge, brake booster etc.... something is not right with # 5 & #6.
I know this isn't the case but is your firing order of plug leads 1, 5, 3, 6, 2, 4 ? you haven't got 5 and 6 crossed?.... the motor would be extremely lumpy if you had... and it probably wouldn't have enough power to move the car......
I don't believe it's cracked distributor cap as # 3 is in between them in firing order.
Nice plates, by the way...
frats,
Rosco
Re: EK Wagon project - Total rebuild
Thanks Constable Steve.FeeBee wrote:yep, plates look good!
I just hope Sergeant Tim doesn't still try to book me.
IT's LIKE WATCHING DRUNK MONKEYS TRYING TO HUMP A FOOTBALL.