EK Wagon project - Total rebuild
Re: EK Wagon project - Total rebuild
Looking Great Finny! 
Re: EK Wagon project - Total rebuild
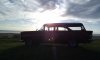
Lots of activity over the last week.
Days of work and things are moving but it's slow progress.
Mixture of some good stuff and some devastating stuff.
I really think rebuilding cars is a lot like a relationship with a woman.
They challenge you, they frustrate you, sometimes you sit back and admire them and see a glimse of something beautiful, they demand a lot of work and a lot of your time, they don't always respond the way you want them to, you can love them, you can hate them, you just want to take it for a ride.
But most of the time they just frustrate you.............


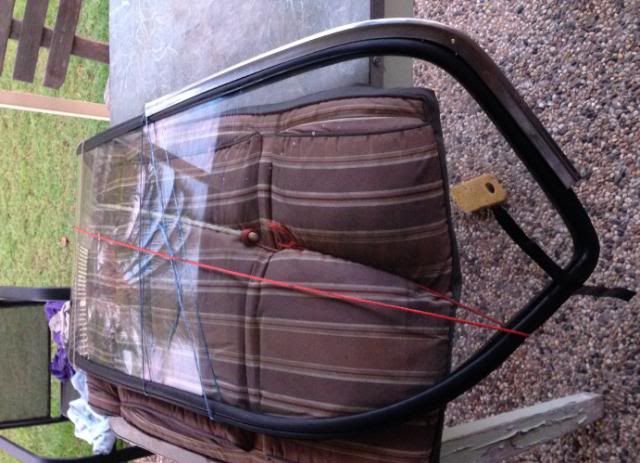
Decided to use KBS rust converter and sealer system, to treat up under the dash, inside the doors and inside the rear quarter panels.
Unfortunately the paint was running out of the drain holes on the door bottoms. (Black)
And once it hardens this stuff is permanent, So I put down some old sheets and curtains and laid them on their backs on the grass, until the paint dried.
The rust treatment worked really well.
When I got back in the afternoon, I noticed that the curtains felt very moist/wet, which I thought was strange.
I then noticed some marks which didn't seem to wipe off that easily.

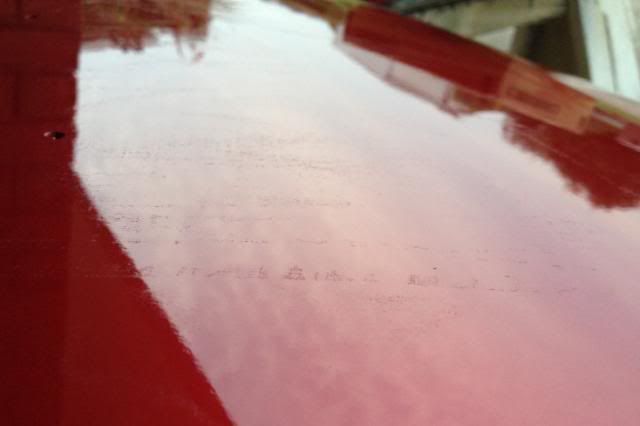
I have now tried to compound them back, however no improvement, it looks like it has actually etched into the paint.

This really knocked the wind out of my sails. Has anyone ever had this happen before ??????????????????????? 
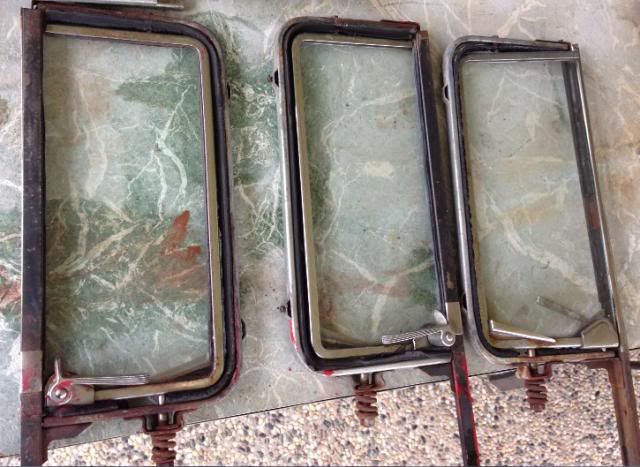
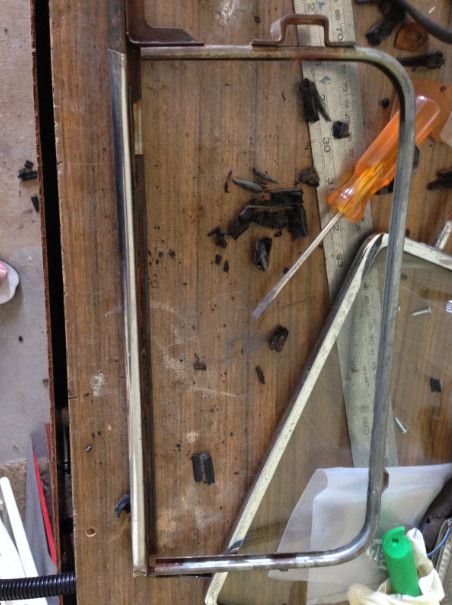
Started working on the doors also, tackling the 1/4 vents.
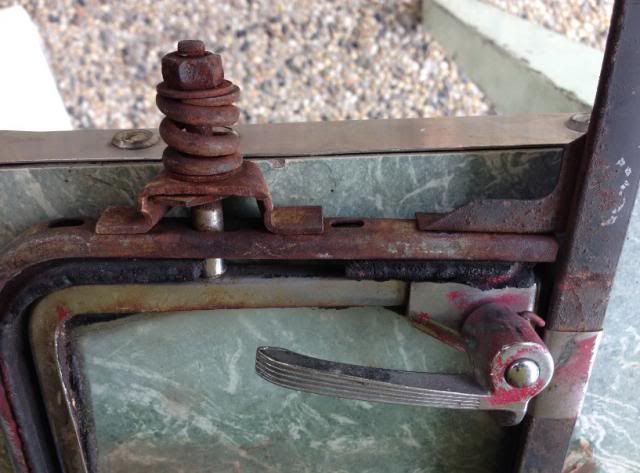
Used a thin cutting disc to cut the nuts off the bottoms, being careful, it worked really well.
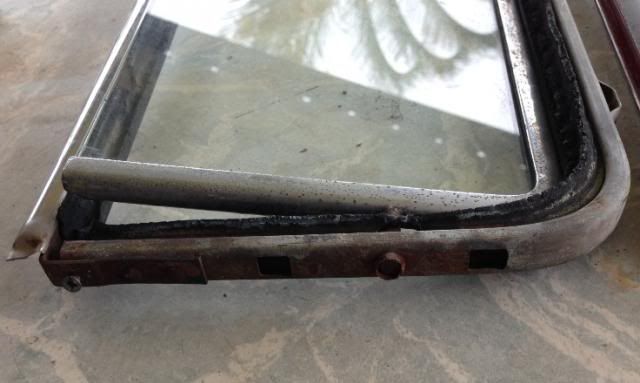
Then ground off the pop rivets from the tops and bottoms.
Cleaned out all the old rubber (Rock hard) and pulled the rest apart.
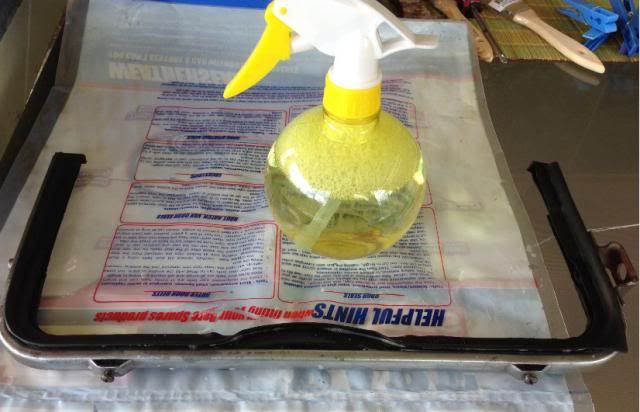
Cleaned, Polished and Painted,
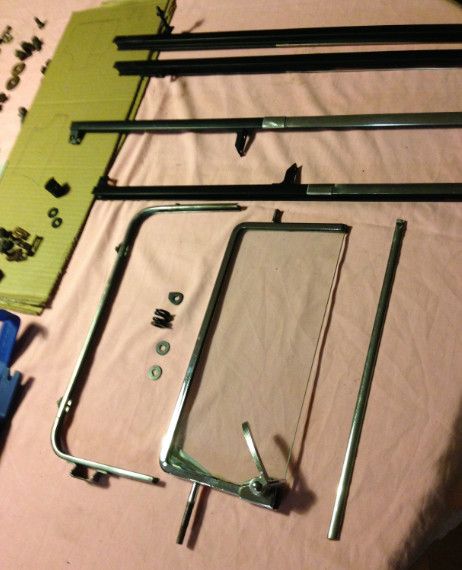
One thing I did find when putting the rubbers in, start at the two ends and work towards the middle.
You can't move them (to line up the ends) once they are in, unless you start at the ends like below.
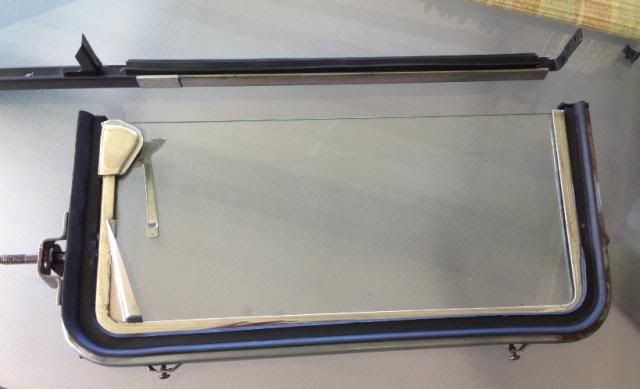
Putting it back together including new pop rivets.
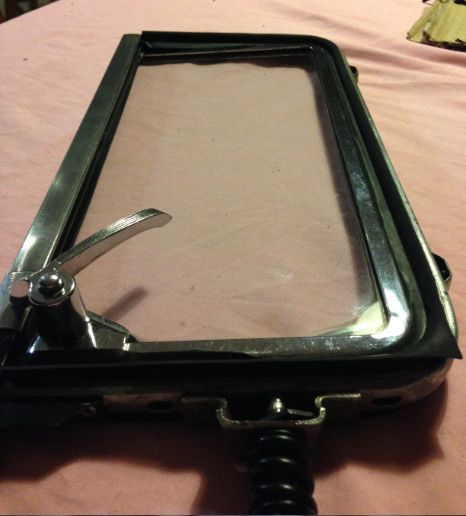
All back together and they look great.
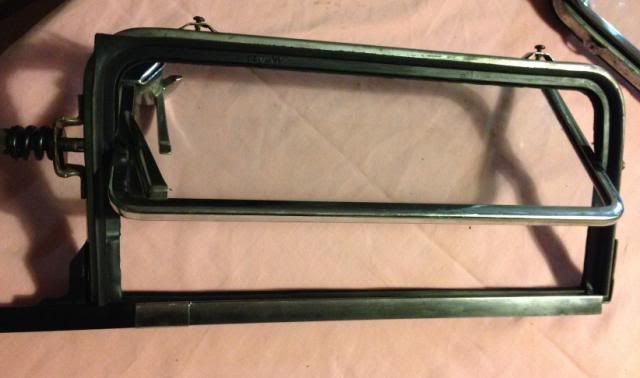
So why doesn't it sit in correctly.
Actually seems to be bent out of shape, so the top end just doesn't want to seal or go into the closed position..
ANY IDEAS WHY THIS HAPPENS ???????????????????
And lets end on a good note.
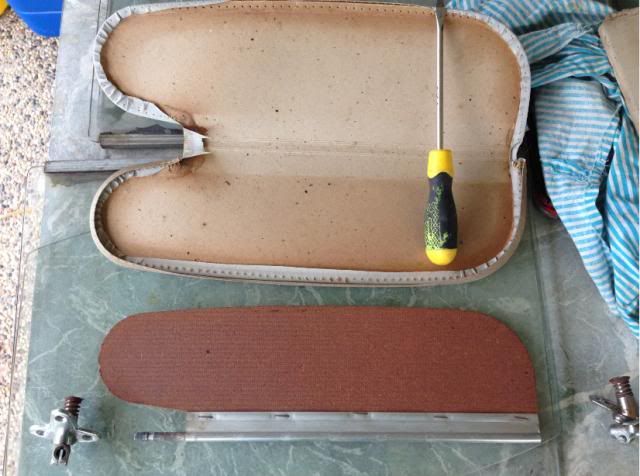
Pulled apart the sun visors and cleaned up. They use Masonite inside.
A few more items ready to re-install.

Even swapped the mirror for a night vision mirror, to add a bit more luxury.
Days of work and things are moving but it's slow progress.
Mixture of some good stuff and some devastating stuff.
I really think rebuilding cars is a lot like a relationship with a woman.
They challenge you, they frustrate you, sometimes you sit back and admire them and see a glimse of something beautiful, they demand a lot of work and a lot of your time, they don't always respond the way you want them to, you can love them, you can hate them, you just want to take it for a ride.
But most of the time they just frustrate you.............
Decided to use KBS rust converter and sealer system, to treat up under the dash, inside the doors and inside the rear quarter panels.
Unfortunately the paint was running out of the drain holes on the door bottoms. (Black)
And once it hardens this stuff is permanent, So I put down some old sheets and curtains and laid them on their backs on the grass, until the paint dried.
The rust treatment worked really well.
When I got back in the afternoon, I noticed that the curtains felt very moist/wet, which I thought was strange.
I then noticed some marks which didn't seem to wipe off that easily.
I have now tried to compound them back, however no improvement, it looks like it has actually etched into the paint.
This really knocked the wind out of my sails.
Started working on the doors also, tackling the 1/4 vents.
Used a thin cutting disc to cut the nuts off the bottoms, being careful, it worked really well.
Then ground off the pop rivets from the tops and bottoms.
Cleaned out all the old rubber (Rock hard) and pulled the rest apart.
Cleaned, Polished and Painted,
One thing I did find when putting the rubbers in, start at the two ends and work towards the middle.
You can't move them (to line up the ends) once they are in, unless you start at the ends like below.
Putting it back together including new pop rivets.
All back together and they look great.
So why doesn't it sit in correctly.
Actually seems to be bent out of shape, so the top end just doesn't want to seal or go into the closed position..
ANY IDEAS WHY THIS HAPPENS ???????????????????
And lets end on a good note.
Pulled apart the sun visors and cleaned up. They use Masonite inside.
A few more items ready to re-install.
Even swapped the mirror for a night vision mirror, to add a bit more luxury.

IT's LIKE WATCHING DRUNK MONKEYS TRYING TO HUMP A FOOTBALL.
Re: EK Wagon project - Total rebuild
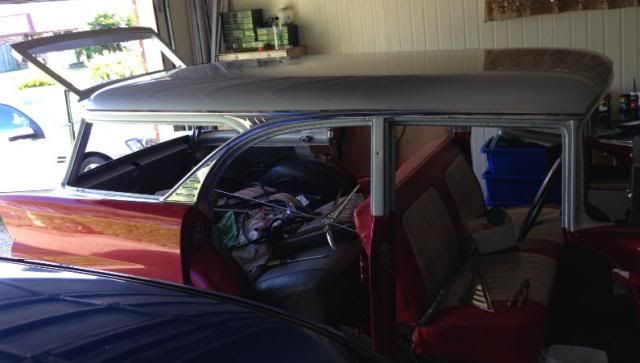
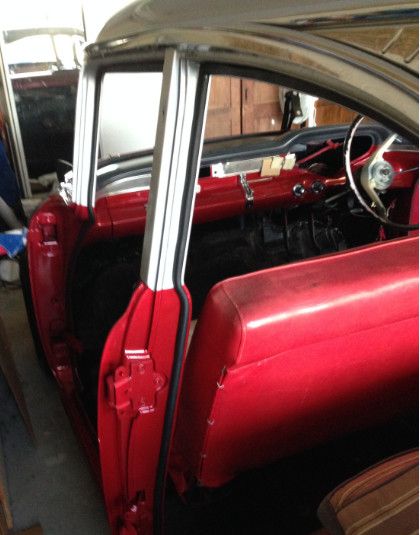
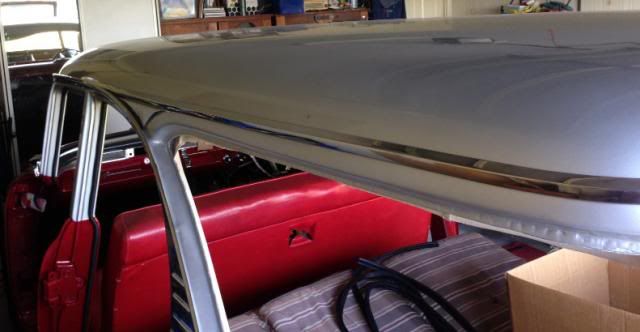
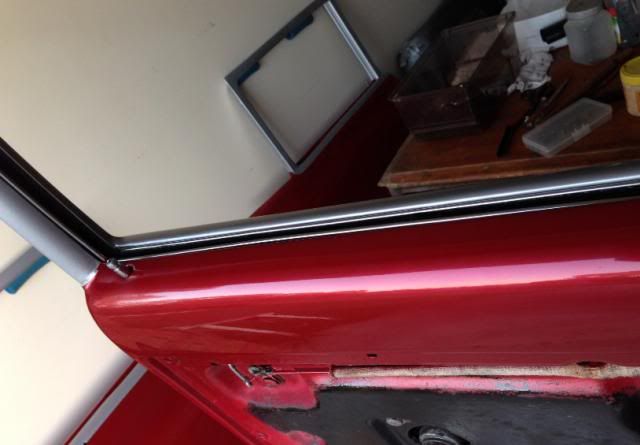
Next task was to finish installing the roof mouldings. 
Use HR door clips which are just right for the rear moulding on the roof of Wagons.
This side all completed. Including drilling holes to add the FB moulds at the bottom.
However the passenger side wasn't going to follow so easy.
The rear sections went on fine, however the long mould front the front, didn't line up with the holes the same as the other side.
It also just didn't seem to fit down without a huge amount of effort to hold it down.
And the last hole didn't even exist in the moulding at all 
Back to the Parts wagon for another mould to try. After I get the windscreen out first.
I wonder if this one was off an FB and they are somehow different ?????????????
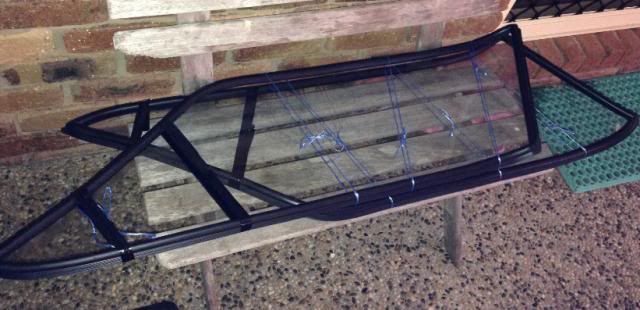
Next I moved onto fitting my first window rubber, in the tailgate section.
Lubricated with soapy water and tried using the wire rubber tools, however it was painfully slow (5 or more picks to get just one centimetre)
Was going to take hours, if I lasted that long. And was marking the rubber also.
After about half an hour I decided to pull it back off and try using some string to install it. Similar to doing a front windscreen install.
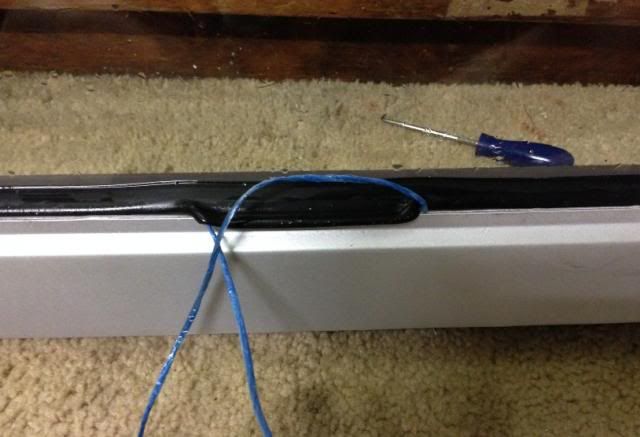
Absolute magic. Entire tailgate screen installed in less than 2 minutes.
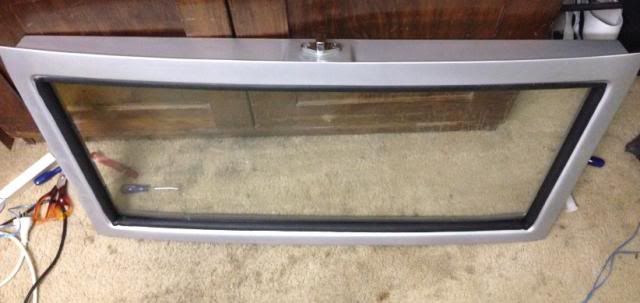
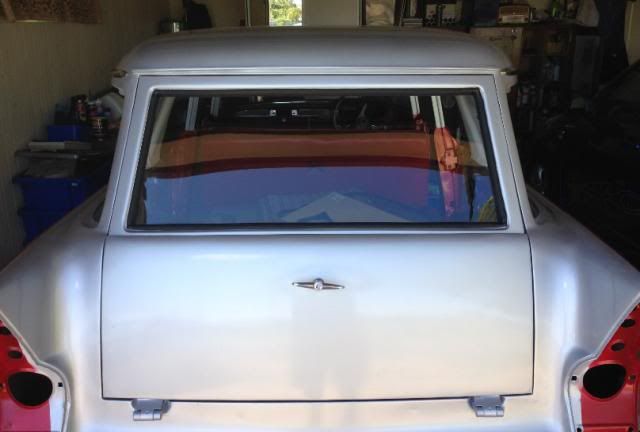
All re-installed the upper tailgate back on the car. I have my first bit of glass in.
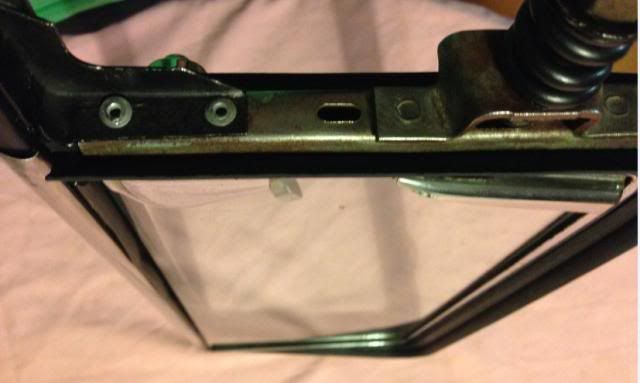
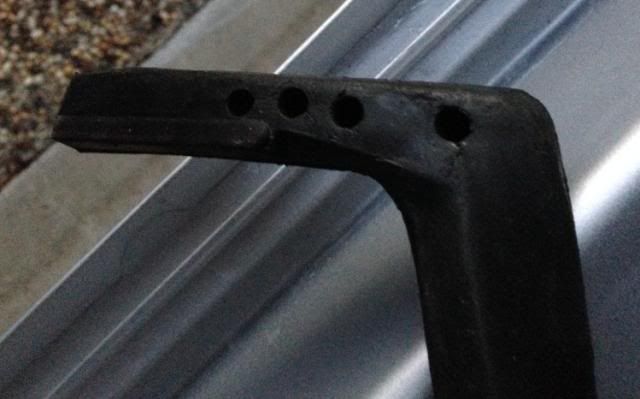
Also did the main tailgate seal around the outside, but didn't finished the rubber on the top of the lower tailgate.
I assume it just gets glued into position, but I wondered what these holes are for ?????????????
Moved onto the rear doors and got one of the rear 1/4 glass sections in.
And that took several attempts to get it in correctly and right.
The manual did say to screw in the adjustment screw all the way, not remove it. If removed you can't get it back in again until you remove it.
Lots of back and forth trips, and finding the right screws is a real pain.
But One step forward ( and several half steps), is still a step in the right direction.
Use HR door clips which are just right for the rear moulding on the roof of Wagons.
This side all completed.
However the passenger side wasn't going to follow so easy.
The rear sections went on fine, however the long mould front the front, didn't line up with the holes the same as the other side.
It also just didn't seem to fit down without a huge amount of effort to hold it down.
And the last hole didn't even exist in the moulding at all
Back to the Parts wagon for another mould to try. After I get the windscreen out first.
I wonder if this one was off an FB and they are somehow different ?????????????
Next I moved onto fitting my first window rubber, in the tailgate section.
Lubricated with soapy water and tried using the wire rubber tools, however it was painfully slow (5 or more picks to get just one centimetre)
Was going to take hours, if I lasted that long. And was marking the rubber also.
After about half an hour I decided to pull it back off and try using some string to install it. Similar to doing a front windscreen install.
Absolute magic.
All re-installed the upper tailgate back on the car. I have my first bit of glass in.
Also did the main tailgate seal around the outside, but didn't finished the rubber on the top of the lower tailgate.
I assume it just gets glued into position, but I wondered what these holes are for ?????????????
Moved onto the rear doors and got one of the rear 1/4 glass sections in.
And that took several attempts to get it in correctly and right.
The manual did say to screw in the adjustment screw all the way, not remove it. If removed you can't get it back in again until you remove it.
Lots of back and forth trips, and finding the right screws is a real pain.
But One step forward ( and several half steps), is still a step in the right direction.
IT's LIKE WATCHING DRUNK MONKEYS TRYING TO HUMP A FOOTBALL.
Re: EK Wagon project - Total rebuild
Go Finny - 
When you're faced with an unpleasant task that you really don't want to do, sometimes you just have to dig deep down inside and somehow find the patience to wait for someone else to do it for you.
Foundation member #61 of FB/EK Holden club of W.A.
Foundation member #61 of FB/EK Holden club of W.A.
Re: EK Wagon project - Total rebuild
Looks good mate, coming together, be cruising it around before you know it! I'm looking forward to starting my wagon project, so I'm sure I will have lots of where does this go kind of questions.
Woody - UMX-282
FB EK Club WA
Foundation Member # 138
FB EK Club WA
Foundation Member # 138
Re: EK Wagon project - Total rebuild
Go Finny - looking great mate
When you're faced with an unpleasant task that you really don't want to do, sometimes you just have to dig deep down inside and somehow find the patience to wait for someone else to do it for you.
Foundation member #61 of FB/EK Holden club of W.A.
Foundation member #61 of FB/EK Holden club of W.A.

Re: EK Wagon project - Total rebuild
When its all done mate, I will come and have a look. Going well!!
He who dies with the most toys wins!!
Re: EK Wagon project - Total rebuild
and any sort of weight say leaning on something it will mark it and I don't think you will get it out
you could try and rub it out depends how deep it goes
I would just rub it right out make sure you get it all
and then repaint it if you have enough paint left just don't put anything else against any more panels
its looking great though mate the colours match up really well
EK JAY SINCE 1990
Re: EK Wagon project - Total rebuild
Thanks again.
Feebee, I was supposed to come out and look at your wagon and measure up for the FB trim holes. Will give you a call.
Happy to share what I learn, I think that's part of the whole experience.
Thanks Jay, I'm over the paint issue now.
As you said, I'll just keep sanding/rubbing it back and hopefully will get rid of it before it gets to the actual colour.
And if needed will repaint the clear again over the doors. I still have to do the guards and bonnet.
Back to "Candy" the Parts Wagon (my stripper girl) to get the roof side moulding and a few odds and ends.
Also needed a rear passenger window, my other one was scratched.
Took a while to get the windscreen out, but it's done.
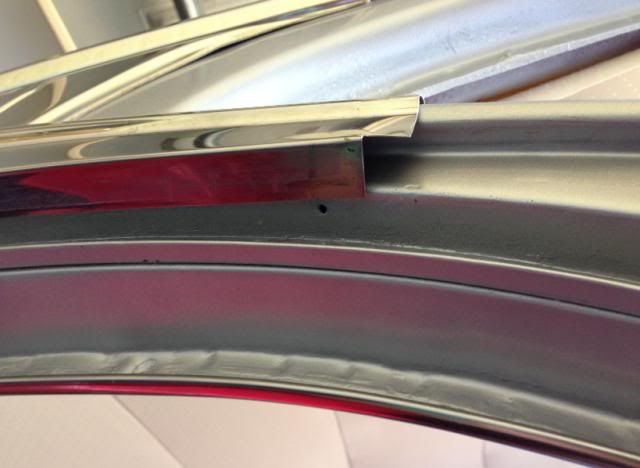
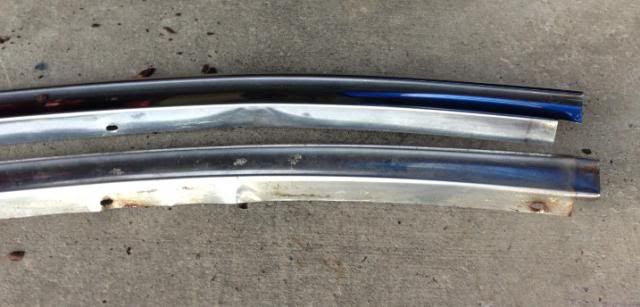
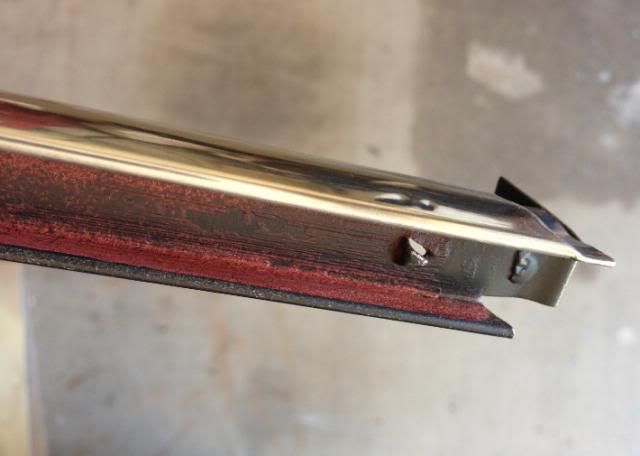
Compared the two moulding and they are slightly different.

The front ends are slightly different shapes, One has an angled cut.
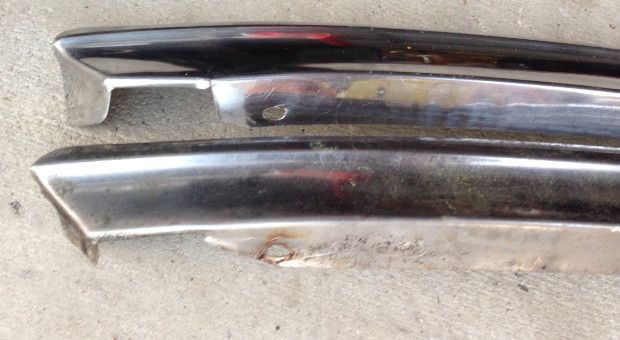
The other end has the hole I needed, and looks just slightly longer.
Now I can get the roof trim finished, get rubbers done and the Windscreen back in.
Also got the inner door rubbers installed, just needed the trim before doing the outers.
So I assume I need to finish installing the scuff plates before I can do the outer door rubbers ??????
Feebee, I was supposed to come out and look at your wagon and measure up for the FB trim holes. Will give you a call.
Happy to share what I learn, I think that's part of the whole experience.
Thanks Jay, I'm over the paint issue now.
As you said, I'll just keep sanding/rubbing it back and hopefully will get rid of it before it gets to the actual colour.
And if needed will repaint the clear again over the doors. I still have to do the guards and bonnet.
Back to "Candy" the Parts Wagon (my stripper girl) to get the roof side moulding and a few odds and ends.
Also needed a rear passenger window, my other one was scratched.
Took a while to get the windscreen out, but it's done.
Compared the two moulding and they are slightly different.
The front ends are slightly different shapes, One has an angled cut.
The other end has the hole I needed, and looks just slightly longer.
Now I can get the roof trim finished, get rubbers done and the Windscreen back in.
Also got the inner door rubbers installed, just needed the trim before doing the outers.
So I assume I need to finish installing the scuff plates before I can do the outer door rubbers ??????
IT's LIKE WATCHING DRUNK MONKEYS TRYING TO HUMP A FOOTBALL.
Re: EK Wagon project - Total rebuild
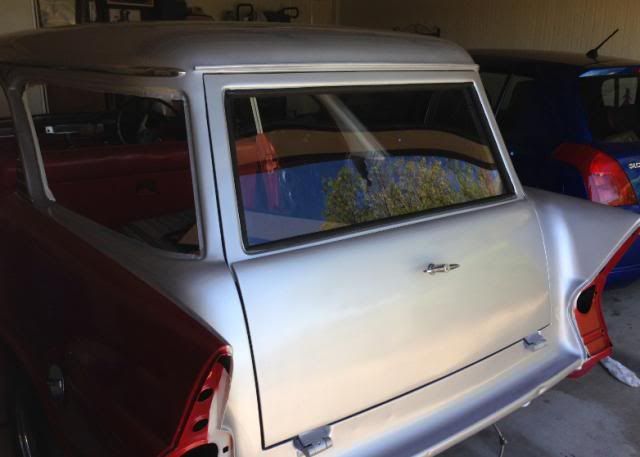
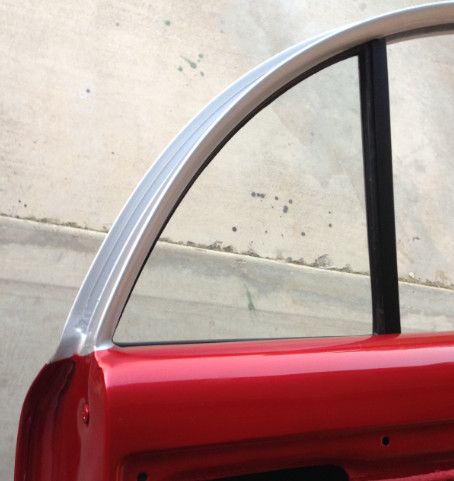
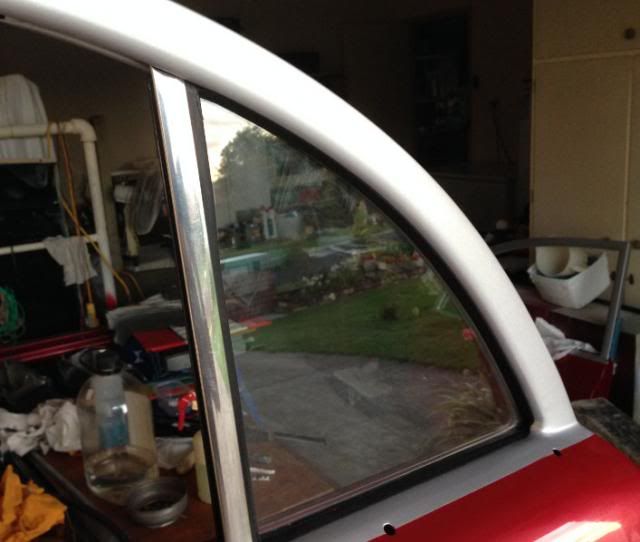
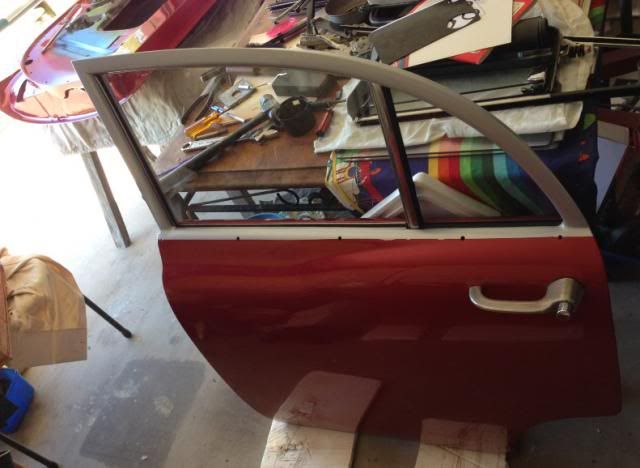
Correct EK roof trim, now installed.
Outer door rubbers cleaned and now trying to get scuff plates to line up.
Unfortunately some of the holes have disappeared and the new Sam Crupi Scuff plates don't quite line up without a bit of bending.
But that centimetre or two really doesn't help to find where the holes are.
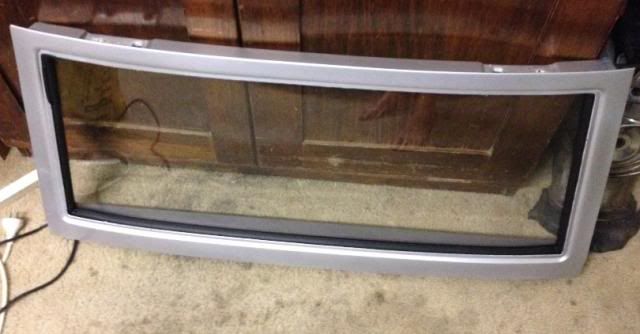
Rear Cargo windows cleaned any ready to install.
Front windscreen and mouldings cleaned, but after an hour of trying, no where near ready to install. 
What idiot designed this moulding set up. Extreme frustration.
I thought installing the actual windscreen would be difficult.
I didn't expect getting the mouldings into the rubber to be such a huge battle.
Finally got one quarter moulding in, not sure it's in well, but its a start.
Not looking forward to doing the big moulding.
After hitting a few dead ends with glass and scuff plates, went back to finishing the doors.
Window mechanisms cleaning and freshly greased.

Not a lot of free time this weekend, but will be aiming to have the doors back on the car at least.
Outer door rubbers cleaned and now trying to get scuff plates to line up.
Unfortunately some of the holes have disappeared and the new Sam Crupi Scuff plates don't quite line up without a bit of bending.
But that centimetre or two really doesn't help to find where the holes are.
Rear Cargo windows cleaned any ready to install.
Front windscreen and mouldings cleaned, but after an hour of trying, no where near ready to install.
What idiot designed this moulding set up. Extreme frustration.
I thought installing the actual windscreen would be difficult.
I didn't expect getting the mouldings into the rubber to be such a huge battle.
Finally got one quarter moulding in, not sure it's in well, but its a start.
Not looking forward to doing the big moulding.
After hitting a few dead ends with glass and scuff plates, went back to finishing the doors.
Window mechanisms cleaning and freshly greased.
Not a lot of free time this weekend, but will be aiming to have the doors back on the car at least.
IT's LIKE WATCHING DRUNK MONKEYS TRYING TO HUMP A FOOTBALL.
Re: EK Wagon project - Total rebuild
Hi Finny, I've been missing again for a longish spell - but have dropped in on this thread occasionally... sorry I didn't catch you when you had paint troubles....
I haven't sprayed candy - pearls are the only thing I ever came close to - and with the extra effort and prep - decided that I'd stick with my very much loved "solids"...
The clear coat will always be softer than the base... and I expect it is in there where your issue exists...
Sadly, my experience with clears is such that it should just be left alone and not worked beyond a light buff after it has reached the fully cured level - that can take a long time with acrylics.... they remain soft for a very long period....
I would suggest to take a magnifying glass to the damaged area and try to determine if the damage is contained to the clear coat - if not - it's probably not news you want to hear.... there isn't any way that I know of which will afford you to spray a base coat over a damaged clear then cover the repair with a clear again... panel beaters do - but they have tricks I am yet to pick up on - they simply won't share......
If my suspicion is correct that it is within the clear coat - it will still be soft - whereas the base will probably have reached a fairly flattened down state....
if your prep was good - and I don't doubt this looking at the marvelous finish you have achieved - you can try to block down the clear and re-spray it over the sound base... but, be warned - break into the base and you're in trouble.... it will always "look" different to the other bases if you compound it... such is the nature of the "float" of particles in the metallic/pearlescent base.... trying to match them is knowing exactly what mix/distance/speed and pressure was used the first time..... or the particles will settle at a different level...... pearls are more forgiving because they reflect light from many angles - metallics are near impossible to match up - differing light and viewing angles will always reveal the "odd" one out..... sorry, but this is as I see it....
Ok - mouldings - yes, absolutely - pain in the whatever part of the body is most sensitive.... but they are there, and our buses look brilliant with them....
It is very hard to find a windscreen mechanic these days who knows his stuff.... most will run at 1,000 mph from you if you tell them the model you have.....
A good one is worth his weight in beer... they just know their stuff - and make it look all so easy....
The moulding track has to be perfectly clear - I don't doubt you have effected this. Your moulding has likewise to be exact. It must be fitted before the glass - as you well know - and has to be positioned exactly.
Once in and the glass is fitted - it won't "pop" out... the leg of the moulding holds it in place... then comes the fitting of the assembly into the window aperture... that is pretty demanding and sometimes needs some "encouragement"....
I assisted the windscreen mechanic do mine - and even he stuffed up the first attempt..... but we worked and worked at it - and for some reason unknown to both of us - it just "went" in..... like the proverbial square peg into a round hole........ the round hole eventually made room for the peg and "pop" the whole show was over......
The scuff plates must be fitted prior to fitting the outer door rubbers - and make absolutely certain you leave those "ports" open at the ends of the bottom section - drainage ports.....
I can only suggest the holes in your questioned rubber are either expansion holes or drainage ones.... I do not have a wagon - nor have I worked on the rubbers of the tail-gate area or side windows for that matter - I simply can't offer you any factual answers.. just speculation, sorry - Finny......
Your work is amazing - it is yet another great build coming together wonderfully... you may not see it from the perspective most of us do - forests and trees, etc.... but it will come together and you will always have things you would like to have achieved a different result....
Step back and take a few breaths and just take a look at the great job you have produced, Finny... don't get frustrated with it - there really is no time frame for finishing... if it gets too much, take a spell...... for as long as it takes... It will afford you opportunity to re-focus, relax and also something might just "click" during one of your opportunities to step away for a bit..... works for me....
As we get nearer and nearer the finish line - we all often get a rush of blood... we have expectations that it will only be "x" days to getting the whole shebang up and running.... and so begins the chronic build up of stress, frustration ....usually culminating in something we regret when a little too much effort is made to force that square peg.....
You are taking the correct approach in re-focusing on another area.... just pick them off as they present themselves... anything can be re-visited....
Sorry for the novel, Finny - and others..... Finny's wagon is certainly one I'm looking forward to spending some time on a personal tour.....
frats,
Rosco
Re: EK Wagon project - Total rebuild
Thanks Rosco for your valuable words of wisdom, always appreciated.
Unfortunately I struggle typing too much, which is why I add lots of pics.
"A picture paints a thousand words"
After 5 years of this project, I have spent a lot of time not rushing but reflecting.
Time marches on, and after losing a few older relatives in the last 12 months, and with ageing parents, some time to think but no more procrastination.
I set a goal almost 4 months ago, and only have two weeks left, so I'll see what I can finish in that time.
And thanks SunnyTim for your time on the phone today. really helpful.
So today it was back to working on the doors.
Getting the rods to re-attach is a lot easier if you undo the mounts were the handles attach.

And getting the Baily channel in is a lot easier if you flatten out the old tabs. They aren't needed any longer and make the bailey too tight.
Had about 4 attempts on the doors, and removing it each time at the end because I forgot to pout the door belt weatherstrips into the doors before the glass.
Bailey done and made a nice contrast to the colours.
I struggled to find this info, and was a little confused by the Rare Spares video on installing Stainless Bailey Channel, but on FB/EK sedans and Wagons the Bailey is cut and installed in 3 separate sections. Not bent, as they are all right angles.
So rear doors are well underway, and front doors to follow. Along with some more attempts on the difficult tasks......
Unfortunately I struggle typing too much, which is why I add lots of pics.
"A picture paints a thousand words"
After 5 years of this project, I have spent a lot of time not rushing but reflecting.
Time marches on, and after losing a few older relatives in the last 12 months, and with ageing parents, some time to think but no more procrastination.
I set a goal almost 4 months ago, and only have two weeks left, so I'll see what I can finish in that time.
And thanks SunnyTim for your time on the phone today. really helpful.
So today it was back to working on the doors.
Getting the rods to re-attach is a lot easier if you undo the mounts were the handles attach.
And getting the Baily channel in is a lot easier if you flatten out the old tabs. They aren't needed any longer and make the bailey too tight.
Had about 4 attempts on the doors, and removing it each time at the end because I forgot to pout the door belt weatherstrips into the doors before the glass.
Bailey done and made a nice contrast to the colours.
I struggled to find this info, and was a little confused by the Rare Spares video on installing Stainless Bailey Channel, but on FB/EK sedans and Wagons the Bailey is cut and installed in 3 separate sections. Not bent, as they are all right angles.
So rear doors are well underway, and front doors to follow. Along with some more attempts on the difficult tasks......
IT's LIKE WATCHING DRUNK MONKEYS TRYING TO HUMP A FOOTBALL.
Finny,
you're leaping ahead of me... your work is progressing in so many different areas that I have to hang on to something and get a grip on associating my path through the differing targets and applications.... to quote a common phrase "you are coming ahead leaps and bounds".....
I am amazed at the finish you have achieved in your paintwork.... where did you learn to spray like that?.... and I hope followers are watching!... we "back-yarders" are every bit worthy of our salt vs. those privvied to a formal education....... take heed! if you "want" it - you'll achieve it....... but you must "commit"...
Arghhhhh! Bailey channel...... it's another one of those "mystery" boxes.... those pesky stainless tubes on each side take a distinct liking to the hardiness of your fingers... and will present themselves from and elevated platform of awareness -which none of us can compete with.... just try and get the angles right when making the 90 deg bend at the front of each door......
If you have the Rares ones, there is absolutely no opportunity for a "trail" fit... the adhesive on the internals seems to be able to grab at anything as you work around the channel - and, when all seems to go swimmingly - the blasted stainless tubing bends - and can't be straightened take a look at mine, everyone - you'll see the seemingly Mr. Cool has lost his temper here in many places..... ..... but, when you get it right - it's a sight to behold!........I can't offer any suggestion for the "trial" fitting of this blasted stuff.... it grabs when you don't want it to - and won't when you do.... dibs to you, Finny .... I'll be knocking on your door when I do the right hand side of my old bus...... Virgin (although I would like to support the National carrier) might be sending a limo to collect you for an unexpected two day escapade down south (this time of year is probably more suitable...... our winters, well...... Yeti climate...).
Don't be afraid to use masking tape to protect that fabulous finish, Finny - it's far easier to gently peel the masking tape off with a tear in it - than to see an errant screwdriver track in your precious paintwork.....
I am now very keen to be afforded an optic on your bus.... and I expect nothing less than a considerable time apportioned to your personal disclosure of work performed.... we're all in this together - regardless of what we have, or how much effort we put into our endeavors .... in time immemorial, one generation passes knowledge down to the next.... never forget folk - this is why we "belong" to our fraternity... and, don't for one moment believe we are traveling alone - there are many lurking visitors who watch what we do.... our old buses are probably now the hardest Oz has ever had to maintain... all other models flourish in availability - but these two great Mammoths in fin, chrome and embellishment are truly now "dinosaurs"....
Finny, you are affording those with aspiring hopes of creating such reflective specimens - a product which is one to be envied... don't for one moment pressure yourself into any deadlines.... this is surely going to be one amongst many others - which will endure for all to enjoy for years to come.....
Your attention to detail is exquisite....
As has been the noted observation of many of us "old" sojourners..... the "standard" of all vehicles on display at our gatherings as escalated beyond comprehension.... GMH NEVER had one roll off the production line in the likes of some of the un-original "originals"...... the "sports" are well beyond the capabilities of the day "sports" enthusiasts... and the modifieds.... well, I guess you can probably apply the technology and grunt of what is now built into our old jelopies in virtually any make/model .... yet, for some - it's FB or EK body which strangely associates the attraction......
You have indeed created a wonderful example of period - with an accent of liberation..... and I dips me lid to your achievement....
Please, Finny - don't rush this last vital bit to completing the mission.... pick it off as you want to - not need to..... and enjoy the journey... the good bits and reward are at your doorstep.....
frats,
Rosco
Re: EK Wagon project - Total rebuild
Thanks again Rosco.
I concur with your thoughts.
Had a day off today to help out family and spend time with our grand daughter.
Same again for most of tomorrow.
But may get a few hours I'm the afternoon.
I concur with your thoughts.
Had a day off today to help out family and spend time with our grand daughter.
Same again for most of tomorrow.
But may get a few hours I'm the afternoon.
IT's LIKE WATCHING DRUNK MONKEYS TRYING TO HUMP A FOOTBALL.
Re: EK Wagon project - Total rebuild
Just enjoy the ride, Finny.... if you don't "feel" like doing some more - then it's probably fair to say you shouldn't....
Our passion in these old jalopies is basically a "hobby".... if it feels like a labor - you've probably got your sights set on your back-side.....and pushing the envelope will result in a good kicking....
I get the urge to go out and uncover mine to do just a couple of little jobs..... because I "want" to... not because I "should"....
We've been under this convention for some time now... and it works.... the results are better... and I get a lot of satisfaction out of the endeavour... that's what a hobby is supposed to be .... not something which you are compelled to chagrine yourself to - in some unworldly timetable or schedule.... life's got enough of those.... don't add your build to that foresaken list of fatigues....
frats,
Rosco