kustomizing dash... not finished

Includes seating, upholstery, door trims, dashboard and heater.

Moderators: reidy, Blacky

mattymartin
Posts: 841
Joined: Fri Oct 06, 2006 12:49 pm
State: NOT ENTERED
Location: sydney

kustomizing dash... not finished

Post by mattymartin »

ok guys,

thanks to DR, ekv8ute & a few others, I've attempted to
customising my own dash... below are the steps taken to
creat a dash with a new look...

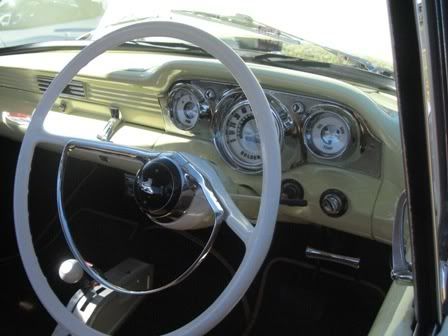
the plan...
Image


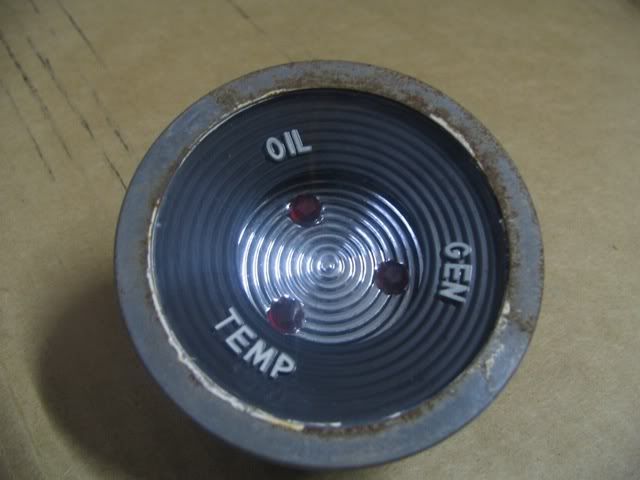
i started buy removed the gauges form the chrome
housing, buy unscrewing the screws that held held the gauges
in place...
Image


then very carefully bent the cliped over metal on the back
of the gauge, over eniugh that it was free of restriction...
before
Image
after
Image


then i just let the gauge fall out into my palm carefully...
to see what i have got...
Image


then i cleaned all peices thoroughly, let them dry & hit the black
face with an antique white colour (SQUIRTS, Ivory...).
colour...
Image

before
Image
after (the first coat)
Image


while the paint was drying, i sprayed oven cleaner onto the
face of the gauges. because i want the numbers black, i
need to get the old light green colour off...
Image
DevilRod, said to use oven cleanier as it more gentle
on the the glass than trying to scratch out the paint from
the numbers... (make sure you where gloves it burns alot)

before
Image
during, (the oven cleaner needs to be left on for
at least 30 mins, i left it on for about 45mins then just
rinsed off with water & the old paint just wash straight off...
no scrubing needed)...
Image
after
Image

then put another coat on the faces, i will do three coats in total...
Image

while they where drying i cracked the paint for the numbers...
Image

applied paint with a very small paint brush & put enough to fill the numbers with paint...
Image

then I waited 30mins & wiped the surface with a rag with some turps to get rid of the over flow...
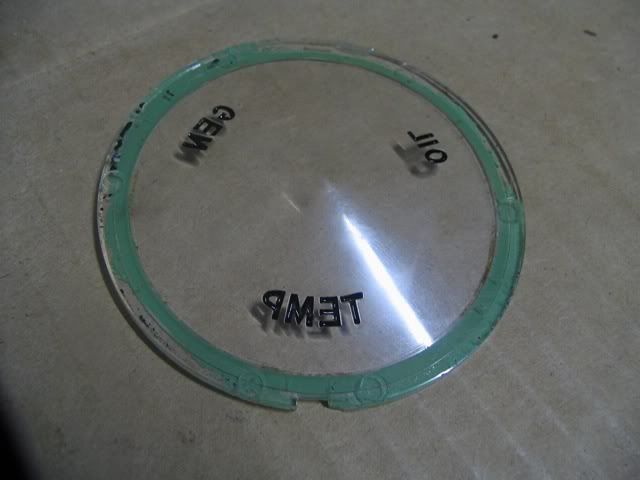
Image

now i just have to wait till the faces dry... & bingo...

the speedo...
Image


all the same steps as taken before, just different with the speed indicator lines...

step 1. dismantle, buy bending the clips & unscrewing
the nut on back...
Image
Image

then unclip the inner face, with the speed indicator lines... then the chrome center...
Image
Image

IMPORTANT... BEFORE YOU PAINT, COPY WHERE THE SPEED
LINES ARE, ON THE REVERSE SIDE...

Image

& then the numbers
Image

the next steps are the same as the previous gauges...

these are all the faces painted, making sure that they all matchup in colour & density...
Image

once faces have dried over night & lettering/ numbers have been painted & cleaned, reassemble...
Image

place back in surrounds to get a feel...
Image

nioce... hey?


still have finished speedo lines yet...


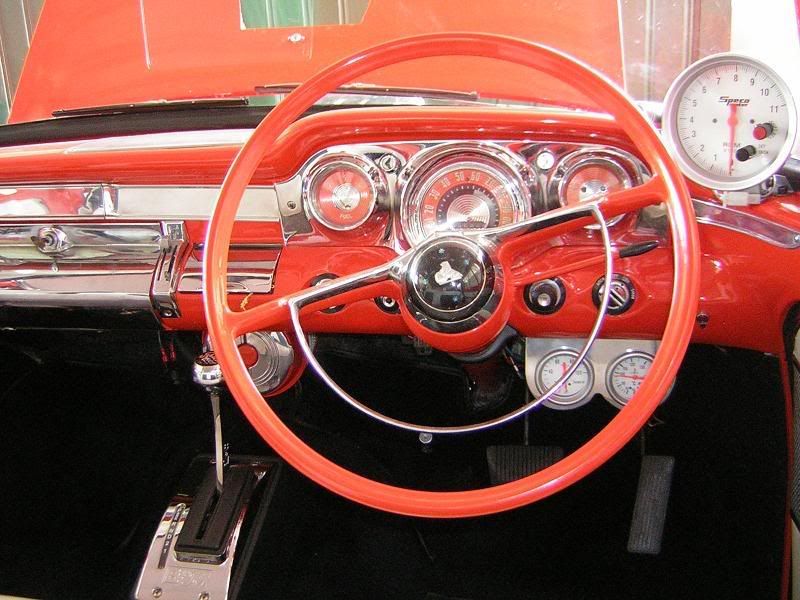
this is unfinished... to be completed


thanks
matty martin
Last edited by mattymartin on Tue Nov 13, 2007 6:38 am, edited 4 times in total.
go the wagons....
retro
Posts: 848
Joined: Wed Apr 25, 2007 9:15 pm
State: NOT ENTERED

Post by retro »

nice work matty, wouldnt mind seeing the finished product before i copy you buddy.
master of nothing, leader of nobody.
captainbill
Posts: 264
Joined: Tue Jul 03, 2007 10:44 pm
State: NOT ENTERED
Location: Adelaide.sa

Post by captainbill »

Looks good matty.Thinking of changing mine to a lighter colour aswell.


Image
User avatar
Devilrod
Posts: 7394
Joined: Fri Apr 30, 2004 12:55 pm
State: VIC
Location: Beaconsfield, Vic

Post by Devilrod »

I said you need to use GLOVES with the oven cleaner, IT IS FAR FROM GENTLE ON YOUR SKIN!!!

Use enough and it takes off your finger tips!!! Guess how I know :oops: :oops:

Other than that mMatty is right on the mark. Glad you're documenting all this, I never did and it is very easy to do.
Speed and Style........... One day I'll get the speed bit.
User avatar
(AUST)Mod
Posts: 2272
Joined: Sun May 07, 2006 11:16 pm
State: WA
Location: Perth

Post by (AUST)Mod »

has anyone customised their blinker stalk? does the black plastic on the end come off?
Craig wrote: Andrew you have a red so I wouldn't race it :wink:

Image
User avatar
Devilrod
Posts: 7394
Joined: Fri Apr 30, 2004 12:55 pm
State: VIC
Location: Beaconsfield, Vic

Post by Devilrod »

Yeah it does unscrew from memory...
Speed and Style........... One day I'll get the speed bit.
mattymartin
Posts: 841
Joined: Fri Oct 06, 2006 12:49 pm
State: NOT ENTERED
Location: sydney

Post by mattymartin »

austmod,

yep the blinker black rubber thing does unscrew as DR said... what where you thinking of doing...:idea: :idea: :idea: :idea:

hey DR,
i had i massive typo... i'll fix it asap...

captain bill, love the heater, the dash trim & gauges below...

thanks
matty martin
go the wagons....
captainbill
Posts: 264
Joined: Tue Jul 03, 2007 10:44 pm
State: NOT ENTERED
Location: Adelaide.sa

Post by captainbill »

Thanks matty got more gauges to go in now.The end of the indicator stalk does unscrew.Heres what rick(basicgreen) has done to his.


Image
mrs ratbox

Post by mrs ratbox »

yor a champ matty
get in and give it a go then put up a step by step with pics :D the guy on ebay is gunna hate you now that yor showing the world just how easy it is
yeprat1
Posts: 385
Joined: Tue Nov 15, 2005 8:56 pm
State: NOT ENTERED
Location: richmond ;sydney

Post by yeprat1 »

yeh dude thanks for that info guess what ill be doing next time im bored
User avatar
(AUST)Mod
Posts: 2272
Joined: Sun May 07, 2006 11:16 pm
State: WA
Location: Perth

Post by (AUST)Mod »

Great work so far Matty. Why don't you add led lighting to the gauges while they are out of the fascia and apart? The ebay ones with leds look ace, i think it would cap off your painted gauges nicely.
Craig wrote: Andrew you have a red so I wouldn't race it :wink:

Image
mattymartin
Posts: 841
Joined: Fri Oct 06, 2006 12:49 pm
State: NOT ENTERED
Location: sydney

Post by mattymartin »

hey aus mod,

mate i dont know the first thing about that sort of stuff... (i really like the affect thay give though), can any else shed some light on replaceing the standard dash lights for led lights...

thanks
matty martin
go the wagons....
blue ute
Posts: 595
Joined: Mon Nov 14, 2005 11:27 pm
State: NOT ENTERED
Location: Perth

Post by blue ute »

Further to that, has anyone tried the same to the plastic around the knobs on the dash - ie choke, wiper etc
User avatar
(AUST)Mod
Posts: 2272
Joined: Sun May 07, 2006 11:16 pm
State: WA
Location: Perth

Post by (AUST)Mod »

mattymartin wrote:hey aus mod,

mate i dont know the first thing about that sort of stuff... (i really like the affect thay give though), can any else shed some light on replaceing the standard dash lights for led lights...

thanks
matty martin
here you go Matty
http://gallery.oldholden.com/ReaperHR/H ... nals/LEDs/
Craig wrote: Andrew you have a red so I wouldn't race it :wink:

Image
mattymartin
Posts: 841
Joined: Fri Oct 06, 2006 12:49 pm
State: NOT ENTERED
Location: sydney

Post by mattymartin »

thanks austmod,

had a read but can find out where he got them from, i'll check out tandy or dicksmith on monday....

but it was well documented hey...

hey did you ever end up putting that stereo in... lets see some pics in the the old link mate...


thanks again
matty martin
go the wagons....
Post Reply