
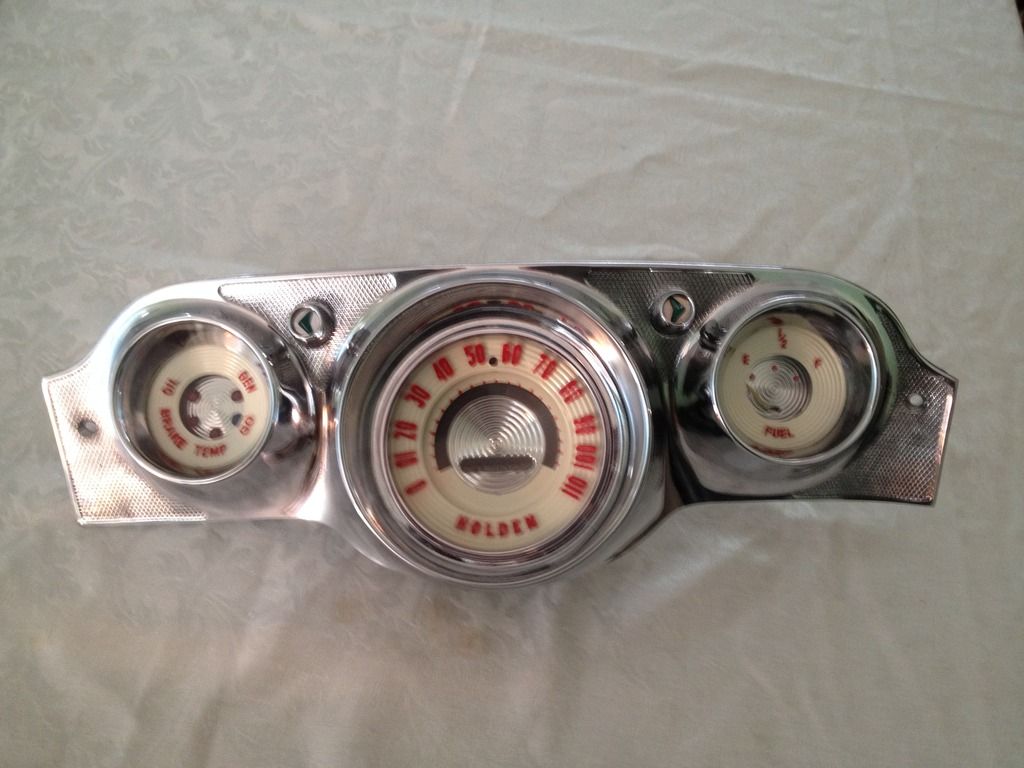
I've been cleaning up a few odds and ends for the EK wagon over the last few weeks. One thing I tackled was the gauges. Mine were pretty crusty, so I used Matty Martin's excellent post (http://www.fbekholden.com/forum/viewtop ... uge#p20261) to give them a facelift. I went for ivory backgrounds and red lettering, and they came up pretty well. Matty's technique works pretty good for the bonnet insert too.
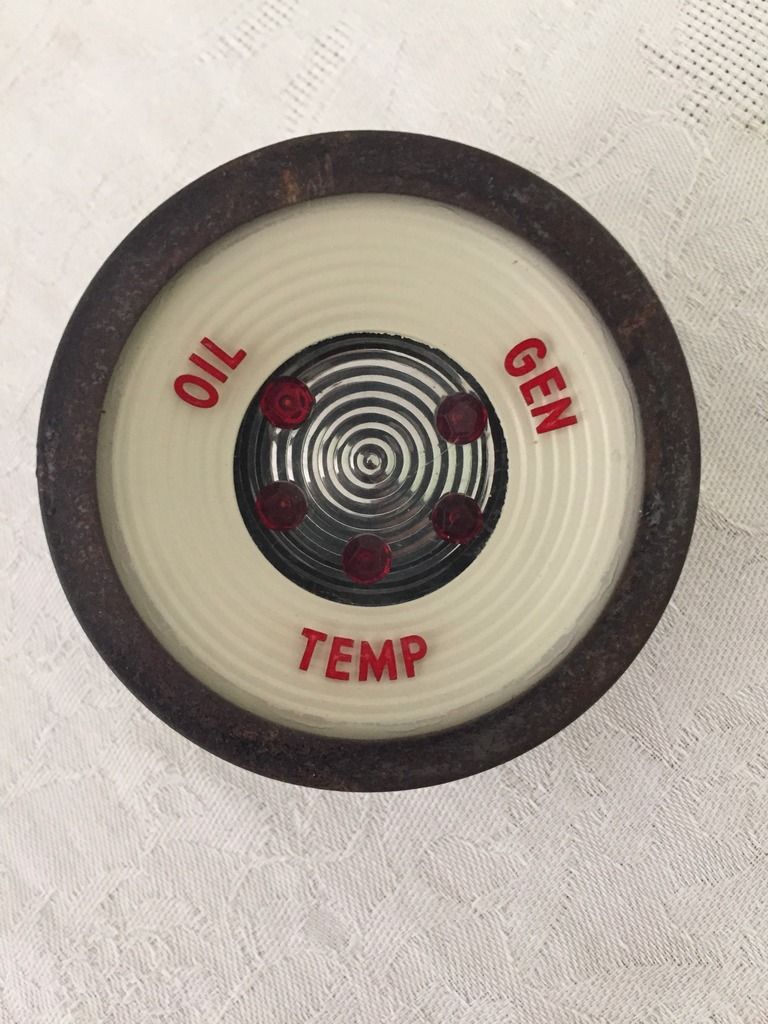
While I had the gauges apart, I modified the idiot light gauge. I wanted to keep the standard OIL/GEN/TEMP lights, but wanted to add two more lights. I figured that by putting the lights into this idiot light cluster they won't look like an add-on hanging off the dash. The first extra light will be used for the brake fail warning light, which my engineer wants. The second one light I added to balance up the gauge... the plan is to use it one day for an "armed" light for nitrous (one day). It was pretty simple to add the extra lights - carefully drilled some holes, scavenged some red "jewels" from an old gauge, and added some cardboard light shields to the back. There is not much room at the back of the gauge for some extra bulb holders, so I'll probably glue some LEDs in place. Apologies for not taking photos.
The challenge I've got is how to mark up the plastic gauge face. I kept the standard OIL, GEN and TEMP words, but would like to add to them for the other two lights - maybe BRAKE and N2O (perhaps STOP and GO!). The original letters are engraved into the rear of the gauge face (probably when the plastic is moulded). This makes it easy to dribble some paint into the engraved groove, as per Matty's method. I'm not sure how to add the two extra words though. My hands are pretty shaky, and I figure that I would make a mess if I tried to use an engraver.
Any thoughts on how to neatly add the two extra words to the gauge face?
Cheers,
Harv
Re-marking idiot gauge plastic
Re-marking idiot gauge plastic
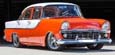
327 Chev EK wagon, original EK ute for Number 1 Daughter, an FB sedan meth monster project and a BB/MD grey motored FED.
-
BILLY BLACKARROW
- Posts: 1065
- Joined: Thu Aug 21, 2008 9:22 pm
- State: NSW
- Location: NEWCASTLE MACQUARIE HILLS
Re: Re-marking idiot gauge plastic
Harv
I did the same thing with brake fail light for the wording I went to a sign writer I know and he cut the lettering in stick on vinyl in reverse and stuck it to the inside of the glass worked a treat I will post some photos tomorrow didn't cost me a cent (mates rates)
BILLY
I did the same thing with brake fail light for the wording I went to a sign writer I know and he cut the lettering in stick on vinyl in reverse and stuck it to the inside of the glass worked a treat I will post some photos tomorrow didn't cost me a cent (mates rates)
BILLY
BILLY BLACKARROW
MY Father always said do the hard part first --because when you are OVER IT you only have the easy part left to do THINGS I HAVE TRIED TO LIVE BY
MY Father always said do the hard part first --because when you are OVER IT you only have the easy part left to do THINGS I HAVE TRIED TO LIVE BY

Re: Re-marking idiot gauge plastic
The challenge I've got is how to mark up the plastic gauge face. I kept the standard OIL, GEN and TEMP words, but would like to add to them for the other two lights - maybe BRAKE and N2O (perhaps STOP and GO!). The original letters are engraved into the rear of the gauge face (probably when the plastic is moulded). This makes it easy to dribble some paint into the engraved groove, as per Matty's method. I'm not sure how to add the two extra words though. My hands are pretty shaky, and I figure that I would make a mess if I tried to use an engraver.
Any thoughts on how to neatly add the two extra words to the gauge face?
Cheers,
Harv[/quote]
I'm thinking that someone who does CNC engraving, as in trophies etc should be able to copy the lettering.
Any thoughts on how to neatly add the two extra words to the gauge face?
Cheers,
Harv[/quote]
I'm thinking that someone who does CNC engraving, as in trophies etc should be able to copy the lettering.
-
BILLY BLACKARROW
- Posts: 1065
- Joined: Thu Aug 21, 2008 9:22 pm
- State: NSW
- Location: NEWCASTLE MACQUARIE HILLS
Re: Re-marking idiot gauge plastic
Harv
As promised it was hard to get a decent photo so I took two hope it shows up properly
The brake fail light is a LED in the centre.I am happy


BILLY
As promised it was hard to get a decent photo so I took two hope it shows up properly
The brake fail light is a LED in the centre.I am happy


BILLY
BILLY BLACKARROW
MY Father always said do the hard part first --because when you are OVER IT you only have the easy part left to do THINGS I HAVE TRIED TO LIVE BY
MY Father always said do the hard part first --because when you are OVER IT you only have the easy part left to do THINGS I HAVE TRIED TO LIVE BY
Re: Re-marking idiot gauge plastic
Cool  .
.
I didn't even think of drilling the centre. I put the two new bulbs at the 4'oclock and 7 o'clock positions, at the same PCD as the original three bulbs. I think your way looks neater.
I'm going to try a trophy place as OZ_EK suggested once I get home again. There is a mob close to me that specialises in fancy digital engraving, and I'm hoping they will do a one-off for my gauges (the gas strut mob nearby got real excited when they saw I wanted struts for an EK tailgate, and made me up a pair of one-offs).
If they fail, is there any chance your mate could make me a BRAKE and GO! decal? Happy to pay.
Cheers,
Harv
327 Chev EK wagon, original EK ute for Number 1 Daughter, an FB sedan meth monster project and a BB/MD grey motored FED.
Re: Re-marking idiot gauge plastic
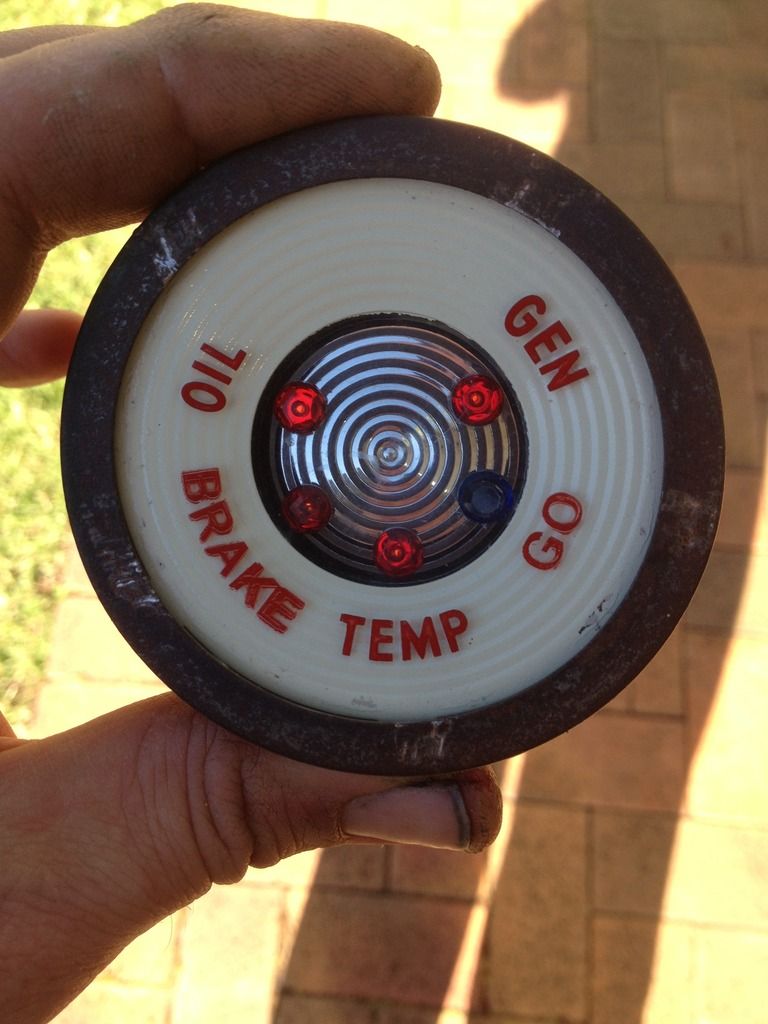
Attached below a photo of the idiot lights with the two additional "jewels" in place:
I managed to get onto an engraver who believes he can engrave the lens for me (with thanks Pete). I'll post some pictures up once it is back together.
Plan is for the extra light on the left to be for brake fail (with BRAKE engraved on the lens), and the extra light on the right for a nitrous arming switch (with GO! engaged on the lens). I'll get the car on the road first, then have a play with the giggle gas... would be fun to run it occasionally at Eastern Creek (one day... patience grasshopper).
One drama I hit is that the ANDRA specs require the nitrous arming light to be blue, not red. I could remove the red "jewel" and poke the head of a blue LED through, but it would not look too neat. Any thoughts on how (and from what) I could make a transparent blue "jewel"?
Cheers,
Harv
327 Chev EK wagon, original EK ute for Number 1 Daughter, an FB sedan meth monster project and a BB/MD grey motored FED.
Re: Re-marking idiot gauge plastic
Harv,
Ebay is your friend!........These are 5mm craft gems.
Ebay is your friend!........These are 5mm craft gems.
- $_12.jpg (52.87 KiB) Viewed 1385 times
Re: Re-marking idiot gauge plastic
Cool
You just saved me a drama trying to machine something up.
Many thanks,
Harv
You just saved me a drama trying to machine something up.
Many thanks,
Harv
327 Chev EK wagon, original EK ute for Number 1 Daughter, an FB sedan meth monster project and a BB/MD grey motored FED.
Re: Re-marking idiot gauge plastic
I cant get the link to upload, so here's the ebay item # 281991585701.
Cheers.
Cheers.
Re: Re-marking idiot gauge plastic
Great work fella's.
Harv, if it's of any benefit (can't find my thread on this) - I used the vacant "Temp" jewel for my anti-theft alarm light.
I simply drilled out the back of the jewel and filed down the LED which came with the unit.
You have a vacant "12 O'clock" in your dial face - if you decide to go with the blue jewel for NoX, you could drill the 12 hole and fit an anti-theft armed light.
As for marking up the clear lens - I would be inclined to go with a reverse decal.
The only downside I can see with this is that it might not illuminate at night - but show up as dark lettering against a slightly lighter shade of dark surround.
Of course, if the decals are semi-transparent - this should remedy the issue.
As for engraving the back of the lens - no, I don't believe you'll ever satisfy your requirement. Engraving can be a testy process. Depth is probably the most critical, secondly would be to get a cut which is both flat and without marks.
An option to outline can be achieved by applying some laser printed decals - the material is available in hobby shops. You simply do your design on a computer - then print the sheet out on a laser printer. Ink-jet also works - but does not have the sharp edges achieved with a laser printer. You can "reverse" the font so that it will adhere to the inner face of a lens.
If there is absolutely no demand for anything precise, applying cut-out letters to the rear and carefully scribing around them to produce an outline might suffice. Simply painting in would then result in reasonable lettering.
Another option would be to lay a strip of masking tape down on a piece of extremely clean glass. Cut away your letters/numbers to produce a stencil, apply this to the inner lens face and air-brush an appropriate colour through the stencil. Translucent paints are available and there is also the option to mix/match any colours to produce something similar to the green of our gauges.
The masking tape/glass trick is used a lot in model detailing (scale locomotives, slot cars, aeroplanes etc). An extremely sharp pointed hobby knife and a steel straight edge can produce some amazing results.
Ok, still working my way through the months of "new posts" since I was last on...
frats,
Rosco
Re: Re-marking idiot gauge plastic
Thanks Rosco. I remember your LED thread from a long time ago - it was that article that drove me to put my lights into the idiot gauge panel. It's funny, but your use of the word "jewel" stuck in my mind.  .
.
http://www.fbekholden.com/forum/viewtop ... wel#p21317
From memory, the 12 o'clock position is not accessible because the gauge backlight binnacle is in the way.
Cheers,
Harv
http://www.fbekholden.com/forum/viewtop ... wel#p21317
From memory, the 12 o'clock position is not accessible because the gauge backlight binnacle is in the way.
Cheers,
Harv
327 Chev EK wagon, original EK ute for Number 1 Daughter, an FB sedan meth monster project and a BB/MD grey motored FED.
Re: Re-marking idiot gauge plastic
www.engravingcrew.com.au
Specialize in engraving round and curved surfaces.
Specialize in engraving round and curved surfaces.
Re: Re-marking idiot gauge plastic
Got the gauges just about finished off. I ended up getting the plastic gauge lense engraved (with thanks Pete), and it came up pretty cool. I bought some "blue jewels", and added one for the nitrous warning light (yeah, I know... a bit of a poser for now  . But one day
  ). I gotta hide the spare blue jewels before the kids find them and Bedazzle the house. Made some cardboard dividers for the back, and got some LEDs/resistors from Jaycar.
Cheers,
Harv


Cheers,
Harv
327 Chev EK wagon, original EK ute for Number 1 Daughter, an FB sedan meth monster project and a BB/MD grey motored FED.