hey Danny,
all the best for a speedy recovery!
Pa's Ute
-
samprinci

- Posts: 1111
- Joined: Thu Aug 06, 2009 10:17 am
- State: NOT ENTERED
- Location: Nthrn Beaches / Liverpools - Syd
Re: Pa's Ute
Join the fun! Join the club! - FB-EK Holden Car Club of NSW
www.fbekholdennsw.com
www.fbekholdennsw.com
-
OldMan's Lacky
- Posts: 232
- Joined: Wed May 11, 2011 8:35 am
- State: NOT ENTERED
- Location: The Capital
Re: Pa's Ute
Thanks Sam.
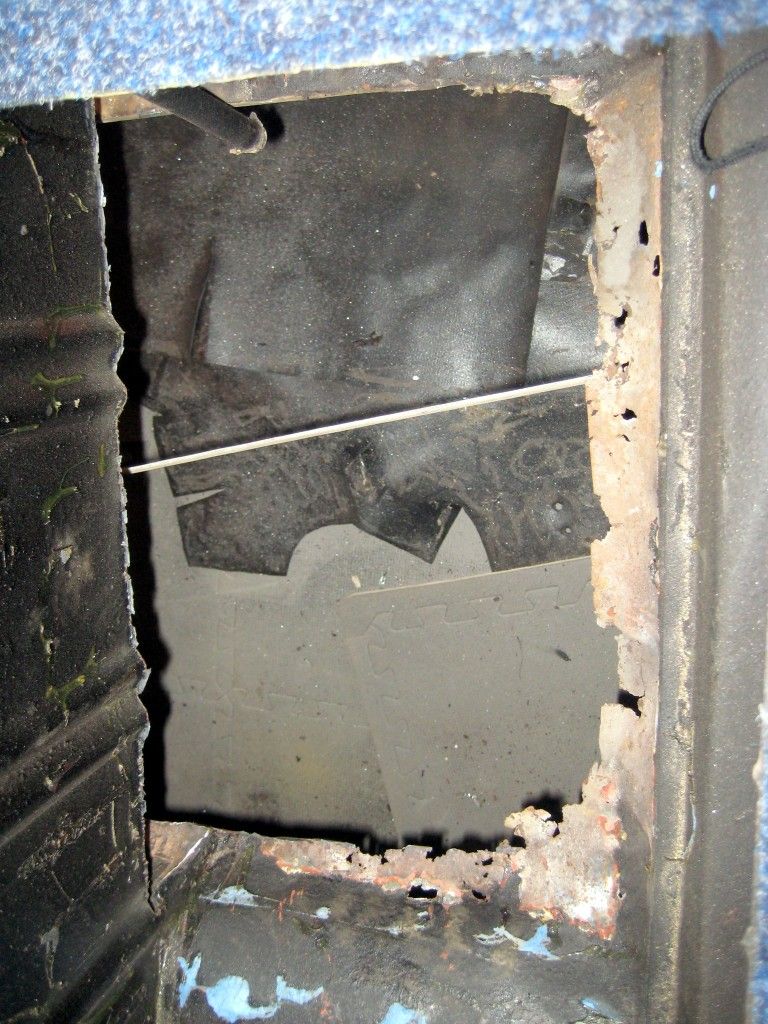
Recovery has gone well and I had the opportunity to put a few hours of work in on Sunday. Had to remove a lot of the body deadener the old man had put in the cab so we could see the patch up job (from the painter) and how much more rust was hiding. What a b*tch of a job Started off using flapper discs but that just seemed to spread the stuff!! Ended up using a chisel and scraping it off and then used the flapper discs. What it revealed was this:
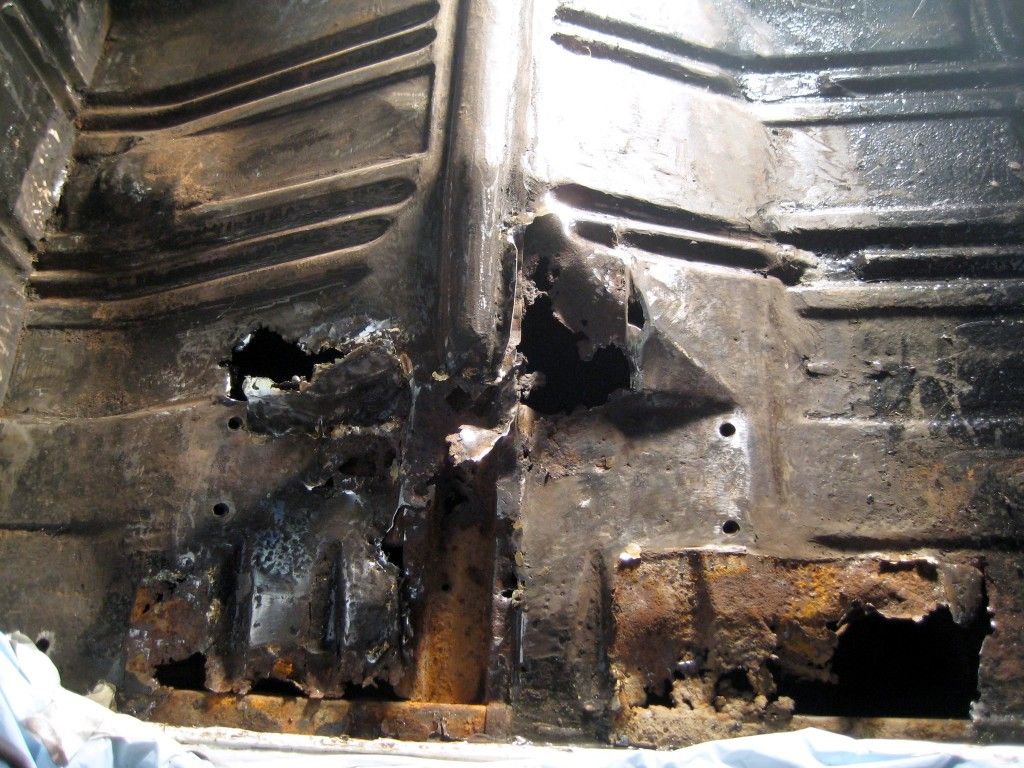
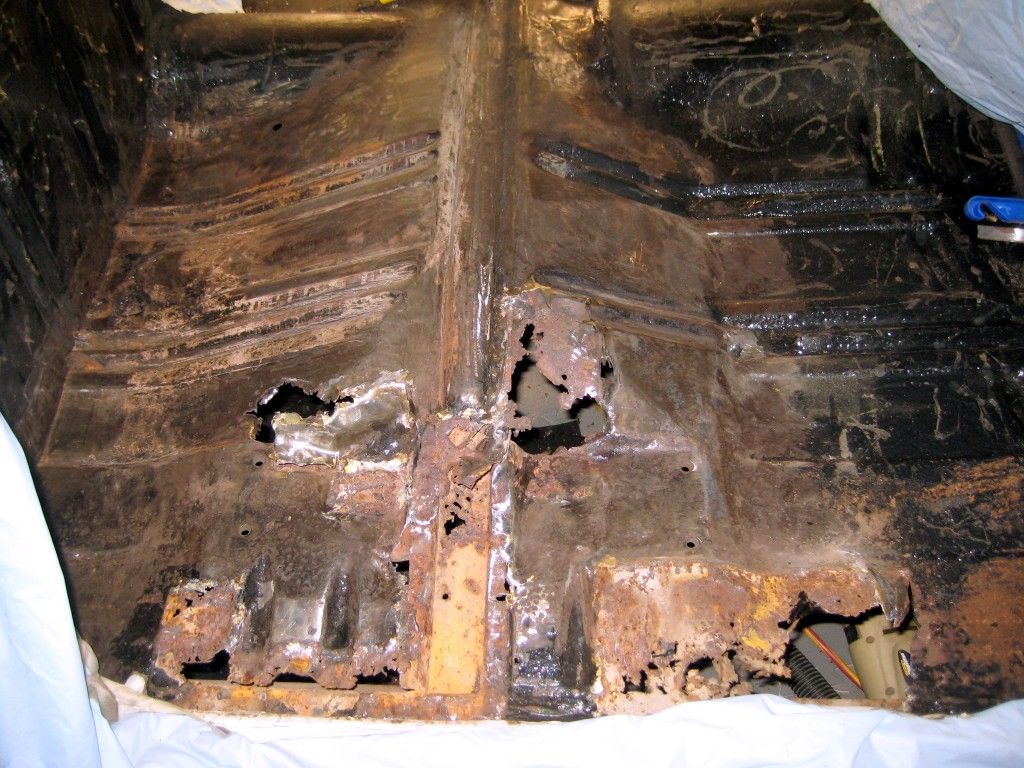
I've done a bit researching but I can't find the actual name for the rail (pictured running down the middle) that divides the two rust panels. I obviously need to get a new one!!! Can't find them on Rares so will have to look elsewhere.
Anyway I have been instructed to remove all the patches that were previously welded ... here's an example of one:
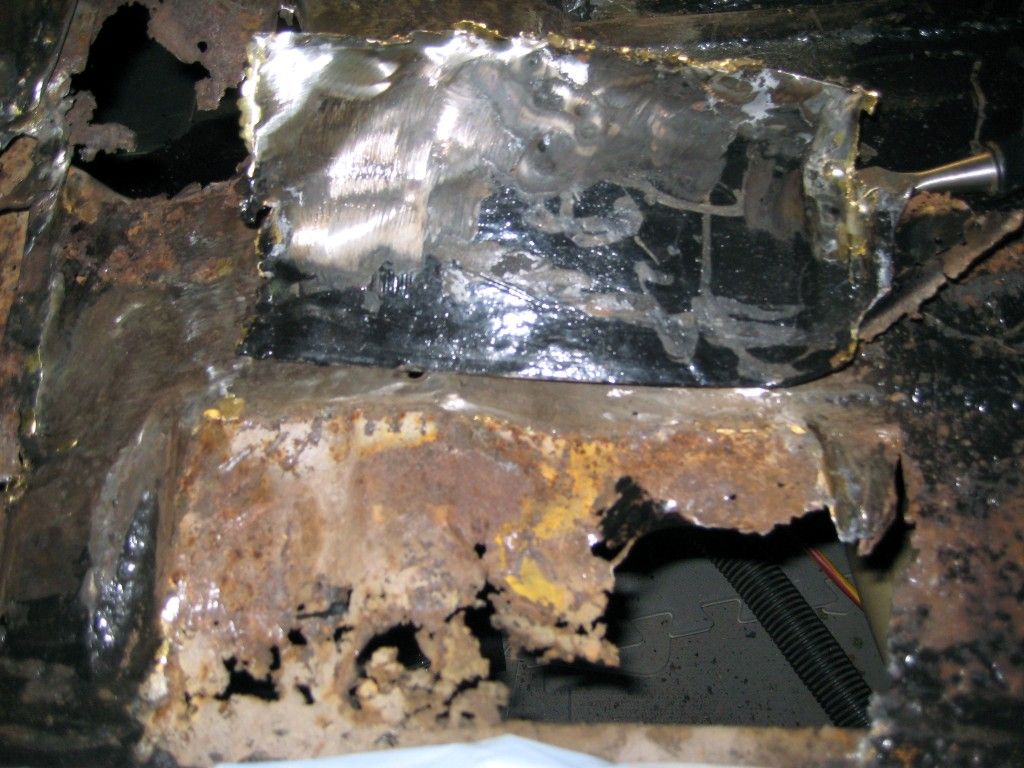
Anybody notice something different here?
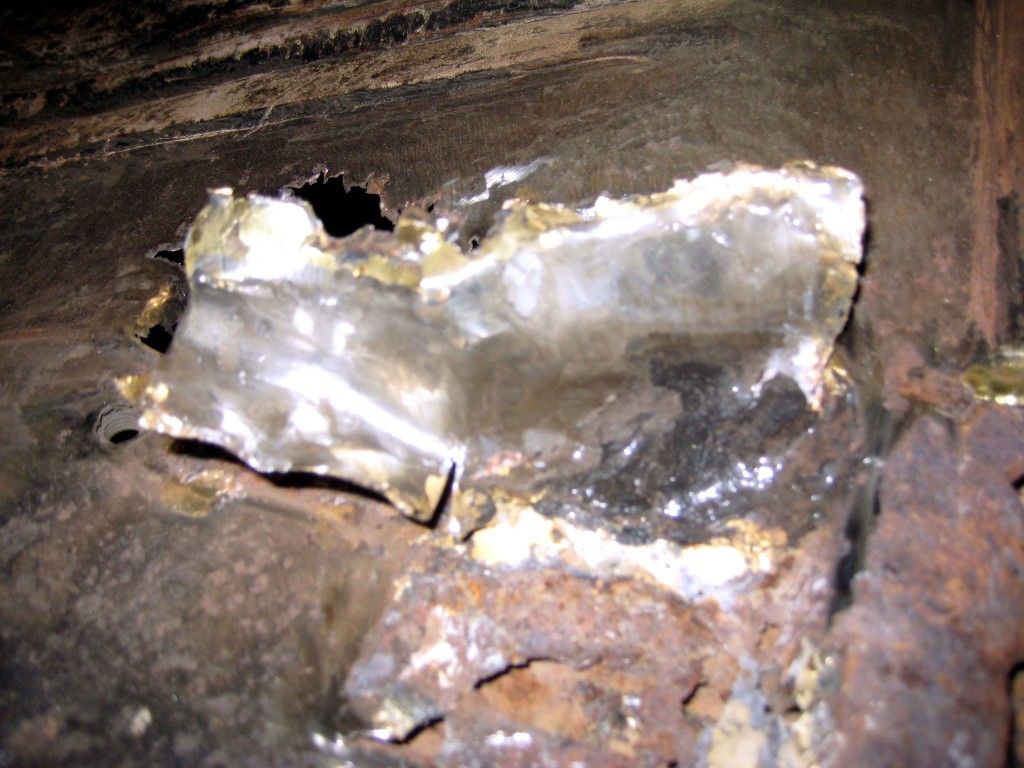
The guy brazed all the patchwork which made just that more difficult to remove the sections.
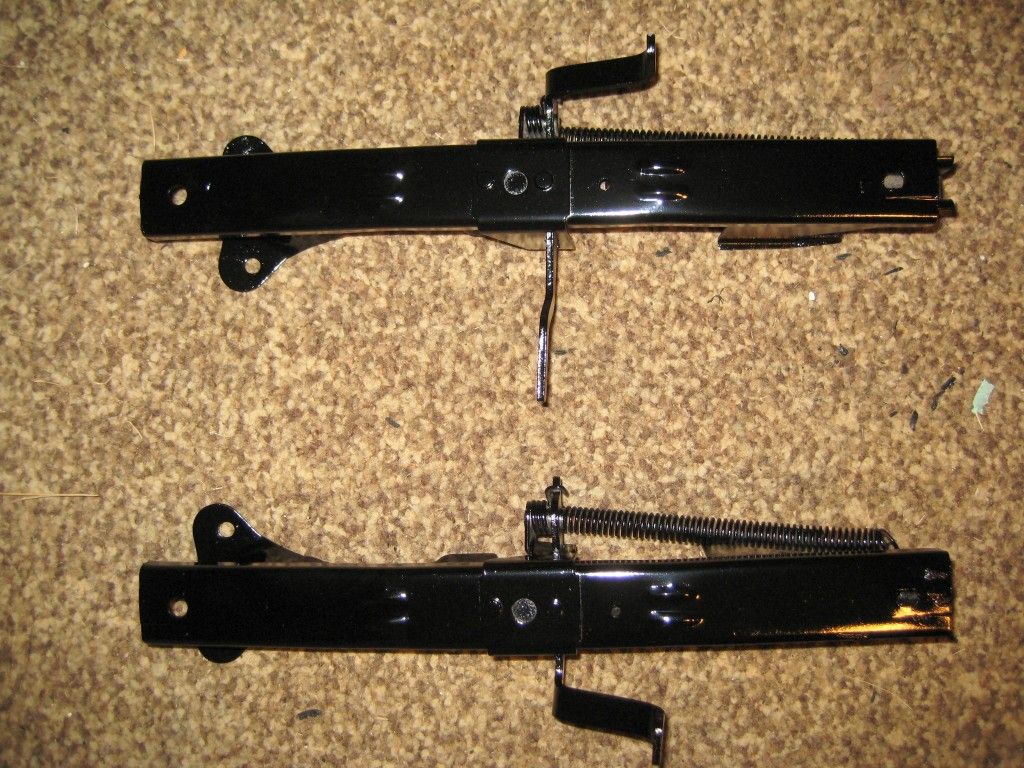
On a brighter note finished de-rusting, priming and painting the bench seat rails and am re-kitting a couple of carbies to compliment this:
Cheers and until next time!!!
Danny
Recovery has gone well and I had the opportunity to put a few hours of work in on Sunday. Had to remove a lot of the body deadener the old man had put in the cab so we could see the patch up job (from the painter) and how much more rust was hiding. What a b*tch of a job
I've done a bit researching but I can't find the actual name for the rail (pictured running down the middle) that divides the two rust panels. I obviously need to get a new one!!! Can't find them on Rares so will have to look elsewhere.
Anyway I have been instructed to remove all the patches that were previously welded ... here's an example of one:
Anybody notice something different here?
The guy brazed all the patchwork which made just that more difficult to remove the sections.
On a brighter note finished de-rusting, priming and painting the bench seat rails and am re-kitting a couple of carbies to compliment this:
Cheers and until next time!!!
Danny
Last edited by OldMan's Lacky on Wed Jun 20, 2012 7:15 am, edited 1 time in total.
Re: Pa's Ute
Those are some real dodgy repairs  , good to see you going to do it properly
  .
.
[img]http://i47.photobucket.com/albums/f177/trevwood/WOOFTOsmall.jpg[/img]
Woofto Car Club Member No3
Woofto Car Club Member No3
-
OldMan's Lacky
- Posts: 232
- Joined: Wed May 11, 2011 8:35 am
- State: NOT ENTERED
- Location: The Capital
Re: Pa's Ute
Thanks Trev. The rust was the main reason why the old man decided to let it go but hopefully with new enthusiasm we can get her done!
-
samprinci
- Posts: 1111
- Joined: Thu Aug 06, 2009 10:17 am
- State: NOT ENTERED
- Location: Nthrn Beaches / Liverpools - Syd
Re: Pa's Ute
hey Danny... WOW!!!  thats some rust.
heres some pix from parts manual that might ??? help. good luck mate.
sam

heres some pix from parts manual that might ??? help. good luck mate.
sam
- Attachments
-
- body parts - 1_Page_2.jpg (197.73 KiB) Viewed 2014 times
-
- body parts - 1_Page_1.jpg (194.06 KiB) Viewed 2014 times
Join the fun! Join the club! - FB-EK Holden Car Club of NSW
www.fbekholdennsw.com
www.fbekholdennsw.com
-
parisian62
- Posts: 3996
- Joined: Wed May 11, 2005 2:19 pm
- State: NSW
- Location: Sydney
- Contact:
Re: Pa's Ute
Hi Danny
those 'repairs' are bad. What a shocker.
Manifold and seat riser came up real well. What did you dip them in?
While your at it just get em to weld a new patch panel onto your foot...

Stewart
those 'repairs' are bad. What a shocker.
Manifold and seat riser came up real well.
While your at it just get em to weld a new patch panel onto your foot...
Stewart
Feelin free in a '61 FB.
Member of FB-EK Holden Car Club Of NSW Inc.
Check out the Rebuild of Old Timer
Member of FB-EK Holden Car Club Of NSW Inc.
Check out the Rebuild of Old Timer
Re: Pa's Ute
Danny,
I haven't forgotten you and I may be able to help with the overlap joint, just depends on the condition, I will contact you this weekend after I cut the other bit out.
Regards Greg
I haven't forgotten you and I may be able to help with the overlap joint, just depends on the condition, I will contact you this weekend after I cut the other bit out.
Regards Greg
So many cars so little time!
-
OldMan's Lacky
- Posts: 232
- Joined: Wed May 11, 2011 8:35 am
- State: NOT ENTERED
- Location: The Capital
Re: Pa's Ute
Thanks heaps Sam, Much appreciated!!!
Stewart - Didn't do anything to the manifold, that's the condition it was in, when the old man gave me it with the car . The seat rails I dipped in Molasses (1 part molasses to 9 parts water). Put around 45 litres of mix in a large garbage bin. Dipped them in for a couple of days, rinsed them with water, scrubbed them with a wire brush and threw them back in for a couple more days. Worked a treat! As for the ankle, demonstrated too much at my daughter's football training yesterday  Nothing that ice can't fix!
Greg - It's all good mate. I still have a few more weekends of work before the welder needs to do his stuff. Don't feel pressured Oh and thanks for checking to see if you have the other part I'm chasing.
Stewart - Didn't do anything to the manifold, that's the condition it was in, when the old man gave me it with the car
Greg - It's all good mate. I still have a few more weekends of work before the welder needs to do his stuff. Don't feel pressured
-
OldMan's Lacky
- Posts: 232
- Joined: Wed May 11, 2011 8:35 am
- State: NOT ENTERED
- Location: The Capital
Re: Pa's Ute
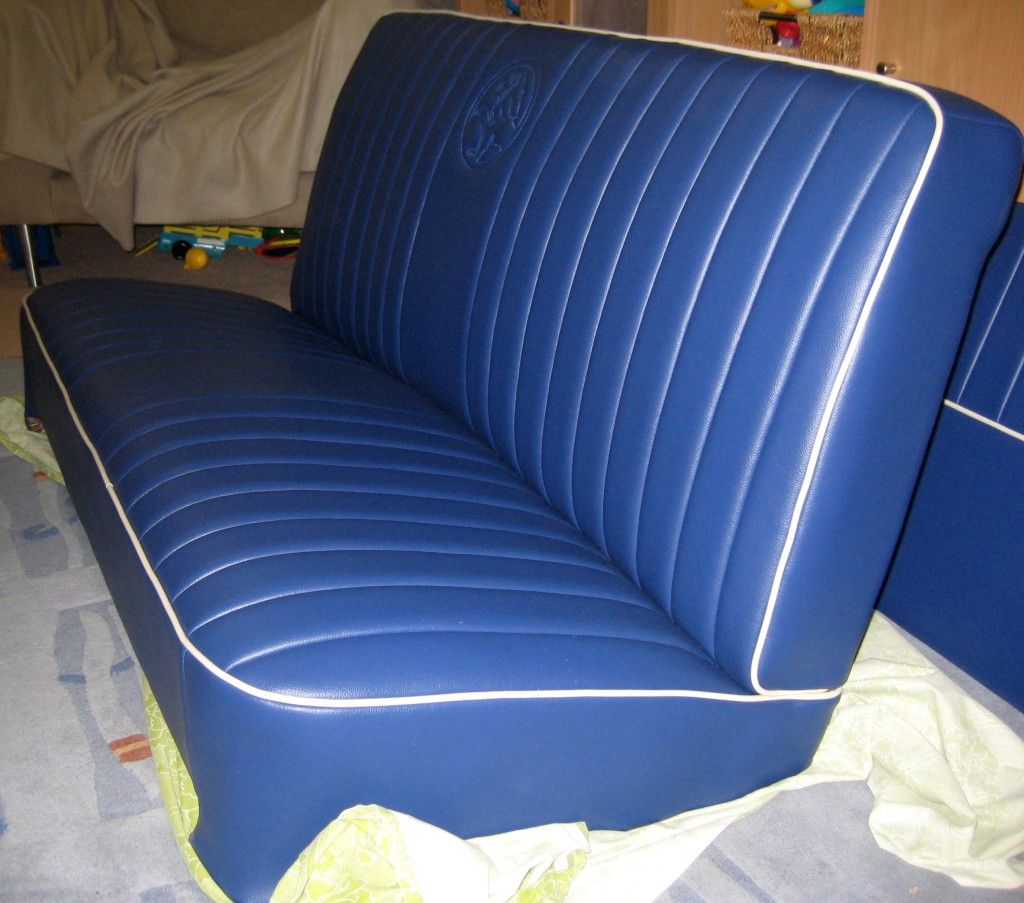
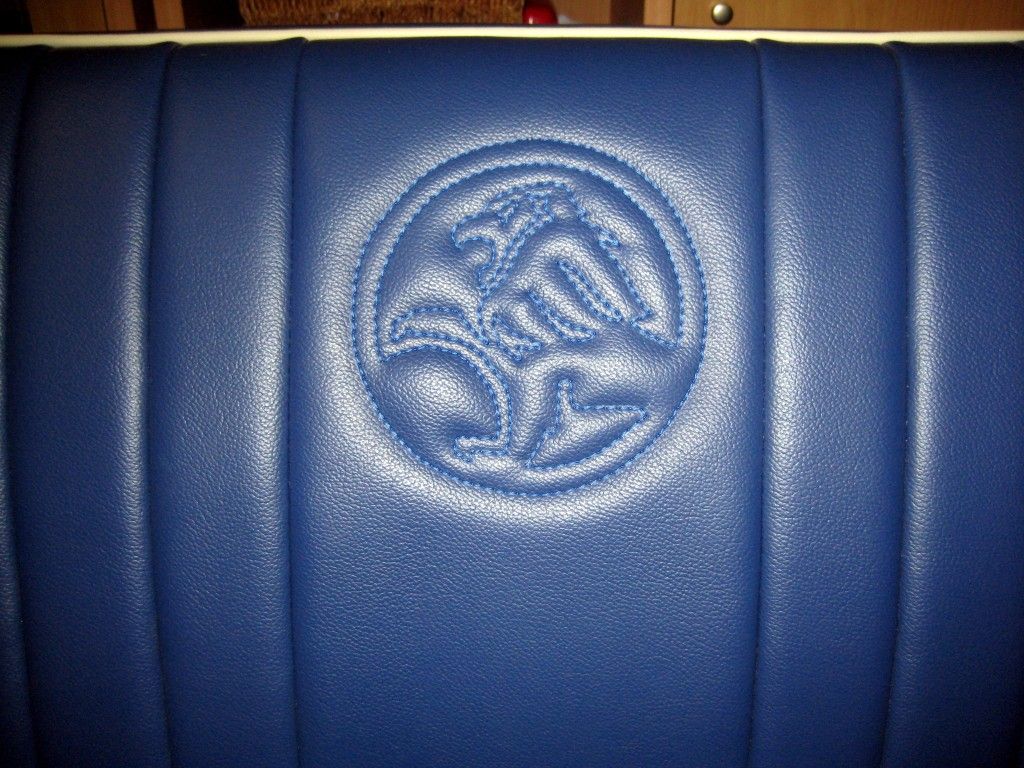
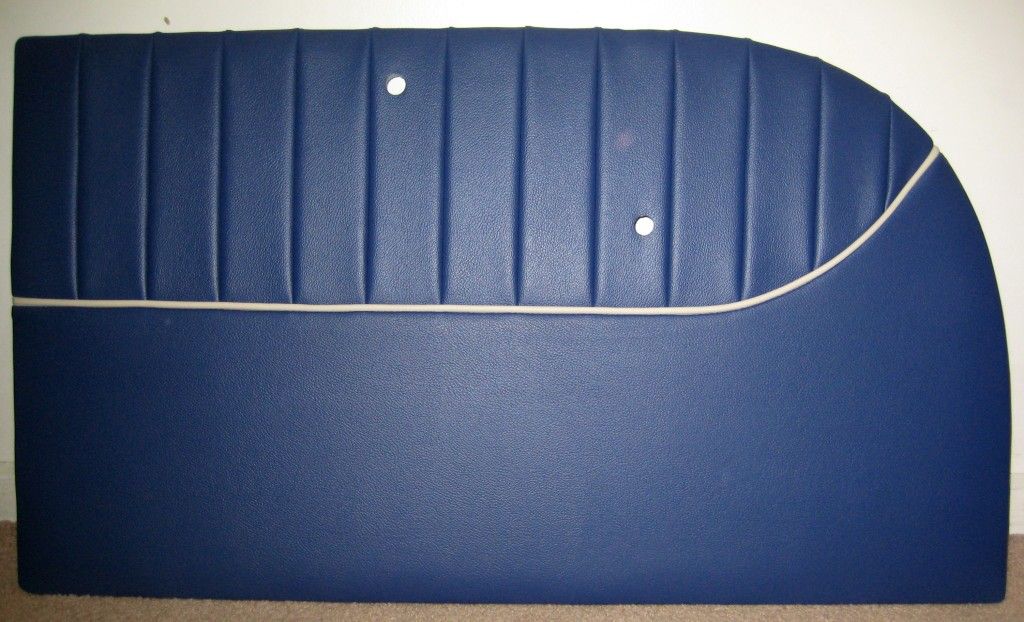
Well after becoming quite disillusioned with rust removal I received a call a couple of days ago from the upholsterer ... bench-seat, door cards and visors completed! Like an excited little boy I promptly picked them up and I must say I think they look absolutely brilliant!! (I am probably a little biased  ). The piping is beige which is the same as the roof and visors. Anyways judge for yourself:

Okay that's enough excitement for one evening, back to the rust
BTW - For those that are interested I will post over the weekend, in the for sale thread, some of the old vinyl (for free) as it isn't that fantastic and I would like to give something back to those that have helped/inspired me.
Cheers.
Danny

Re: Pa's Ute
The seat has come up real nice
Re: Pa's Ute
Interior looks sweet mate
FB Holden Fernando Yellow/Arctic Beige flash
Stock as a rock
75 series Landcruiser 350 Chev
Not so stock
Stock as a rock
75 series Landcruiser 350 Chev
Not so stock
-
OldMan's Lacky
- Posts: 232
- Joined: Wed May 11, 2011 8:35 am
- State: NOT ENTERED
- Location: The Capital
Re: Pa's Ute
Cheers Cal & Muza.
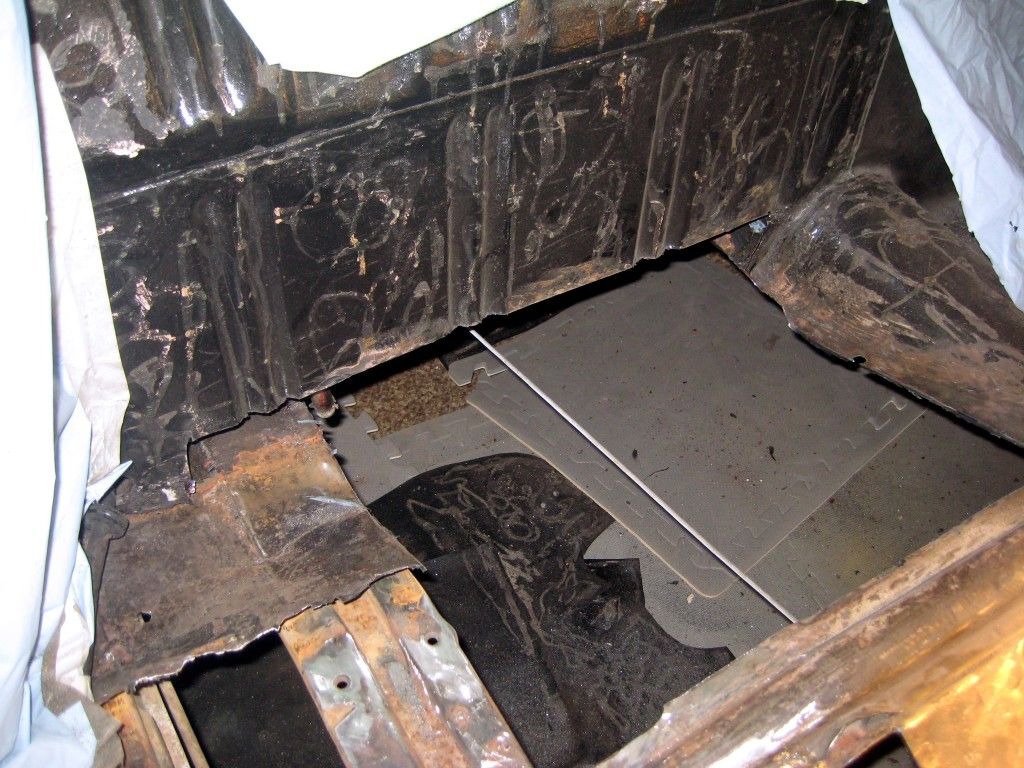
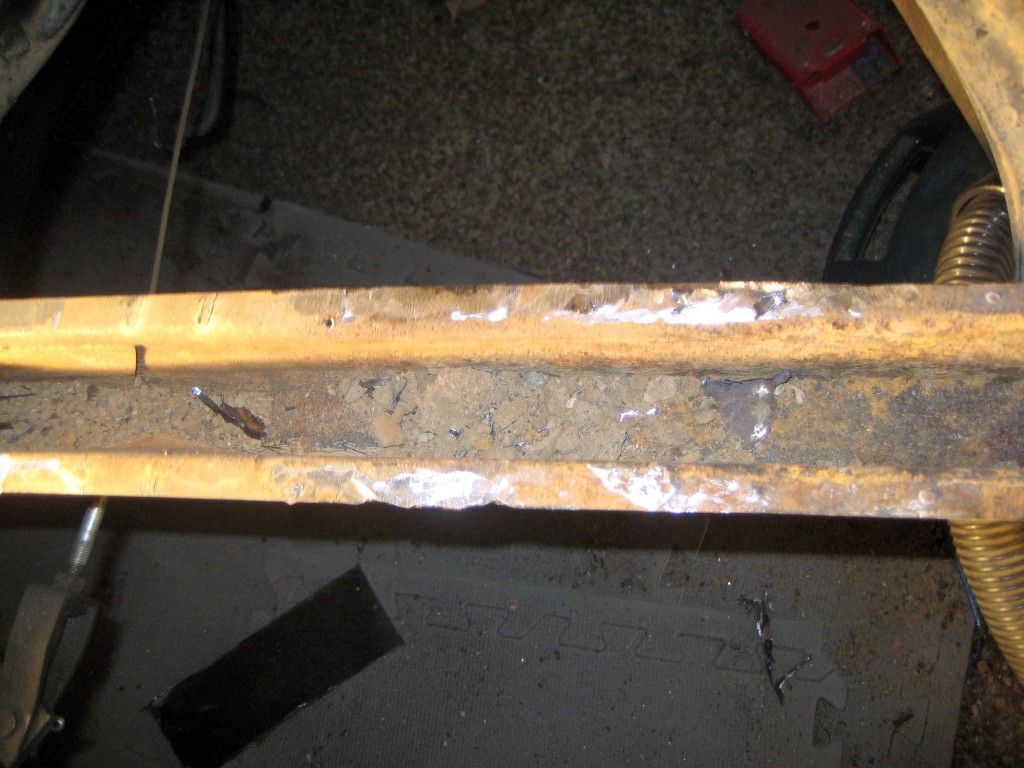
Been hard at work with the rust in the floor. Finally starting to get confident with the grinder. With panels to go in and the replacement of a support I'm nearly at the stage where I can call in the professional (welder). Here's the progress:
A few small areas to tidy up here:
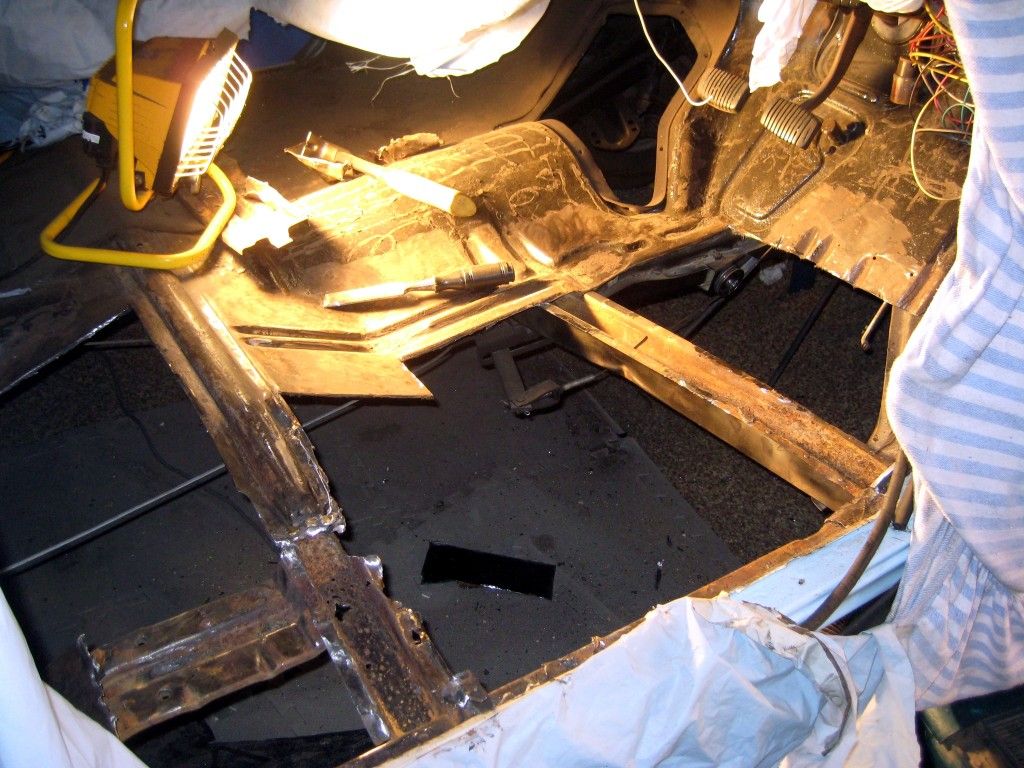
Had to cut a few inches on the back panel too as it was getting eaten away.
This rail was absolutely chockers full of dirt. Kinda explains why there was so much rust in the floor - the water had nowhere to go!
Just have to tidy behind the cabin up a bit ...
And remove these plates ...

Oh and finally have to get the small rust cut out in one of the sub-frames.
Boring compared to many other builds on the forum but I am enjoying it nonetheless.
Cheers.
Danny
Been hard at work with the rust in the floor. Finally starting to get confident with the grinder. With panels to go in and the replacement of a support I'm nearly at the stage where I can call in the professional (welder). Here's the progress:
A few small areas to tidy up here:
Had to cut a few inches on the back panel too as it was getting eaten away.
This rail was absolutely chockers full of dirt. Kinda explains why there was so much rust in the floor - the water had nowhere to go!
Just have to tidy behind the cabin up a bit ...
And remove these plates ...
Oh and finally have to get the small rust cut out in one of the sub-frames.
Boring compared to many other builds on the forum but I am enjoying it nonetheless.
Cheers.
Danny
Re: Pa's Ute
Not boring at all Danny, brings back good/bad memories. Its a good feeling knowing you have saved one from the crushers. The seats look very nice. It makes it easier handing over the hard-earned when you get a good job

Re: Pa's Ute
Welcome to the world of rust repairs , looks like you have a little bit of fun in front of you , but you will have a nice ute at the end of it , keep the pics coming
-
OldMan's Lacky
- Posts: 232
- Joined: Wed May 11, 2011 8:35 am
- State: NOT ENTERED
- Location: The Capital
Re: Pa's Ute
Cheers Ben & Rusty.
Rusty - Each time I lose faith I just look at the first page of your build and I tell myself "I ain't got it so bad".
Rusty - Each time I lose faith I just look at the first page of your build and I tell myself "I ain't got it so bad".